The new ArcGIS Maps SDK for Flutter is a powerful tool for developers to build cross-platform mobile applications that solve real-world geospatial challenges. Whether you’re planning routes, visualizing data, or tackling location specific problems, the Flutter Maps SDK enables you to create interactive apps with ease. In this blog, I’ll share how I built a handy mobile app that maps vehicle meeting points to improve journey efficiency and allow better journey planning.
On a recent holiday, I had an idea for an app that I could use to calculate the meeting point between two vehicles travelling toward each other along a single-track main road. This idea is location specific to the Isle of Mull, Scotland, where driving back eastward toward the ferry terminal, you often encounter large buses travelling toward you that have picked passengers up off the ferry. This can lead to difficult passing conditions depending on where you meet them (e.g. areas with sparse passing places, blind bends in the road). Knowing where you are likely to encounter them is beneficial for journey planning and efficiency – and can save some stress!
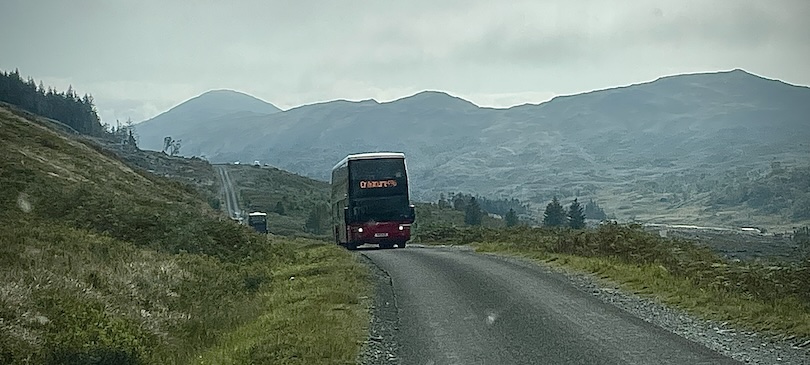
Throughout this blog I’ll walk through the process of how I created this ferry traffic helper mobile app using the Flutter Maps SDK. I’ll share how to combine custom logic calculations to determine where two vehicles will meet based on the route travelled, ferry timetable, and vehicle time of departure provided by user input. I’ll also cover how to set up graphics overlays and renderers to display this information in a dynamic and interactive app.

For this blog I’ll share an overview of the key steps required to configure the app, followed by relevant code snippets. I’ve simplified and shortened these for the purposes of the blog – the best place to view the completed code in full context is on my GitHub repo.
Install ArcGIS Maps SDK for Flutter
First, you’ll need to install the Flutter Maps SDK and sign up for an API key if you don’t already have one (essential for authenticating routing and mapping services). Learn how to do this on the Get Started doc pages.
Add a basemap and graphics overlays
Once you have the Flutter Maps SDK installed, follow the steps in the Display a Map tutorial to build an app that imports the arcgis_maps package, sets an API key and displays a map. The map provides the spatial context for the data to be shown, and the viewpoint can be set to a location of your choice – for this app, set up so the map loads over the Isle of Mull.
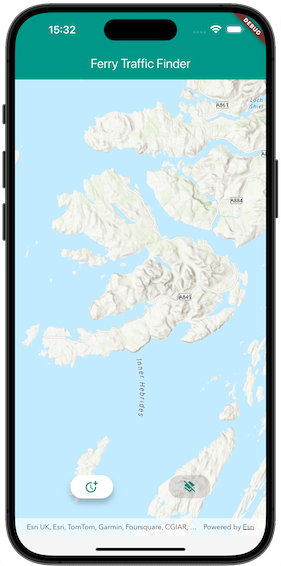
Next, set up and add three graphics overlays with renderers to the map view controller to prepare to display the route, stops, and meeting point data on the map. For the route overlay, set a SimpleLineSymbol with a dashed style as the renderer. For the stops overlay, which will mark the location of the ferry terminal (vehicle destination) and the point of vehicle departure, use a PictureMarkerSymbol.withImage with a pin image. Finally for the meeting point overlay, use another picture marker symbol with an image of a bus (a fun way to show where you might encounter a convoy of ferry related buses!).
Calculate the route
To calculate where two vehicles travelling toward each other will meet, we first need the geometry of the road between them. This road is a particularly easy one to manage, as there is only one possible route that can run between the two vehicles as there is only one road! We can easily generate the route geometry as a polyline using the ArcGIS Routing service by adding the ferry terminal as a stop (as this is always where the ferry traffic will be departing from), and also a user defined vehicle departure point as a stop.
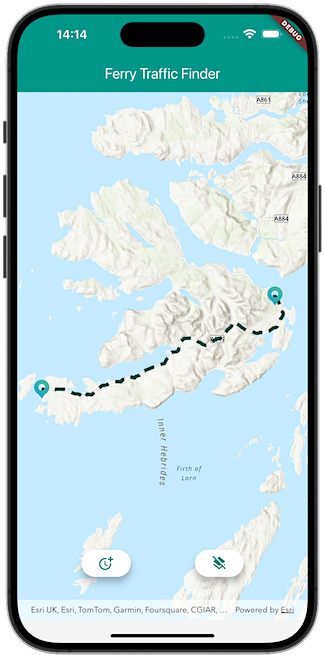
First, initialize the routing service by setting up a RouteTask with the request URL. Then create default parameters on the route task by setting the stops and then solving the route asynchronously. Once the route geometry has been returned, add it to the route graphics overlay.
Add custom logic to map vehicle meeting points
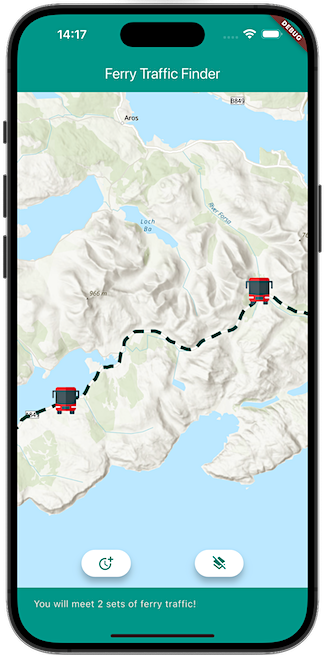
Now we have the map, graphics overlays and routing set up, we can calculate the vehicle meeting points. The logic relies on vehicle speeds, ferry schedule and route geometry to determine the meeting point. To keep things simple, we’ll call the traffic coming from the ferry terminal the bus, and the vehicle driving toward the ferry terminal the car.
First, I store the ferry schedule in a separate class and use that to store valid ferry arrival times (coincident with bus departure time) that could coincide with the car departing. Then I calculate the time difference in hours between the bus and the car starting their journeys (car delay relative to ferry arrival times) and store their relative speeds. I have assumed the vehicle speeds will be constant for the purposes of this app (50km/hr for the bus, 60km/hr for the car). Then using the route geometry length, I calculate the distance the vehicles will meet using:

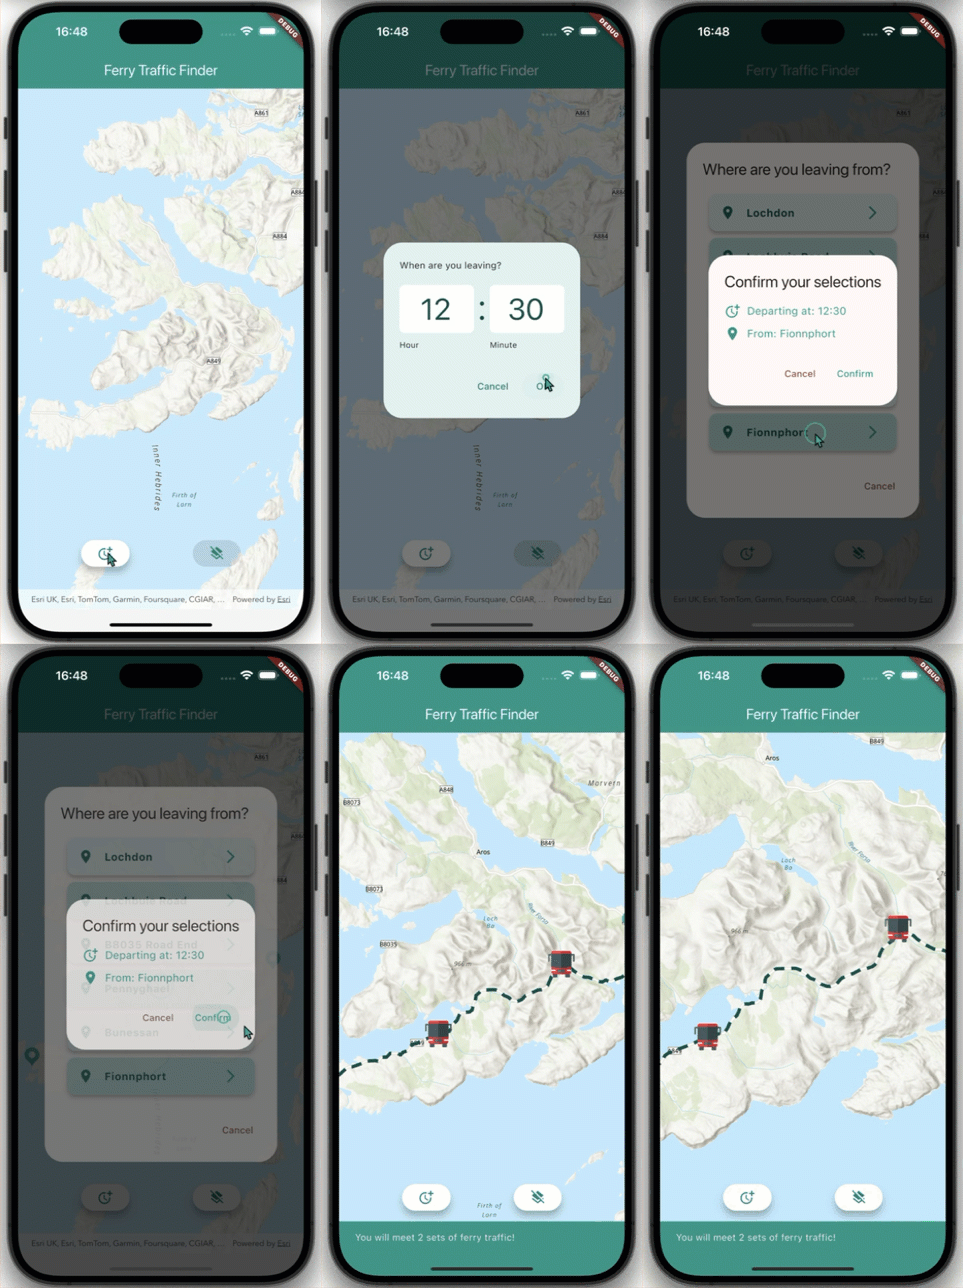
After calculating the meeting point distance, I add checks to ensure the result is valid by confirming the meeting point is within the route geometry. If the result is less than the route geometry length, it means the bus will have already passed through the route and the car won’t meet it. Similarly, if the result is 0 or negative, it means the bus hasn’t left yet and the car will complete its journey before encountering the bus. I then use the GeometryEngine API in the Flutter Maps SDK to create a point along the route geometry using the distance to meet and I add that to the map as a graphic on the meeting point graphics overlay.
And that’s it in terms of logic to set up the app! We’ve used the Flutter Maps SDK to display a map, display graphics, calculate routes, and carry out a spatial operation that shows where two vehicles travelling toward each other will meet each other.
Build the user interface
All that remains is to build the app’s UI using Flutter widgets. Flutter makes it straight forward to build user-friendly UIs that work well with the Flutter Maps SDK, especially using the hot reload feature to fine-tune designs quickly.
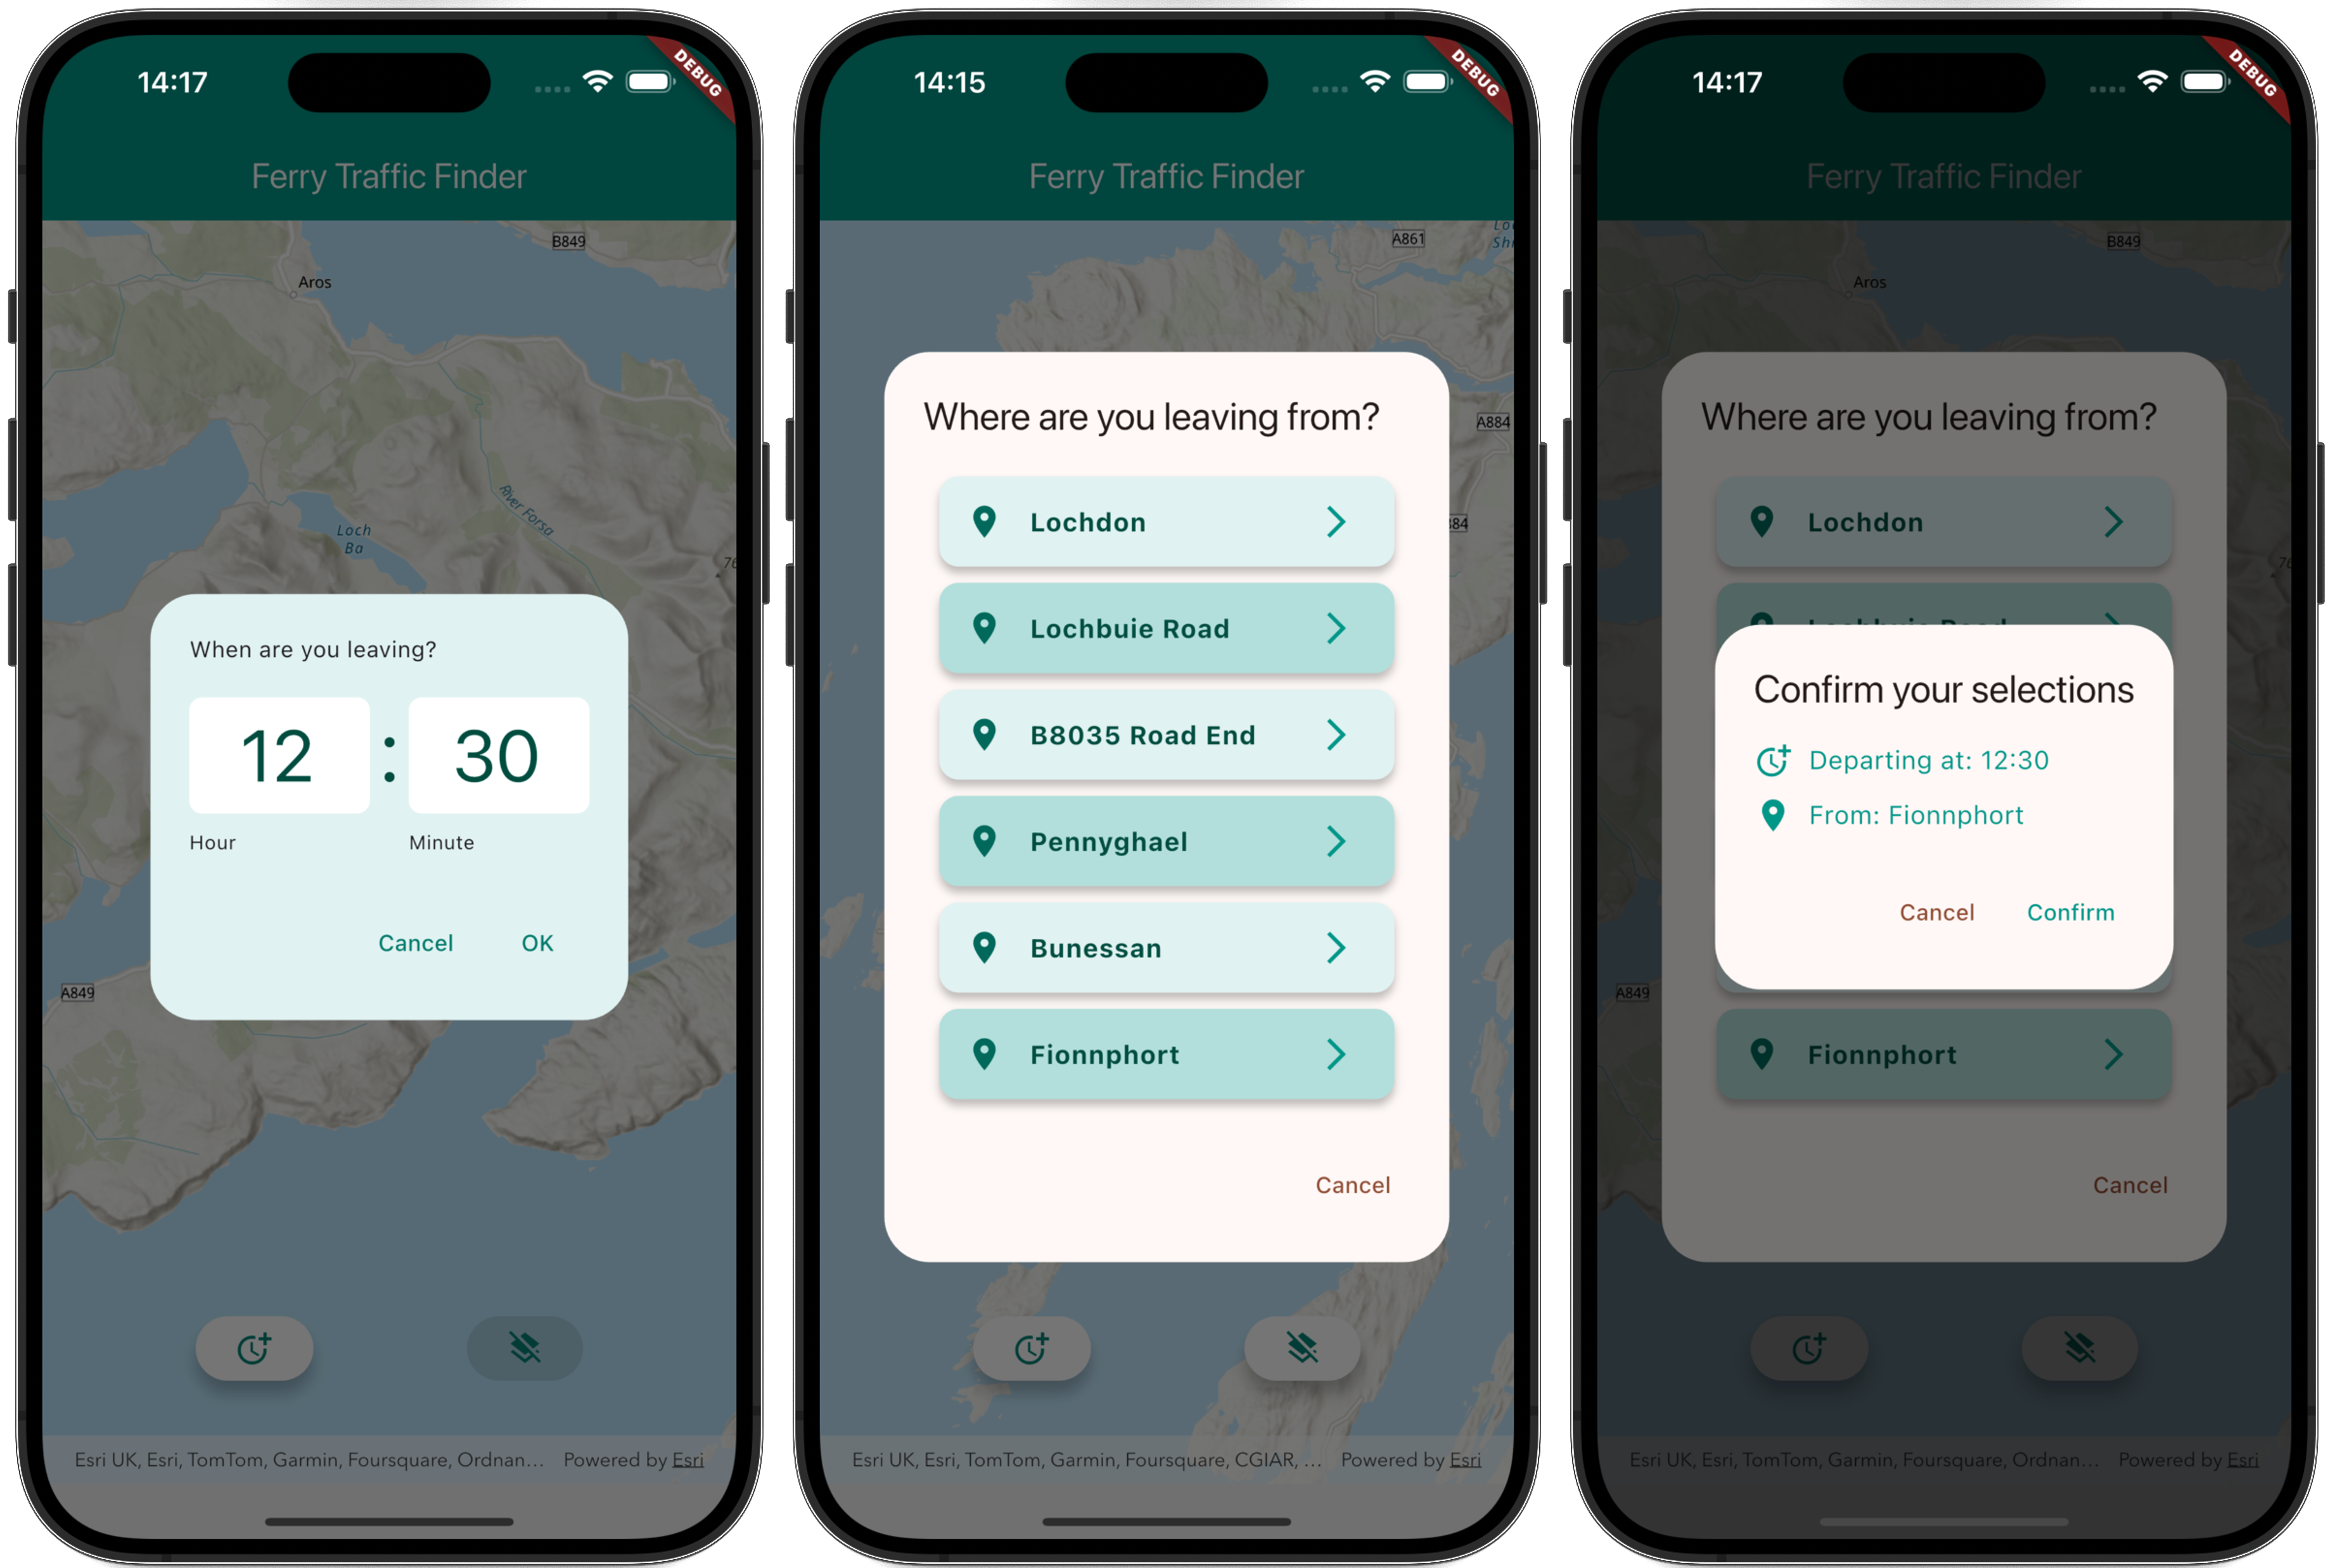
For this app I opt for two simple interactive ElevatedButtons to allow a user to select their departure time, or to clear the graphics layers on the map. Flutter provides a wide range of built-in Icons that can be applied to UI elements for a minimal app design. I use Flutter’s showTimePicker to allow users to select a departure time, and then build a custom dialog to display a list of possible departure locations for the user to select. Finally, I create a final custom dialog that confirms the user inputs and calculates the result once confirmed.
Summary
I’ve shown you how to build a simple mobile app with the Flutter Maps SDK that determines where you’d encounter traffic travelling toward you along a single-track road. By integrating ferry schedules with vehicle speeds and route geometry, the app delivers precise and fast insights for where the meeting point occurs. This allows the user better insights into their journey and being more aware of when they may encounter heavier traffic than usual on their journey, or, being able to plan to avoid it.
This is just the beginning for this type of app! You could adapt or extend this app to various scenarios using further ArcGIS capabilities within the Flutter Maps SDK, such as adding more routes, account for different modes of transport, allow users to enter precise departure locations and build in offline workflows.
What next?
I hope this mini project has inspired you to create your own Flutter Maps SDK apps to solve your own geospatial puzzles!
You can start building ArcGIS powered apps today by signing up for a free ArcGIS Location Platform account. Once you have an account and have generated an API key, you can import the arcgis_maps package from pub.dev to start building your Flutter Maps SDK app. Check out the ArcGIS Maps SDK for Flutter sample code repo for more inspiration, and let us know your feedback and what apps you’re building on our new Esri Community Flutter Maps SDK forum.
If you’d like to view the source code and/or give this app a try for yourself, you can find it here on GitHub. I’ll be ground truthing this app on my next holiday to the Isle of Mull!

Commenting is not enabled for this article.