The new ArcGIS Maps SDK for Flutter simplifies accessing location data by automatically requesting permissions when a MapView’s LocationDisplay starts for the first time. The LocationDisplay, a key component of the MapView, manages the familiar blue-dot location experience provided by the Flutter Maps SDK.
However, relying only on this default behavior, which is typically triggered when the MapView is already visible, can disrupt the user experience. Proactively managing when and how permissions are requested, such as during onboarding or through a call-to-action before displaying the MapView for the first time, allows for a better user experience.
In this article, we’ll show how to use the ArcGIS Maps SDK for Flutter alongside a third-party Flutter plugin, such as permission_handler, to efficiently manage location permissions. Other permission management plugins are also available, providing additional options. With this approach, users have full control over granting location access and can easily navigate to settings to enable location when needed, ensuring the map functions as intended.
Set up ArcGIS Maps SDK for Flutter
Before diving in, ensure your app is set up to use the Flutter Maps SDK. This includes:
1. Adding the Dependency
Add the arcgis_maps package to your project. Run the following command in your terminal:
flutter pub add arcgis_maps
2. Configuring Your API Key
Obtain an API key and configure your app for the Flutter Maps SDK. For detailed setup instructions, including platform-specific requirements, refer to the official Flutter Maps SDK documentation.
Set up permission_handler plugin
The permission_handler plugin provides a cross-platform API for managing permissions on both iOS and Android. It allows you to request permissions such as storage, camera access, and location services, as well as check their status.
1. Add the permission_handler plugin
Run the following command to add the permission_handler plugin to your project:
flutter pub add permission_handler
2. Configure platform-specific settings
After adding the plugin, you need to configure platform-specific settings to ensure proper functionality.
Android configuration
- Add the required permissions to the
AndroidManifest.xmlfile to access the device’s location:<uses-permission android:name="android.permission.ACCESS_FINE_LOCATION" /> <uses-permission android:name="android.permission.ACCESS_COARSE_LOCATION" />
- Update the compileSdkVersion in
android/app/build.gradleto ensure compatibility with the SDK:android { compileSdkVersion 33 ... }
iOS configuration
To request user location access on iOS, include the following keys in your ios/Runner/Info.plist file.
NSLocationWhenInUseUsageDescription
We need your location to display maps and provide location-based services.
NSLocationAlwaysAndWhenInUseUsageDescription
We need your location to display maps and provide location-based services.
Declare variables
Let’s declare some essential variables that will help manage the map view and handle location data in the app. For the location permission status, we will focus specifically on granted, denied, and permanentlyDenied for our purpose.
Initialize location permissions
Let’s define the initLocationPermissions() method to check the initial status of location permissions. This method will help us determine whether location access has already been granted or not.
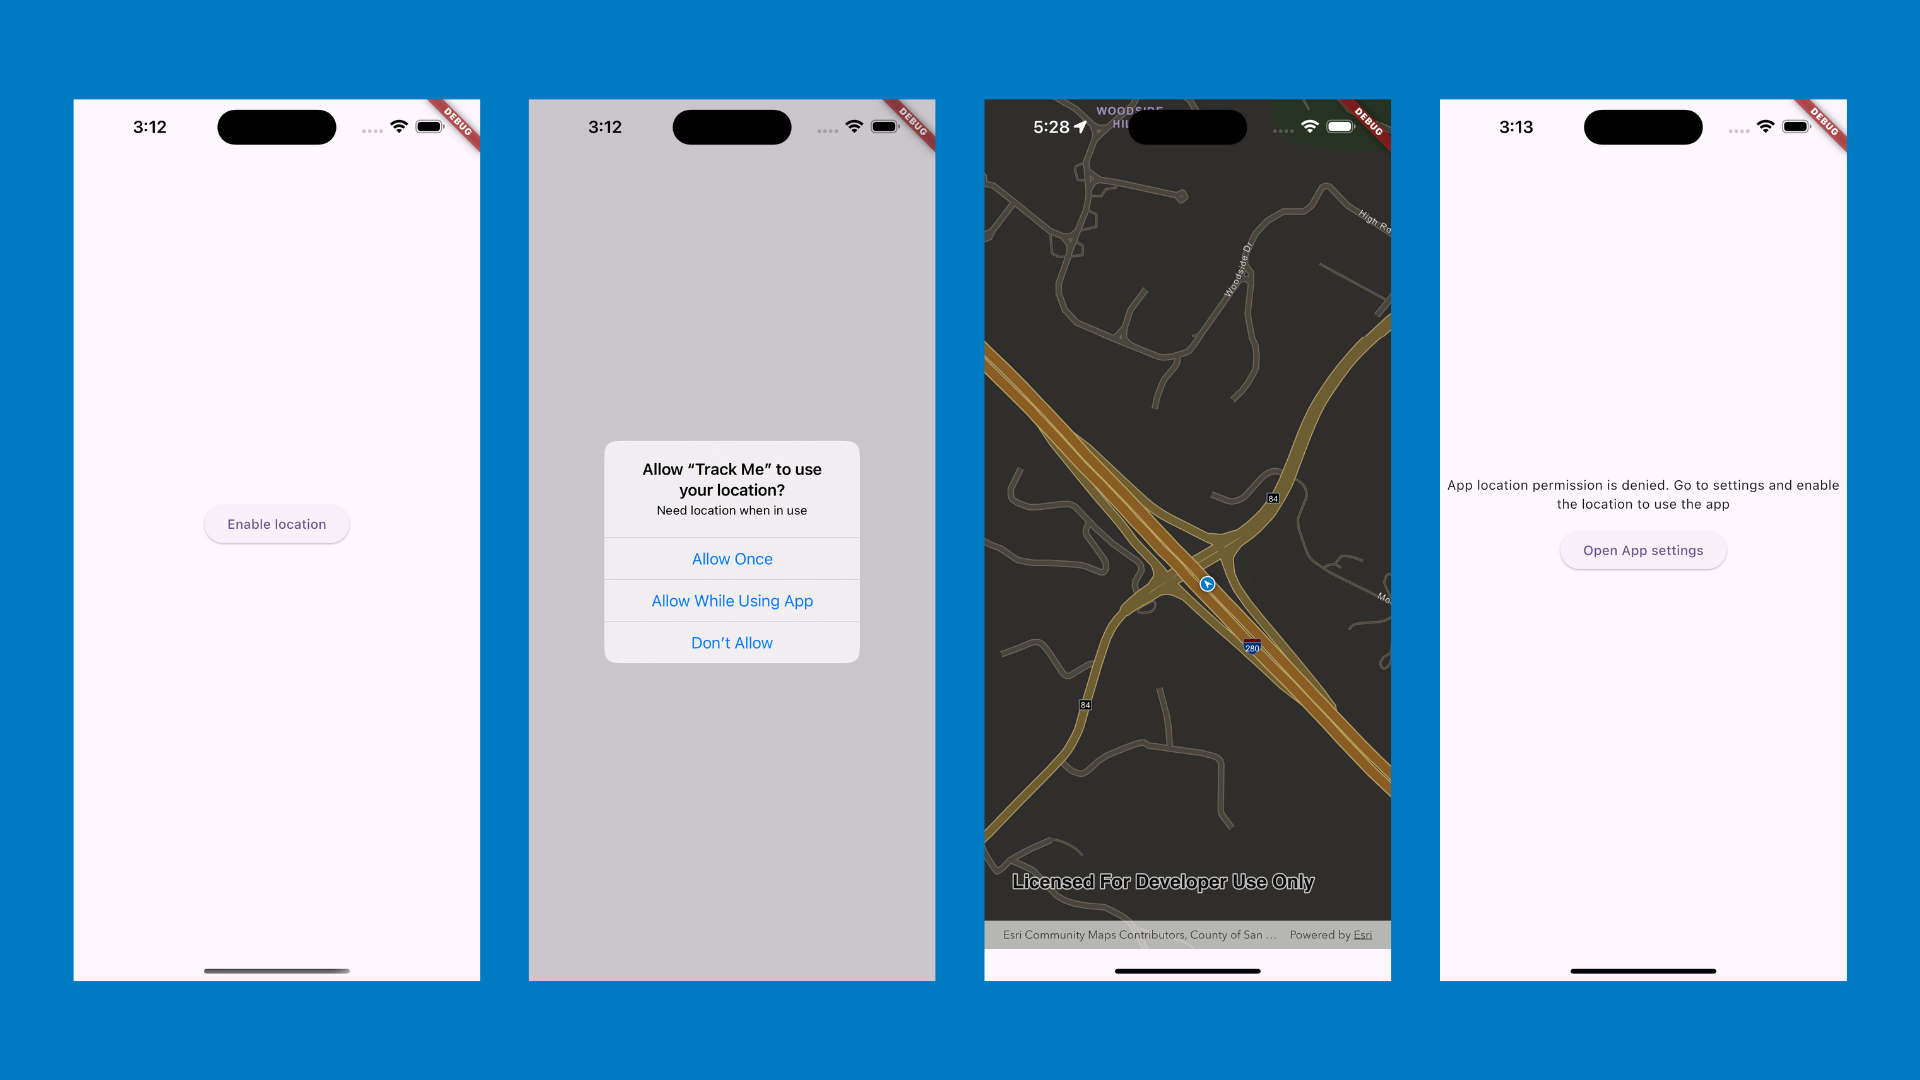
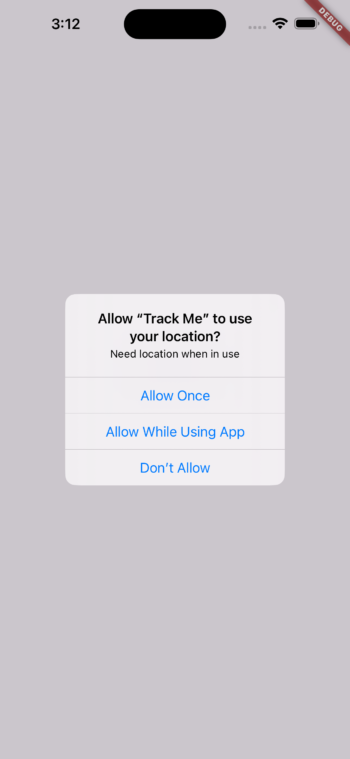
The initLocationPermissions() function allows us to perform the permission check as soon as the widget is initialized. It’ll prompt a system dialog like the one displayed below:
Set up an interactive map with location display
Let’s define a function called _onMapViewReady. This function will be triggered when the ArcGISMapView is fully initialized and ready for interaction.
Integrate with ArcGISMapView
Before we configure and display the ArcGISMapView widget, we need to ensure that location permissions are handled properly.
1. When location permission is granted
If the user has granted location permissions, we load the map and connect it to the ArcGISMapView widget. This is done through the _onMapViewReady function, which will be called when the map is fully ready.
2. When location permission is denied
If the permission is denied (i.e., the user can still be prompted again), we display a button that allows the user to request location permissions.
3. When location permission is permanently denied
If the user has permanently denied the permission (i.e., they’ve selected “Don’t allow”), they can no longer be prompted through the app’s UI. In this case, we inform the user to go to the app settings manually and enable location permissions. We’ll use the function openAppSettings() from the permission_handler plugin.
Stop location tracking on widget disposal
To ensure that location tracking doesn’t continue when the widget is no longer visible, we override the dispose() method.
Refresh permission status with app lifecycle
To ensure the app reacts correctly when the user returns from the settings after enabling location permissions, we need to introduce Flutter’s WidgetsBindingObserver. This allows us to listen for lifecycle events, such as when the app resumes from the background.
Add WidgetsBindingObserver to your state class
Let’s make the widget’s state class a WidgetsBindingObserver and add an observer to our initState. This enables the app to track lifecycle changes.
We’ll introduce a new boolean variable to track if the app settings were opened _appSettingOpened.
Handle the app resuming
Override the didChangeAppLifecycleState method to check for updates when the app resumes. Here’s where we verify the current location permission status and update the app’s state:
Update the dispose method
Since we are now handling app lifecycle states with WidgetsBindingObserver, we need to remove lifecycle observer to avoid memory leaks. The updated dispose method should look like this:
Update the settings widget to handle app lifecycle state
We need to update the _buildSettingsWidget widget to update the _appSettingOpened flag when the user interacts with device settings.
Final result
By implementing app lifecycle handling and location permission checks, the app now automatically adjusts to location permission changes.

Conclusion
In this article, we explored how to manage location permissions using the Flutter Maps SDK. We also covered how to handle denied permissions and ensure that the app updates when users return from the settings.
While the ArcGIS Maps SDK for Flutter provides a built-in automatic permission handling, in this blog article we integrated the third-party package permission_handler to create a customized experience, as demonstrated throughout this guide.
If you’re new to Flutter, checkout Flutter’s get started page. Ready to build your own ArcGIS-powered apps? Sign up for a free ArcGIS Location Platform account today!
We’d love to hear your feedback and see what you’re creating. Join the discussion on our new Esri Community Flutter Maps SDK forum.
The complete project code shared in this blog is available on GitHub.

Commenting is not enabled for this article.