This is the first post in a three-part series exploring 3D attribute-based visualizations in web applications using the ArcGIS API for JavaScript version 4.0. In this post we’ll primarily discuss working with flat 3D symbols – icons, lines, and fill symbols in a SceneView.
1. Working with icons, lines, and fill symbols
2. Working with Objects, paths, and extrusion
3. Using attributes to represent real-world sizes of features
Last week, I discussed multivariate mapping using version 3.15 of the ArcGIS JavaScript API. Thanks to visual variables, we were able to easily expose some interesting spatial patterns using size, color and opacity. The principles mentioned in that post apply similarly when working with 2D visualization in a MapView using the 4.0 API.
Prior to making visualization decisions, we first must understand our data, its geometry type, the number of variables we want to visualize, and how to represent them.
While the SceneView supports all of the 2D symbol types for rendering data in MapViews (SimpleMarkerSymbol, SimpleLineSymbol, SimpleFillSymbol, etc.), we also have 3D symbols at our disposal that give us more customized control over the look and feel of each symbol. This is made possible thanks to symbol layers.
Symbol Layers
Version 4.0 of the JavaScript API introduced the concept of symbol layers in 3D symbols. Think of the symbol object as a package that contains multiple symbol layers that define the symbol’s appearance. One layer may be an outline, another the fill, etc. The relationship of symbol layers to symbol is similar to the relationship of operational layers to a map. The map is the package that holds the data, and the layers are the individual pieces of the data that make the map a visual representation of geographic phenomena.
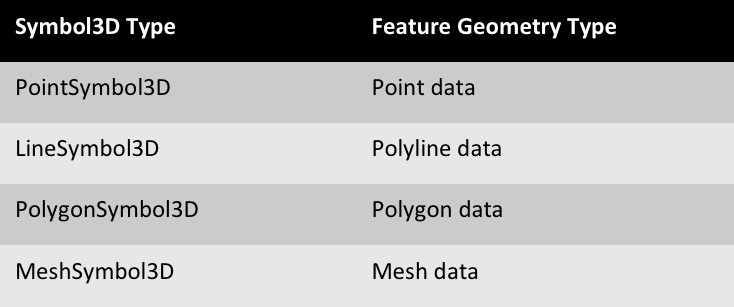
There are four types of 3D symbols that correspond to specific geometry types: PointSymbol3D (points), LineSymbol3D (lines), PolygonSymbol3D (polygons), and MeshSymbol3D (meshes). These symbols can only be assigned to features that share their respective geometry type.
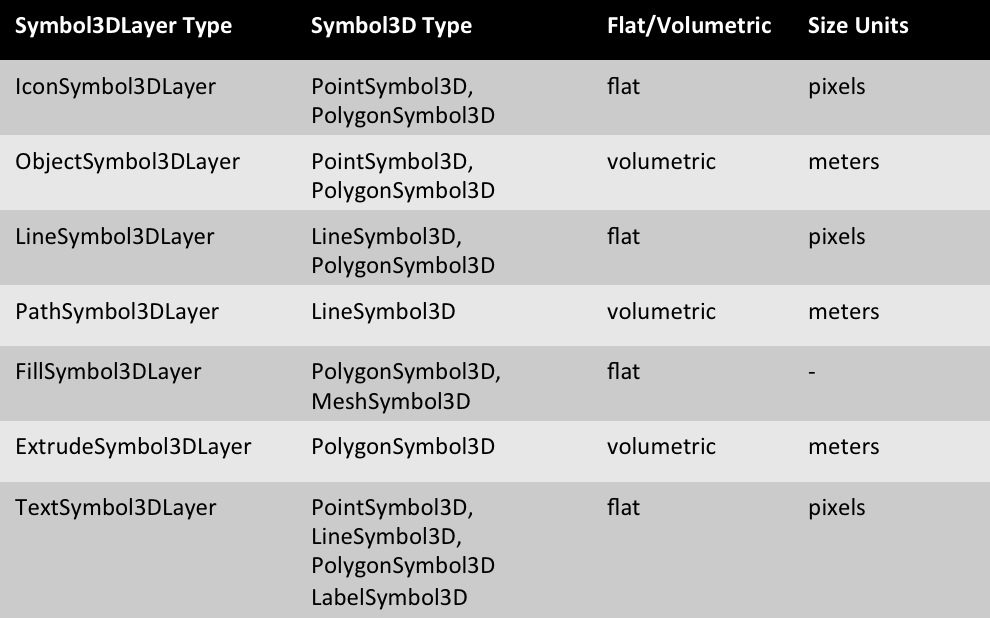
Each symbol type has a symbolLayers property, which is an array of symbol layers that make up the symbol. All symbols must have at least one symbol layer added to this property. There are various types of symbol layers. See the table below to learn about each:
Each symbol layer has a material property, which defines the symbol’s color, and a size property (with the exception of FillSymbol3DLayer) that controls the size of the symbol.
In most cases, a single symbol layer will be sufficient for a particular symbol. However, you may add multiple symbol layers to create a custom symbol like in the screenshot below.
CLICK HERE TO VIEW THE LIVE SAMPLE
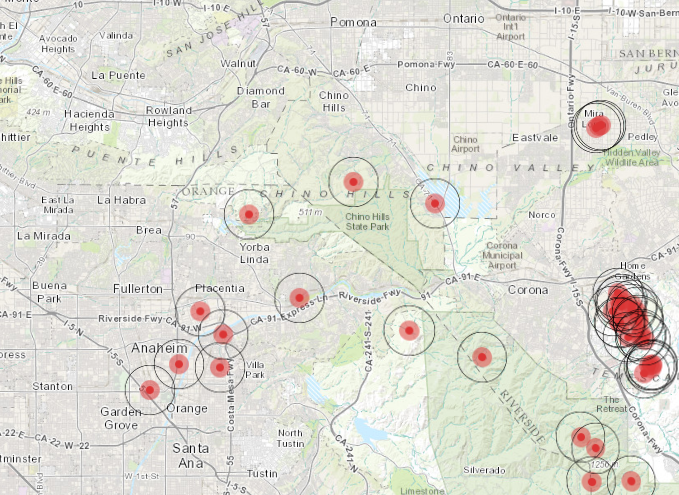
The symbol in the sample above was created with three IconSymbol3DLayers. In code, the symbol is created in the following way:
var surfaceSym = new PointSymbol3D({
   symbolLayers: [
     //wide semi-transparent icon
     new IconSymbol3DLayer({
       material: { color: [219,53,53, 0.5] },
       resource: { primitive: "circle" },
       size: 20
     }),
    //smaller opaque icon centered in transparent icon
    new IconSymbol3DLayer({
      material: { color: [219,53,53, 1] },
      resource: { primitive: "circle" },
      size: 8,
      outline: {
        color: "white",
        size: 0.5
      }
    }),
    //places an outer ring around the red icons
    new IconSymbol3DLayer({
      material: { color: [0,0,0, 0] },
      resource: { primitive: "circle" },
      size: 50,
      outline: {
        color: "black",
        size: 0.5
      }
    })
  ]
});
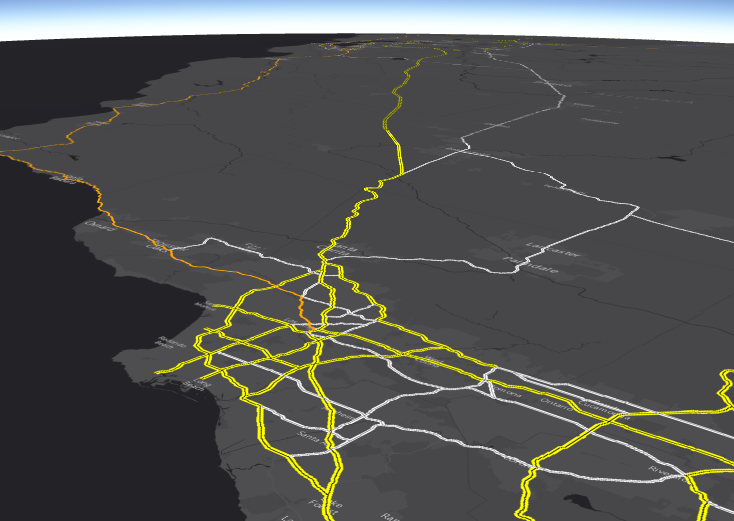
The following sample takes a similar approach, but symbolizes highways using multiple LineSymbol3DLayers in a UniqueValueRenderer.
CLICK HERE TO VIEW THE LIVE SAMPLE
Billboarded vs draped icons
If working with icon symbol layers, another consideration when creating 2D-like visualizations in a 3D scene is whether to drape the symbols on the terrain or “billboard” them. Billboarding allows the symbol to face the user at all times as long as it is visible to the camera. Draping allows the symbol to lie on the surface so that it is “draped” on the terrain. The earthquake sample referenced below uses draped symbols.
CLICK HERE TO VIEW LIVE SAMPLE OF DRAPED SYMBOLS
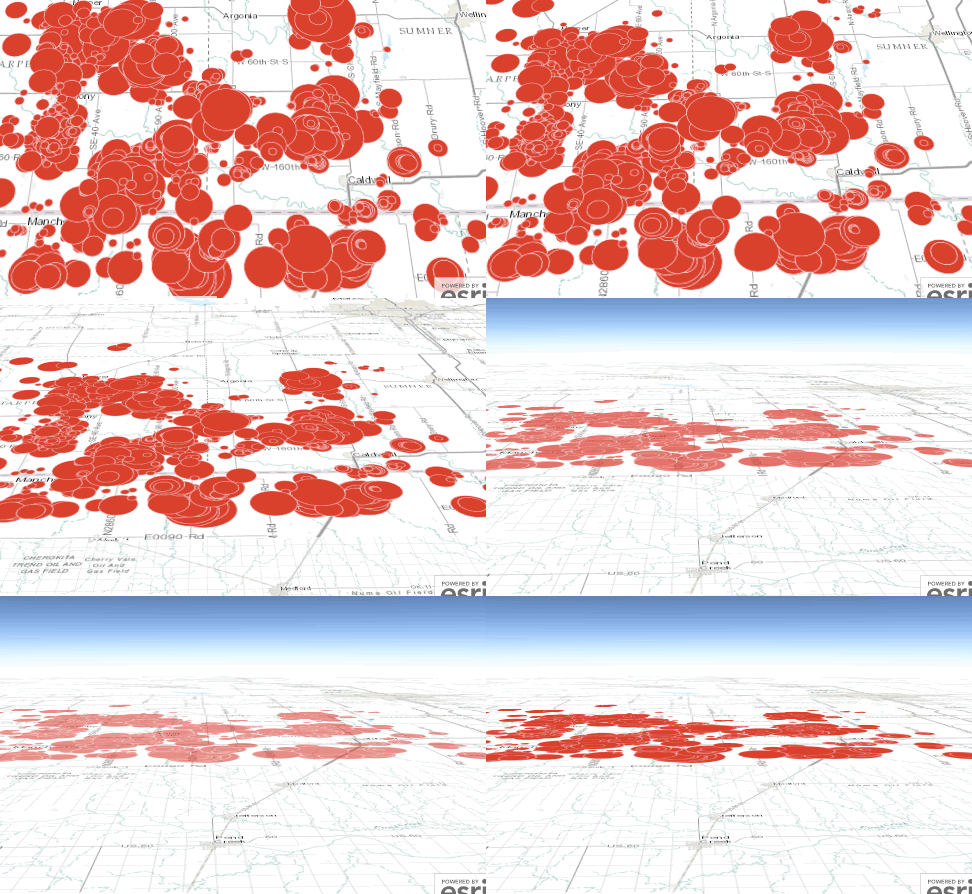
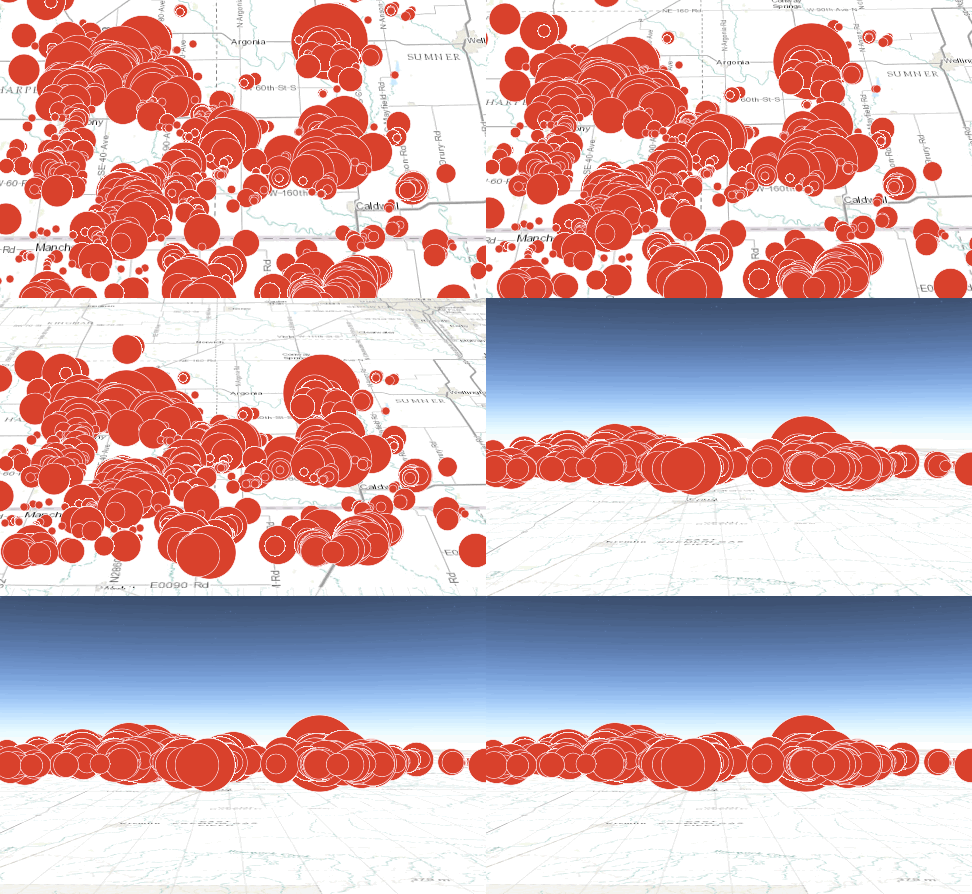
Both options have their benefits and tradeoffs. Draping takes perspective into account so symbols of the same size appear smaller when located further from the camera. This isn’t the case with billboarding where symbols maintain the same screen space as long as they are visible.
Another limitation with flat symbols is they can be difficult to interpret when the view is tilted no matter if they are billboarded or draped. For that reason you may want to consider using view constraints to keep the user from tilting the view to angles that make the data difficult to understand. However, that decision is up to you as a developer and depends on the purpose of the application and the context of the data.
Draping and billboarding is controlled in the elevationInfo property on the layer. Setting the mode to “on-the-ground” drapes the symbol, and setting the mode to “absolute-height” or “relative-to-ground” billboards it. When billboarding, setting the optional offset helps render each icon optimally.
var layer = new GraphicsLayer({
  //this billboards the icons
  elevationInfo: {
    //setting the mode to “on-the-ground” drapes the icons
    mode: "relative-to-ground",
    offset: 100
  }
});
CLICK HERE TO VIEW LIVE SAMPLE OF BILLBOARDED SYMBOLS
Visual Variables
As I discussed in the multivariate post from last week, visual variables may be used to easily render the size, color, or opacity of each feature based on data values mapped to a continuous ramp of size, color or opacity values.
The sample below takes the same data from last week’s post and uses visual variables to size and color each icon based on whether or not the majority of adults in each U.S. county attended college. Opacity is determined based on the percentage of the majority group (those who attended at least some college vs. those who didn’t).
CLICK HERE TO VIEW THE LIVE SAMPLE
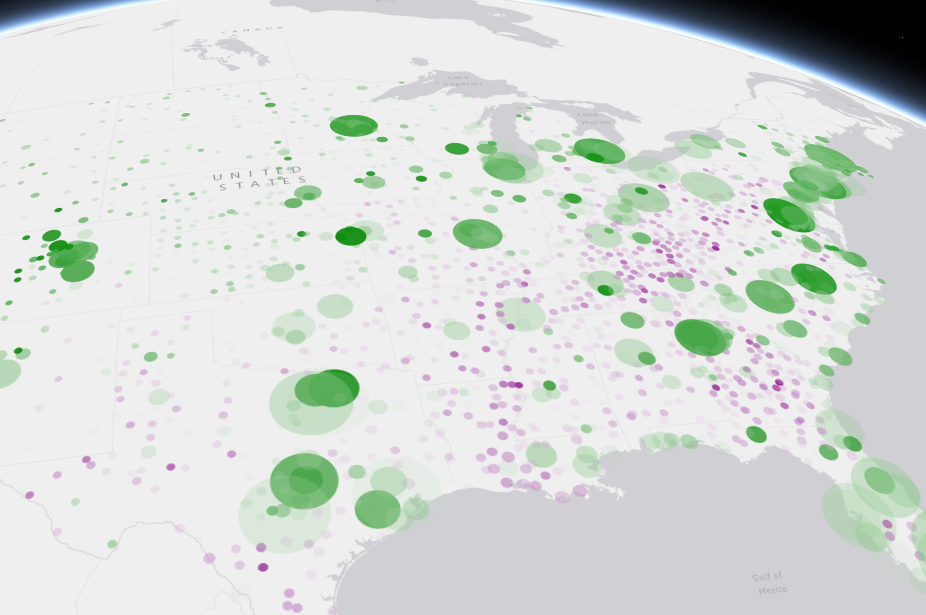
When using IconSymbol3DLayer, LineSymbol3DLayer, and FillSymbol3DLayer, visualVariables will render the data in the same way that was demonstrated in last week’s post. The rendering changes when the volumetric symbol layers listed in the table above are used.
Next week I’ll discuss using objects, paths, and extrusion to visualize 2D data with volumetric graphics.

Commenting is not enabled for this article.