To explore Collector, the “Try it” maps (available before you sign in) are a great starting point. They let you jump right into the app and see what it can do. But the next question is always “How can I get my own data in the app?” Users starting on their data from scratch should take a look at the ArcGIS Online and ArcGIS Enterprise templates. This blog answers their question, showing how to use the templates and, in five minutes, be out in the field with your own data in the app. It takes three steps:
- Create a feature layer (tip: use templates!)
- Put your layer in a map
- Open the map in Collector and get to work
First, create a feature layer
While there are multiple ways to create a feature layer, using the Feature Layer templates available in ArcGIS Online and ArcGIS Enterprise is a great way to quickly create a layer in your ArcGIS organization. While a variety of templates are available (and worth exploring!) in this blog you’ll use the Field Notes template.
- Sign in to your ArcGIS organization in a browser using either ArcGIS Online or your ArcGIS Enterprise portal.
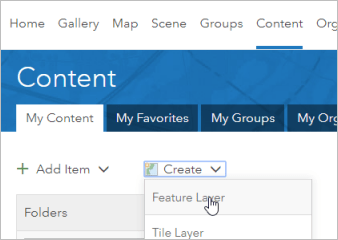
- Go to Content, and in My Content click Create and choose Feature layer to open the New Hosted Feature Layer dialog.

If you are using ArcGIS Enterprise your screen will look a bit different, but the same options are there.
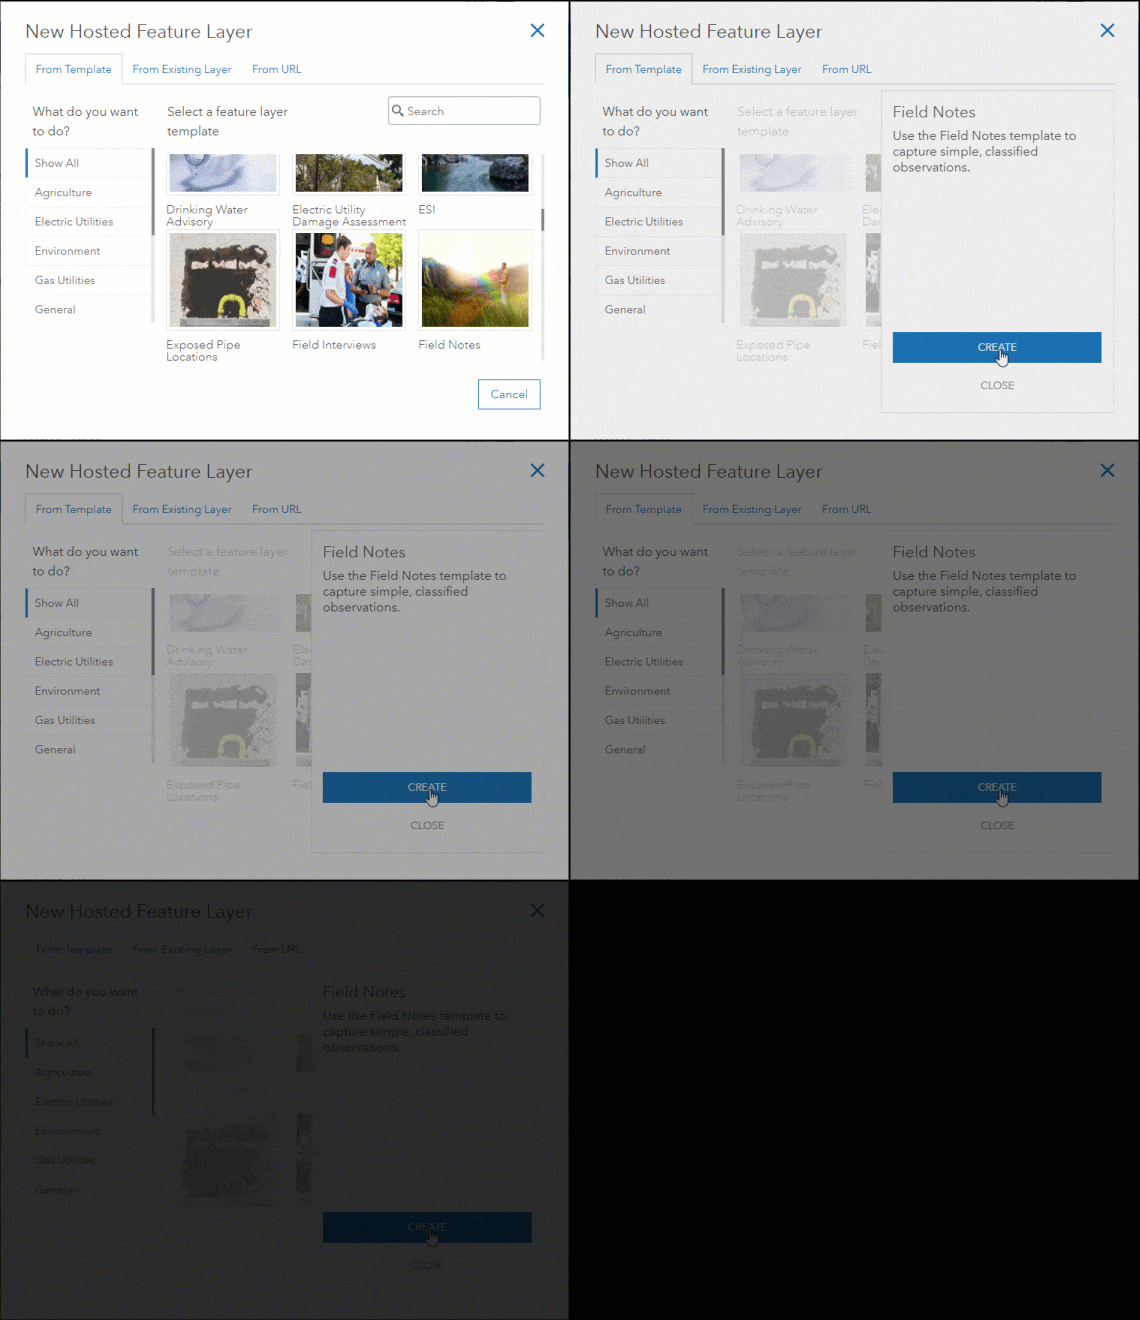
- Scroll to or search for the Field Notes template, and select it. Click Create in the panel.

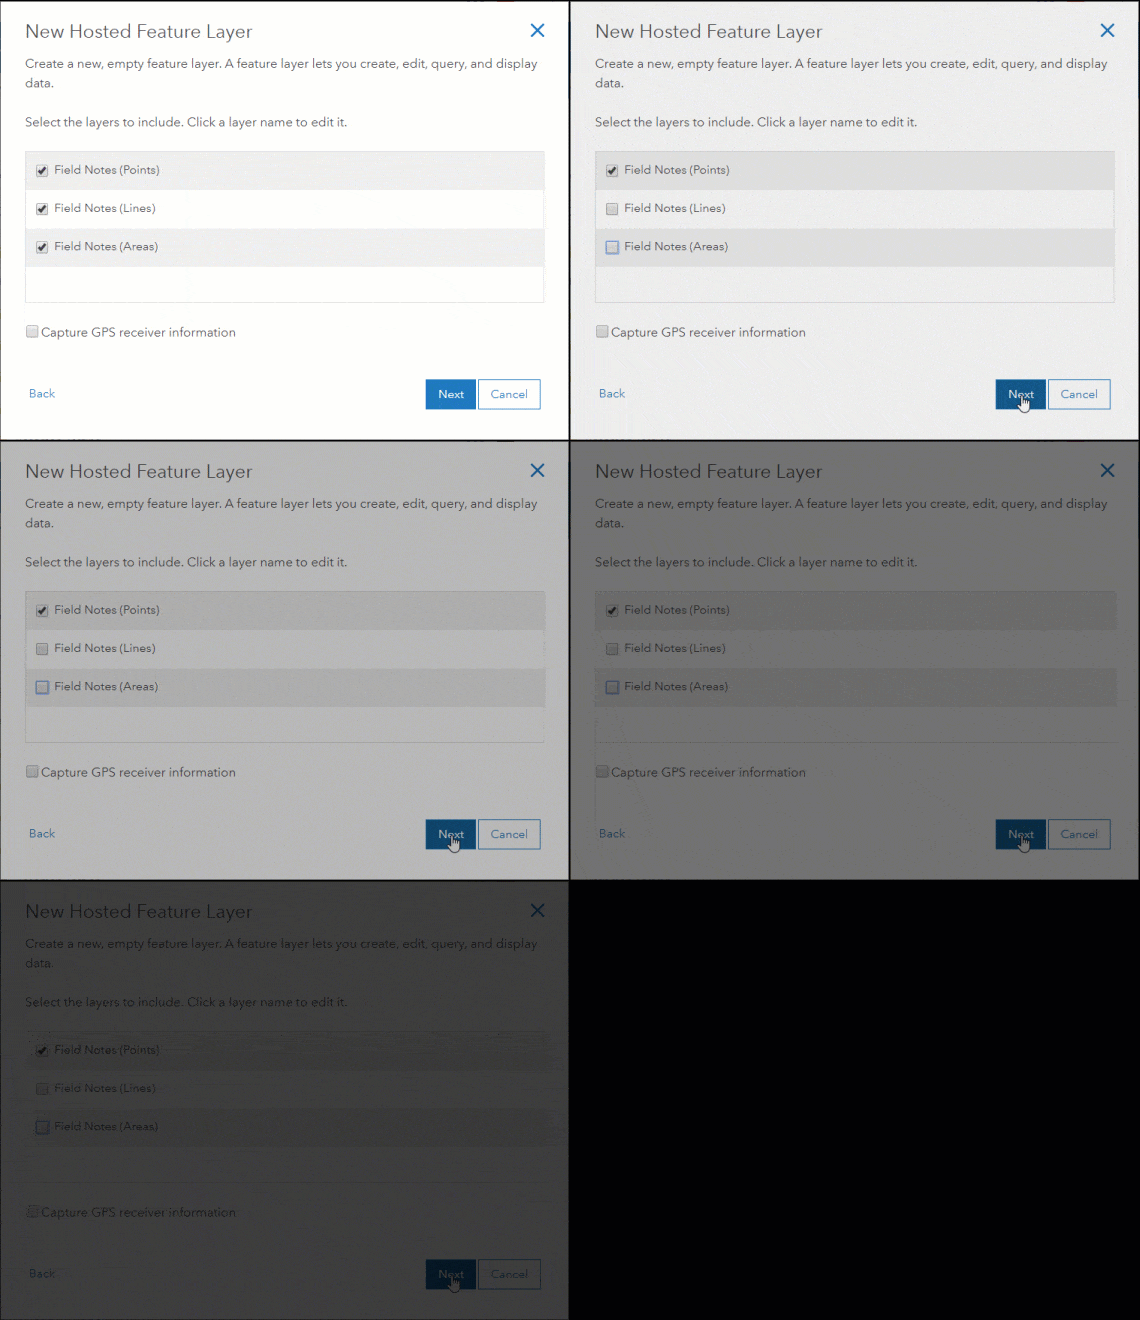
- For now, you just need a single point layer. Make sure Field Notes (Points) is enabled, and uncheck the other layers. Click Next.

- Set the extent for your layer and click Next.
- Provide a title, like Field Notes. You might need to include your initials in the name to get a unique layer name. Click Done to create your layer and see its item page.
Second, put your layer in a map
Now that you have a layer for the data you collect, put it in a map that you’ll open with Collector.
- Go to the item page of your layer, if you aren’t already viewing it. Click the drop-down next to Open in Map Viewer and click Add to new map.

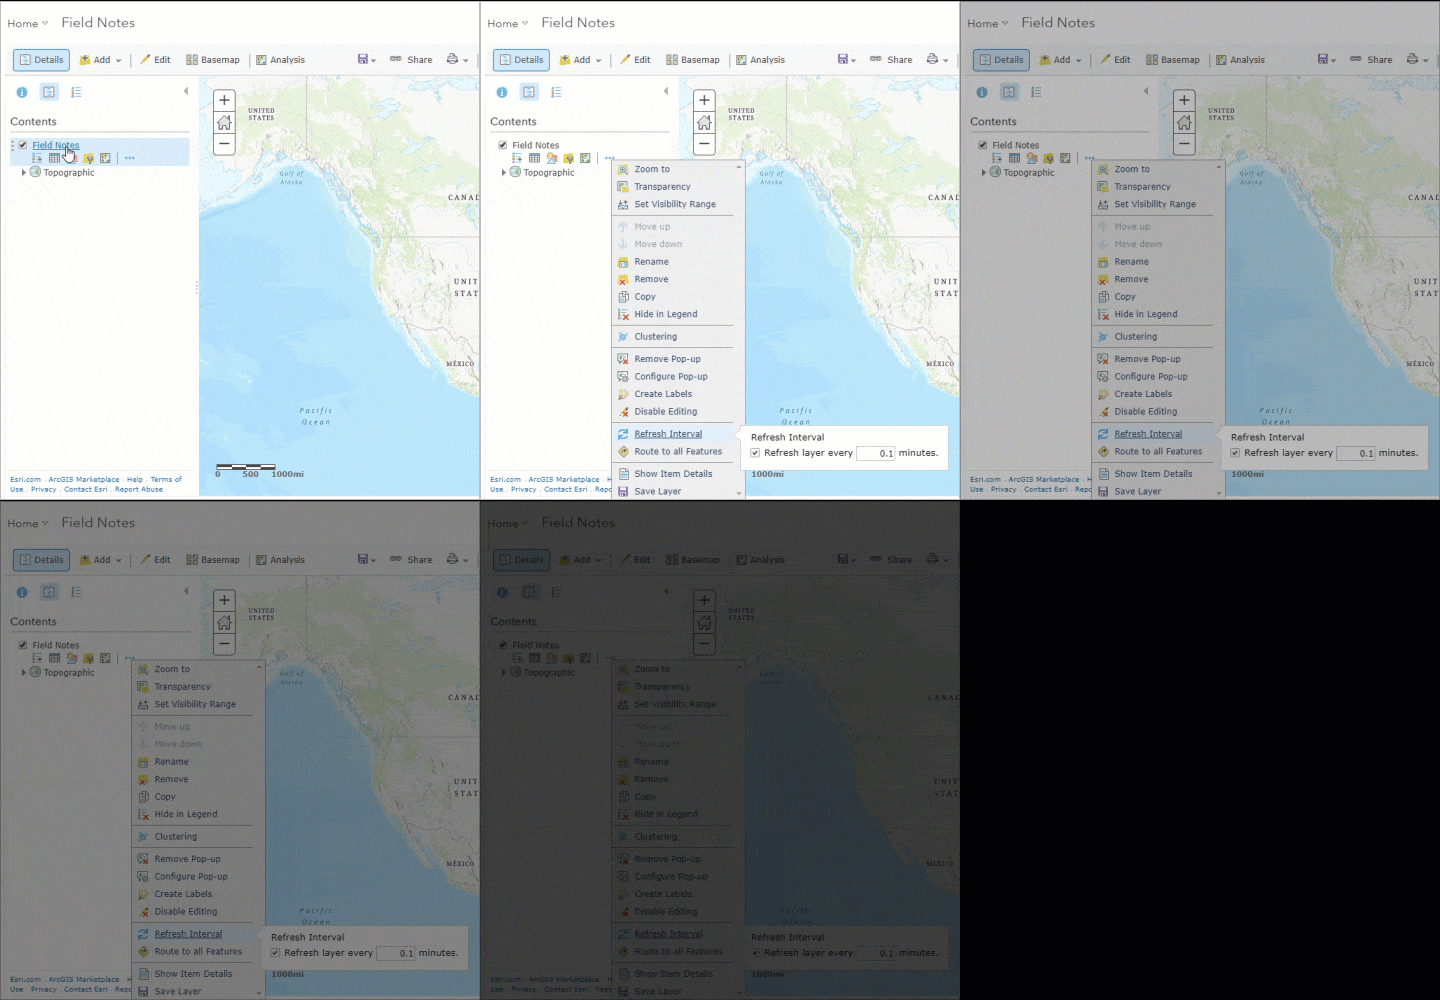
- Because you are collecting data into the layer and will want to see it on your screen, you’ll want the layer to update on the map regularly. Hover over your layer, click the More Options ellipses, hover over Refresh Interval, and provide an interval of 0.1 minutes.

- Save the map. You’ll need to give it a name (like Field Notes) and tags.
Third, open the map in Collector and get to work
Now that you’ve made the layer and the map, open the app and get to work.
- Open Collector on your device (Android, iOS, or Windows 10).
- Sign in to your organization. You’ll want to use the same account that made the map, as you haven’t shared it yet.
- Browse to the map you just made and open it.
- Tap Collect + (or go to the Collect new panel on a tablet) and select a type of note to start your first collection.
- Your GPS will be used to add the point, or you can use the map to set a different location. Provide a name for your note, and any other information you’d like to fill out in the form.
- Tap Submit (the checkmark on Android) to add your note to the layer.
- Go back to your web browser and look at the map you made. Within a couple seconds, you’ll see your note appear on the map.
In three steps you’ve created a feature layer, made a map, and brought your data into Collector, where you can collect the data that matters to you. Although we didn’t try it here, you can add attachments to your data, and even work offline. While you might need to collect field notes, there are templates that provide the data structure for a number of industry-specific projects, too. Go take a look at them, and see what data your organization could bring into their GIS. Have a suggestion for another template? Let me know!
Commenting is not enabled for this article.