ArcGIS StoryMaps combine maps, 3D scenes, embedded content, multimedia, and more into an interactive narrative that can create awareness, influence opinion, and affect change. StoryMaps can also be used to create presentation-style briefings, offering a slide-based format and the ability to integrate live maps and data from your organization. Additionally, StoryMaps briefings can be configured for use offline, enabling the use of briefings even in situations where network connectivity is unreliable or not available using the ArcGIS StoryMaps Briefings app.
This blog article covers the essential steps and considerations for creating effective and informative StoryMaps briefings. If you’re already versed in authoring StoryMaps, you’ll find many of the settings and workflows familiar.
Quick links
Use these links to jump to a section of interest.
Get started
Use briefing builder
Finalize and publish your briefing
Use the briefing
Tips for success
More information

Get started
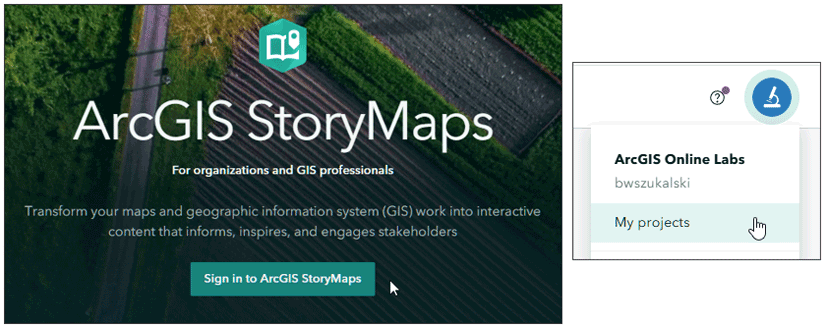
To create a briefing, first go to your StoryMaps projects. The quickest way to get there is to go to storymaps.arcgis.com and sign in with your account. You can also reach your projects after you’ve signed in by clicking your avatar and choosing My projects.
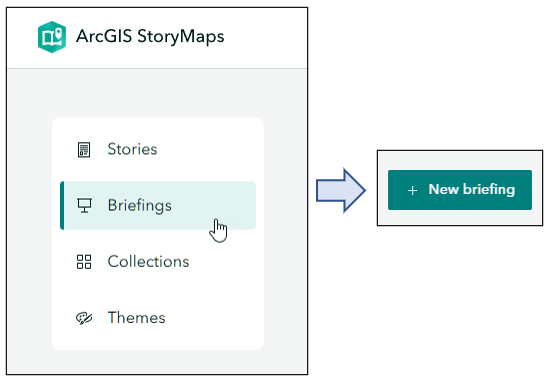
Choose Briefings from the list, then click + New briefing in the upper right.
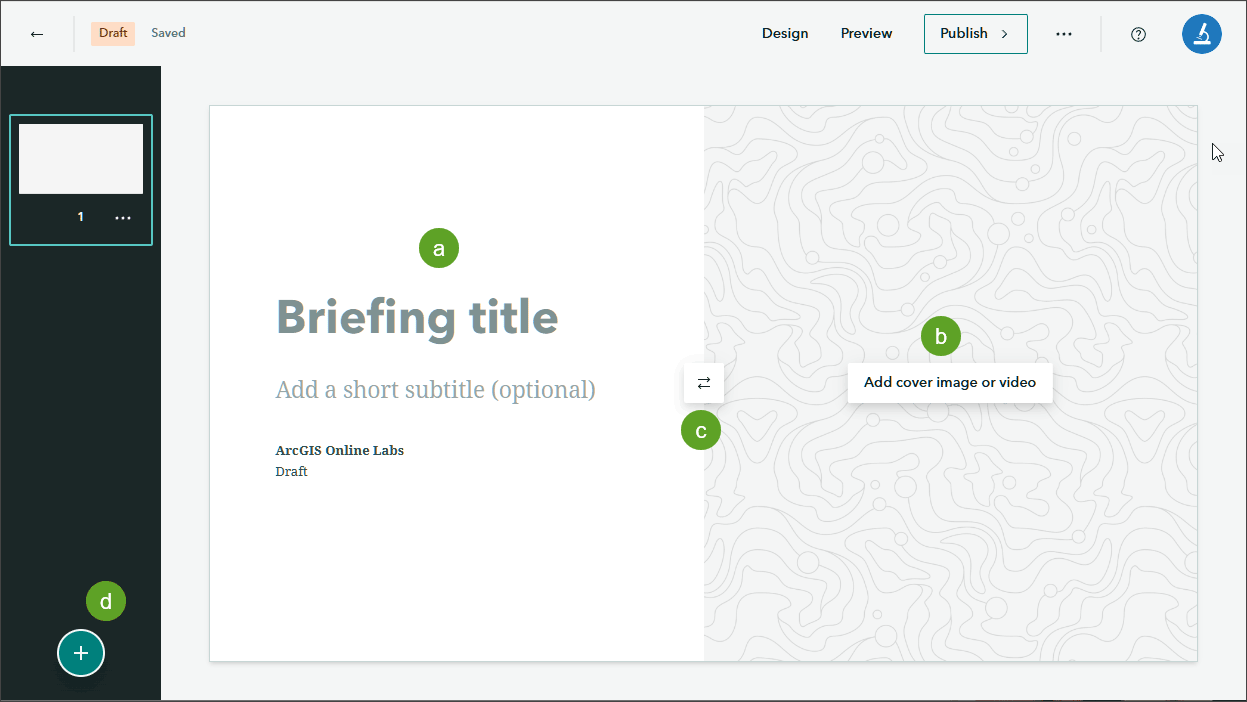
This will launch the briefing builder and open the title slide you can configure.
a – Click text to add a title, subtitle, and author.
b – Add photo or video to the slide.
c – Switch positions.
d – Add a new slide.

Use briefing builder
The briefing builder delivers all the tools and configuration options you need to create an effective presentation that contains text, media, and maps. While each slide might offer different options, each also works in similar ways.
Add slides
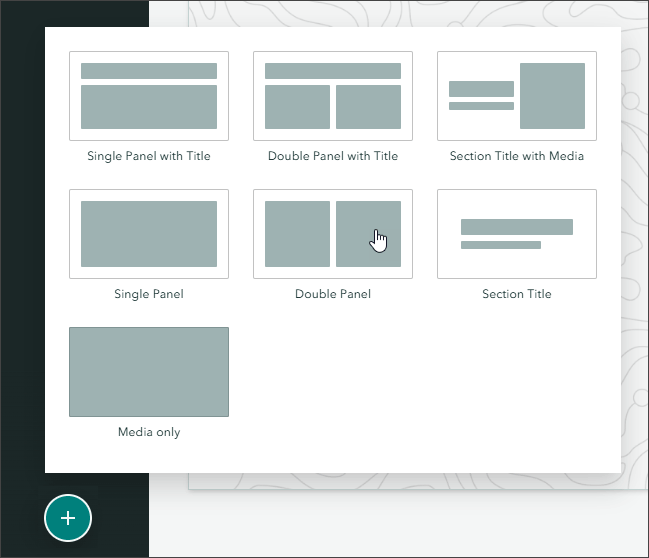
In the lower left corner, click (+) to display a gallery of slide layouts. Click a slide to add it.
Add text
Wherever you can add text, you’ll see placeholder text or Add text here.

Click and begin typing to add text. Select text to display the text toolbar to change style, size, color, justification, or add a link.
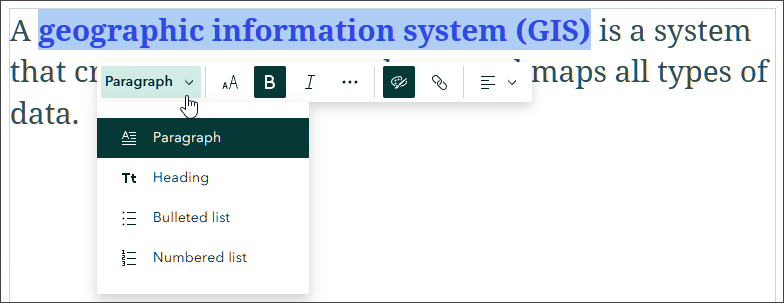
Note that the briefing design you’ve chosen will also change the text style.
Add media
The media drop-down appears anywhere you can add media.
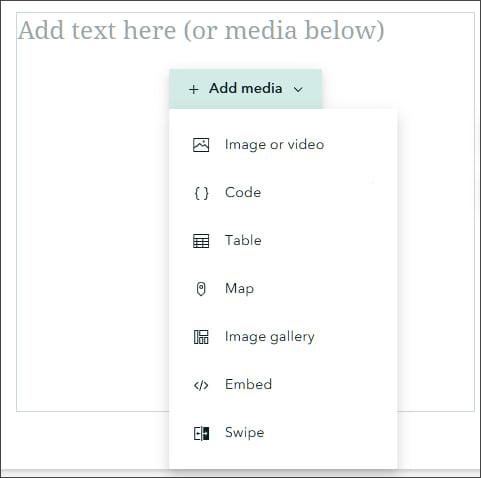
One you’ve chosen the media type, additional panes appear to guide you through selecting and configuring the media.
Slide configuration
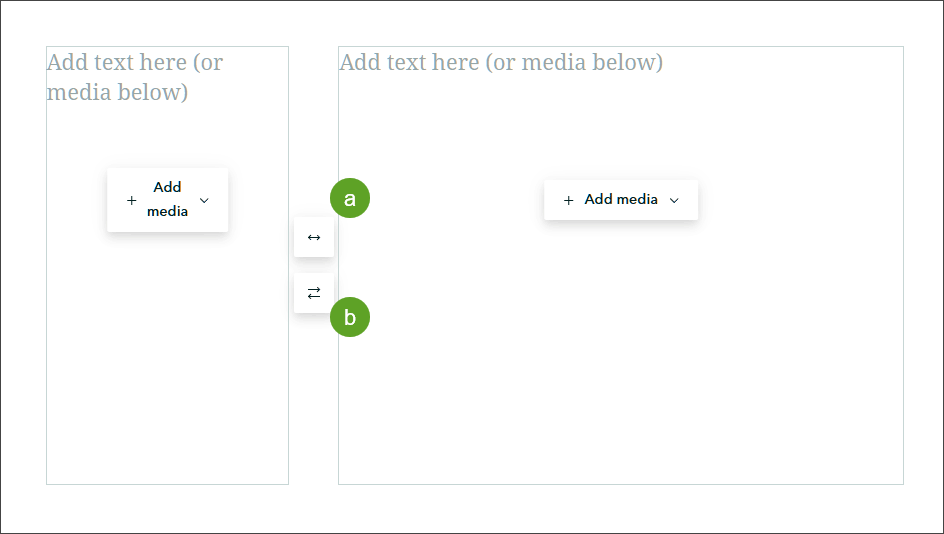
You can configure the slide to suit your needs, style, or emphasis on text or media. Depending on the slide you’ve chosen, you may see one or both of the following:
a– Change panel size. Click to incrementally adjust the size.
b – Change panel placement. Click to swap panel locations.
Slide properties
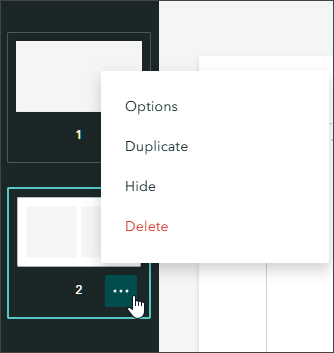
In the lower right corner in the slide thumbnail, click (…) to display a list. Use Options to change the slide title in the table of contents. Drag and drop a slide to a new position to change the order.

Finalize and publish your briefing
Along the right side of the header you’ll find additional tabs to finalize and publish your briefing.

Use Design to change the look and feel of your briefing and add a logo.
Use Preview to view how your briefing looks before publishing.
Use Publish to save your work and configure sharing options. You can keep your briefing private, share it across your organization, or share it publicly.

Use the briefing
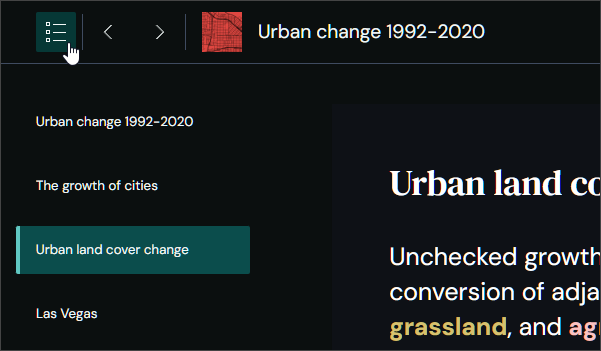
Congratulations! You’ve completed your briefing and are ready to show it, or share it with others. Along the left side at the top of the briefing you’ll find options to view the slide titles and select them, or use arrows to advance to the next slide.
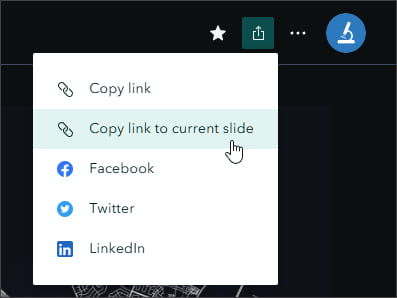
Along the top of the right side, click Share to copy a link to the briefing or share it to social media. Also note that you can create a link to open a briefing at a specific slide.
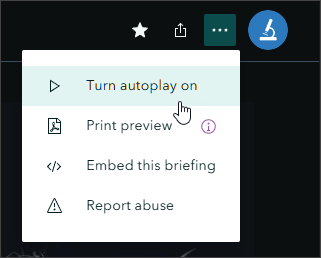
Click More actions (…) to use autoplay, print the briefing, and generate embed code for your briefing.

Tips for success
- Keep your briefings succinct and to the point.
- Ensure that maps, videos, embeds and other media performs well.
- When using ArcGIS Online maps, apps, and other content in briefings, enable delete protection to ensure these won’t be accidentally deleted.
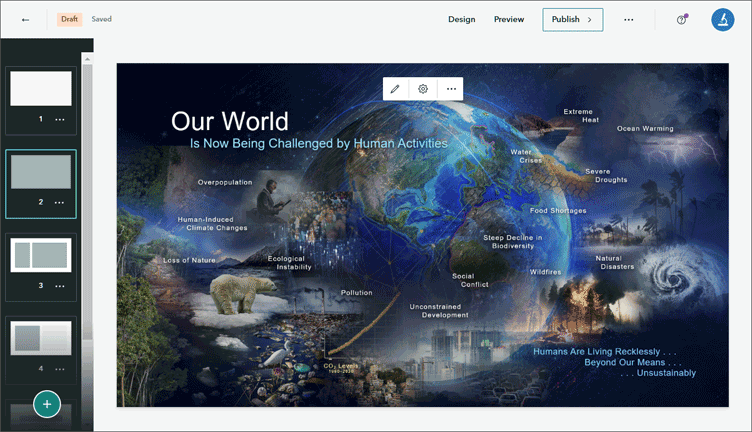
- You can use any graphics program to create compelling artwork for your briefings.
- Use PowerPoint slide captures and a Media only slide template to make a briefing slide that looks just like PowerPoint to complement briefing capabilities.

More information
For more information, see:
- Elevate your presentations: Introducing briefings in ArcGIS StoryMaps (Blog)
- Create your first briefing (Briefing)
- Great examples: Briefings (Collection)
- ArcGIS StoryMaps briefings (Video collection)

Commenting is not enabled for this article.