Now that you’ve had your hands on ArcGIS Pro 2.9 for a little while, the Editing team is introducing some new functionality that you will hopefully find useful. For the full list, see the What’s New page.
Link pointers across views while creating and modifying features
A new setting called Link Cursors is available on the View tab in the Windows group. The setting displays and synchronizes the active pointer in all views across multiple maps or scene views. For editing, this means that you can start a sketch in one map and finish it in another. This applies when you create new features and modify existing ones using tools like Split and Reshape. This is particularly useful for editors who work with Stereo and 3D views.
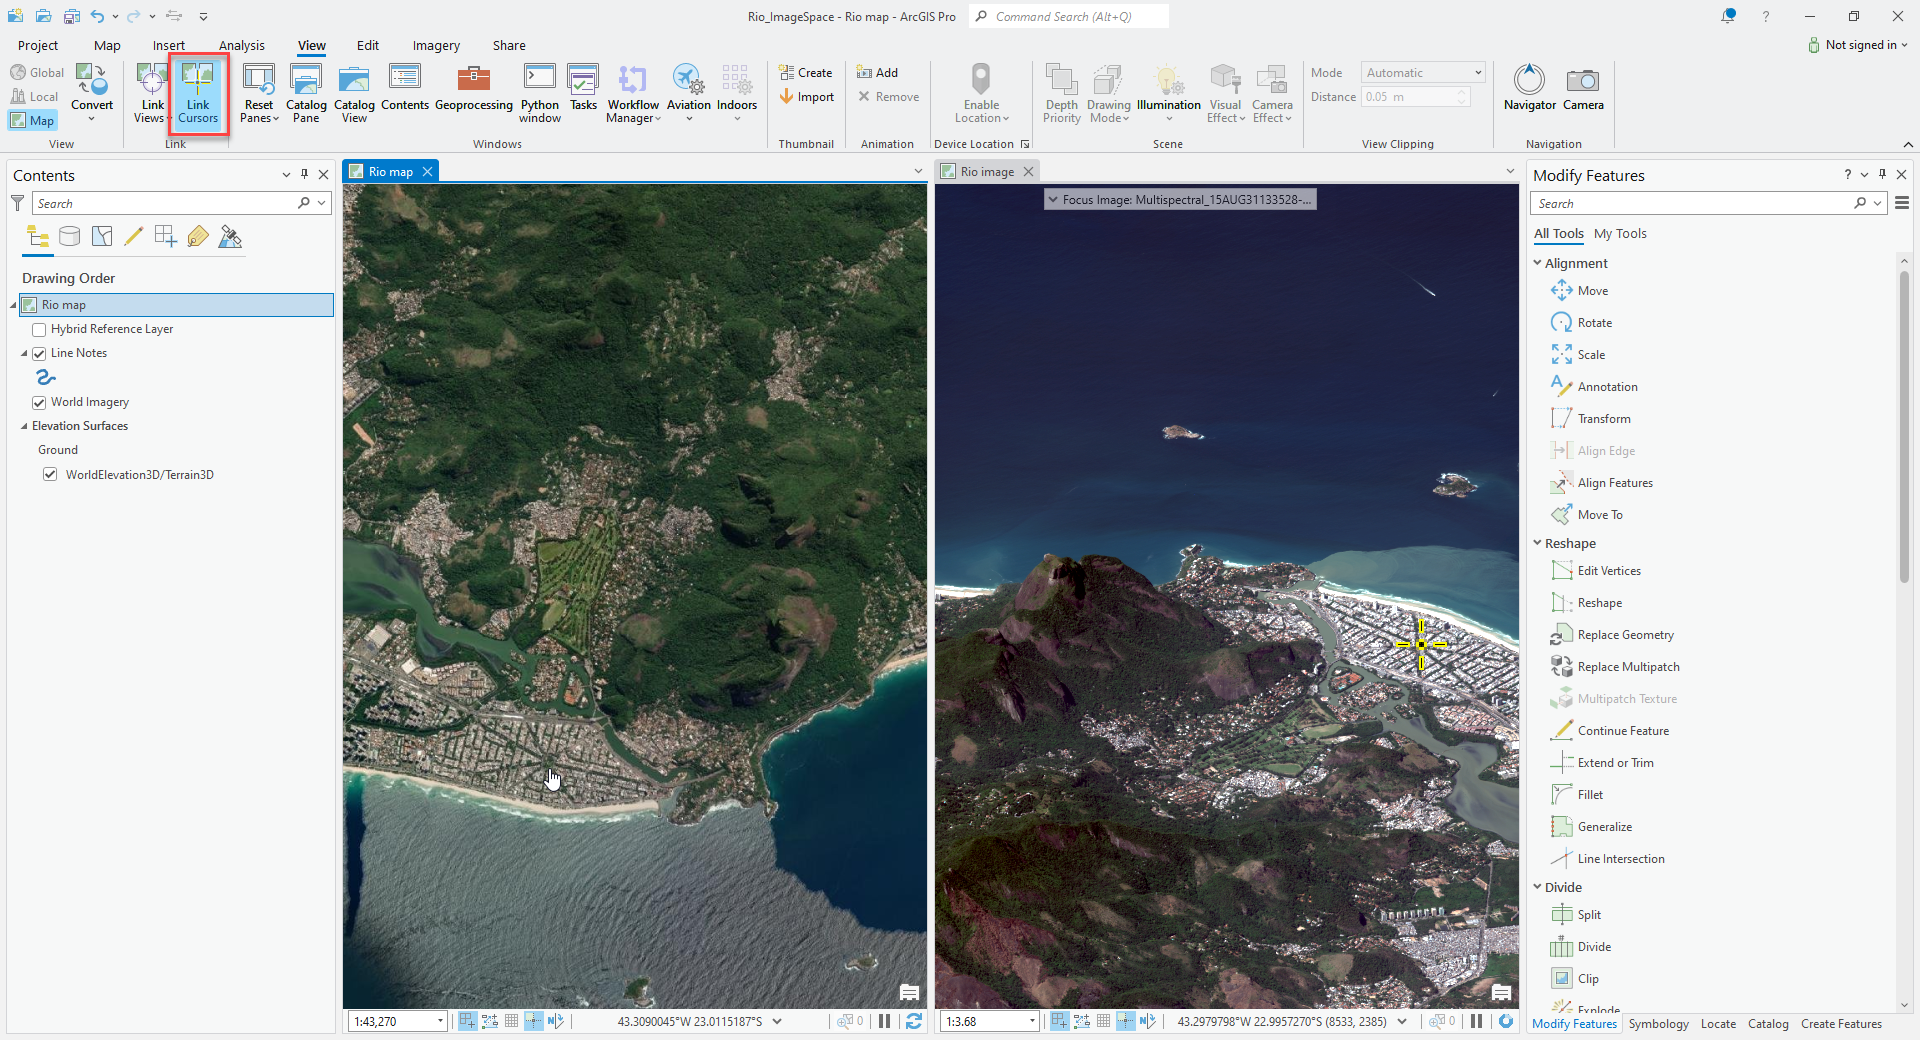
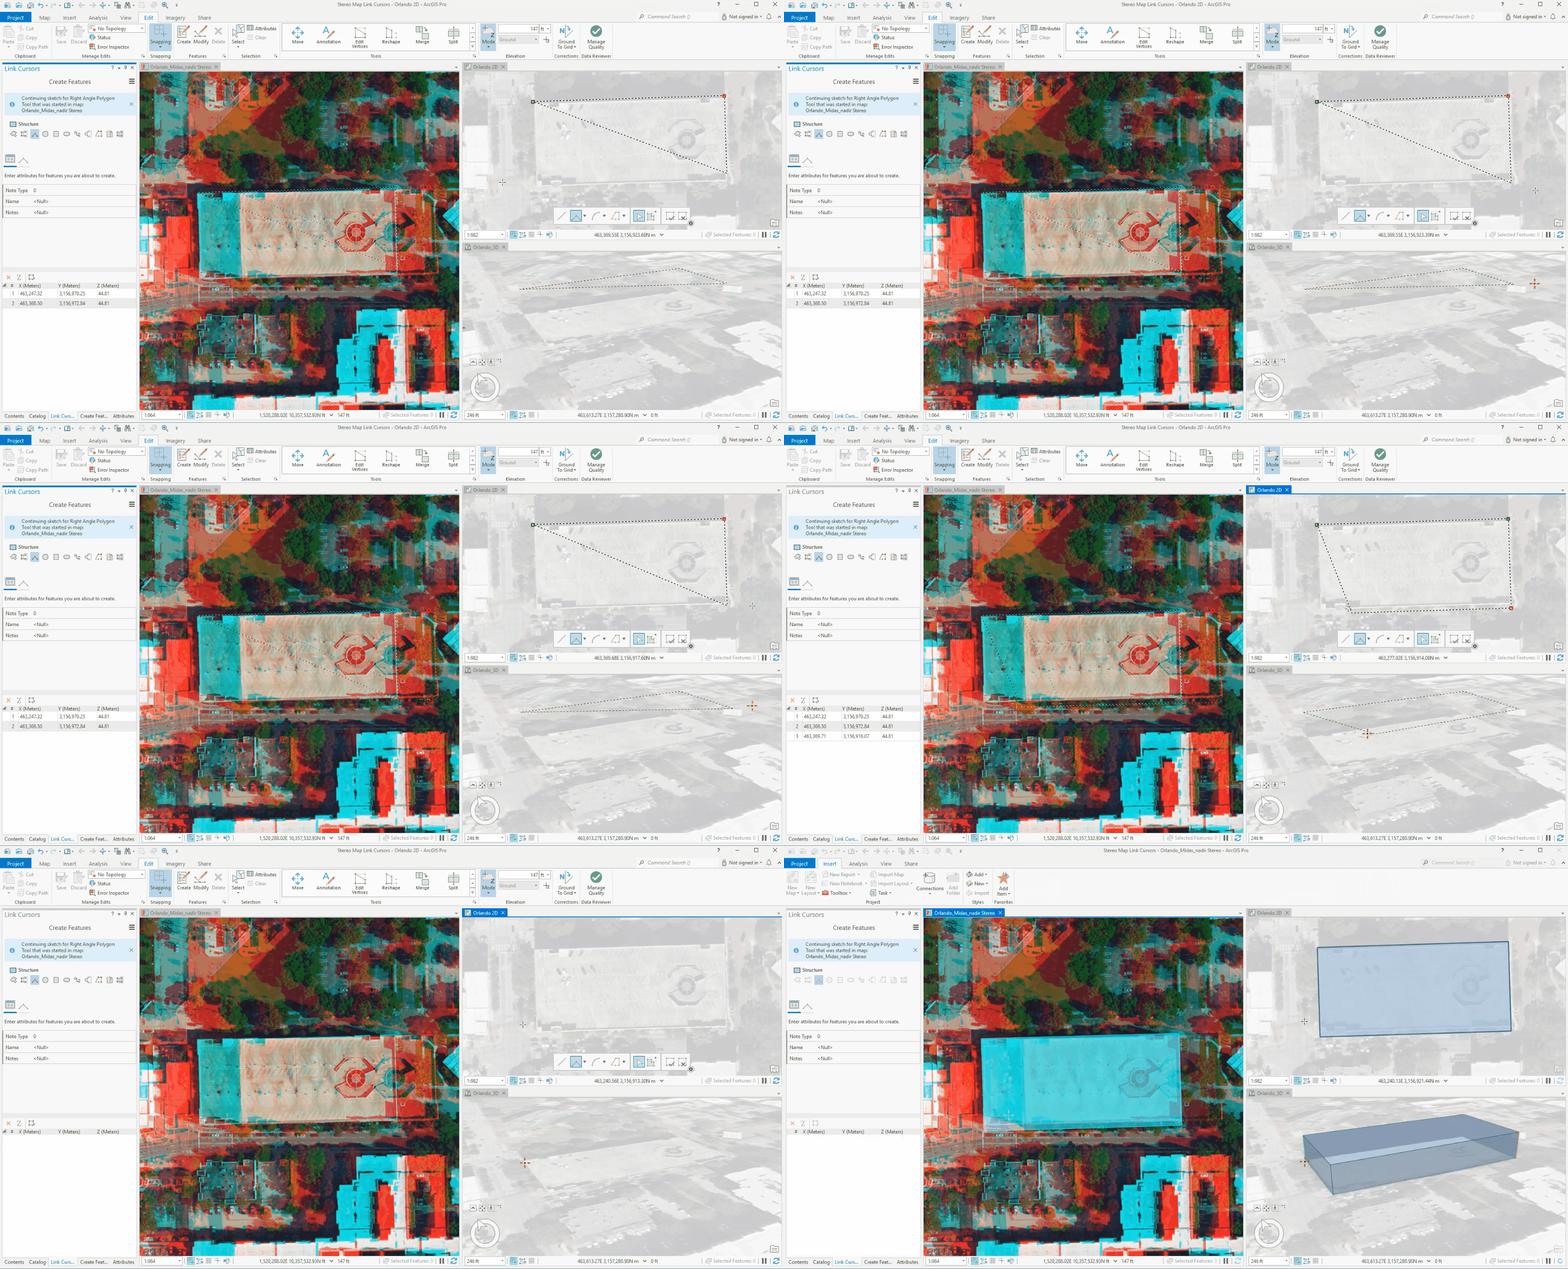
Learn more:
Feature compilation using stereo mapping
Table templates for stand-alone tables
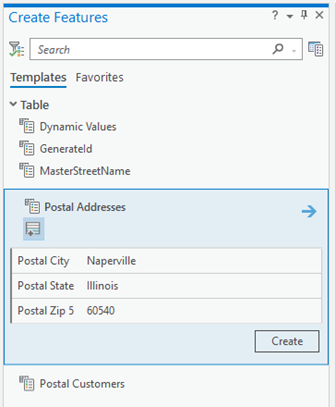
You can now use table templates to insert records (rows) into existing stand-alone tables. Table templates are automatically generated for all tables in a map and are available in the Create Features pane. You can configure table templates to override the existing geodatabase default values or temporarily override values prior to creating them. To insert multiple rows, click the Active Template view and specify a value for Number of rows.
In the following example, the Postal Addresses table template has been configured to prompt users to review or override default attribute values.
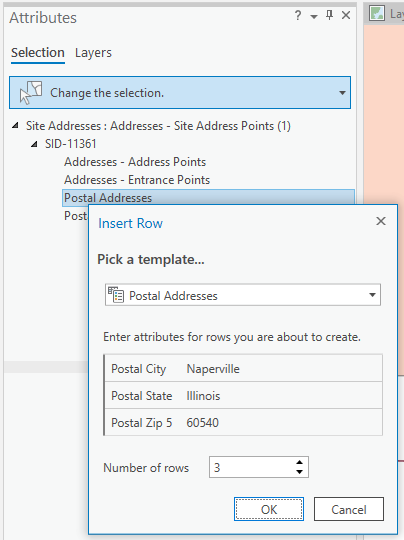
In addition to Create Features, you can use table templates to insert records via the Attributes pane. This provides a convenient way to update stand-alone tables when working in this pane. To access, right-click a table’s node in the tree view and click Insert Row. In the Insert Row window, choose a table template, override attribute values, and choose the number of rows to create (as shown below).
Learn more:
Filter and search for templates
Modify tools selection filtering enhancements
At ArcGIS Pro 2.9, the Modify tools will no longer filter out invalid selections made outside of the tool while the tool is active. For example, while the Move tool is active, you can now manually select rows in a stand-alone table or use a geoprocessing tool like Select By Attributes to query rows in a table. Prior to 2.9, this type of selection would be filtered by the tool because the Move tool can’t act on rows in a table. We made this change based on user feedback. Instead of filtering invalid selections made outside of the tool (perhaps unexpectedly), a warning banner now appears at the top of the tool and warning badges appear on the invalid records in the tool’s selection tree view:
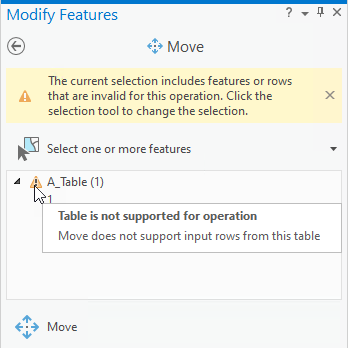
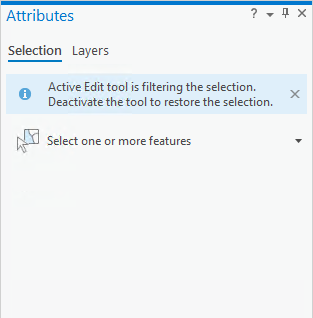
If you see these warnings, you can manually remove the invalid features from the selection or activate either the tool’s active select tool or the embedded tool itself. This will filter the selection to the valid subset of records that can be used with the tool. When a Modify tool has filtered out the selection, to make this filtering a bit more transparent, an information banner now appears at the top of the Attributes pane.
Learn more:
3D Object Feature Layer (DWG support)
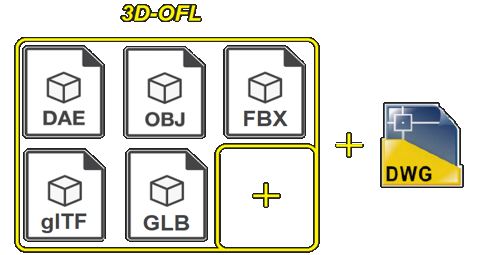
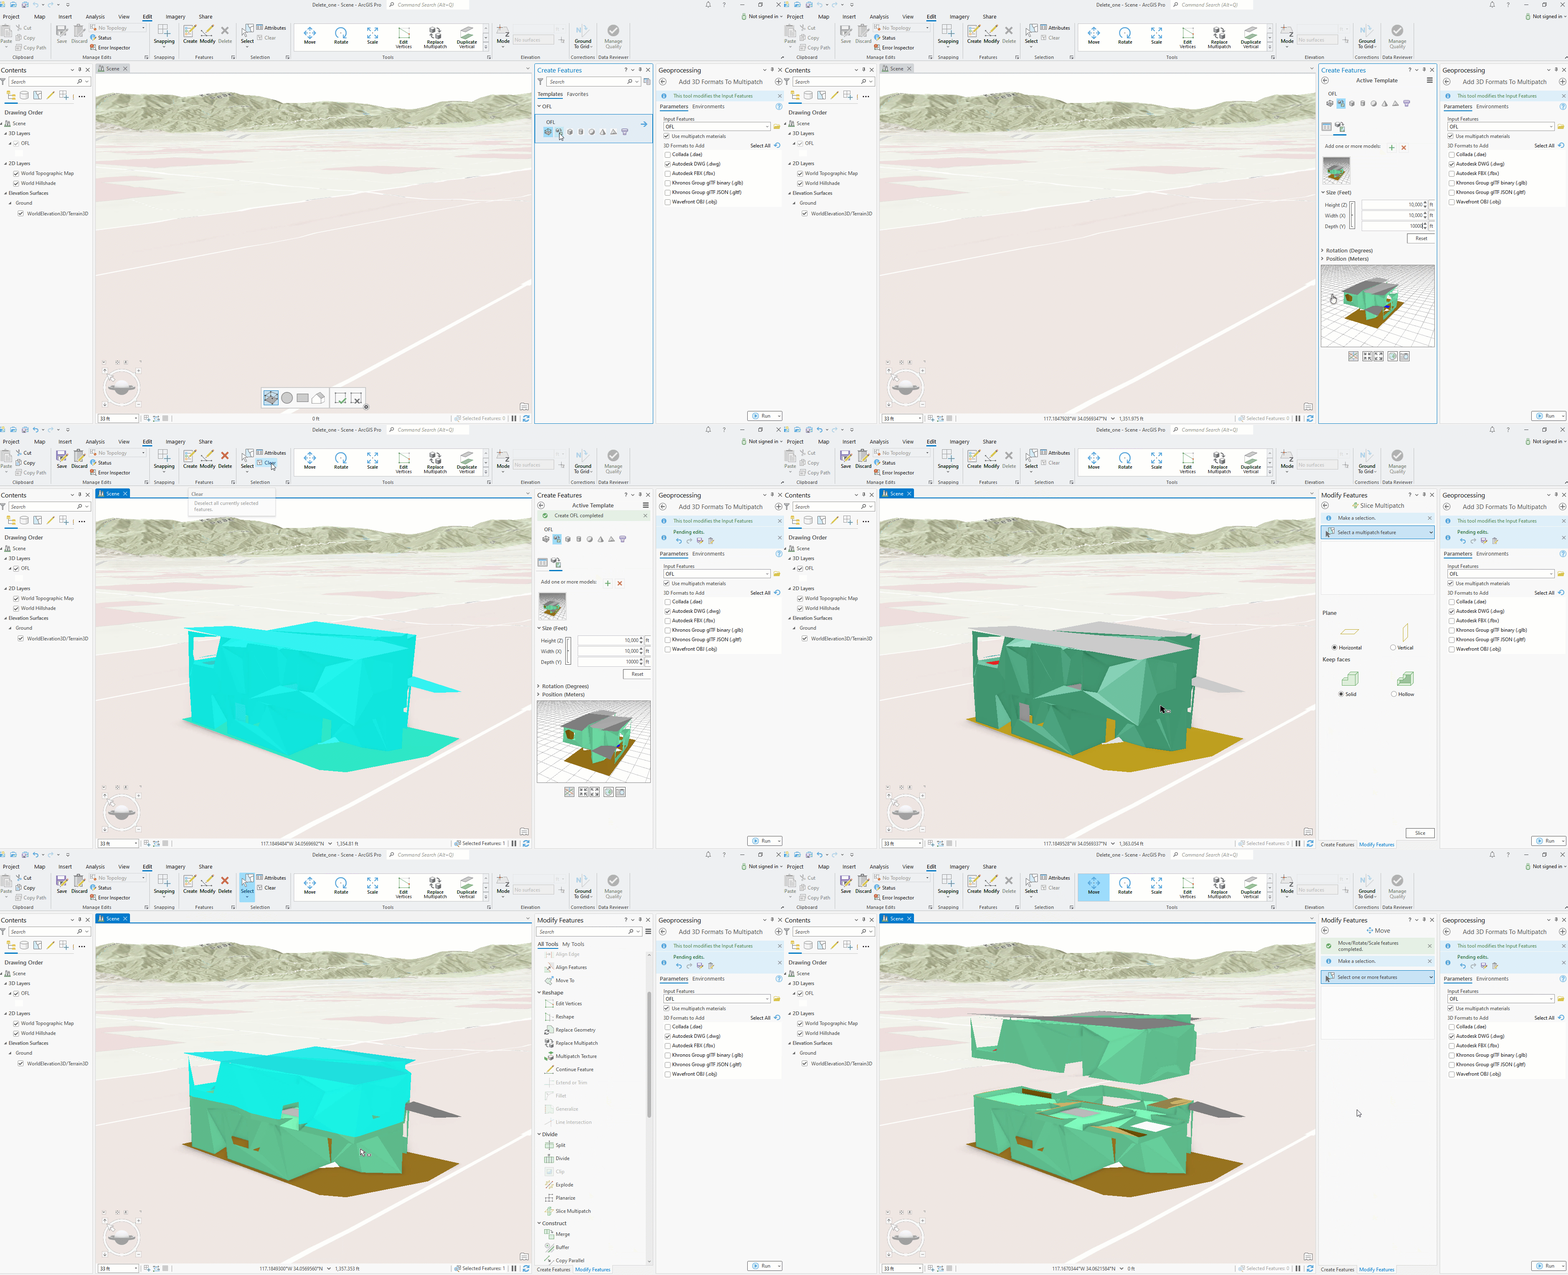
DWG support is the latest enhancement to 3D Object Feature Layer. These files can be added using the multipatch or 3D object’s feature template’s Model File tool to browse and choose a file.
The following are supported file formats:
Learn more:
Add 3D Formats To Multipatch (Data Management)
Edit 3D objects by directly accessing model files
Reviewing and editing attributes of related content that’s not in the map
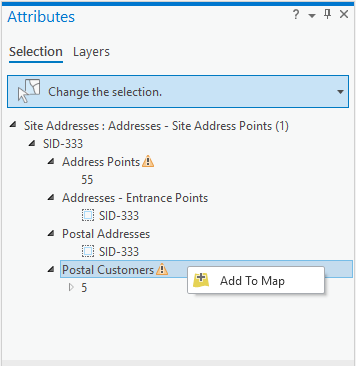
Attribute values are now displayed and editable for related feature classes and tables that are not in the map. This new capability may be helpful for situations in which adding related content is not preferable. You can view these attribute values in the Attributes pane by clicking their node in the tree view. When the node is highlighted, fields and values are displayed in the Attributes view and can be edited by activating the cell and specifying a new value.
Note: To add related content to the map, right-click a node in the tree view and click Add To Map.
Learn more:
Feature Template option to save geodatabase default value as template default
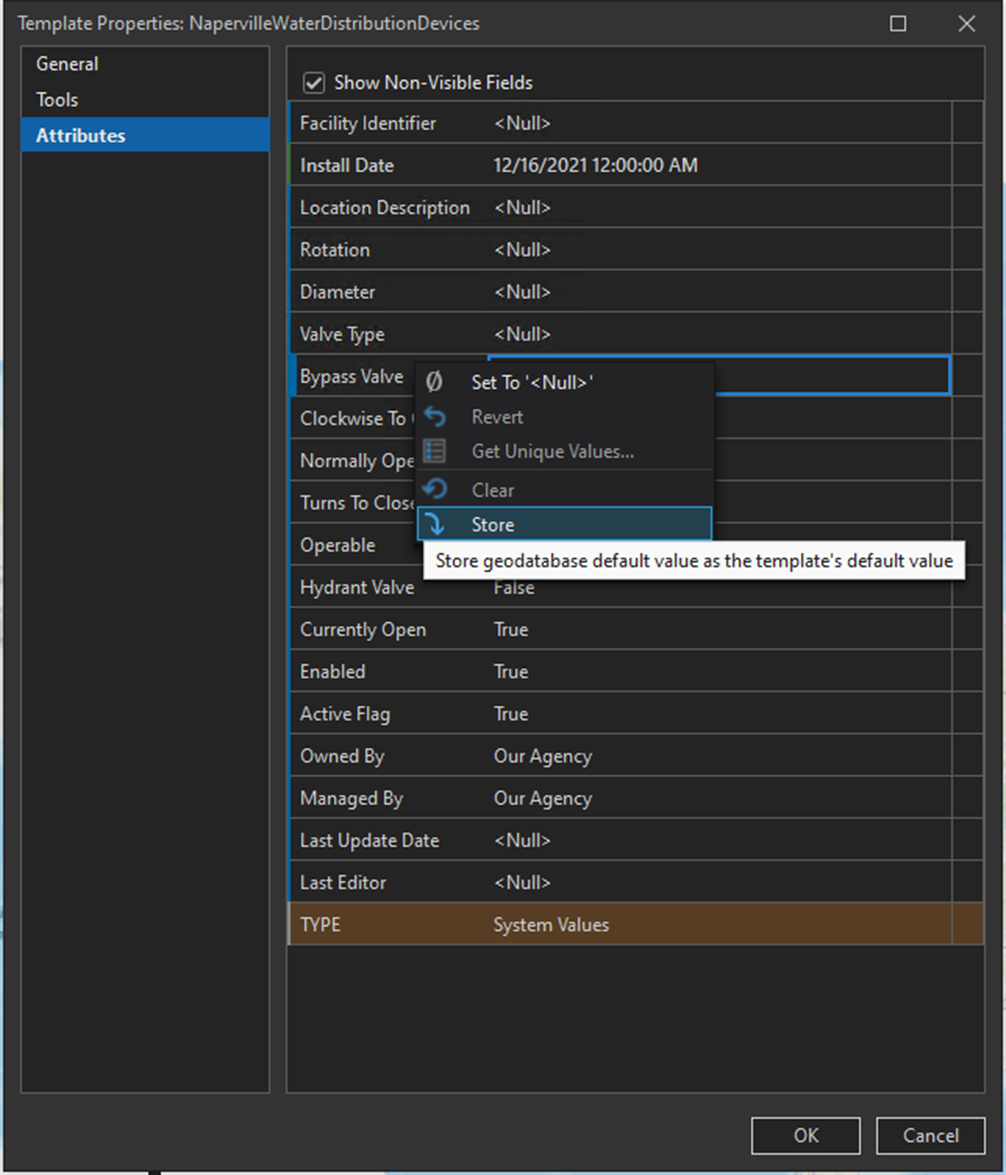
When authoring feature and table templates, there are field context menu items that can help with setting and resetting default values. At ArcGIS Pro 2.9, we added a Store command that saves the geodatabase default value as the template attribute’s default value. You can identify that a field is using the geodatabase default because it will be shown with a blue border whereas an authored attribute will be shown with green border. By storing the geodatabase default in the template, any changes to the field’s data schema will not propagate up to and change the template’s default values. In addition to the Store command, there are commands to do the following:
- Set To ‘<Null>’—Set a nullable field to <Null>.
- Revert—Revert an edited value to the last stored value.
- Get Unique Values—Display a picklist of all the unique values for an attribute
- Clear—Revert to the geodatabase default
- Store—Store the geodatabase default as the template’s default
It is worth noting that Set to ‘<Null>’, Revert, and Get Unique Values are also available in the Attribute pane’s Attribute grid.
Right-click the field name to display the context menu. Commands are available or unavailable depending on the state of the attribute.
Learn more:
Vertex Editing mode
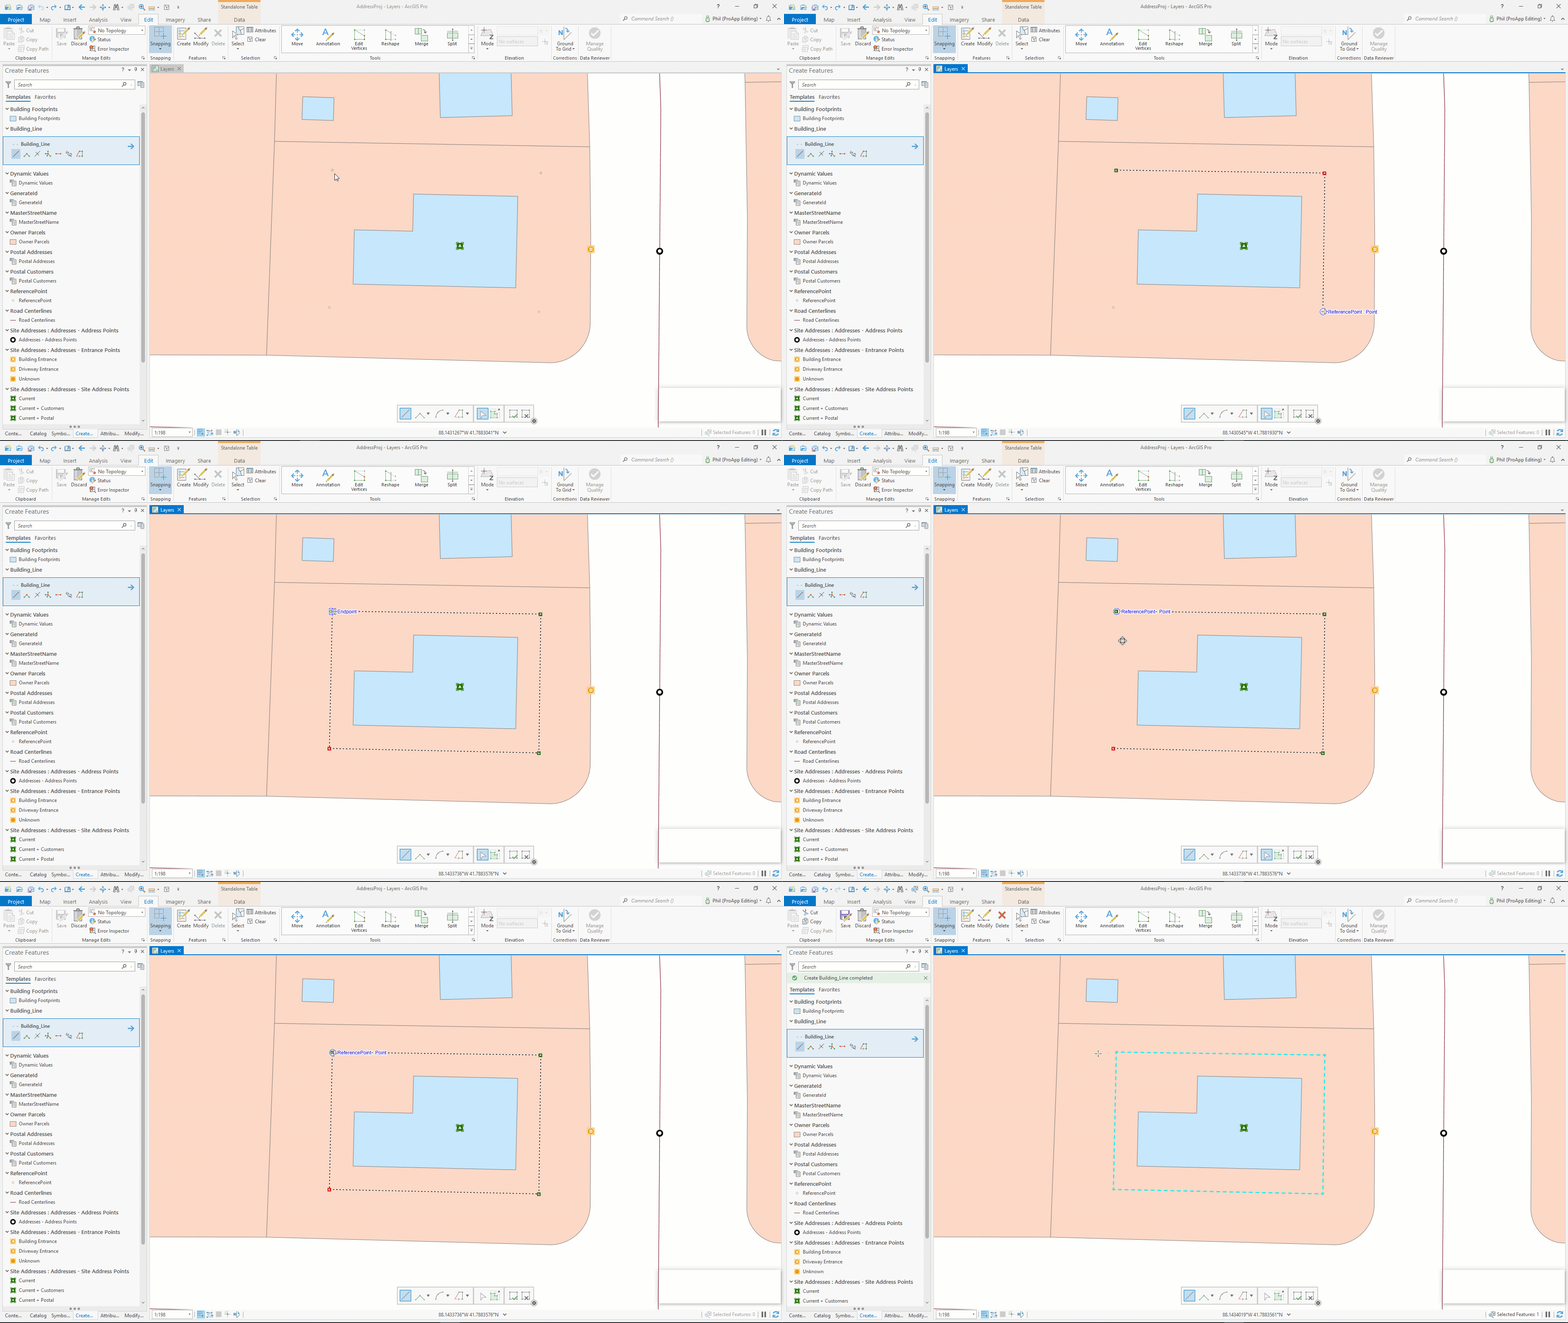
While sketching on the map, data editors can move and delete vertices and add new vertices. Editors can also modify the segments in between vertices. Moving and deleting vertices and modifying segments allow editors to address errors as they happen. However, there are workflows hindered by this capability, for example, creating a closed loop line. With ArcGIS Pro 2.9, there is a new mode on the construction toolbar to disable this capability. While enabled, hover the pointer over a vertex or segment to put it in an editable state. While disabled, hovering over a vertex or segment will snap to it but will not put it in an editable state.
Learn more:
Do not activate Move after Paste
To improve support for the variety of our user’s workflows, a new editing option in the Productivity category gives you the option of activating the Move tool after copying and pasting features. If your workflow includes moving pasted features, the default behavior has not changed, and you do not need to update the option. But, if your workflows do not require moving features after a copy and paste (or paste special), open the Editing page of the Options dialog box and uncheck Activate Move tool after all paste operations.
Learn more:

Thanks, great blog!