In January 2023, I introduced a blog on how to create your own sample tool to download attachments. The purpose of this tool was twofold. First, provide a working sample tool for users who need the ability to export attachments with the option to rename the files. Our user community has provided reasons for such a tool over the past several years. Second, illustrate the tools creation, so that others could use the sample code and validation scripts for their own future script tools. While the blog and tool have been popular, I am proud to announce that ArcGIS Pro 3.3 now has its own core tool—Export Attachments.
In this blog, I will cover the similarities and differences between the sample tool and the core tool that is now part of ArcGIS Pro.
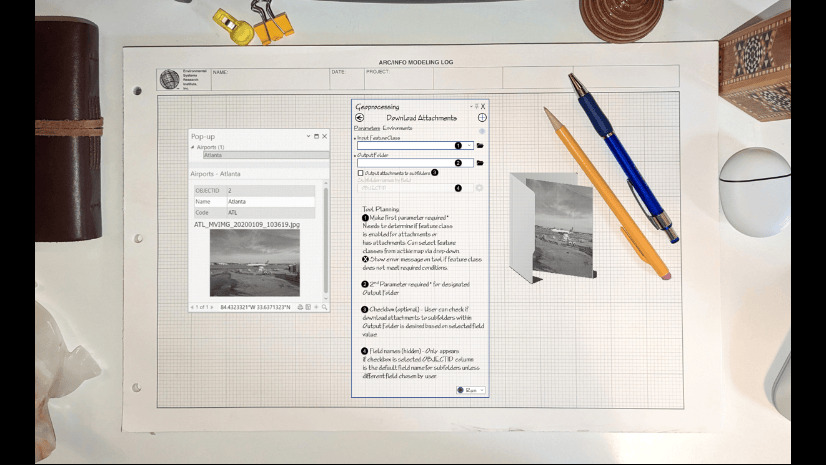
Tool location

To access the Export Attachments tool, select the Analysis tab on the ribbon and click the Tools button to open the Geoprocessing pane. In the Geoprocessing pane, expand the Data Management Tools section, then expand the Attachments toolbox to access the Export Attachments tool.
Tool overview

The new tool has the following parameters.
- Input Dataset—Feature classes, feature layers, feature services and tables enabled with attachments.
- Output Location—Folder location to store all exported attachments or exported attachments in subdirectories if applicable.
- Subdirectory Field—Selected attribute field used to create optional subdirectories based on field values to export attachments.
- Name Format—Choice of exporting attachments with original file names, replacing file names with field values, add a prefix of field values to original names, or add a suffix of field values to original names.
The tool supports date fields for renaming files.
Export attachments
Let’s look at different scenarios for exporting attachments with the new tool.
- All scenarios use the enabled for attachments Airports feature class with attachments.
- The tool honors selections, and only exports attachments for selected features. The selected feature illustrates the tools different options in our scenarios.
- The attribute table is shown in each scenario. This illustrates naming subdirectories or renaming exported attachment file names with field values when applicable.
Default scenario: Single folder output with original file names

In our first (and default) scenario, I want to export all original attachments for Palm Beach International Airport (PBI) into a single folder. I can accomplish this using the tool with the two required parameters and accepting the optional parameters as they are.
- Input Dataset—I added the Airports feature class from the active map. The tool indicates it will use the selected record to export only those attachments.
- Output Location—Folder location for all exported attachments of the selected airport feature.
- Subdirectory Field—I chose to leave this optional parameter blank to store all exported attachments in the output folder only.
- Name Format—This optional parameter allows me to rename the exported files. I want to export the attachments for this airport with their original names, so I kept the default value, Use Original Filenames.
We see the exported attachments with their original filenames in the chosen output folder in the Windows File Explorer window above the left side of the active map.
Output to subdirectory and rename files

In the second scenario, I want to export all attachments from PBI into a subdirectory of the same name. I also want to rename the files using selected field values from the Airport feature class attribute table. I’ll choose a field for the Subdirectory Field and Name Format parameters.
- Input Dataset—As before, I added the Airports feature class from the active map. The tool indicates it will use the selected record to export only those attachments.
- Output Location—Folder location for all exported attachments of the selected airport feature, including subdirectories.
- Subdirectory Field—I chose the Code field to create one or more subdirectories with the field values in the attribute table. In this scenario, it will only create a subdirectory named PBI because of the single selection. This option allows us to organize our exported attachments categorically by feature attribute.
- Name Format—Selecting Use Field Values Only for this optional parameter reveals the Name Fields parameters that allow me to choose the fields I want to rename each exported attachment. I can choose one or more fields in any order to combine the field values for renaming the exported files. Here, I chose the fields Code, Name and TimeStampOffset.
Now we see the exported attachments renamed with field values from the chosen fields in a subdirectory named PBI in the Windows File Explorer window above the left side of the active map.
Notice that the replacement names have underscores added between the field values in the new file name.
Special characters such as a colon, used in Date data types such as our TimeStampOffset field, violate rules for naming directory and file names. We’ll discuss how this tool works with special characters and their replacements in an upcoming section.
When choosing to rename files with the Use Field Values Only selection, it is possible for one or more files to have duplicate names. In the results above, the two images could not have identical names. The tool will append an incremental number to filenames when appropriate.
Field values as a prefix added to original name

In our third scenario, I want to export attachments to a subdirectory using the Name field. Next, I want to append field values as a prefix to the original file names. I’ll again choose a value for Subdirectory Field and set the Name Format to Add Field Values as Prefix.
- Input Dataset—As before, I added the Airports feature class from the active map. Again, the tool indicates it will use the selected record to export only those attachments.
- Output Location—Folder location for all exported attachments of the selected airport feature, including subdirectories.
- Subdirectory Field—This time, I chose the Name field to create one or more subdirectories with the field values in the attribute table. In this scenario, it will only create a subdirectory named Palm Beach because of the single selection. This option allows us to organize our exported attachments categorically by feature attribute.
- Name Format—I selected Add Field Values as Prefix for this optional parameter. It also displays the Name Fields parameters to allow me to choose fields I want for the field values as a prefix. Again, I can choose one or more fields in any order to combine the field values for adding a prefix. Here, I chose the fields Name and Date.
The results in Windows File Explorer show our output to a subdirectory in the output folder location named Palm Beach. The field values from the chosen fields are appended as a prefix to the beginning of the original file names. Notice in the attribute table that the Date field for Palm Beach is <Null>. We see in the results how the tool adds the word None in the file name for null values.
Field values as a suffix added to original name

In our fourth and final scenario, I’ll export attachments to a subdirectory using the Code field again. Next, I want to append field values as a suffix to the end of the original file names. I’ll again choose a value for Subdirectory Field and set Name Format to Add Field Values as Suffix.
- Input Dataset—Airports from the active map with a single feature selected.
- Output Location—Folder location for all exported attachments of the selected airport feature, including subdirectories.
- Subdirectory Field—Selected the Code field again to keep the scenarios different. This created a subdirectory named PBI as before.
- Name Format—Selected Add Field Values as Suffix. As before, Name Fields parameters allow me to choose the fields I want to add as a suffix. Choose one or more fields in any order. Here, I chose the same fields, Name and Date.
The results in Windows File Explorer show our output subdirectory in the output folder location named PBI. The field values from the chosen fields are appended as a suffix to the end of the original filenames. The null value is once again replaced with the word None.
Special characters

Up to this point, I have addressed how the Export Attachments tool works with special characters and null values. To support most data field types in the feature class attribute table that may be used for naming subdirectories and renaming exported attachment file names, the Export Attachments tool needs to replace special characters that cannot be used as indicated in the table above.
Summary
We hope this tool helps with your data management and workflow needs. You’re encouraged to continue to share Data Management ideas with us.
Here is a list that summarizes the features of the Export Attachments tool, including a short video of the tool in action:
- Exports attachments for https://prodev.arcgis.com/en/pro-app/latest/tool-reference/data-management/export-attachments.htmall feature classes, feature layers, feature services, and tables enabled and loaded with attachments.
- Exports attachments to a single output folder, or subdirectories based on a selected key field in the input dataset attribute table.
- Optionally allows users to rename exported attachments using field values from selected fields from the input dataset attribute table.
- Replace special characters that would cause the tool to error when naming subdirectories or renaming exported attachments. If a field value is null, the word None is used in the file name.
- To avoid name conflicts in the exported files, the tool will add an incremental number to file names when appropriate.
- Honors selections and exports attachments only for those selected features or rows. No selection exports all attachments for all features or rows.
- Exported attachment files will be the same file type as when added to the geodatabase. For example, if the attachment is a .pdf file, the exported file will be a .pdf.
Licensing information
Basic: Yes Standard: Yes Advanced: Yes


Commenting is not enabled for this article.