ArcGIS Pro editors, did you notice a button in the status bar of your maps in ArcGIS Pro in between the editing Reference Grid button and Ground To Grid corrections button?
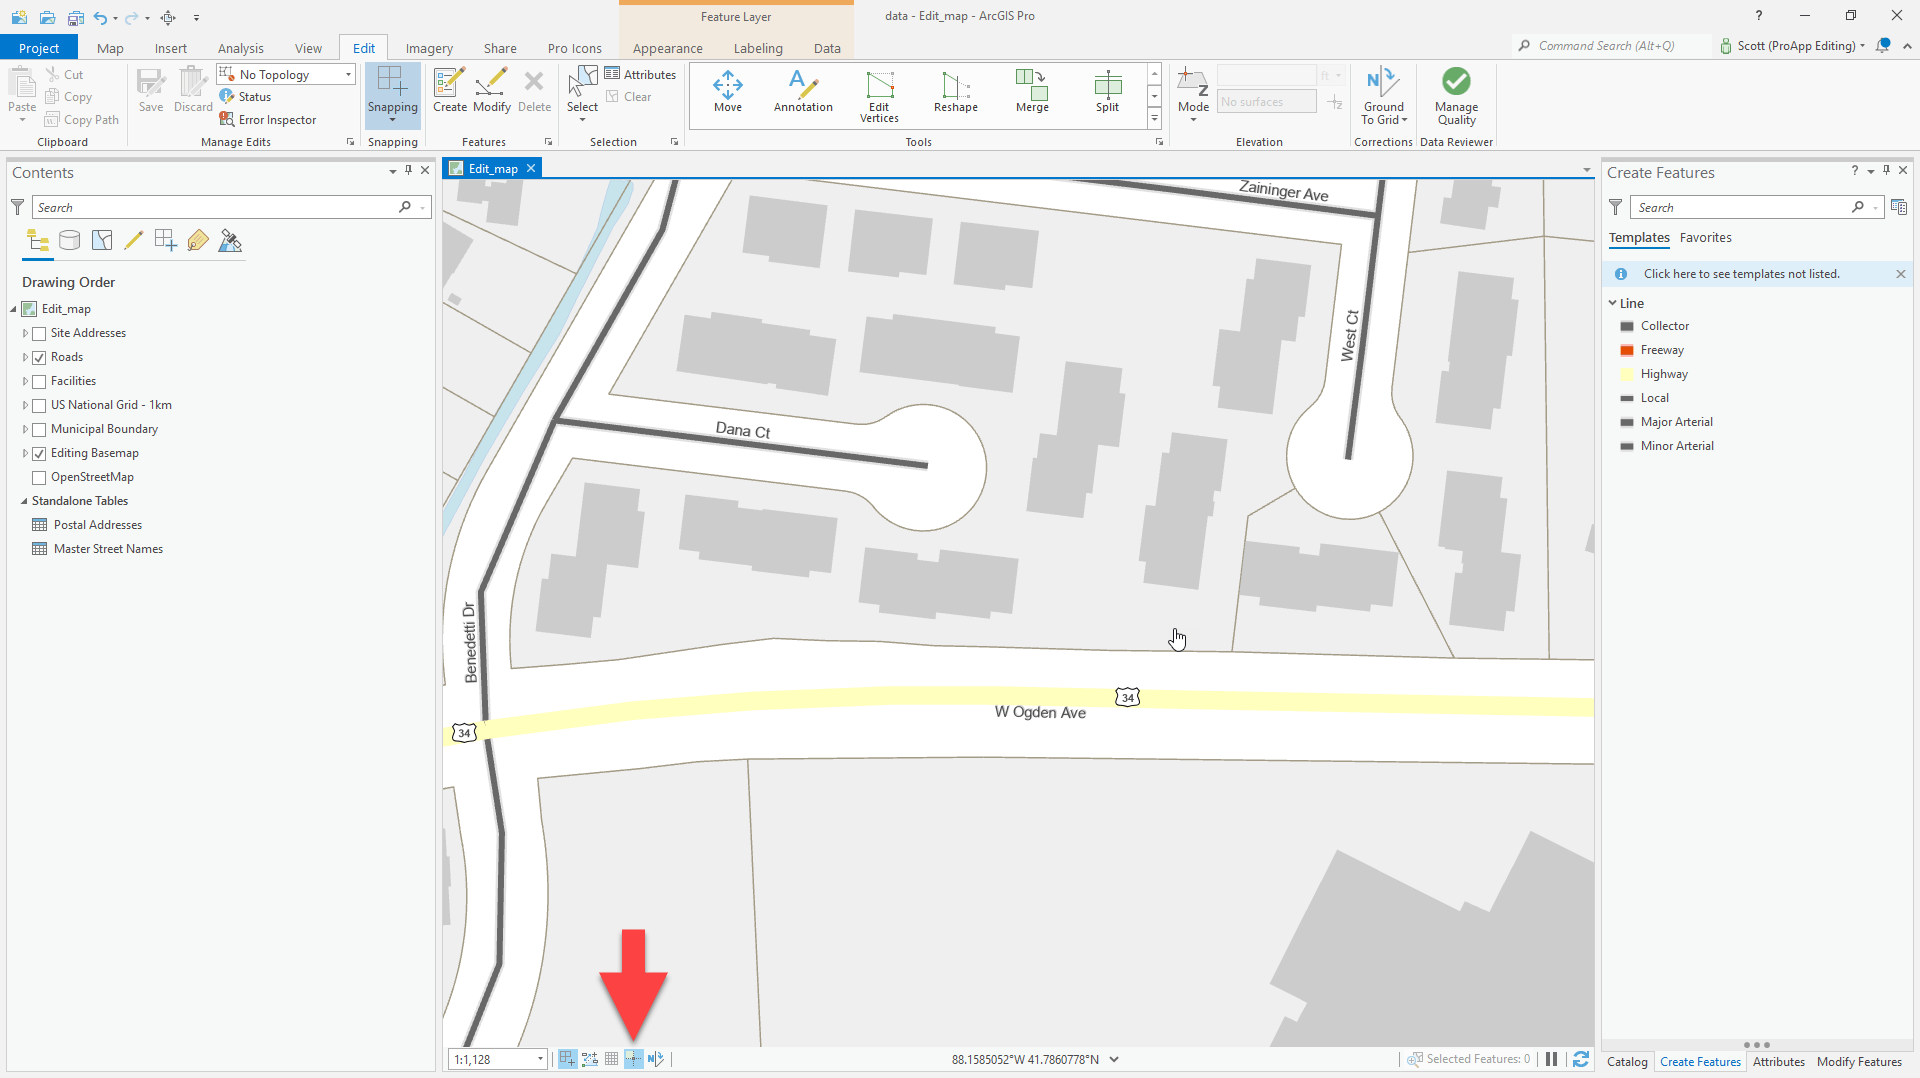

Did you click it? If not, you should.
This button unlocks an editing capability that was introduced in ArcGIS Pro 2.7 called Inference. It allows you to quickly create regular shaped features while sketching. Think right angles and aligned features. This will be especially helpful for those of you who work with built environments such as floor plans, site plans, building footprints, or any project where you need to quickly create squared up and aligned features.
You’ll start with an example: creating a line. This simple example illustrates the core features of Inference, but before working with Inference, you need to prepare the map where you are working.
Preparation
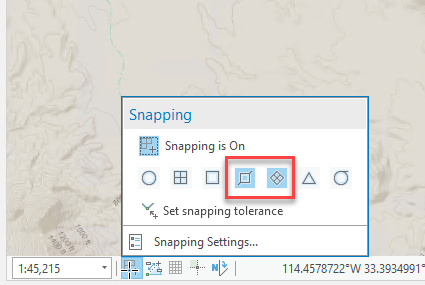
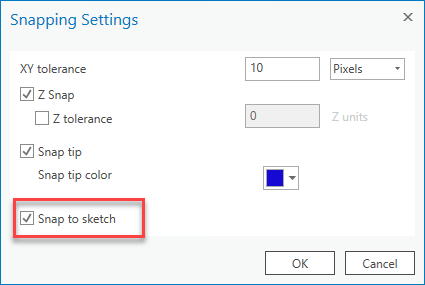
Since Inference works in conjunction with Snapping, you will turn on Snapping and the Snapping Agents. At a minimum, turn on the Edge and Intersection snapping agents, as well as the Snap to sketch setting.
Create a line
Now that you have both Inference and Snapping enabled, you’re ready to create your line.
From Create Features, choose a line template and the Line tool, and click two points on the map to create a straight segment. Everything looks normal:
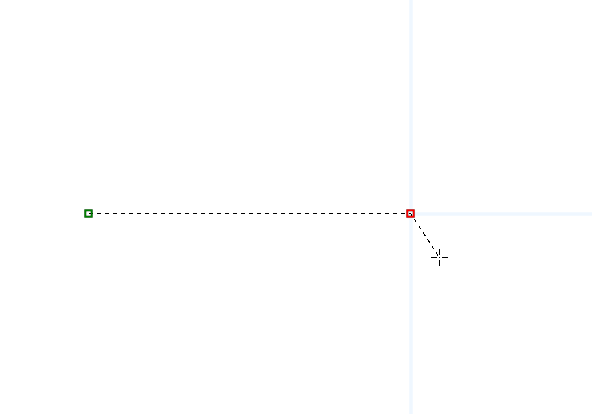
Or does it? What are those blue lines radiating from the endpoint? Those are inference rays, and they go in two directions: parallel and perpendicular. You can snap to rays while sketching features, so if you want to constrain the next segment perpendicular to the last, hover over the perpendicular ray and let edge snapping take over:

What if you want to make the next segment perpendicular but also the same length as the first? With Inference, you can. Hover over any segment in the sketch and that segment flashes for a moment, and you’ll get the following:
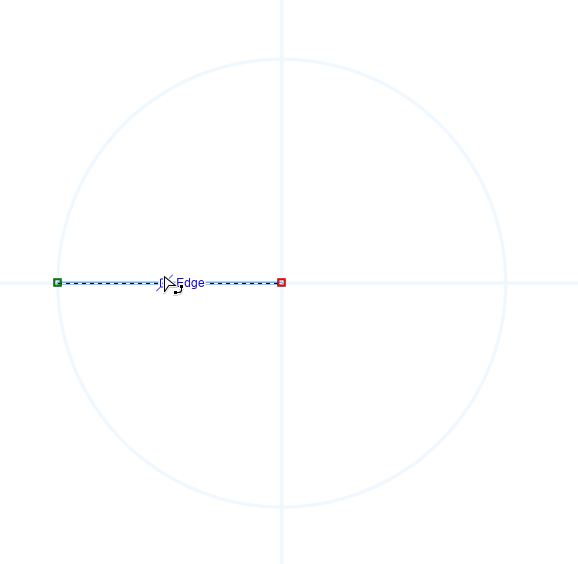
A quick flash and more Inference help appears. The circles are distance radii (there is only one now, but more will show up if you infer from two or more segments that intersect).
So now that you have inference rays and radii being previewed on the map, you can now snap to the intersection of the perpendicular ray and the distance radius, like so:
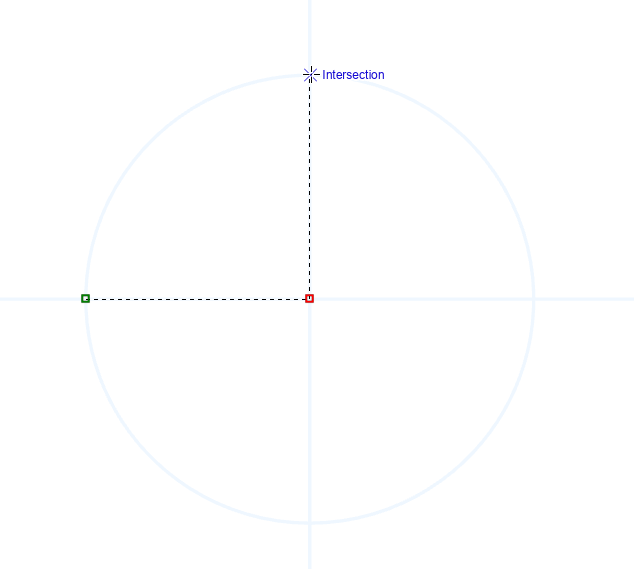
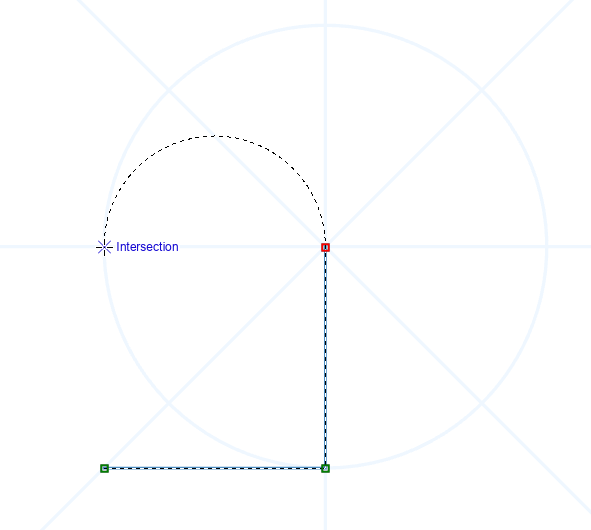
What about curved segments? Inference works with the Tangent Curve Segment construction tool:
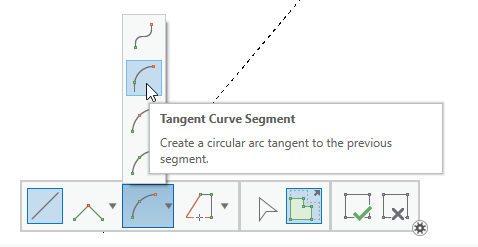
Once you switch construction tools, you’ll see a different set of inference rays in directions that are inferred from the previous segment in 45-degree increments:
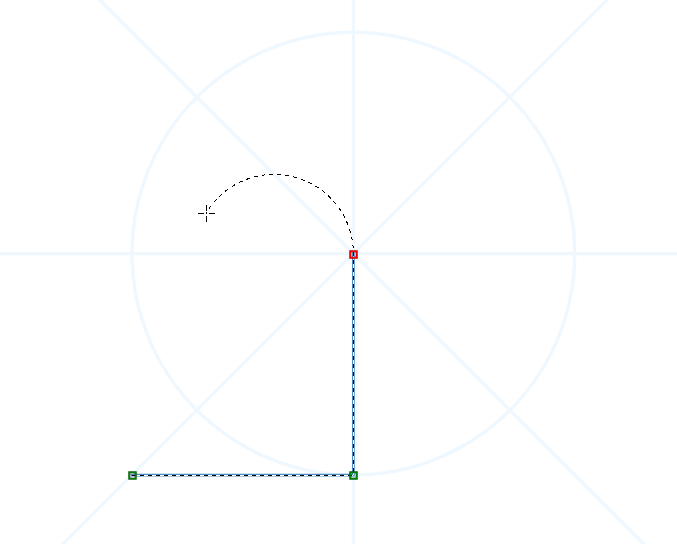
In this case, you will snap to the intersection of the inferred 90-degree angle and the inferred length of the previous segment, heading back to the beginning point:
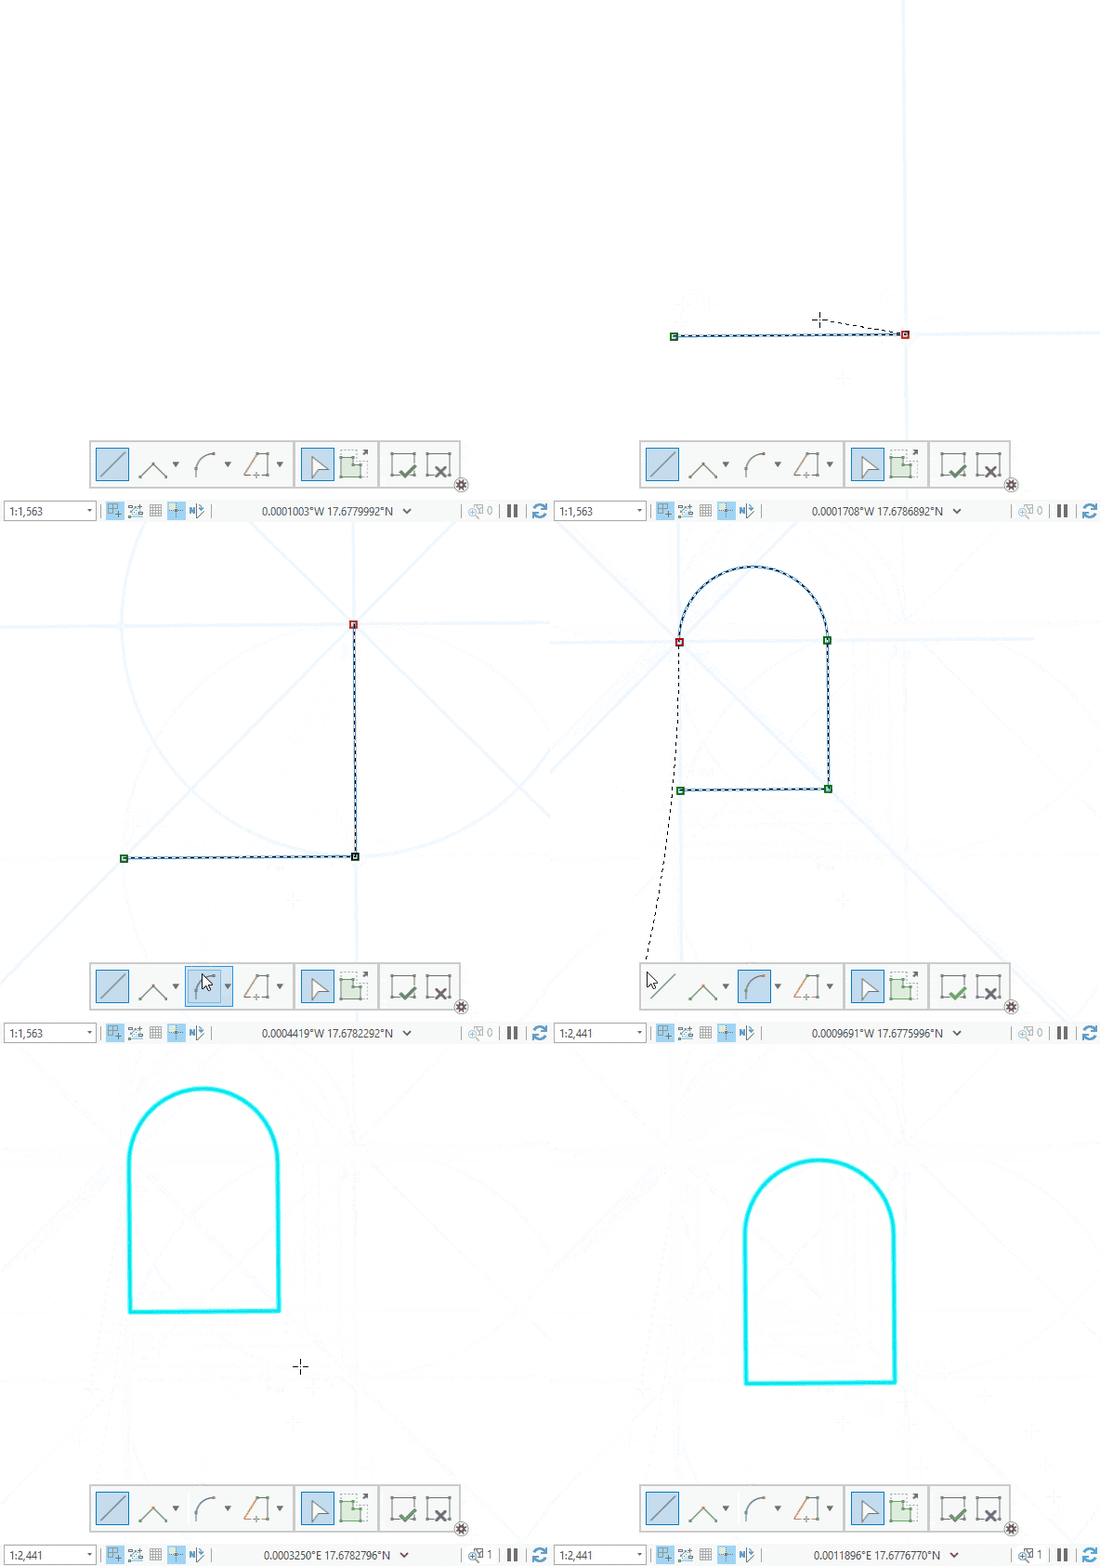
You can snap and close this polyline on itself to end up with this doorway shape:

All together now
Here it is all together:
Other capabilities
With Inference, you can infer from more than just the current sketch, and I’ll be covering these capabilities in future articles. For now, here is a list of all the capabilities:
- Constrain segments parallel or perpendicular when snapped to an existing line or polygon segment
- Constrain segments perpendicular to an existing line or polygon segment on the initial click when using the Right Angle Line tool
- Constrain tangent arcs at 45 degree intervals
- Snap to implied points of intersection of the current segment and an existing line segment
- Snap to implied points of intersection perpendicular to the current segment and other segments on the same sketch
- Create a right angle between two points
The metaphorical doorway is now open. I welcome you to find new and interesting ways to use Inference in your daily work. If you find something useful and want to share with others, let us know in the comments. Let Inference be your guide to creating squared up and aligned features.

Article Discussion: