This blog article is a follow-up to the Improve campsite data quality using a relationship class Learn ArcGIS lesson. In the one-hour lesson, a regional GIS specialist has been tasked with improving campsite data quality in Wyoming. The specialist addressed loss of data at the park level by creating joins and relates and enforced spatial data integrity by creating a one-to-many relationship class between campgrounds and campsites feature classes.


You are going to build upon the same datasets and scenarios used in the Learn lesson, but with a many-to-many relationship class to help maintain park data validity.
The manager asked the GIS specialist to include a list of outdoor activities specific for each facility type in Grand Teton National Park. This effort is meant to help tourists locate specific activities such as swimming, hiking, and boating in the park. To achieve this, you will act as the GIS specialist and create a many-to-many relationship class between the Facilities feature class and the Outdoor Activities stand-alone table.
Note: Completing the Learn lesson is not a requirement to successfully perform this workflow, but it is encouraged, as it will provide context and help you become more familiar with the data.
This workflow was tested using ArcGIS Pro 3.0. If you’re using a different version of ArcGIS Pro, you may encounter different functionality and results.
Review Grand Teton National Park data
1.Download the GrandTeton.zip file. Then locate and open the Wyoming.aprx project file. This project contains the data you will use to complete the workflow.
2. The project opens with the Explore M:N Relationship Class map active, showing the study area, Grand Teton National Park.
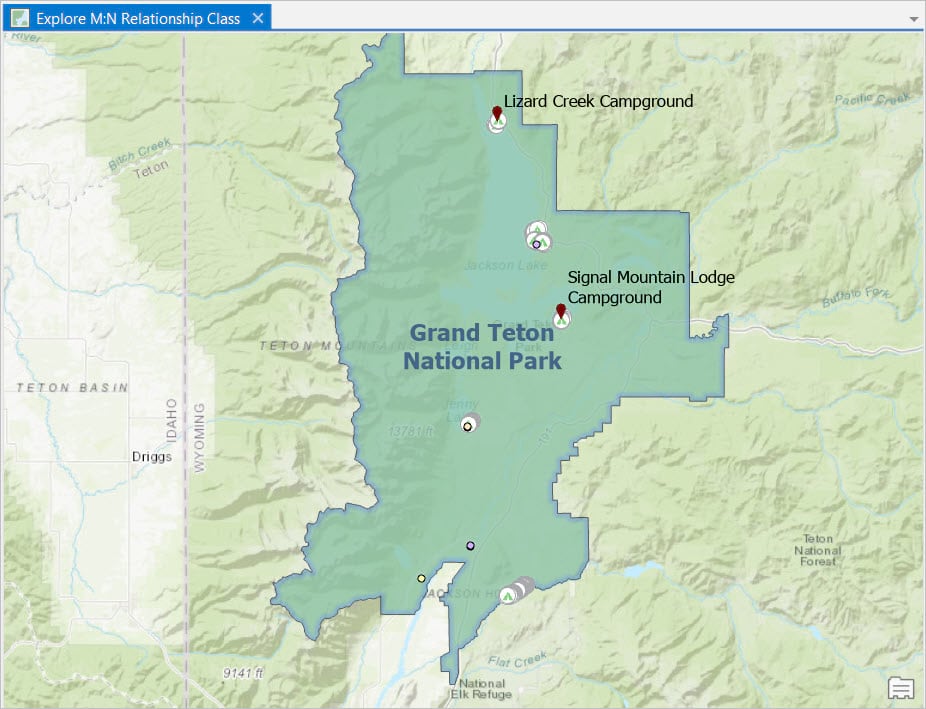
3. In the Contents pane, locate the data you will use to create a relationship class, in the Facilities feature class and Outdoor Activities table.
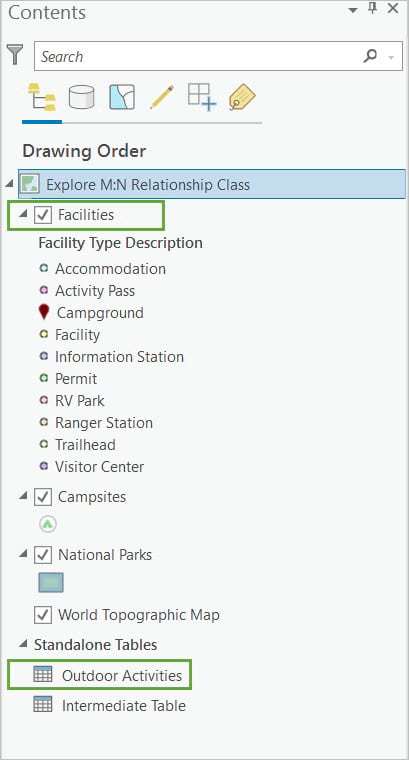
4. Right-click the Facilities feature class to open the Attribute Table, then right-click the Outdoor Activities table to open and review it’s data and identify possible fields used to build associations.
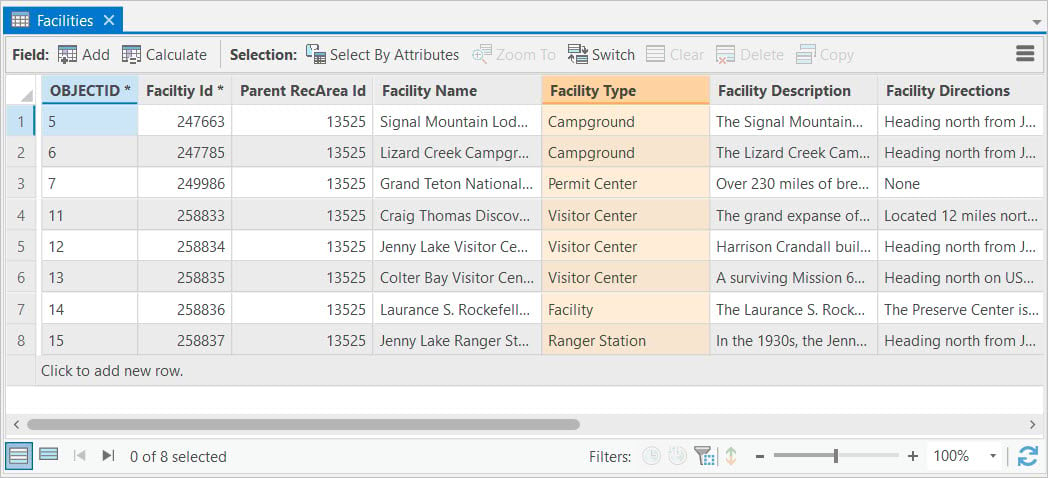
The Facilities feature class contains eight point features with information about the facility type, description, and direction.
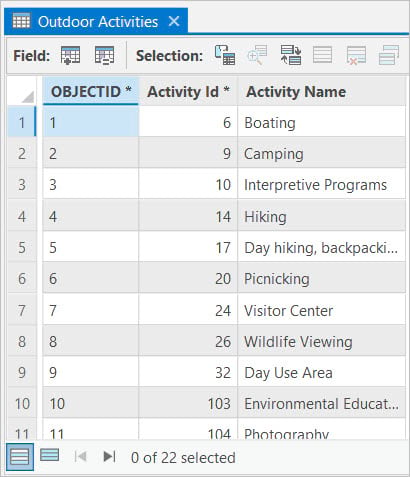
Now that you made yourself more familiar with the attributes and fields, the next step is to create an association with the stand alone table using a relationship class.
Create a many-to-many relationship class
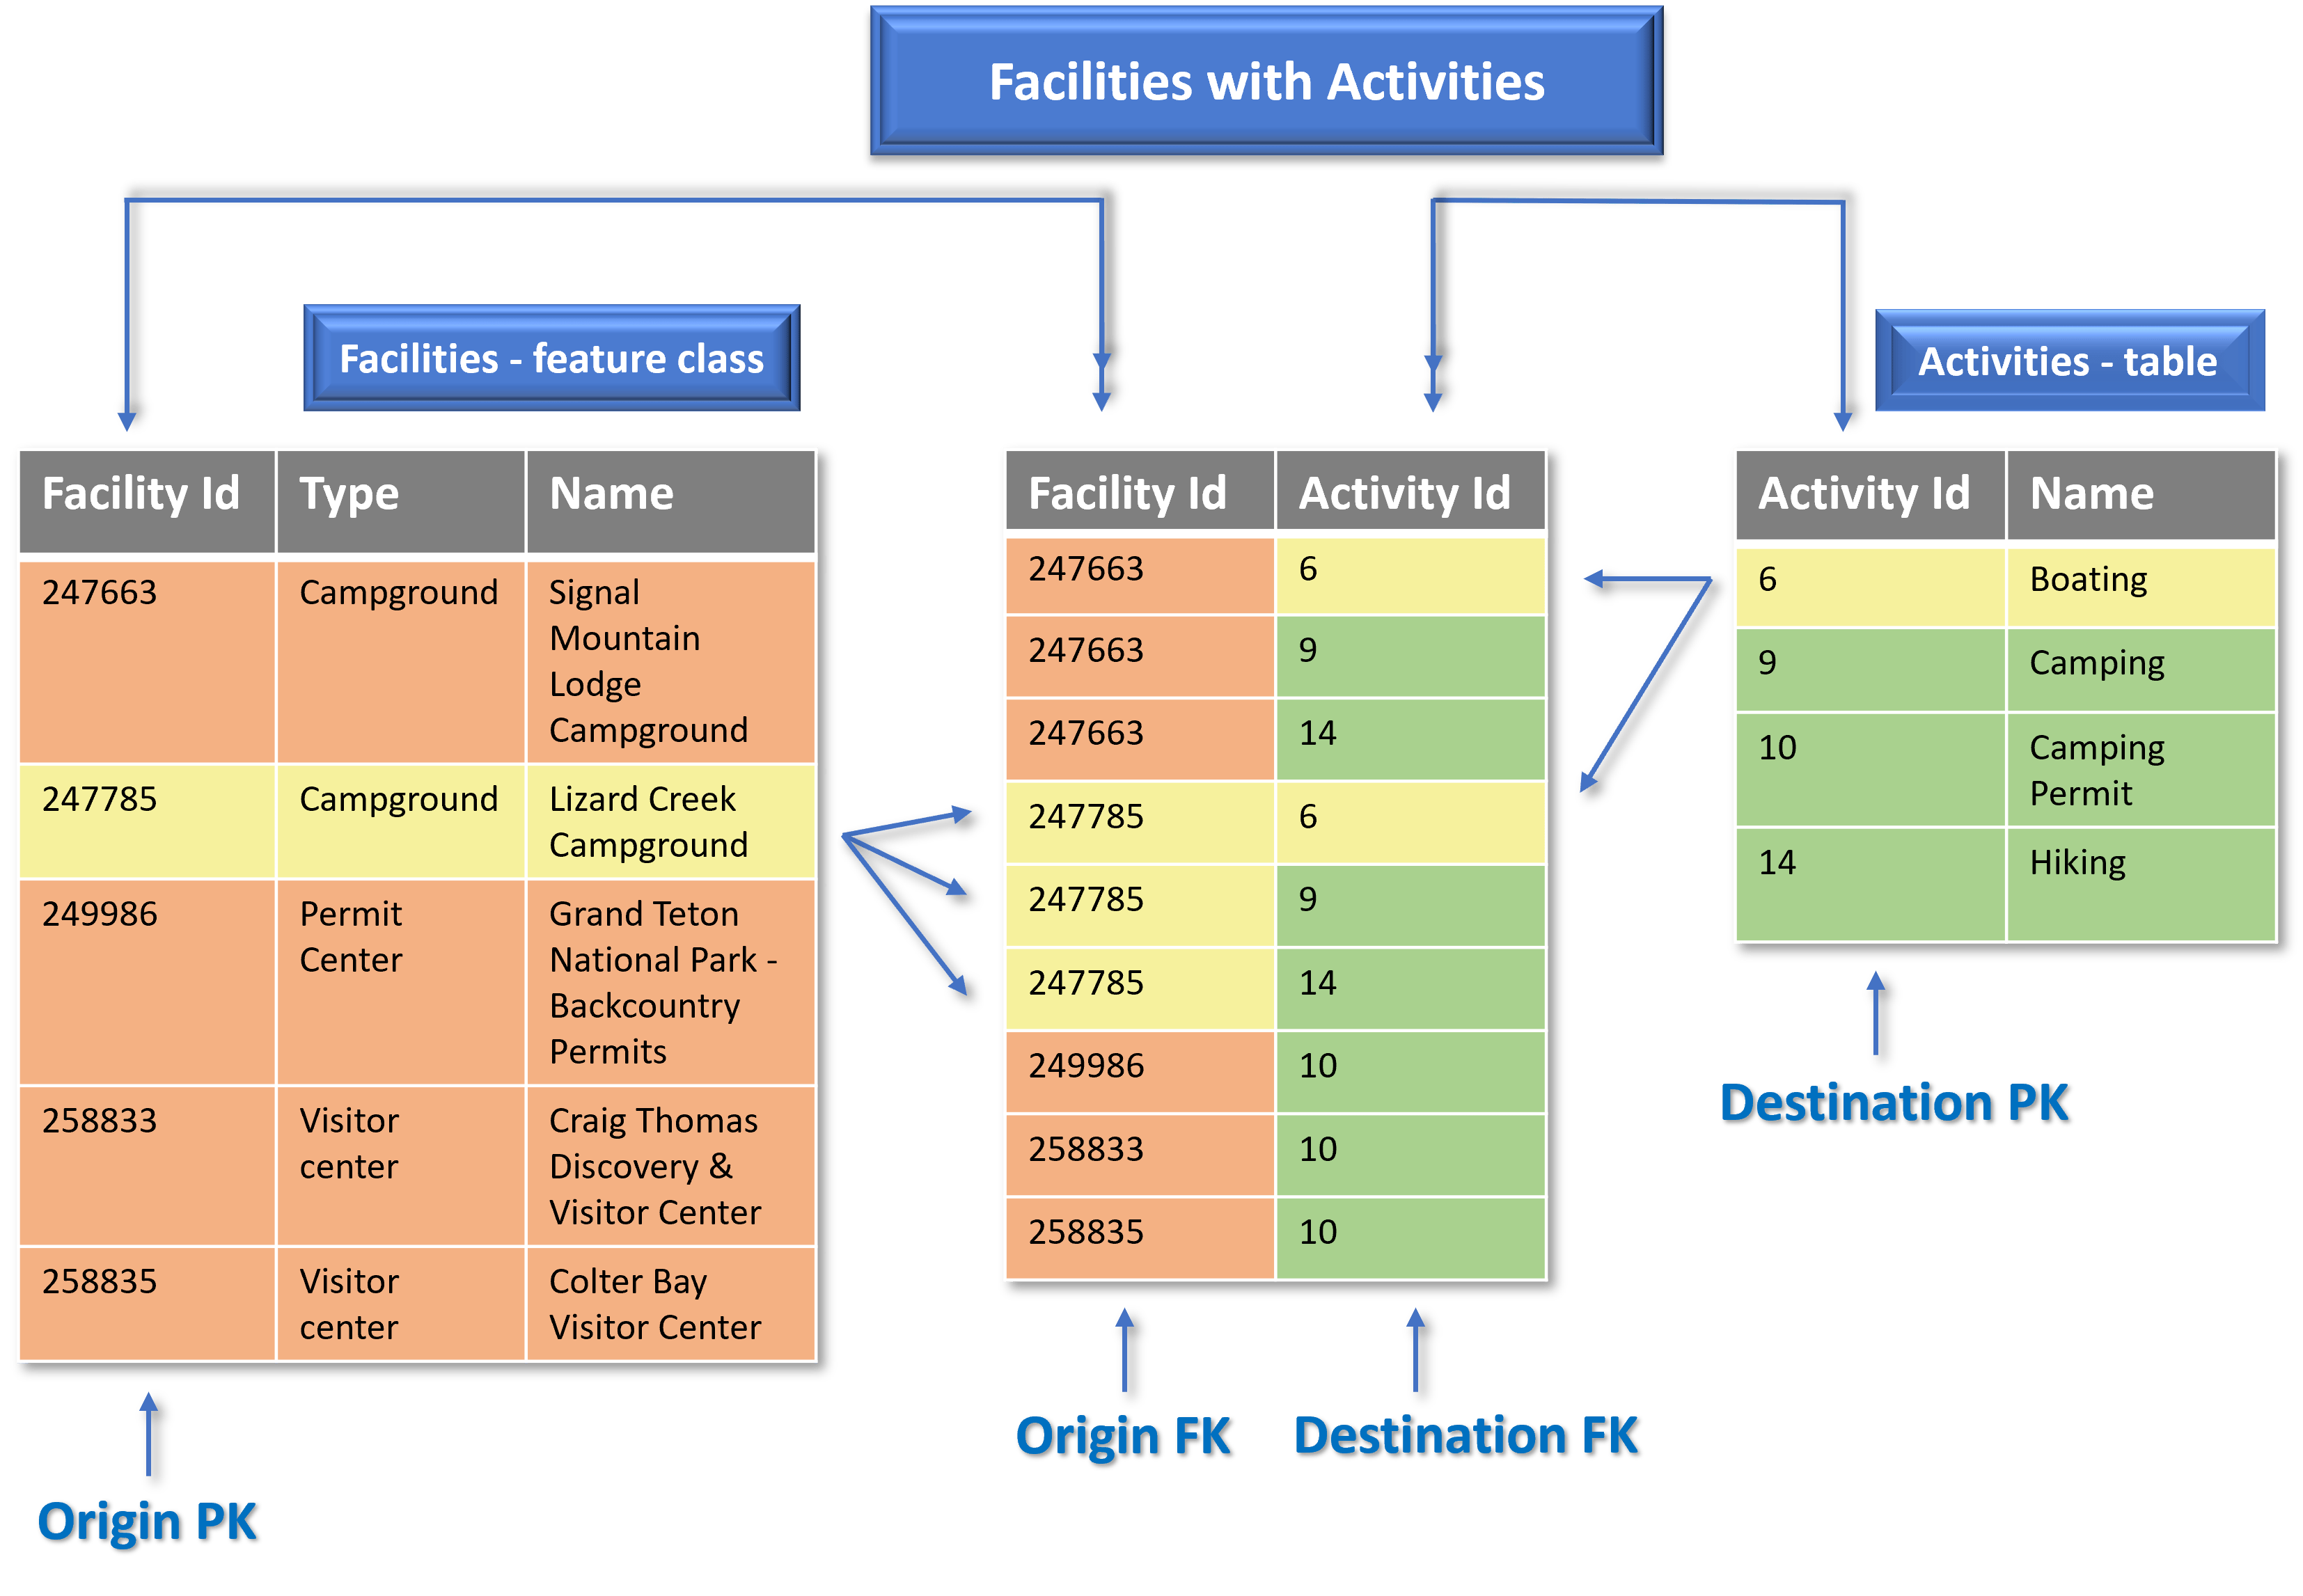
A many-to-many relationship class is used when an object from the origin table relates to multiple destination objects and when one destination object relates to multiple origin objects. In this example, a facility can host multiple activities and an activity can be performed in more than one facility.
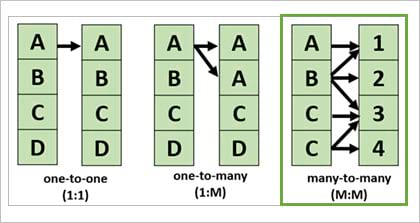
Compared with the other cardinality types where the origin primary key directly relates to the values from the destination foreign key, many-to-many relationships require the use of an intermediate table to map the associations between primary key values from the origin table and foreign key values from the destination table. Therefore, when you create a many-to-many relationship class, an intermediate table is automatically created.
There are two geoprocessing tools you can use to create a relationship class. You can use the Create Relationship Class or the Table To Relationship Class geoprocessing tool.
Note: Take a few moments to review each geoprocessing tool and its parameters.
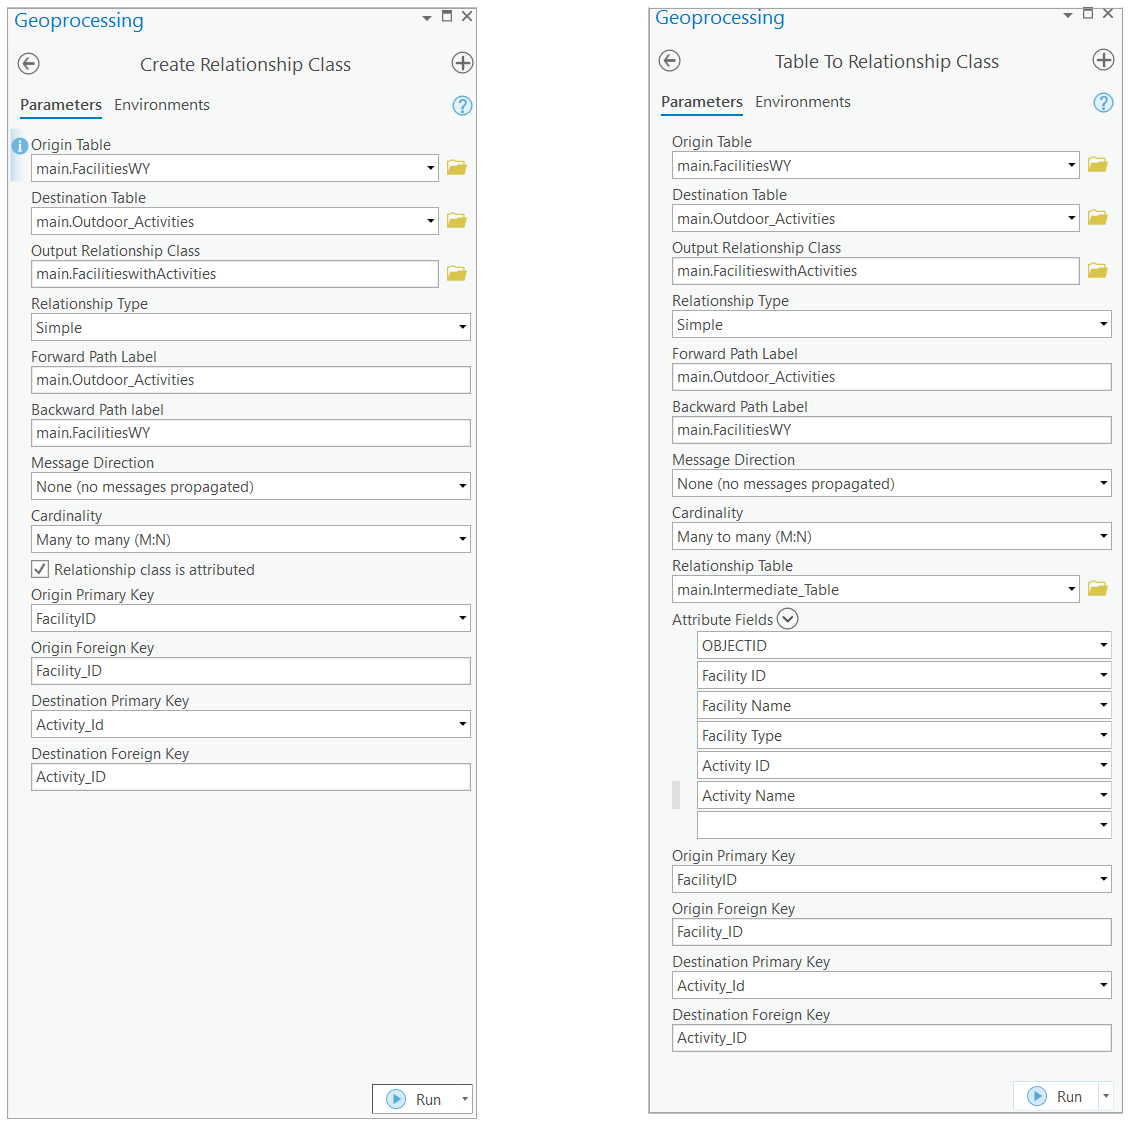
If the Create Relationship Class tool is used to create a many-to-many relationship class, the resultant intermediate table will only have the fields generated, as ArcGIS does not map the associations between origin and destination objects. Using this approach, you must manually populate the table.
When creating a many-to-many relationship class, the Table To Relationship Class tool is used; the intermediate table containing the attributes is a required parameter and will be added to the relationship class.
In this example, to save time, the intermediate table has already been created. You will use this table, together with the Table To Relationship Class tool to create a relationship class.
1. But first, in the Contents pane, under Standalone Tables, locate the Intermediate Table.
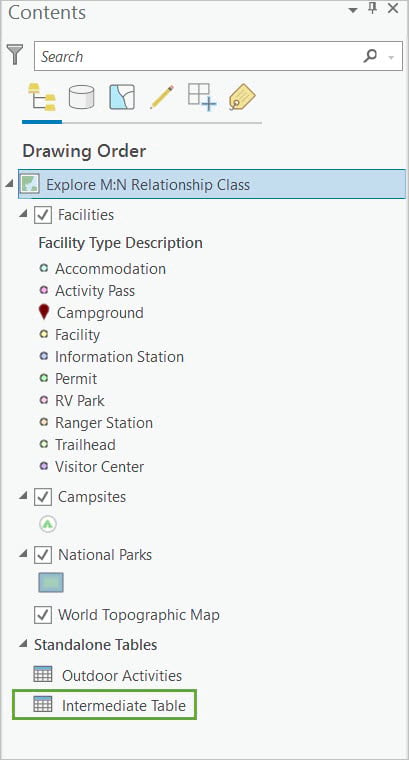
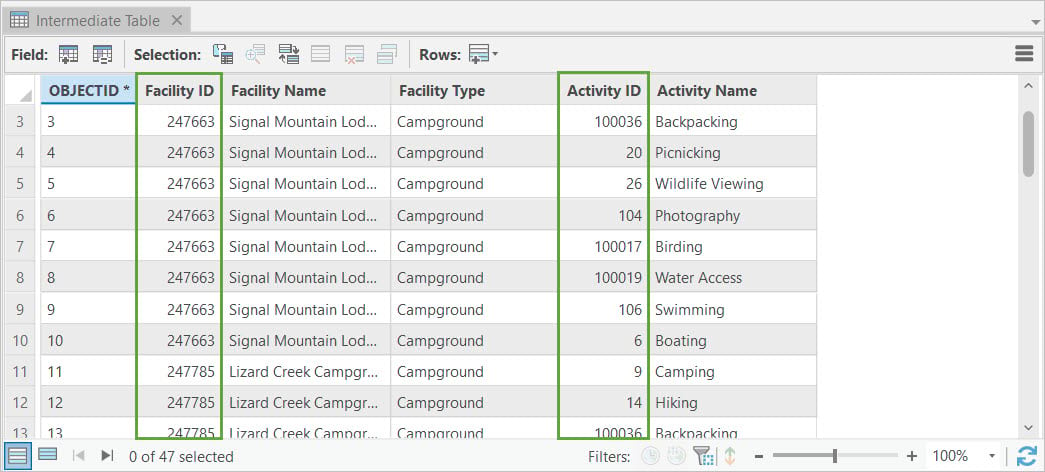
2. Right-click and click Open to review the fields and attributes. The Intermediate Table contains all the valid relationships between the Facilities and the Outdoor Activities, where the Facility ID field is the origin foreign key and the Activity ID field is the destination foreign key.
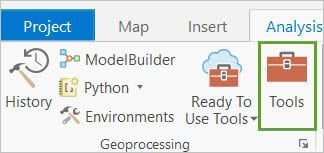
3. On the ribbon, click the Analysis tab, and in the Geoprocessing group, click the Tools button.
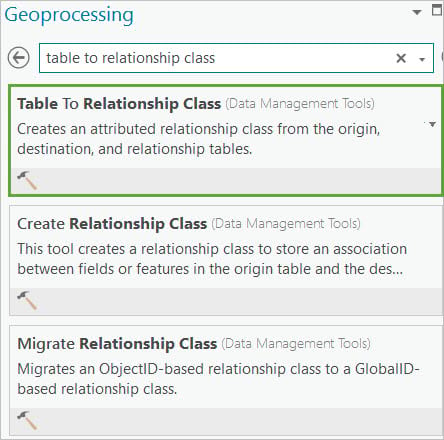
4. On top of the Geoprocessing pane, in the Search bar, type table to relationship class.
5. From the list of results, choose Table To Relationship Class (Data Management Tools).
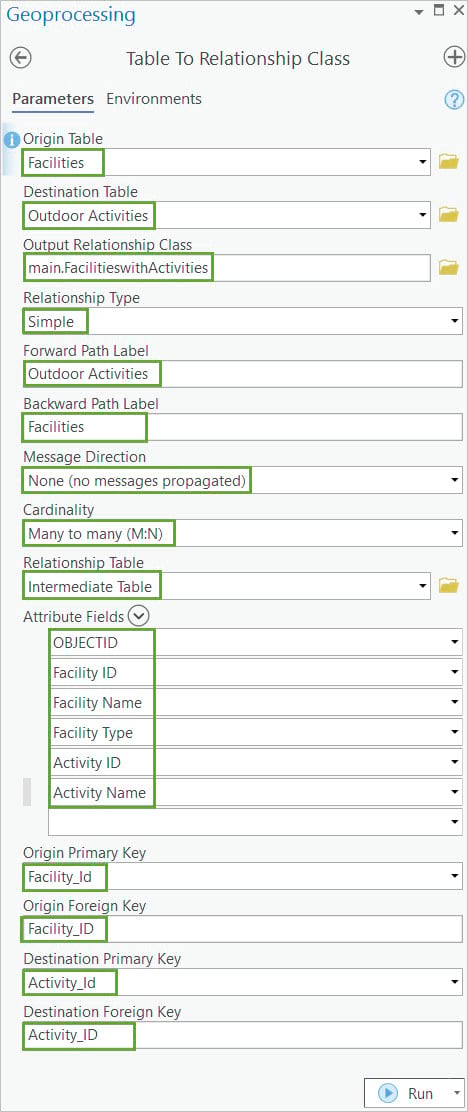
6. In the Table To Relationship Class geoprocessing tool, update the following parameters:
- For Origin Table, choose Facilities.
- For Destination Table, choose Outdoor Activities.
- For Output Relationship Class, type FacilitieswithActivities.
- For Relationship Type, choose Simple.
- For Forward Path Label, type Outdoor Activities.
- For Backward Path Label, type Facilities.
- For Message Direction, choose None.
- For Cardinality, choose Many to Many (M:N).
- For Relationship Table, choose Intermediate Table.
- For Attributes Fields add all fields existing in the Intermediate Table.
- For Origin Primary Key, choose Facility_Id.
- For Origin Foreign Key, type Facility_ID.
- For Destination Primary Key, choose Activity_Id.
- For Destination Foreign Key, type Activity_ID.
Note: Review Relationship class help for more information on each parameter.
7. Verify all parameter settings, then click Run.
Explore the related records and relationship class
1.In the Catalog pane, in the Databases folder, expand Wyoming Natural Assets. geodatabase and locate the FacilitieswithActivities relationship class.
Notice the (.geodatabase) extension. This indicates that you are working with a mobile geodatabase, which is an implementation of an open source public domain SQLite database. Because this SQLite geodatabase is a full-featured RDBMS, feature class names must include the primary database name to make them unique within the instance, thus the word “main” is appended to all feature class and table names.
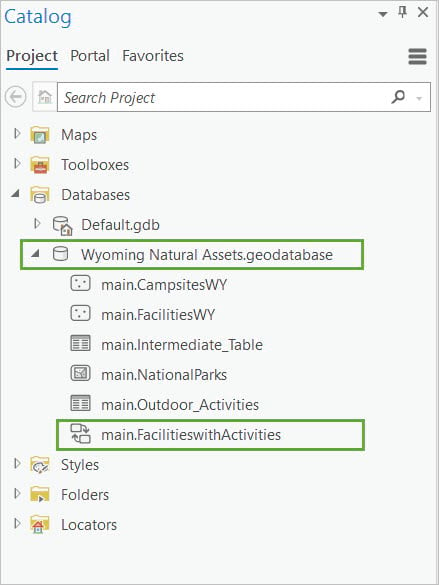
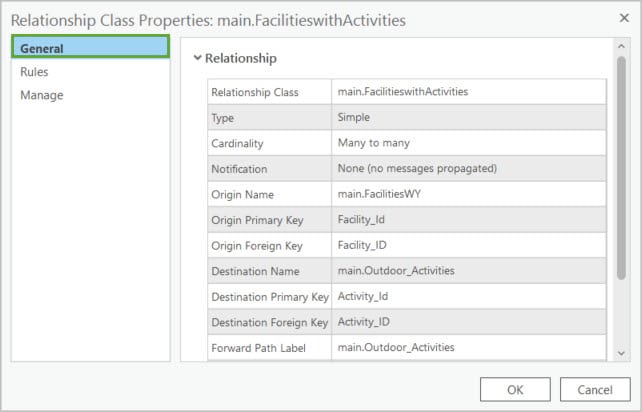
2. Right-click the FacilitieswithActivities relationship class and click Properties.
3. Under the General tab, you can review the relationship class properties.
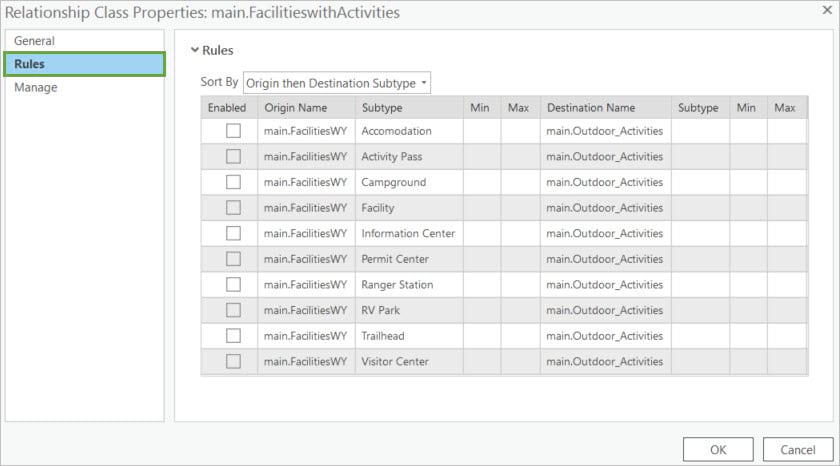
4. On the Rules tab, you can set up rules to enforce restrictive behavior to help maintain data integrity during editing and data entry.
5. The Manage tab allows you to enable all geodatabase functionalities for the intermediate table.
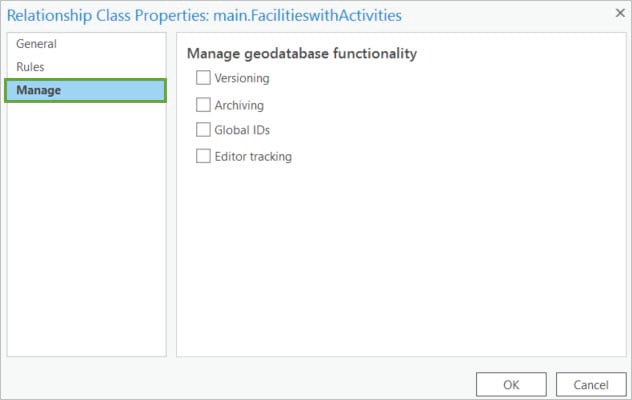
Note: The Manage option is enabled only for attributed and many-to-many relationship classes.
6. If necessary, right-click the FacilitieswithActivities relationship class and click Add to Current Map.
This will add the relationship class table in the Contents pane under the Standalone Tables section.
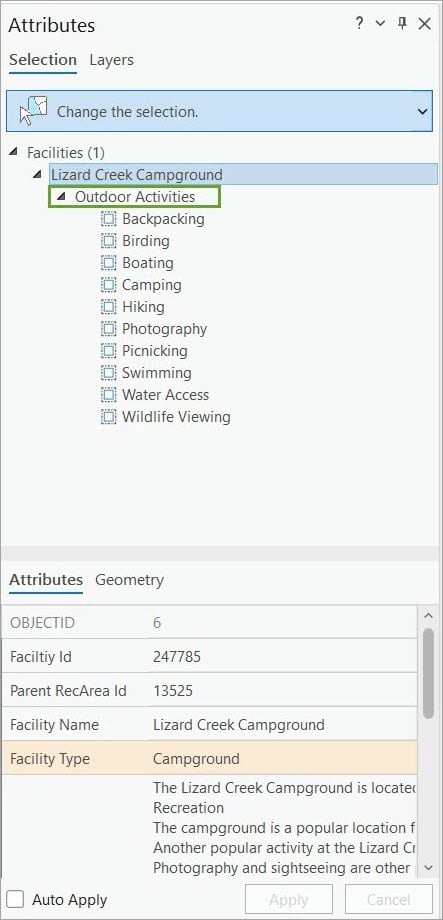
7. Using the Select tool, select the Lizard Creek Campground feature on the map and open the Attributes pane.
8. Notice all the Outdoor Activities records related to this campground.
Note: If the related records are not being displayed in the Attributes pane, remove the origin feature class (the Facilities feature class) from the map and the readd it from the Catalog pane.
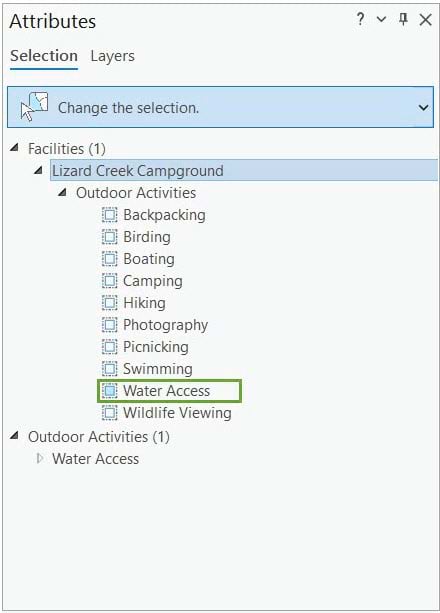
9. If you want to check all the facilities that have water access, turn on the selection for the Water Access activity.
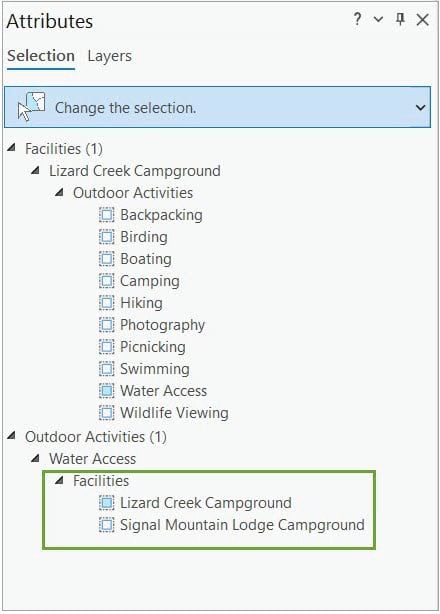
10. Expand the Water Access selection and notice that Lizard Creek Campground and Signal Mountain Lodge Campground are the only two facilities with water access.
Manually populate the relationship class table
Create an amphitheater for the Colter Bay Visitor Center
You have been informed a new amphitheater was inaugurated in the Colter Bay Visitor Center. As this is a new activity for this visitor center, you will need to add it in the relationship table.
1.First, make sure you cleared all the previous selections. Then locate and select the Colter Bay Visitor Center
Hint: You can use the Select by Attributes tool.
2. Open the Outdoor Activities table and select the row with the Amphitheater
3. Open the Attributes pane and assess the two active selections. The Colter Bay Visitor Center is the origin feature, and the Amphitheater Outdoor activity is the destination.
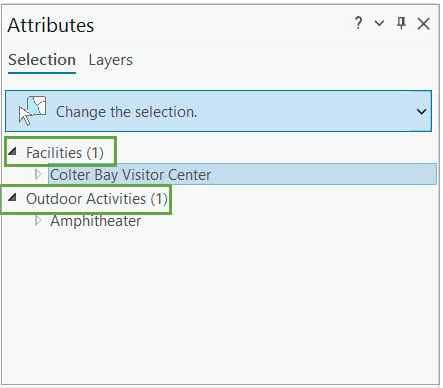
4. Expand the Colter Bay Visitor Center selection and assess the current outdoor activities related to this feature. Currently, only camping, hiking, day use, and visitor center are allowed at this facility.
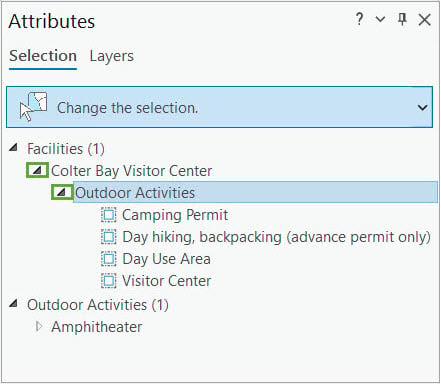
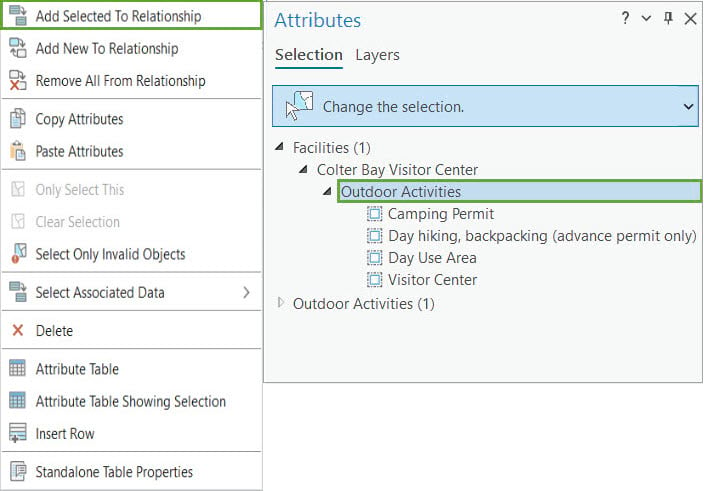
5. To add the Amphitheater, right-click the Outdoor Activities selection, the related feature item, and select the Add Selected To Relationship option.
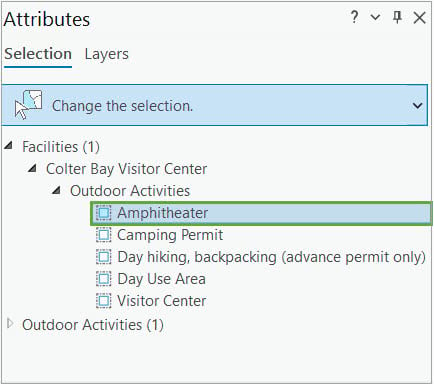
6. The Amphitheater is added as a related object and the Colter Bay Visitor Center has five outdoor activities.
7. Make sure to save your edits using the Edit tab on the ribbon, then close the project.
In this workflow, you helped enforce referential data integrity between facilities and outdoor activities in Grand Teton National Park by creating a many-to-many relationship class and managing the related records.
Bonus section!
Now that you experienced the power of relationship classes, you might be curious what else can be done. If so, check out the short video below and see how related data works via services.

Commenting is not enabled for this article.