Demystifying how editing works in ArcGIS Pro
Editing GIS data is a task that should be done carefully and intentionally. Our data is the foundation of any other work we do in our GIS, so maintaining its integrity is vital.
Knowing that editing is serious business, some people have reported feeling uneasy with editing workflows in ArcGIS Pro. This has to do with a certain statement you’ve likely heard or read at least once: In ArcGIS Pro, you’re always editing. “If my collaborators and I are always editing,” you might wonder, “what keeps our data safe from error? What if authoritative data is altered without the user even knowing?”
The idea that you’re always editing in ArcGIS Pro isn’t really an accurate assessment, so we thought it’d be helpful to demystify how editing works in ArcGIS Pro and explain how your data is kept safe from editing mishaps.
Editing in ArcMap
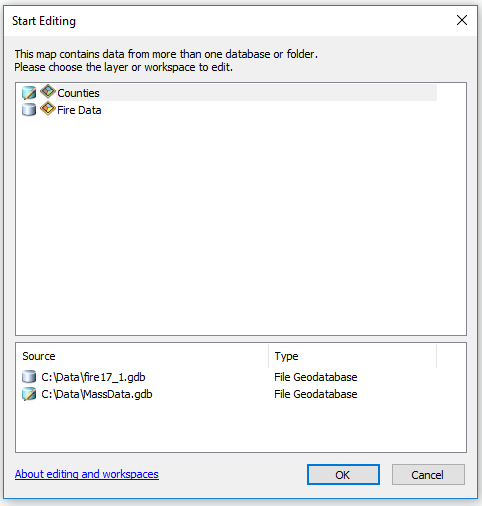
Let’s begin with a quick refresher on how editing works in ArcMap. Editing is done in discrete edit sessions which must be explicitly started and stopped. In an ArcMap document, when you want to edit, you go to the Editor toolbar and choose Start Editing. You are then presented with a dialog box that prompts you to choose which workspace to edit. You can only make edits in one workspace at a time. There are lots of steps, but not much confusion. It’s what many of us are used to.
Two ArcGIS Pro editing myths, debunked
Before we look at editing examples in ArcGIS Pro, let’s examine two common misconceptions.
1. In ArcGIS Pro, there’s no such thing as an edit session
From the help: ArcGIS Pro automatically starts an edit session when you modify existing data or create new data. Saving or discarding your edits automatically stops the edit session. Any subsequent edits you make resumes the edit session until you save or discard your edits.
There are no buttons to start or stop an edit session. You can edit any data source that is granted view and edit privileges. In the Contents pane, you can disable editing at the application level for the layers you need to protect against unwanted edits.
What this means: The concept of an edit session still exists in ArcGIS Pro, it is just started and stopped differently than ArcMap. It happens automatically, and without presenting you with a dialog box. However, the fact that ArcGIS Pro still sees edit sessions as discrete events offers you control over them, as we’ll discuss momentarily.
2. You’re always editing in ArcGIS Pro, so your data is at risk
As mentioned above, you are not always editing in ArcGIS Pro. A more accurate statement would be: “Layers are editable by default in ArcGIS Pro.”
From the help: In the Contents pane, on the List By Editing tab, you can specify which layers can be edited. By default, editing is automatically enabled for editable layers when you add them to a map or a scene. These settings apply to the current map or scene and do not change permissions granted at the data source.
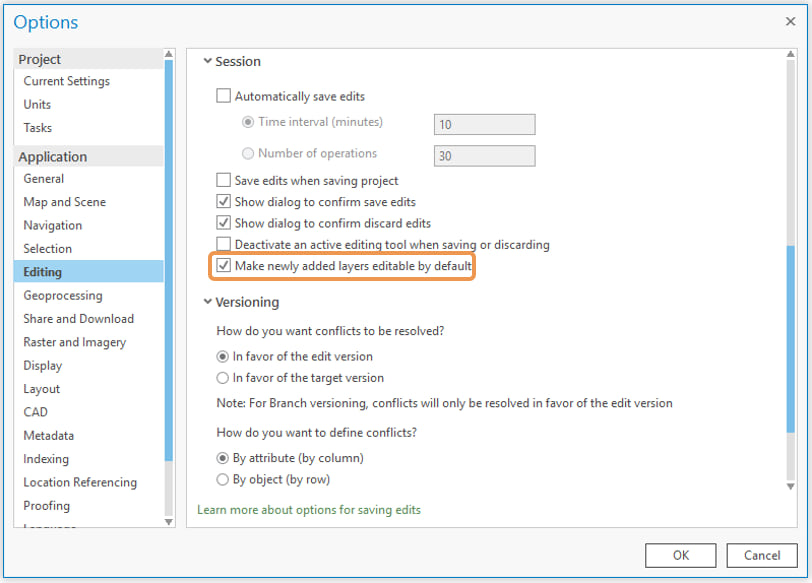
What this means: Take a look at the image above. These are the default settings for editing in ArcGIS Pro. Edits are not saved automatically, or when the project is saved. You will be prompted with a dialog to save or discard edits separately from the project as a whole.
If that still doesn’t feel like enough security, note the highlighted checkbox. Out of the box, ArcGIS Pro makes newly added layers editable by default. By unchecking this box, you can ensure that all newly added data is un-editable until you specify otherwise. These settings are applied universally.
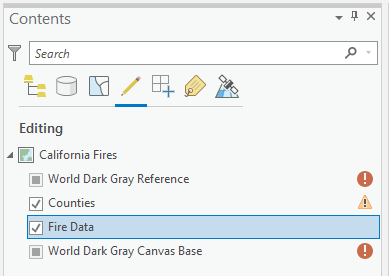
You can also control editability on a layer-by-layer basis. On the Contents pane, click List by Editing (the pencil icon). You can toggle editability by using the checkboxes.
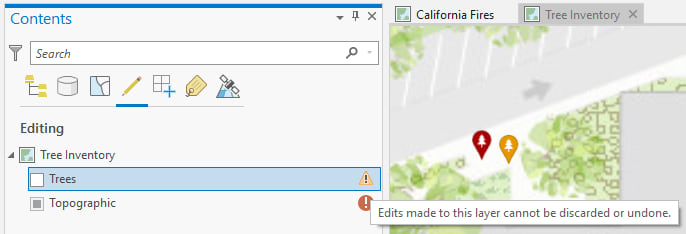
A couple of quick notes before we jump into editing methods. Some data sources, such as certain feature services, do not currently support undo/redo, meaning that edits are immediately applied. This is important to understand, though keep an eye out for this experience to keep getting better.
Also, while this blog is meant to focus on how all of this works in the ArcGIS Pro interface, we’d be remiss if we didn’t point out that you can and should control editing permissions at the data source/database level as a best practice.
Cool. Now that we’re all reading from the same playbook, how do we start editing in ArcGIS Pro? The answer depends on whether we’re talking about editing features’ geometry in a map or scene, or editing attributes. Let’s look at both.
Editing geometry
Instead of going to the Editor toolbar (or right-clicking a layer) and clicking Start Editing, as in ArcMap, you go to the Edit tab and choose to Create or Modify features.
Pro tip #1: Use the Reset Panes command to set up your panes for Editing. Located on the View tab of the ribbon, this option will open the Attributes, Create Features, and Modify Features panes.
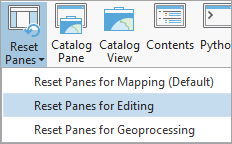
Any way you choose to start editing feature geometry, there are several clicks built in to the workflow involving the aptly named Edit tab of the ribbon as well as either the Create Features or Modify Features pane. This makes editing features an intentional act.
Learn more about creating features and modifying features in ArcGIS Pro.
Pro tip #2: ArcGIS Pro uses locks while editing in shapefiles or file geodatabases. However, the lock is not placed until the first edit operation is applied. For example, choosing Edit Vertices and selecting a feature will not place the lock. You need to actually make and apply the edit (e.g. click Finish from the Edit tab). After that first applied edit, an edit session exists and the editing workspace contains the locks.
Editing attributes
It is possible to edit attributes either in the Attributes pane (recommended) or directly in the attribute table. In the attribute table, you can tell that a cell is activated for editing when it is highlighted green and denoted with a pencil icon to the left of the record.

In the Attributes pane, cells are immediately available for editing. You can open the Attributes pane from the Edit tab on the ribbon.
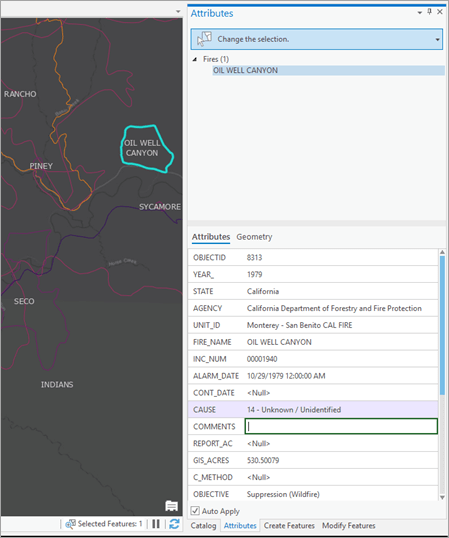
Learn more about editing attributes.
Finish editing
In all of the above scenarios, after editing features’ geometries and/or attributes, it is necessary to either Save or Discard the edits in order to close the edit session.
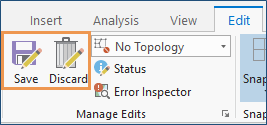
And if you forget to Save or Discard your edits (or if you unintentionally made edits that you weren’t aware of), when you close your project, you’ll be prompted to save or discard edits.

We hope this information has demystified the ArcGIS Pro editing process, and that you’re feeling confident in the control you have. Edit sessions look different in ArcGIS Pro than in ArcMap, so the key here is to understand how they are started and stopped. To start editing, well, just start editing. And to stop the session, simply choose whether to Save or Discard edits. If you want more control, customize the Editing Session options or use the List By Editing view of the Contents pane. That’s it!


Commenting is not enabled for this article.