In this blog from a couple of months ago I shared how to automatically maintain x,y,z attribute values using attribute rules in ArcGIS Pro. That is a valid workflow and, in fact, I was inspired to share it because we see that capability requested periodically.
However, as I was finishing up that blog, it occurred to me that for many people, it may not be necessary to write those values to the data source’s table at all. So consider this a prequel! Before you store data, ask yourself, “Is it necessary?”
The primary use case for when it may not be necessary to actually maintain three extra fields in your data is when you only need it for display in the map. The three display examples that I could think of off the top of my head are 1. Labels, 2. Pop-ups, and 3. MapTips.
Let’s work with the Himalaya peak data that I was using in that previous blog and take a look at how to leverage the same Arcade expression to dynamically populate Labels, pop-ups, and MapTips, without having to store those values in your table. Just to prove there’s no funny business going on, I stripped the PointX, PointY, and PointZ fields, so we’re just dealing with the Shape (PointZ) field:

Labels
To label each point pulling directly from its geometry, we’ll use the following Expression:
var X = Round(Geometry($feature).x, 2)
var Y = Round(Geometry($feature).y, 2)
var Z = Round(Geometry($feature).z, 2)
return “X = ” + X + TextFormatting.NewLine + “Y = ” + Y + TextFormatting.NewLine + “Z = ” + Z
- Open the layer’s Label Class pane by going to the Feature Layer > Labeling tab and clicking the Expression button.
- Populate the Expression with the example from above.
- Hit Apply.
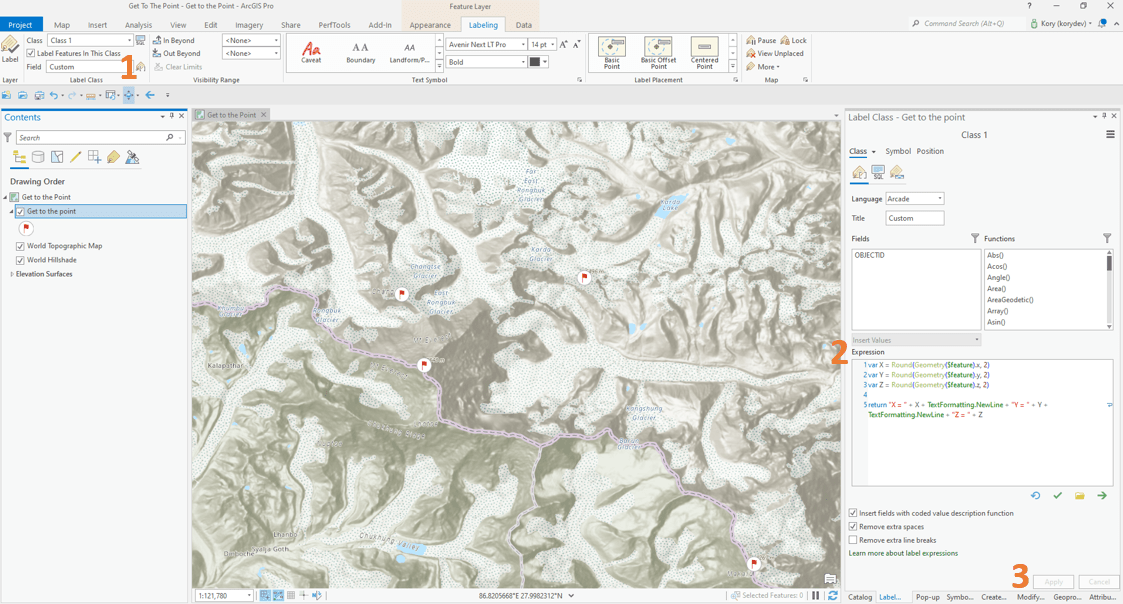
Now when you turn your labels on, you’ll see each point labeled directly from the shape’s geometry.
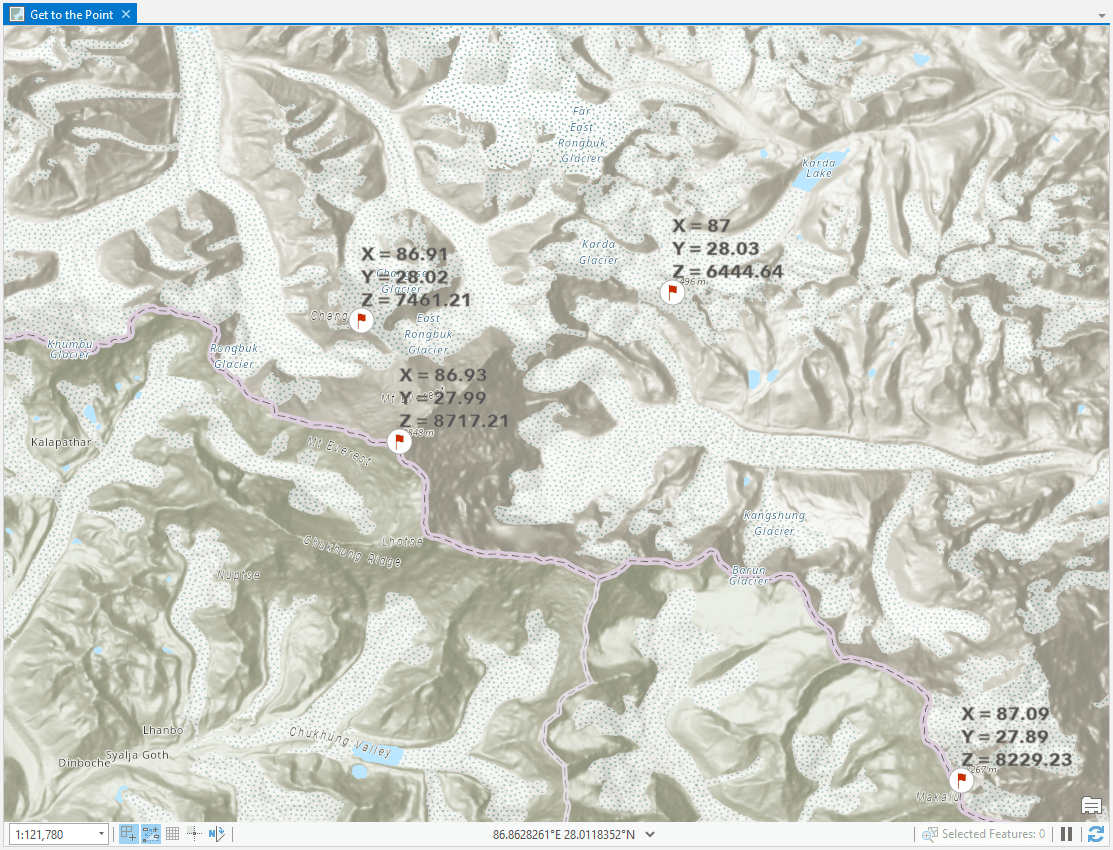
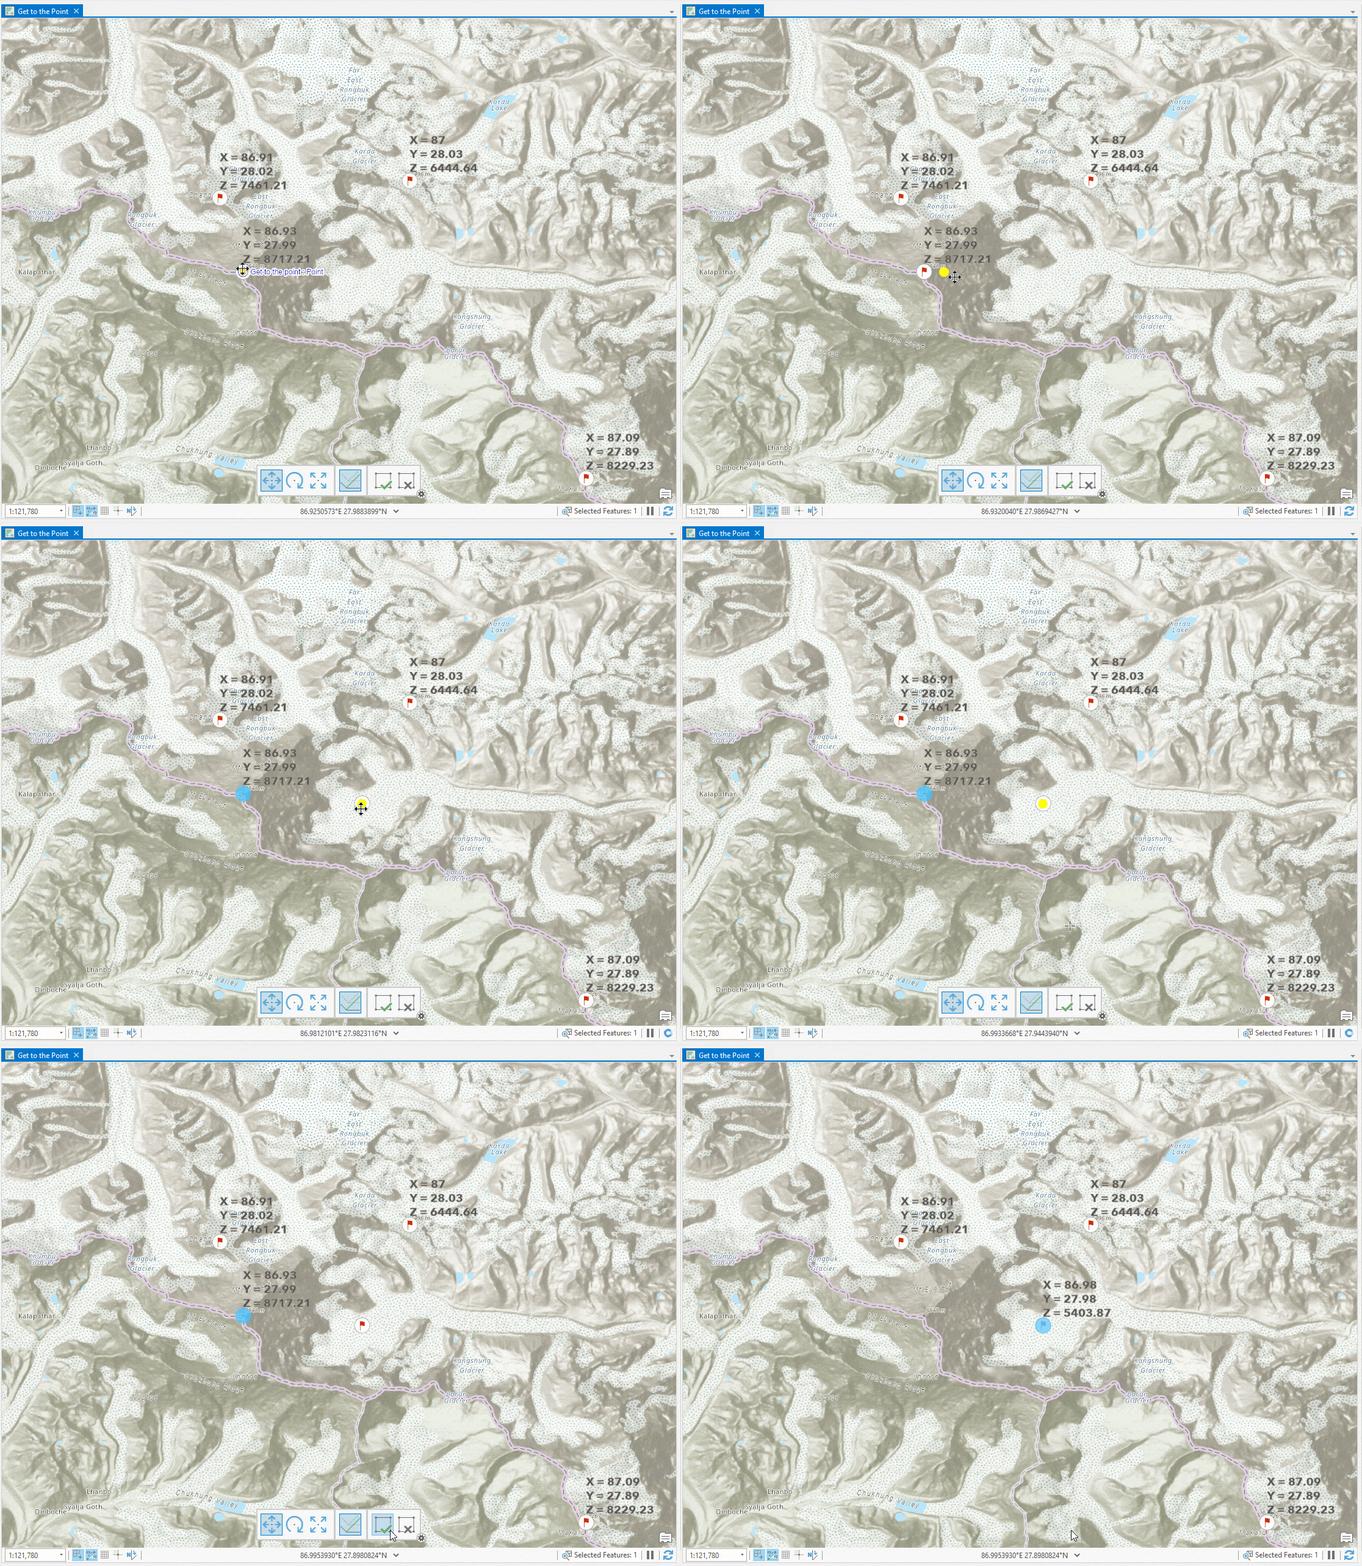
This is great because, without having to store additional attribute values in your table, your labels will stay updated regardless of where you move a point.
Pop-ups
We can use the same expression to configure pop-ups.
Right-click your point feature layer > Configure Pop-ups.
In the Configure Pop-ups window, click Expressions.
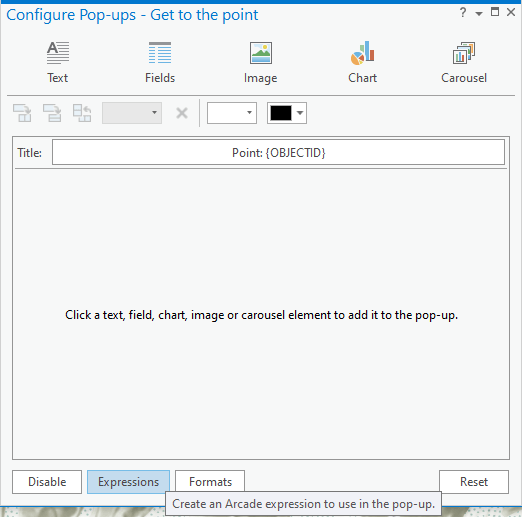
Click New.
Just as with labels, paste the text from above for the Expression.
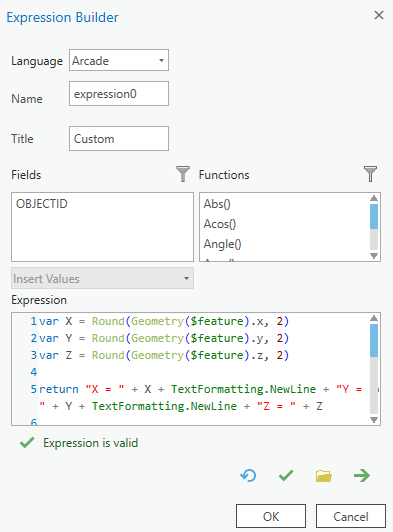
Click OK and click the back arrow to get back to the Configure Pop-ups window.
We’re going to add a Text element to the pop-up and leverage the expression that we just entered.
Add a Text element and then edit the element.
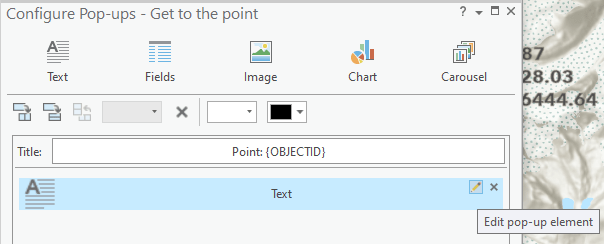
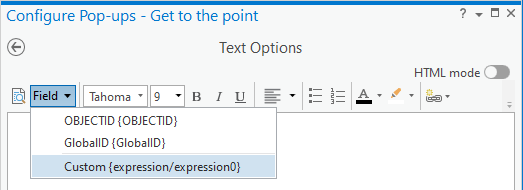
Use the Field pulldown to add the expression.
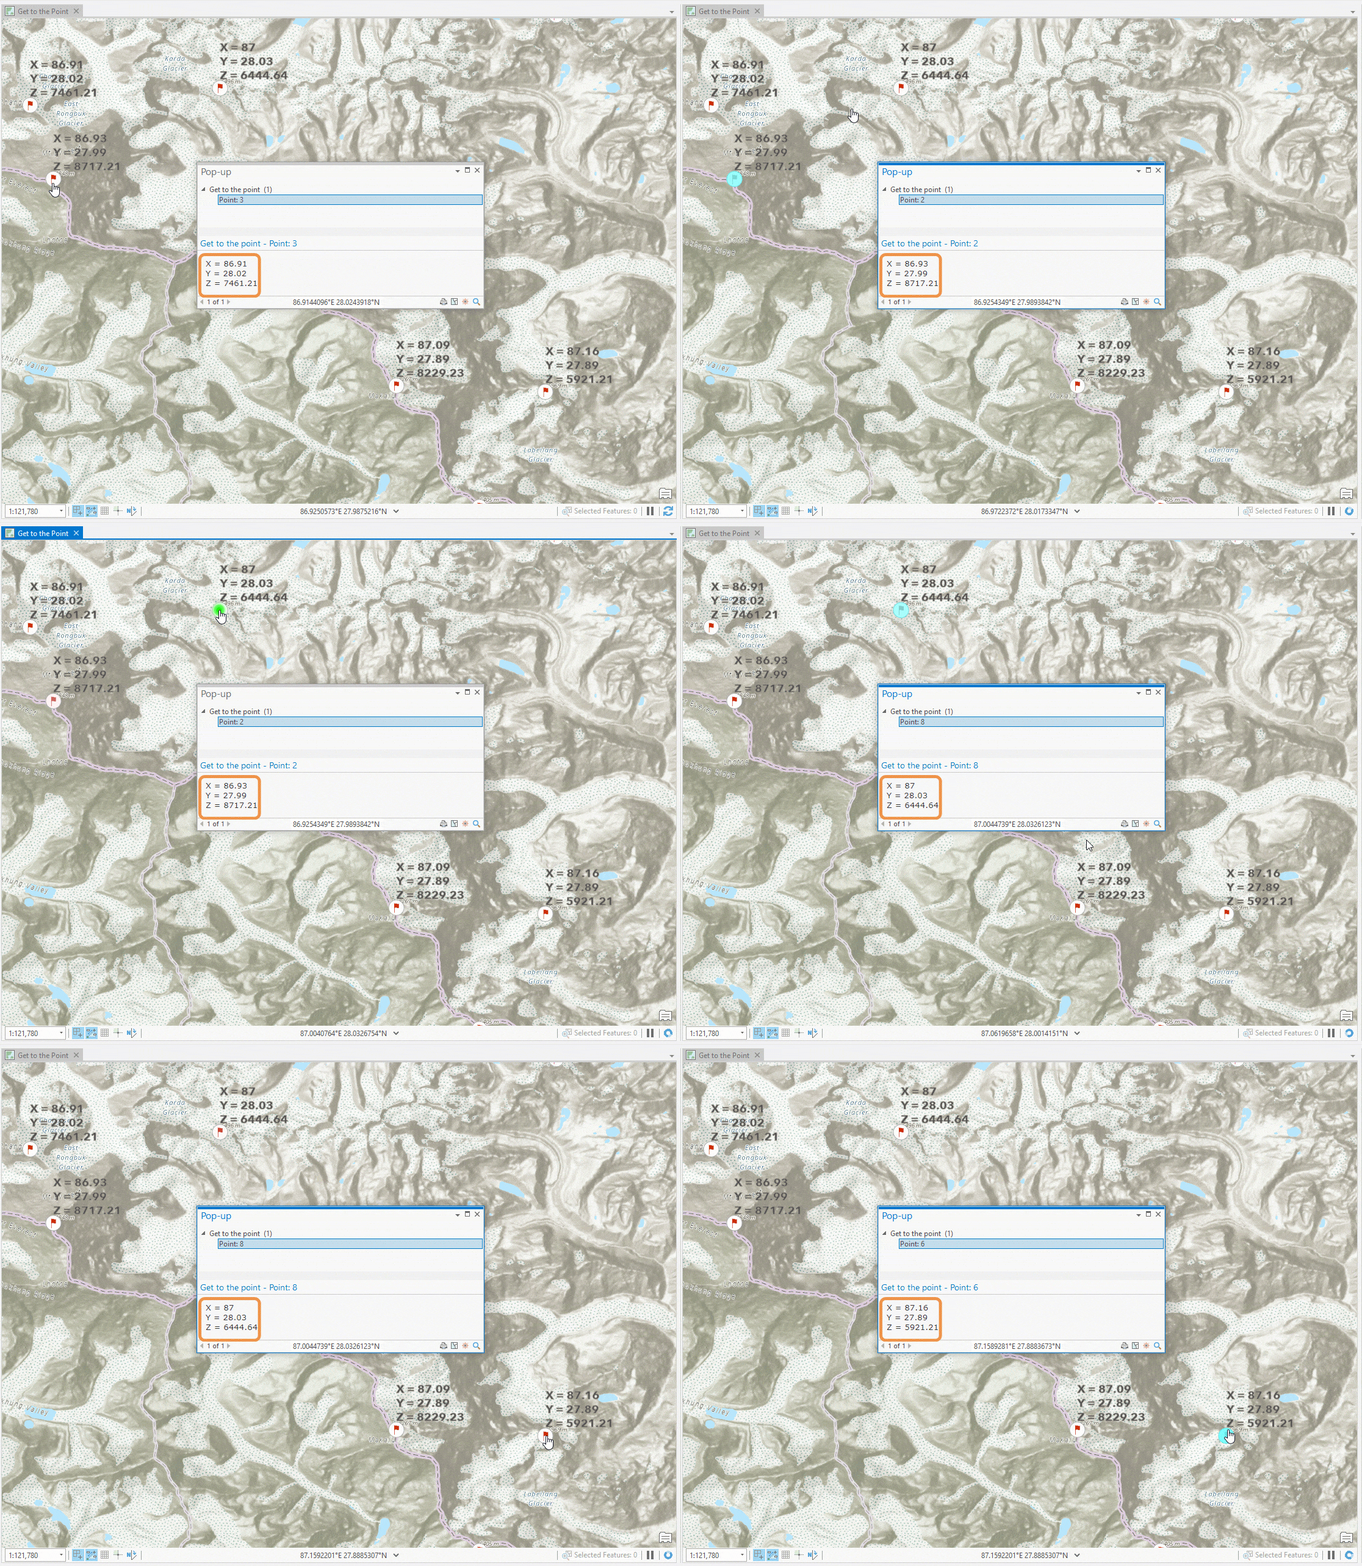
Click the back button and the pop-up should now be configured.
MapTips
It should be pretty quick to cover MapTips because the pattern is the same as what we saw with labels and pop-ups.
Double-click the layer to open the layer properties. From the Display tab, you will see Show MapTips as an option under Display field.
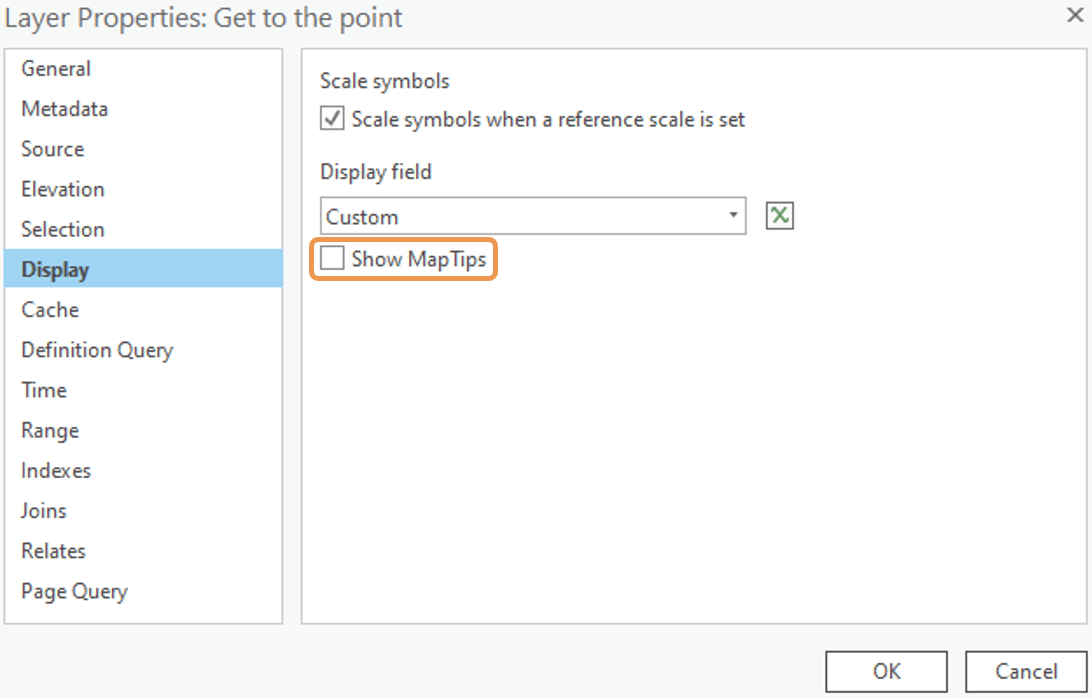
Click the little X to set an expression and populate it using the same text from before.
Toggle on Show MapTips and click OK.
Now you have MapTips that pull directly from the shape’s geometry with no need to store any data unnecessarily in your table.
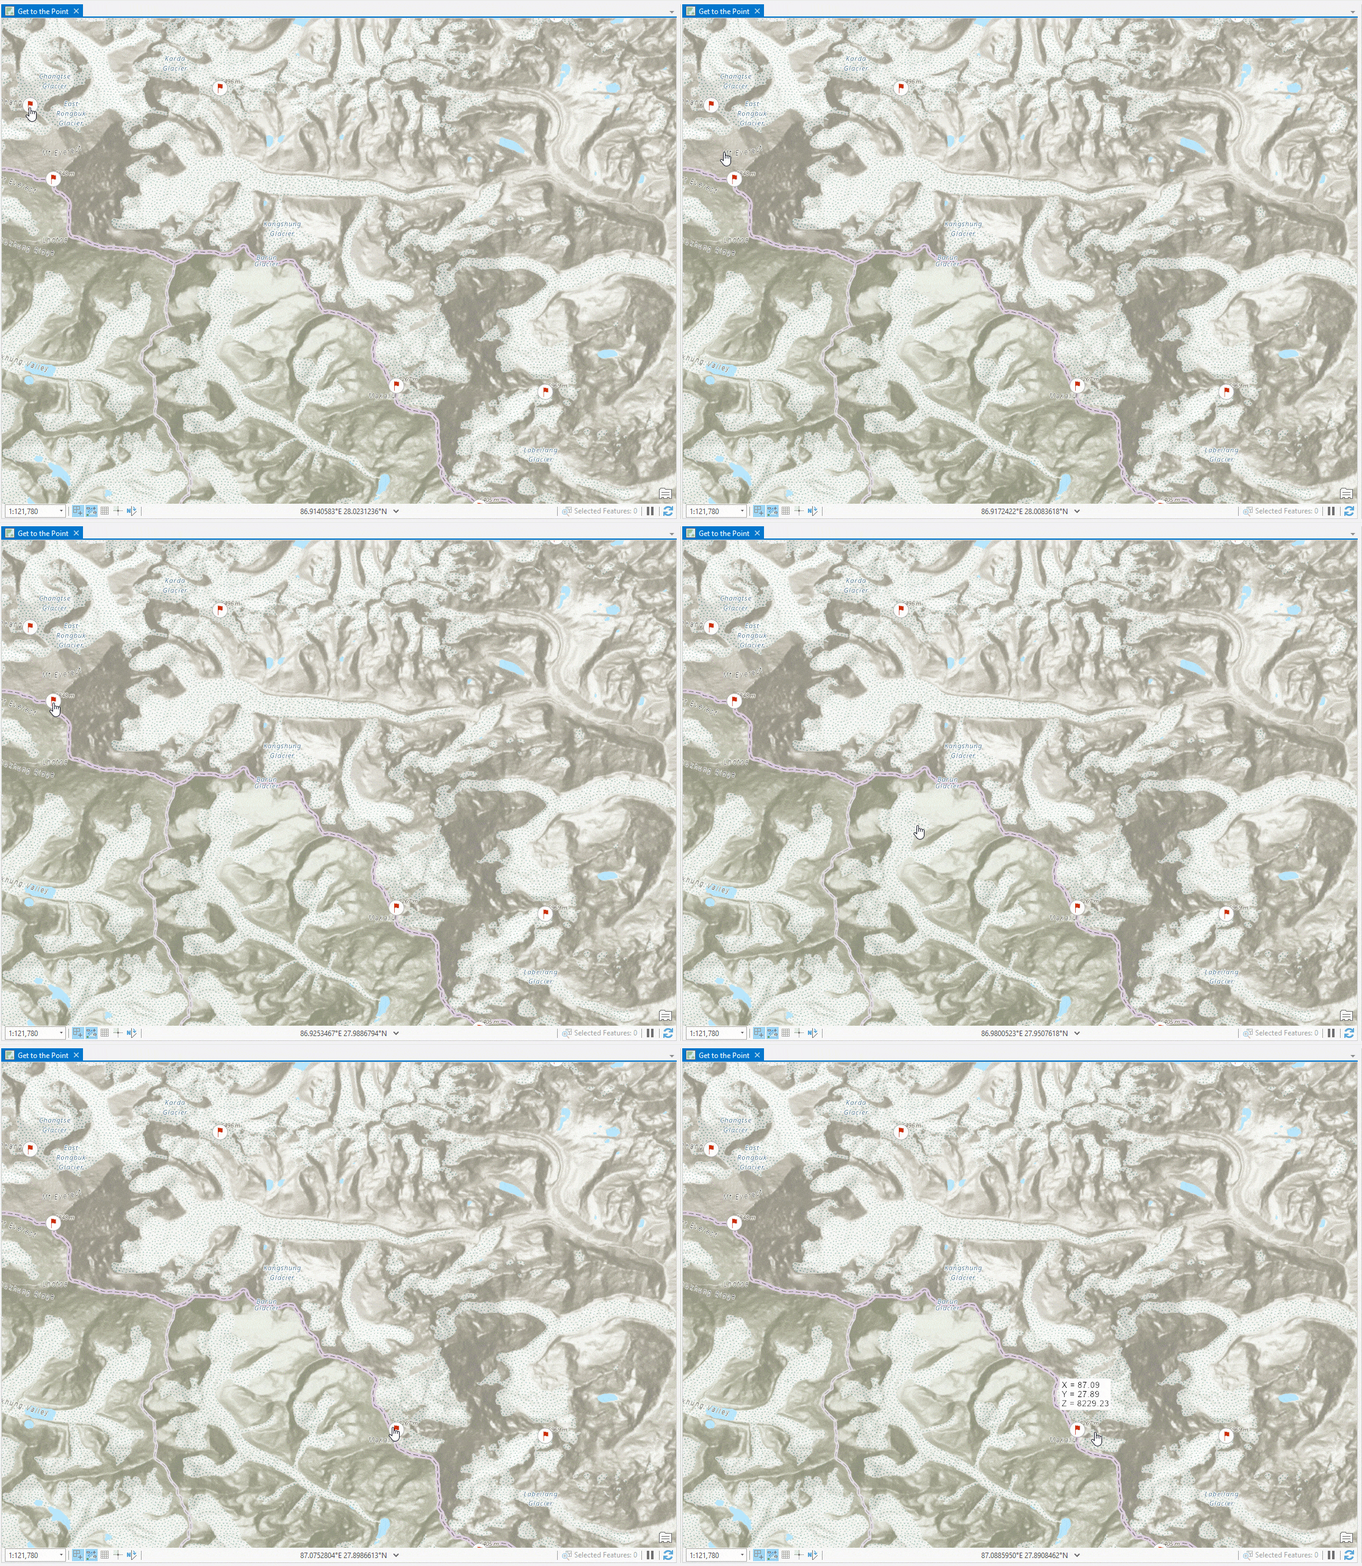
Do take note of that tip from the documentation, though, and use MapTips judiciously as they can impact navigation performance in the map.
Summary
That’s it for what I wanted to share today. It is certainly possible that you have a workflow that requires you to store a point feature’s x,y,z values in the data source’s table. If you need that, check out Get to the Point: Automatically maintain x,y,z attribute values with ArcGIS Pro and attribute rules. Depending on what you’re doing, though, it may not be necessary to store those values permanently, in which case the options covered here may work better for you.
This is a simple demonstration of how to use Arcade expressions to display information without having to add new fields to your data. The general concept can be applied much more broadly and is covered in a number of other blogs, learn lessons, and Esri Academy (search for ‘Arcade’).
Photo by Alexander Popov on Unsplash



Article Discussion: