Microsoft OneDrive is a file hosting service that enables you to upload, save, and share various types of files in the Microsoft cloud. OneDrive can serve as a storage solution to free up space on your device, as a backup for your files, or for collaborating with others. Anyone with a Microsoft account has free storage available on OneDrive.
You can access and add OneDrive files using New item from Content, or using Add layer from file in Map Viewer. Follow the steps to learn how to use OneDrive to add map layers, content, and media to pop-ups.
Add OneDrive CSV files to your map
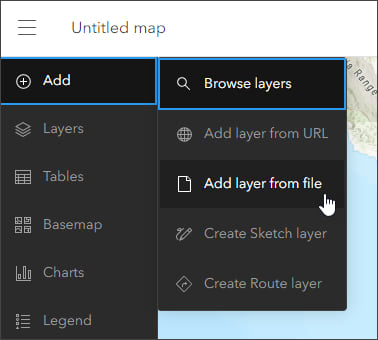
Step 1 — Sign in to your ArcGIS account and open Map Viewer. There are two ways to add OneDrive CSV files as layers from the Contents (dark) toolbar.
(1) Click Add, then Add layer from file.
(2) From the Layers pane, choose Add layer from file from the Add drop-down list.
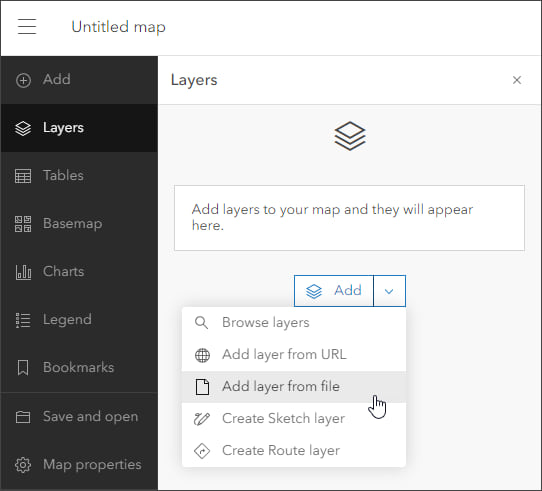
Note that a third way is to add OneDrive files is using New Item in Content. If the file contains location data, a hosted feature layer can be published, then added to your map. The steps are similar to the Map Viewer workflow described here.

Step 2 — In the Add Layers pane, click OneDrive.
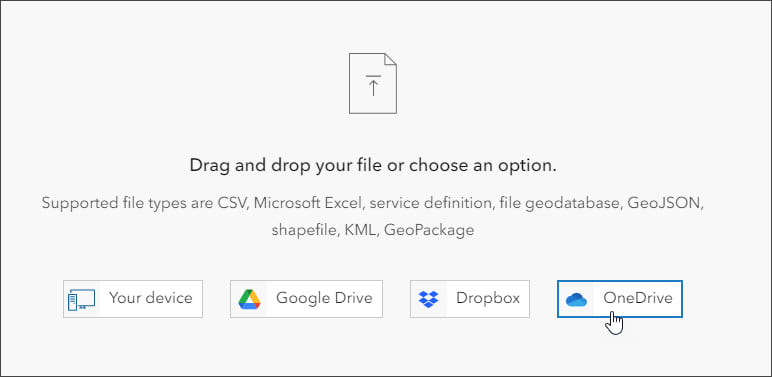
Step 3 — If needed, sign in to your OneDrive account.
Step 4 — Select the CSV file you want to add to your map.
(a) – From the drop-down list of supported OneDrive files, select CSV.
(b) – Choose the file you want to add to your map. The CSV will need to have lat/long coordinates or addresses to add to your map. If not shown in the list, you can use Search to find the file you want.
(c) – Click Next when finished.
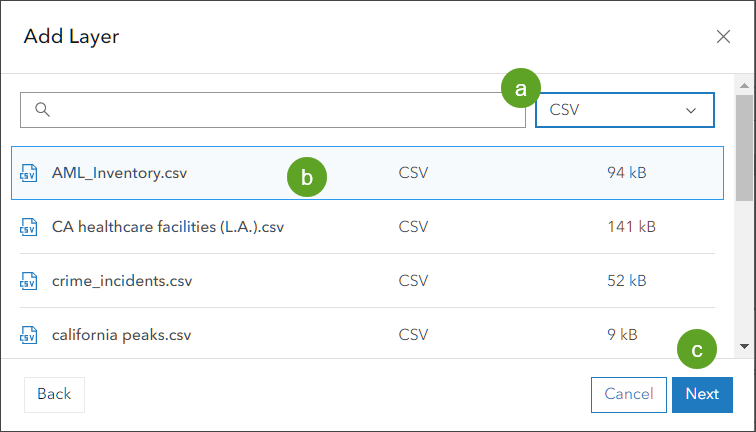
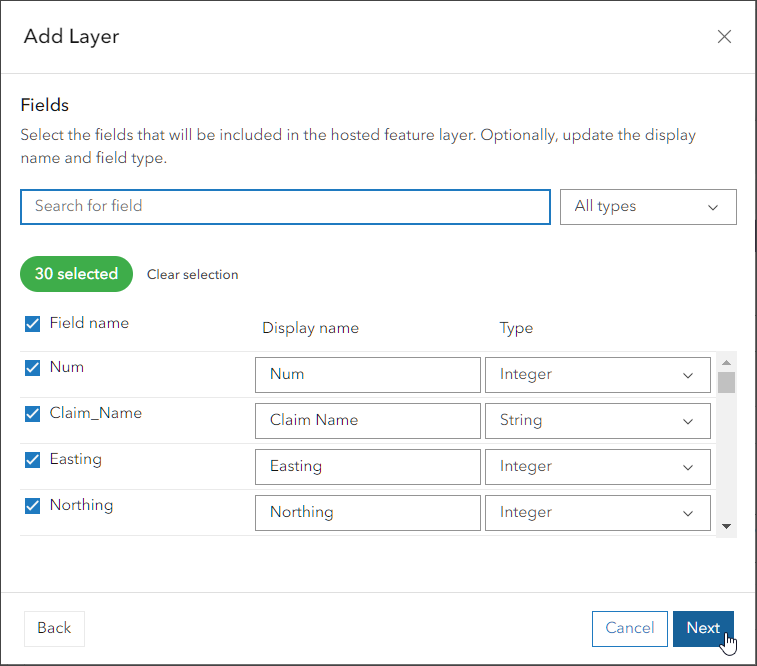
Step 5 — A hosted feature layer will be created from the CSV. Select the fields that you want to include, then click Next.
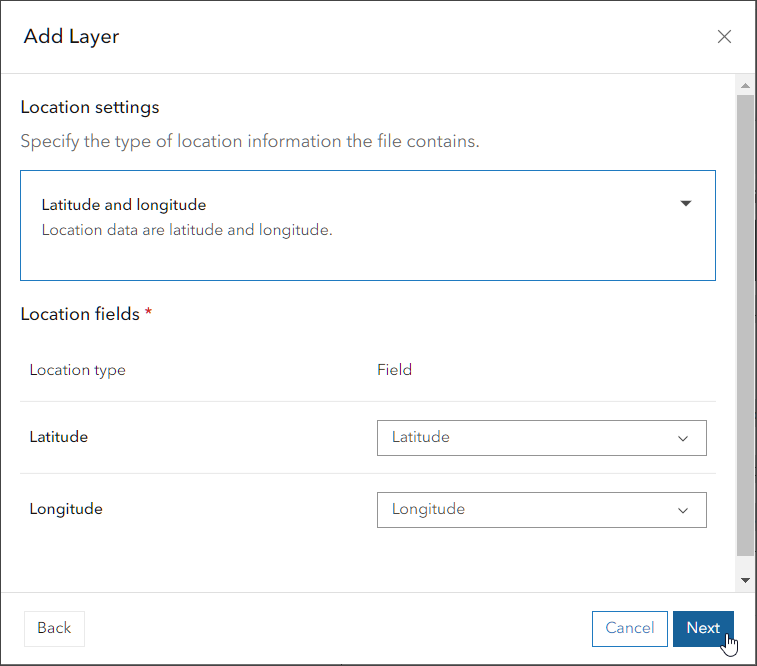
Step 6 — Choose the location fields in the file used to place features on the map. Locations can be:
- Latitude/longitude coordinates
- Military Grid Reference System (MGRS) coordinates
- U.S. National Grid (USNG) coordinates
- Addresses (address matching consumes credits)
If the CSV has no location data, the file will be added as a table. Click Next to continue.
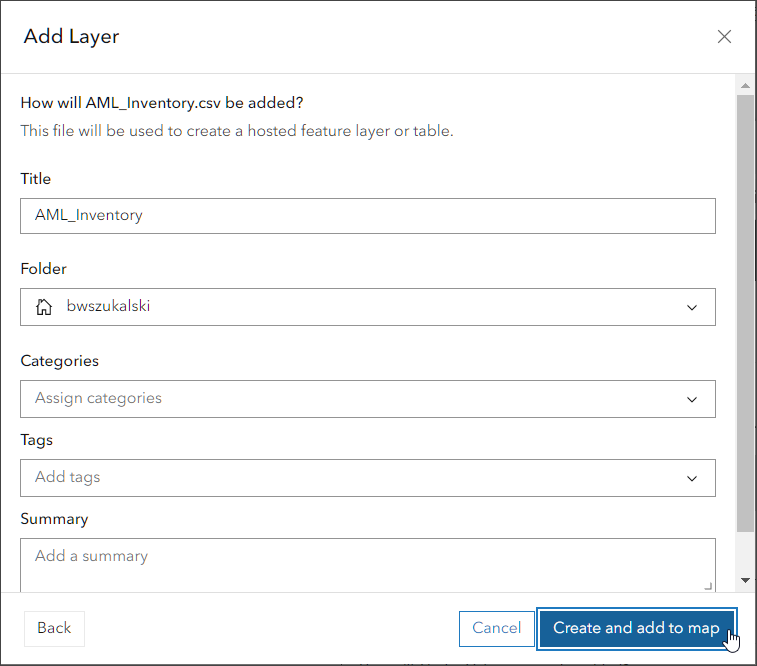
Step 7 — A hosted feature layer will be created and automatically added to your map. Specify the title, summary, tags, and other information for the hosted feature layer.
When finished, click Create and add to map.
Step 8 — Style and configure the layer as you would any other hosted feature layer.
Update hosted feature layers from OneDrive
Once a hosted feature layer is created from a OneDrive source, updating the hosted feature layer works exactly the same as for any other hosted feature layer.
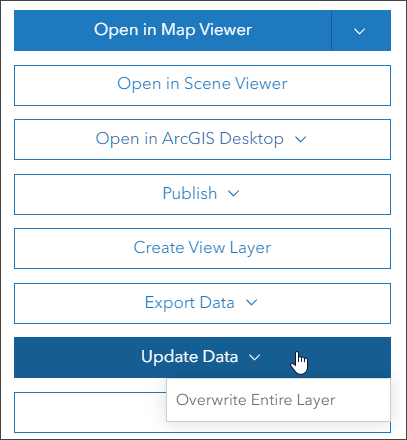
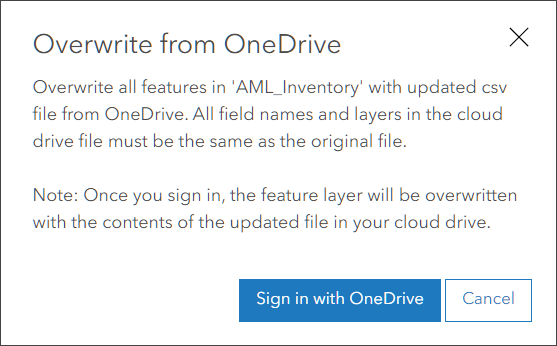
Step 1 — In the Overview tab on the hosted feature layer item pages, click Update Data, then Overwrite Entire Layer.
Step 2 — Sign in to your OneDrive account. Once you sign in, the hosted feature layer will be automatically updated from the OneDrive source. Note that the file name and schema must be the same as the original file used to publish the hosted feature layer.
Add other OneDrive files to your map or contents
To add other supported OneDrive files to your map, simply select the file type from the drop-down menu or use Search. Shapefiles and geodatabases can be added as Zip Files, other supported formats include Excel spreadsheets, GeoJSON, and Google Sheets.
The file will be scanned to determine its contents. If there is no location data the file will be added as an item to My Content.
More information
For more information, see:
- Add layers from files (Help)
- Publish from files on a cloud drive (Help)
- Manage hosted feature layers (Help)

Commenting is not enabled for this article.