This article was originally published on February 14, 2022 and has been updated.
As an organization administrator, you may be looking for more efficient and effective ways to manage members, content, credits, and other resources and activities in your ArcGIS Online or ArcGIS Enterprise organization. If so, it’s time to give administrative reports a try.
The organization status dashboard, accessible from the Organization page Status tab, provides a good overview of your organization. But if you need more detailed, on-demand information that you can easily download and share, administrative reports are your best option.
For example, you may want to compare member credit usage to help with credit budgeting in ArcGIS Online. Or, if your goal is to reduce storage costs, you may need to monitor file and feature storage to identify unusually large items. A variety of report types are available to meet your needs.
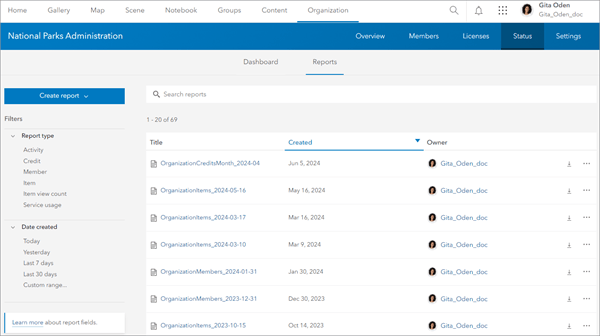
This article describes the types of administrative reports available in ArcGIS Online and ArcGIS Enterprise and explains how to create, find, and use them. The article also shows you how to get the most out of some administrative reports by scheduling them to run automatically.

Reports video
For a quick introduction to administrative reports, check out the following short video:

Find and run reports
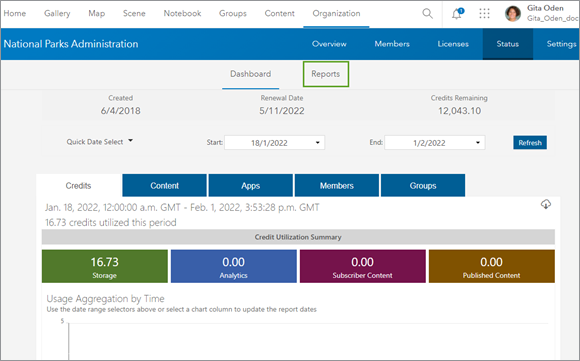
You can find existing reports and run new reports from the Organization page in ArcGIS Online or ArcGIS Enterprise. Choose Reports on the Status tab.
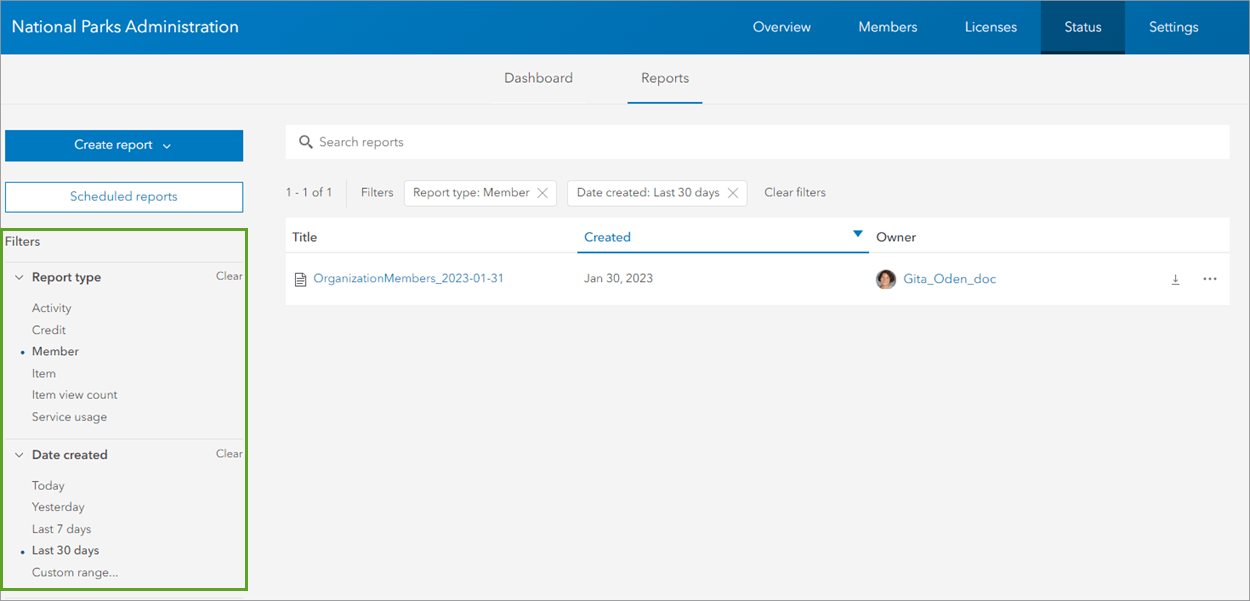
To help you find an administrative report, you can search or filter by report type or date created.
Note: You can create item reports and member reports in ArcGIS Enterprise. ArcGIS Online supports additional report types, as shown in the following image.
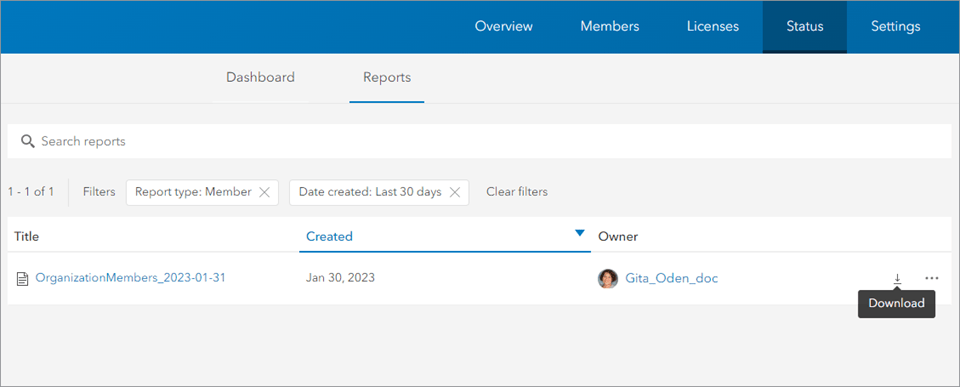
To view the report, download it as a CSV file. It’s also saved automatically as an item in your content.

Types of reports
ArcGIS Online has six report types—member, item, credit, activity, item view count, and service usage. ArcGIS Enterprise has two report types—member and item.
Member report
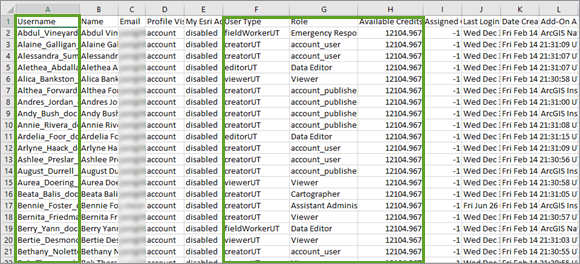
A member report includes a comprehensive list of members in your ArcGIS Online or ArcGIS Enterprise organization at the time the report is created. The member report includes details about each member, such as their assigned user type and role, username, and so on.
Item report
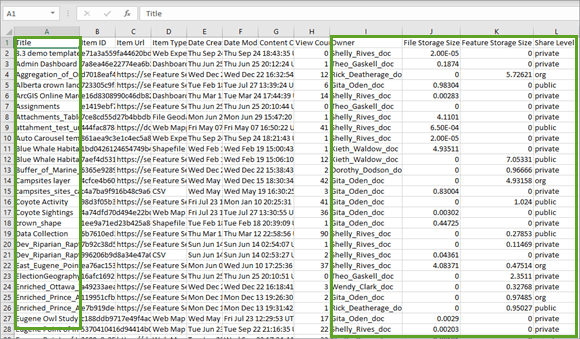
An item report provides a snapshot of all the content items in your ArcGIS Online or ArcGIS Enterprise organization at the time you run the report. For example, you can see the name of the item, the item owner, its share level, and storage size, as applicable.
Credit report (ArcGIS Online)
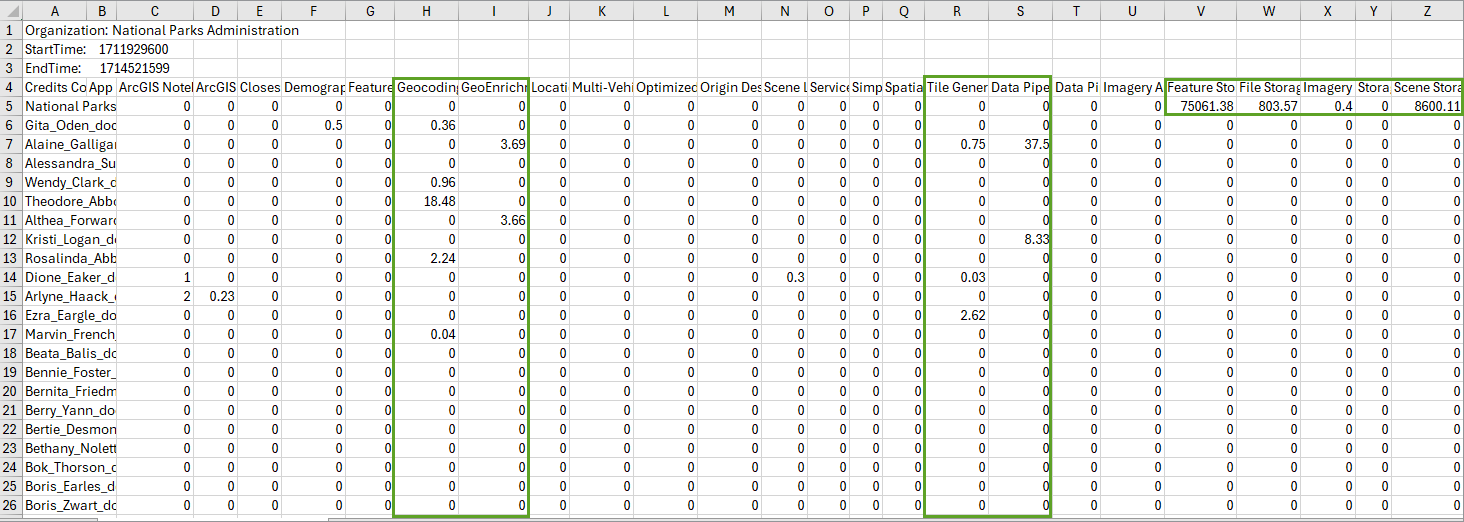
A credit report lists the credit costs associated with credit-consuming tools and capabilities in your ArcGIS Online organization throughout a specified time period. It includes the number of credits consumed by each organization member, broken down by credit-consuming tool and capability, such as geocoding, GeoEnrichment, tile generation, and Data Pipelines. It also lists the number of credits consumed for different types of storage (feature, file, scene, imagery, and so on) in the organization, as well as the credit costs incurred for registered app usage.
Activity report (ArcGIS Online)
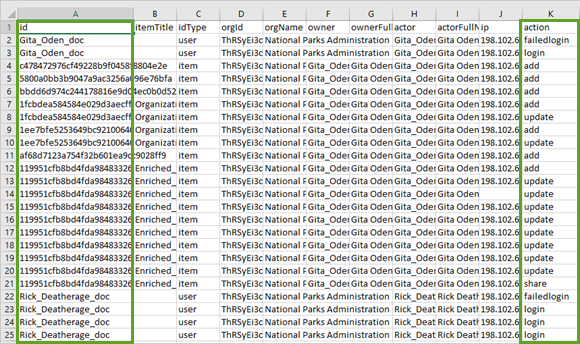
An activity report shows changes made to your ArcGIS Online organization members’ groups and content for the time period you specify. It provides details about added, created, updated, shared, or deleted items, and other item information. The activity report also provides details about member management actions—for example, updated member roles, password resets, and group assignments.
Item view count report (ArcGIS Online)
An item view count report shows a list of items in your ArcGIS Online organization with their corresponding view counts for a specified time period. The report includes the total view count for each item, in addition to counts aggregated according to the chosen reporting period duration and view count aggregation option.
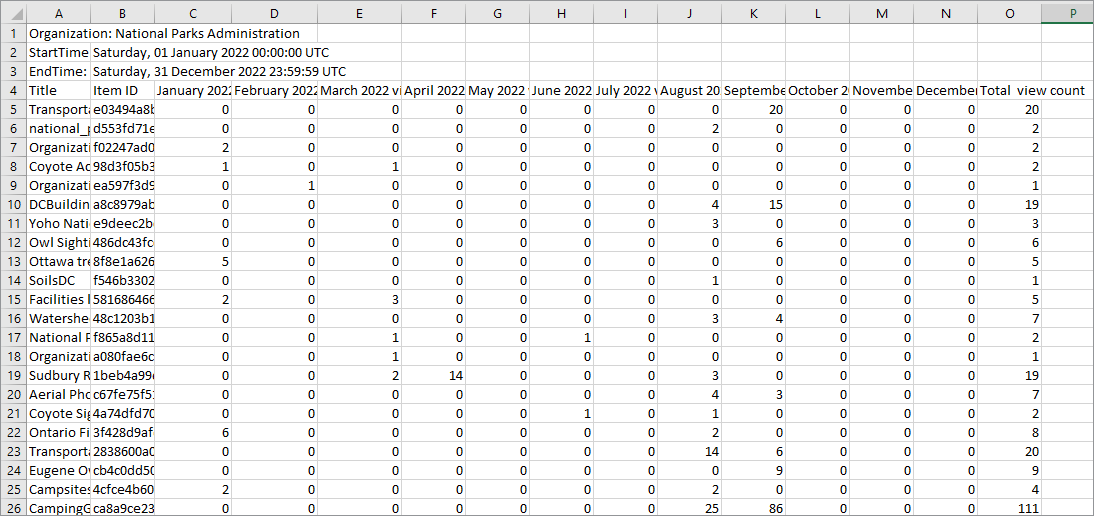
Service usage report (ArcGIS Online)
A service usage report shows credit usage information associated with registered apps for a specified time period. It provides details such as app IDs, when apps were created and last updated, and the amount of storage and bandwidth used.


Create a report
Now that you understand the different types of reports available, it’s time to create a couple.
Create a credit report (ArcGIS Online)
To create a credit report, follow the steps below or check out this video that shows you how.
1. Go to Organization > Status > Reports and click Create report > Single report.
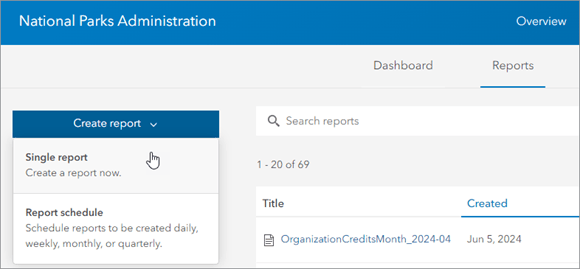
Suppose you’re interested in credit usage for the previous month.
2. Choose Credit as the Report type and keep the default report name. Select Month for the duration, keep the default timeframe, and click Create report.
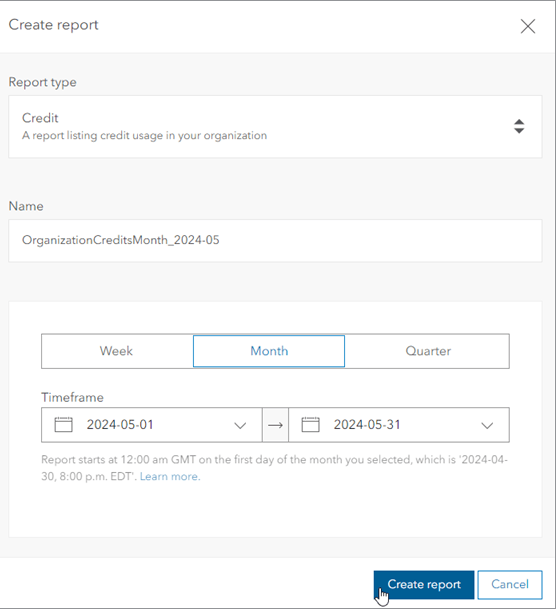
Once the report appears in your list, you can download it from the Reports tab or from its item page, since it has been saved automatically as an item in your content.
Note: If another administrator has already run the same report, you cannot run it again. You can download the existing report on the Reports tab.
3. Open the report’s item page. Optionally, update the item details and share the report with your organization or a group.
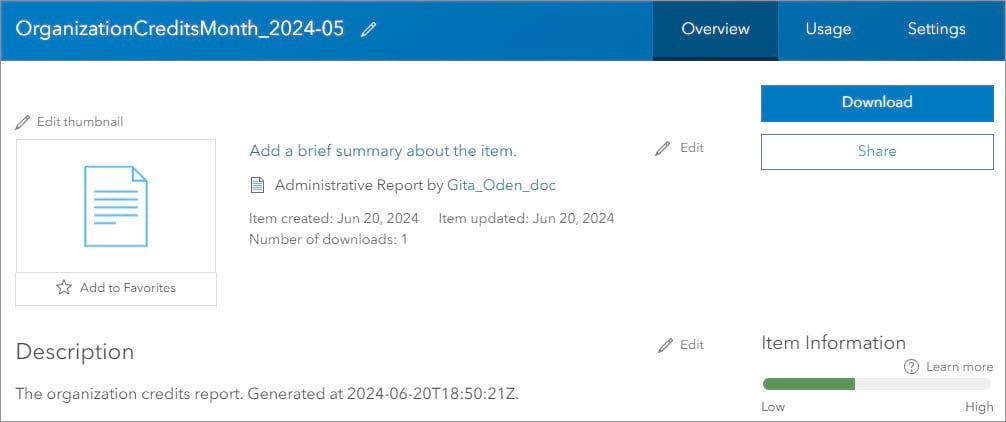
4. Click Download and open the report.
The following example of a credit report shows that a few organization members have used credits for tools such as geocoding and GeoEnrichment. You can also see storage credit costs for the organization.

Create an item report (ArcGIS Online or ArcGIS Enterprise)
Now suppose you want to see which file and feature layer items are taking up the most storage space in your organization.
- On the Reports tab, click Create report > Single report.
- Select Item for Report type, accept the default report name, and run the report.
- Download and open the report.
- Scan the storage size columns—File Storage Size and Feature Storage Size—to see which items are largest in terms of storage.
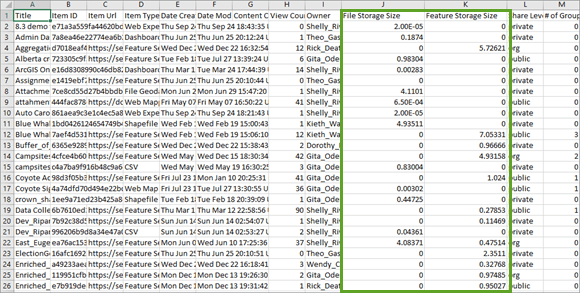
Note: Storage size is reported in megabytes (MB).

Schedule a report
For organization activities and actions your organization wants to monitor on a regular basis, you can also consider scheduling reports to run automatically.
- On the Reports tab, click Create report > Report schedule.
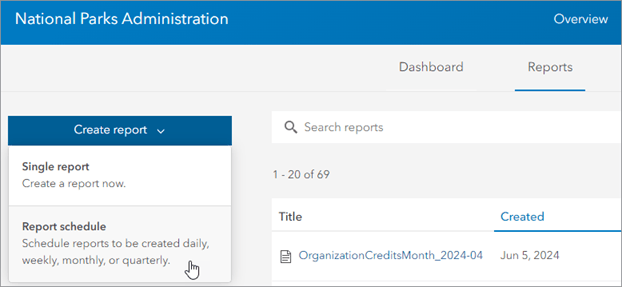
2. Set the report parameters.
3. Choose a report frequency.
Note: The available report frequency options (Daily, Weekly, Monthly, Quarterly, or Yearly) depend on the report type selected. For example, credit reports and service usage reports can only be run weekly, monthly, or quarterly.
4. For weekly and monthly item and member reports, select the day you want the report to run.
5. Set a start date and end date for the report schedule.
6. For a monthly, quarterly, or yearly item view count report, specify how you want the view count to be aggregated. For example, you can choose Weekly totals or Monthly totals when scheduling a quarterly report.
7. Click Create schedule.
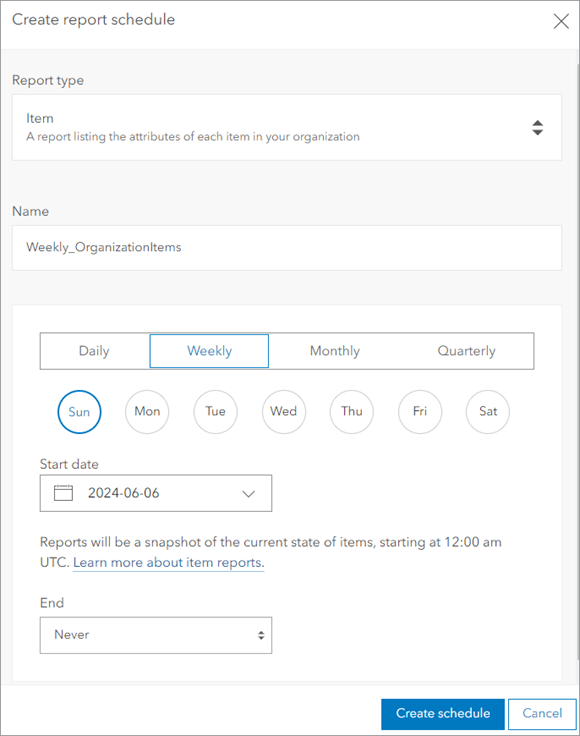
Now the report will run automatically without any further effort on your part!
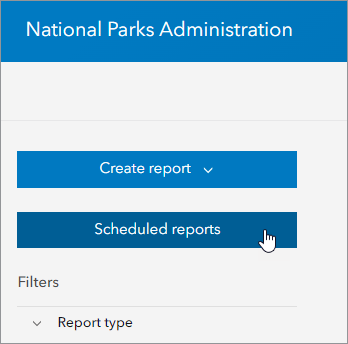
If you need to pause, edit, or delete your scheduled report, you can click the Scheduled reports button, which is now visible on the Reports tab.

Learn more
To learn more about reports and other organization administration tools, explore the following resources.
ArcGIS Online
- View and report status—Help topic with detailed workflows for creating and scheduling reports.
- Report fields—Help topic with a list of fields by report type.
- ArcGIS Online: Create a report—Video showing how to create a credit report in ArcGIS Online
- Time-saving tips for managing members—Blog article with embedded video.
- ArcGIS Online resources—The latest resources for ArcGIS Online, including discovery paths, blog articles, and help documentation.
- Administer ArcGIS Online tutorial series—Videos, tutorials, and blog articles that show you how to configure your ArcGIS Online organization.
- ArcGIS Online Implementation Guide—Essential tasks and best practices for setting up ArcGIS Online.
- ArcGIS Online Community—Exchange ideas, solve problems, and build relationships.
ArcGIS Enterprise
- Work with usage reports—Help topic with detailed workflows for creating and scheduling reports.
- Report fields—Help topic with a list of fields by report type.
- Manage content in ArcGIS Enterprise tutorial series—Videos and other resources that show you how to manage content in ArcGIS Enterprise.
- Time-saving tips for managing members—Blog article with embedded video.
- ArcGIS Enterprise Community—Exchange ideas, solve problems, and build relationships.


Commenting is no longer enabled for this article