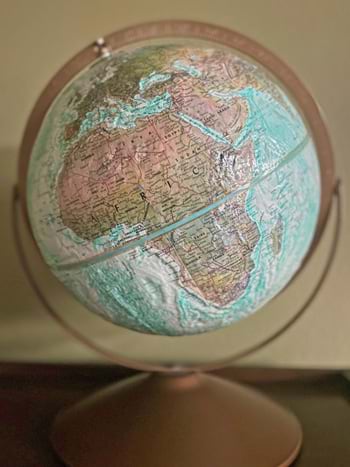
I remember my first rotating globe very well, my parents bought it for me when I was in elementary school. It was a raised relief globe, with topography and bathymetry you could see and touch. Whenever I learned of events in the news, I’d spin the globe to see where in the world those were happening. I still have it; it’s part of my home office decor that you might see in the background during a Teams or Zoom meeting.
Make an auto-rotating globe
Scene Viewer is used to author, view, and interact with 3D scenes. ArcGIS Living Atlas of the World includes authoritative live feeds and other global content. 3D Viewer is one of the ArcGIS Instant Apps that lets you showcase a scene using easily configured tools.
Using the above, follow these steps to make your own rotating globe in a minute, maybe less.
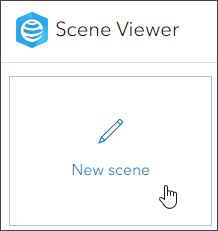
Step 1 — Sign in to your ArcGIS account and open Scene Viewer. Choose New scene to begin.
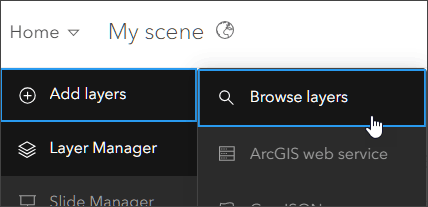
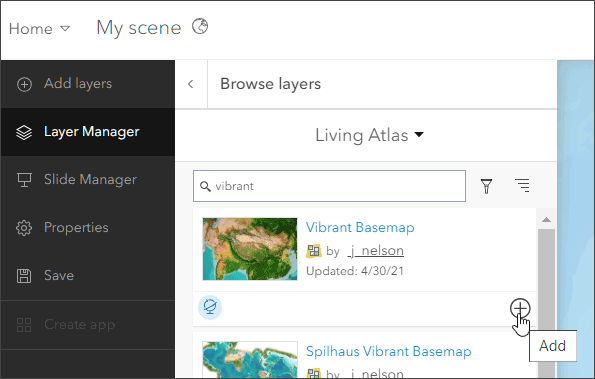
Step 2 — On the Designer toolbar, click Add layers (+), then click Browse layers.
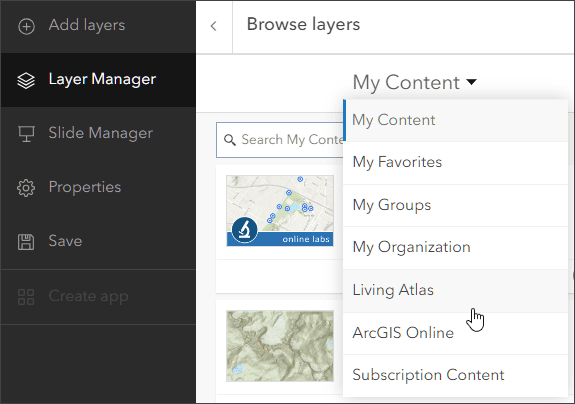
Step 3 — Choose Living Atlas from the Browse layers drop-down.
Step 4 — For this example, we’ll use the Vibrant Basemap, which is actually a tile layer found in Living Atlas. Search for “vibrant” and locate the layer. Click (+) Add to add the layer to your scene.
Tip: You can also search for layers at the Living Atlas website. Sign in to your account, then use the Browse tab to search, filter, and find layers to begin creating your scenes.
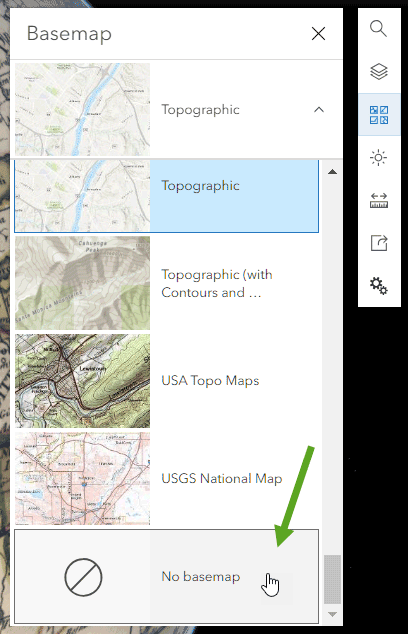
Step 5 — Since the Vibrant layer covers the entire globe, we can remove the basemap. From the toolbar, click the Basemap tool, then scroll down to the bottom and choose No basemap.
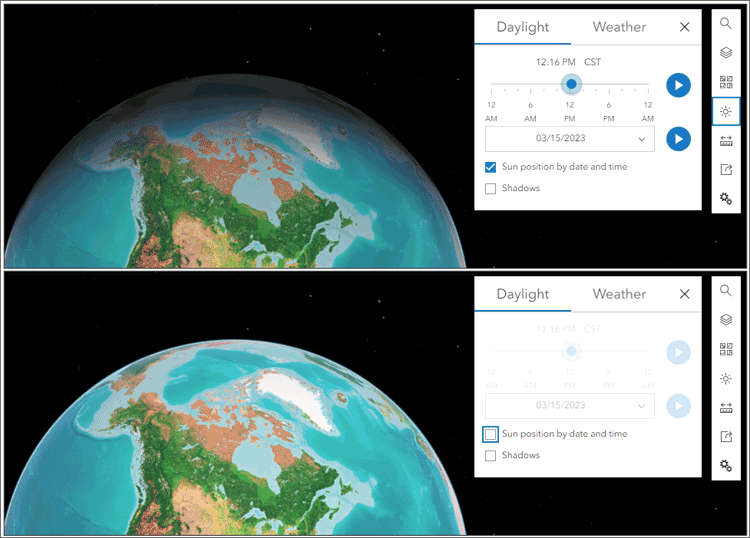
Tip: Experiment with turning the Sun position by date and time off (it is on by default). This will influence the appearance of the globe.
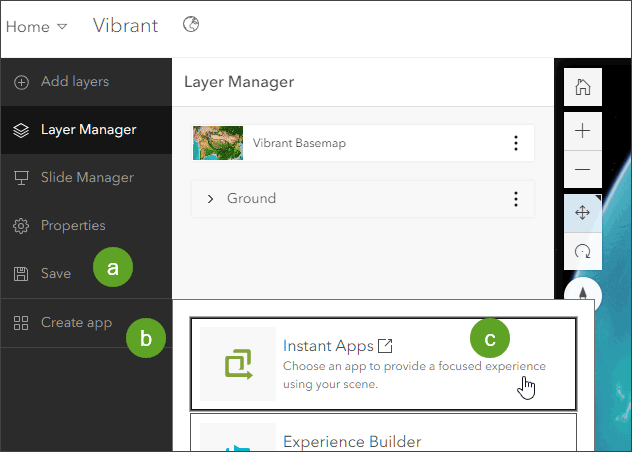
Step 6 — Save your work and use 3D Viewer, one of the Instant Apps, to create a rotating globe.
a – Save the scene.
b – Click Create app
c– Choose Instant Apps.
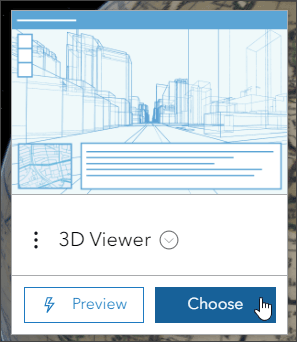
Step 8 — From the Instant Apps gallery page, choose 3D Viewer.
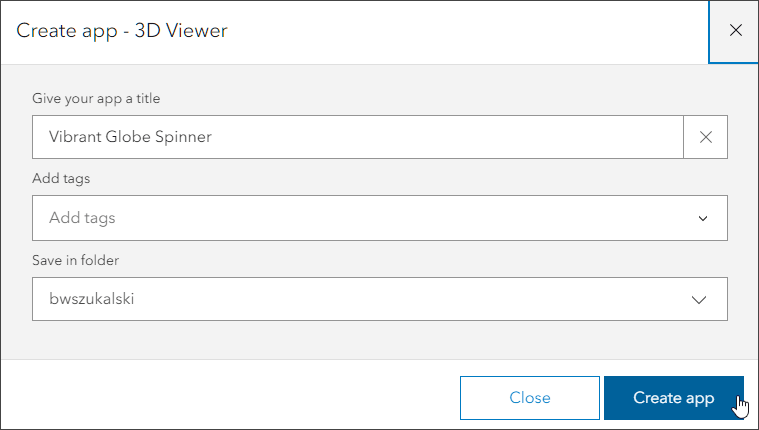
Step 9 — In the Create app pane, name your app and optionally add tags, then click Create app.
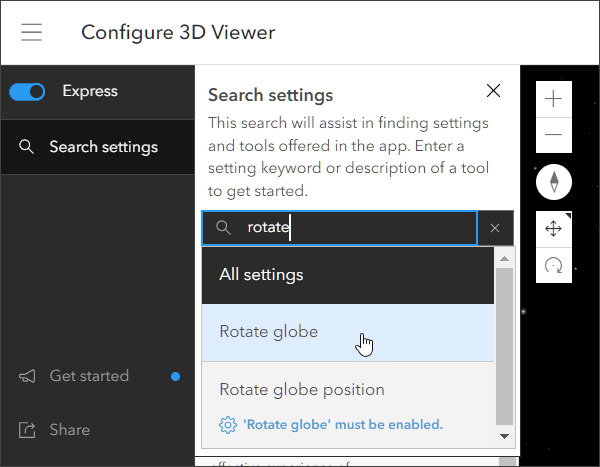
Step 10 — Enable the Rotate globe tool.
All Instant Apps open in Express setup mode, providing access to essential settings. One of the tools not found in Express mode for 3D Viewer is the Rotate globe tool. To locate and enable it, click Search settings in the configuration panel and enter “rotate,” then choose Rotate globe.
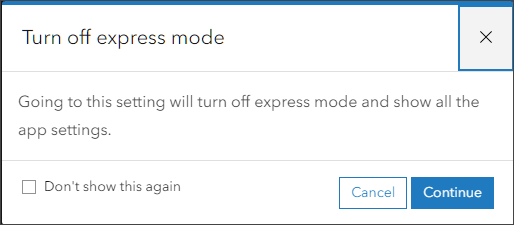
Step 11 – The Rotate globe tool is available in full setup mode. Click Continue to acknowledge that you want to turn off express mode and enter full setup.
For more information, see Express and full setup modes.
Step 12 – Enable the Rotate globe tool.
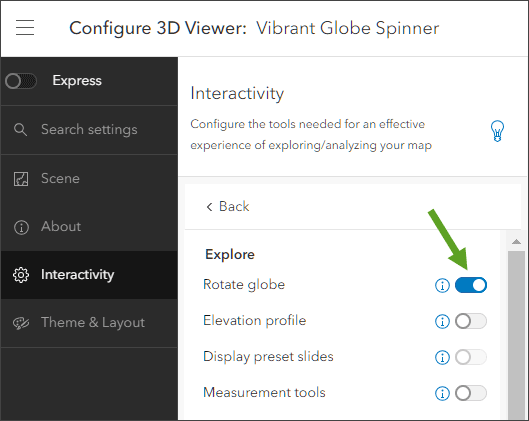
Step 13 – Click Publish when finished. Confirm when prompted, adjust the sharing as desired, then click Launch to view the configured 3D Viewer app.
Technically, in well under a minute, we’ve created an auto-rotating globe app. When the app is opened, the globe will automatically rotate. Click Pause/Play to stop and resume the rotation.
Open the Vibrant Globe scene to review the steps above, or open the Vibrant Globe 3D Viewer app.
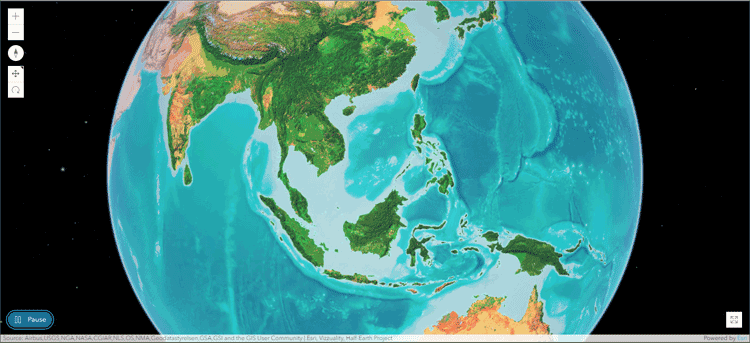
Improve the scene with a reference layer or 3D labels
With a few additional steps, the scene and rotating globe can be improved using the reference layer or 3D labels found in scene basemaps.
An easy way to add a reference layer or labels is to choose the basemap whose reference layer or 3D place labels you want to use from the Scene Viewer basemap gallery. Below, the Enhanced Contrast basemap has been selected, adding the draped reference layer labels to the scene.
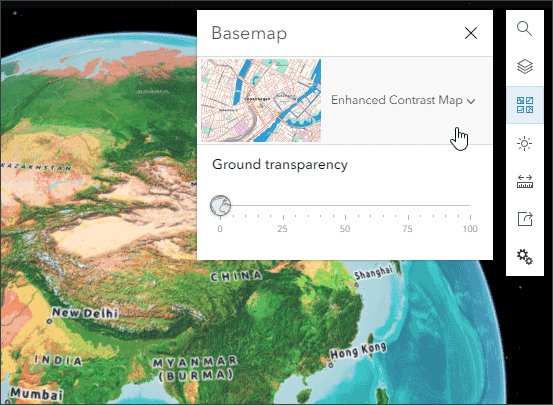
Note that the Enhanced Contrast Map is not in the default basemap collection. You can add it by creating a custom basemap gallery.
To add 3D Places and Labels, choose one of the 3D basemaps. You can toggle the buildings and trees off for the purposes of creating a rotating globe.
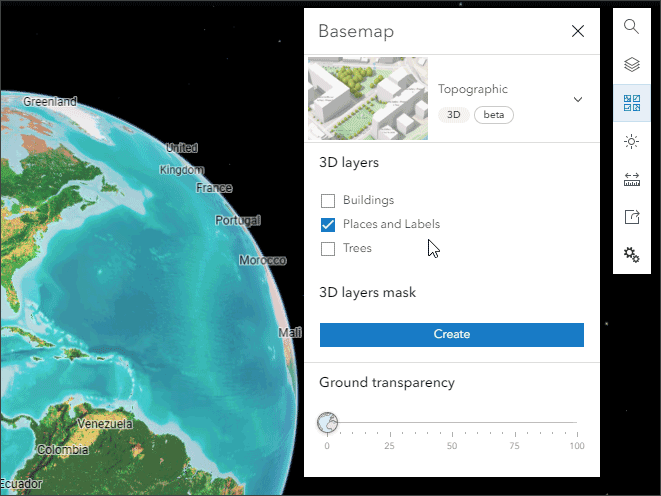
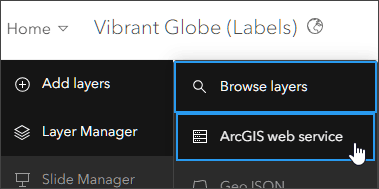
An alternate way to add a 2D reference layer or 3D labels is to identify the URL of the layer in the source basemap or Living Atlas reference layer and add it to the scene by choosing Add layers, then ArcGIS web service.
Tips for going further
Rotating globes can be extended and enhanced using a variety of Scene Viewer techniques, Living Atlas and your own content, and a bit of experimentation. Here’s some ideas for doing more.
- Add and assemble component layers to create unique visual effects. Component layers can be added via search or URL.
- Use Living Atlas live feeds to create dynamic globes.
- Use scene layer filters to apply focus to specific features (e.g., earthquakes 3 or greater in magnitude).
- Use extrusion by attributes (3D Counts and Amounts) and adjust the min-max size or use fit to view for best results. Use the histogram slider to adjust appearance and height of features.
Sample globe gallery
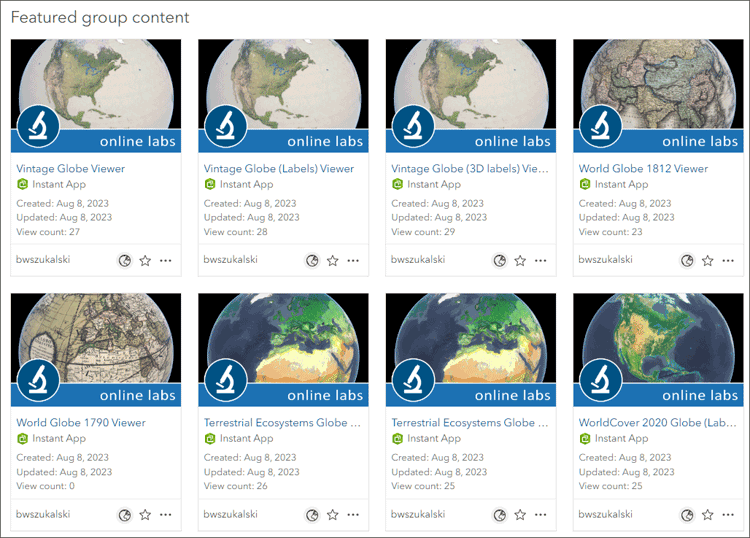
View sample auto-rotating 3D Viewer apps and associated web scenes in this group. Click View all content to find the scenes used to create the apps.
More information
For more information, see:
- Get started with Scene Viewer (Help)
- ArcGIS Living Atlas (website)
- ArcGIS Instant Apps (website)
- Choose global or local (Help)
- How to design and animate a globe in ArcGIS Pro with ArcGIS Living Atlas content (ArcGIS Blog)

Commenting is not enabled for this article.