This blog gives an overview of the recently released Data Loading Tools. The Data Loading Tools streamline loading data from a source to a target dataset with the ability to perform in-flight data transformation. For those who used the tools when they were shared on GeoNet as a preview and were called Data Translation Tools, you’ll need to remove the conda package from the preview. Instructions are at the bottom of this post.
To understand how you can leverage the Data Loading Tools, imagine you have to bring data from one file geodatabase to another file geodatabase. This is also known as Extract, Transfer, and Load (ETL). Let me set the stage.
In this scenario, we have a file geodatabase or fgdb for short. Let’s call this fgdb, our source. Inside this geodatabase, we have a feature class named Cars. We have three subtypes in this feature class: Red, Blue and Green. There are domains assigned to each of these subtypes. I want all my data in this feature class to shuttle over to my target file geodatabase. This target fgdb has a feature class called Trucks with different schema. Schema is a term that includes attributes, data types, domains, and other data management concepts. The Trucks feature class has three subtypes as well, but they are different than those found in Cars. They are One, Two, and Three rather than Red, Blue and Green.
There are three ways to translate data with the workbook. The first method does a straight field mapping using an expression. The second method uses a sheet as a lookup table for domains. The third method uses the Expression field to handle a variety of other tasks in a flexible way. I will cover each method in this blog.
The first tool in our Data Translation toolbox is Create Data Loading Workspace
- Open the GP Tool Create Data Loading Workspace tool within Data Translation toolbox.
- Point each one of your source feature classes to its corresponding target feature class.
- Specify the output folder for your mapping workbooks.
- (Optional) Check the box to Calculate feature count statistics to generate information on what fields have populated data.
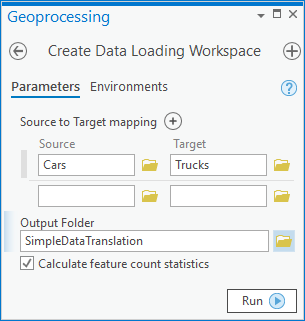
Once the tool has run, you will see a directory named Data Loading Workspace. Inside the DataMapping folder, there is a Points folder that contains a mapping workbook called Cars-Trucks. Also, in the Data Loading Workspace directory is a DataReference.xlsx file which will be used later when using the Execute Data Load tool. Let’s go into how to populate information into these excel workbooks.
Method One: Straight Field Mapping
Step 1:
Open the Cars-Trucks workbook and navigate to the Mapping sheet. We have columns for TargetField, FieldType and Expression which are all system derived. The columns, LookupSheet, LookupKeys, and LookupValue are used for method two. !Type! in the Expression field is mapping all data with or without domains to the TargetField Type. This will transfer data to your new file geodatabase without any translations.
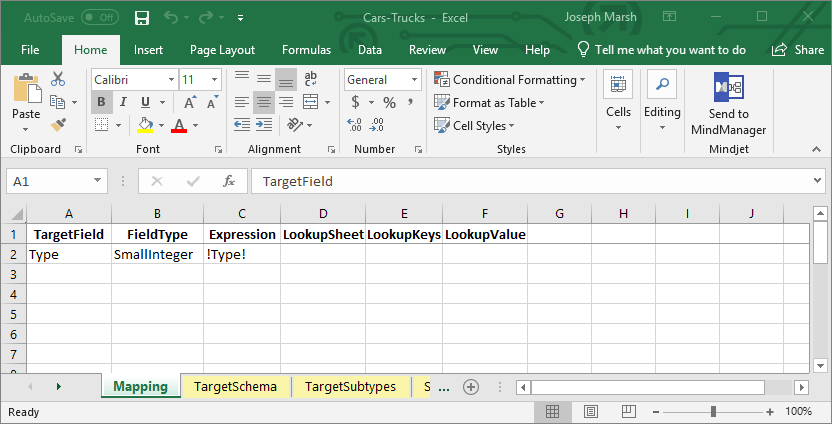
In this example, the domains will be mapped using their existing codes. For example, Red will not be mapped as anything since there isn’t a 0 code in the domain “Type” of our target feature layer. Blue will be mapped as One since they share the domain code of 1. Green will be mapped as Two since they share the domain code of 2.
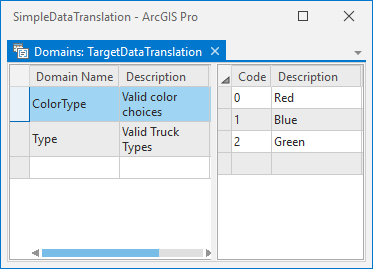
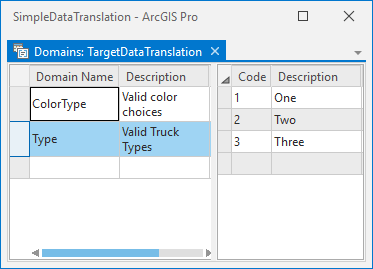
Step 2:
Before we use the Execute Data Load tool to Extract, Transfer and Load our data, it’s time to inspect our DataReference.xlsx workbook.
Each row in this workbook directs the tool to: set the source database, set the target database, and set the mapping workbook. This first row was created when we pointed our Cars feature class to our Trucks feature class during the Create Mapping Workbooks section at the beginning of this workflow.
We have included a True/False column titled Enabled which gives granular control over which mapping workbooks to load. Additionally, we have included columns on the source and target for SQL queries. On the SourceDefinitionQuery column, I can selectively choose a subset of my data. For example, I can filter Red cars by entering Type = 0. On the TargetDeleteQuery, I can truncate the target database for the Trucks feature class by entering 1=1. This will delete all existing records in the target before loading in new data.

We have also added a DataPath sheet to the reference workbook. Here, you can quickly change your source or target data locations.
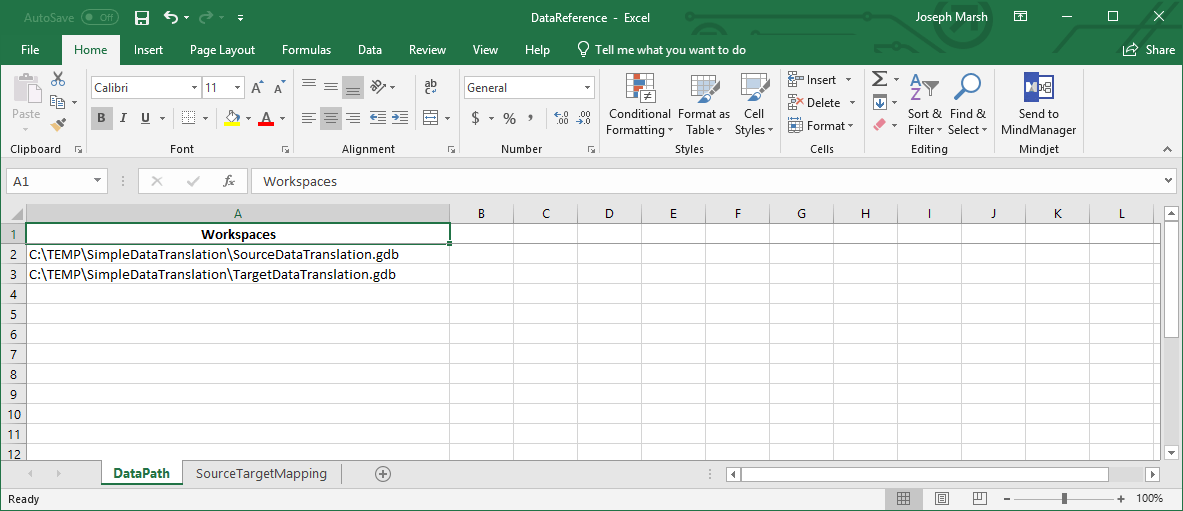
Step 3:
Now that I have inspected everything, it’s time to run the Execute Data Load tool.
- Open the Execute Data Load tool in the Data Translation toolbox.
- Specify the location of the DataReference.xlsx created from the Create Data Loading Workspace tool.
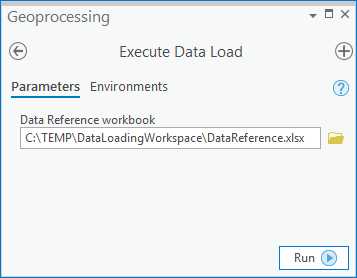
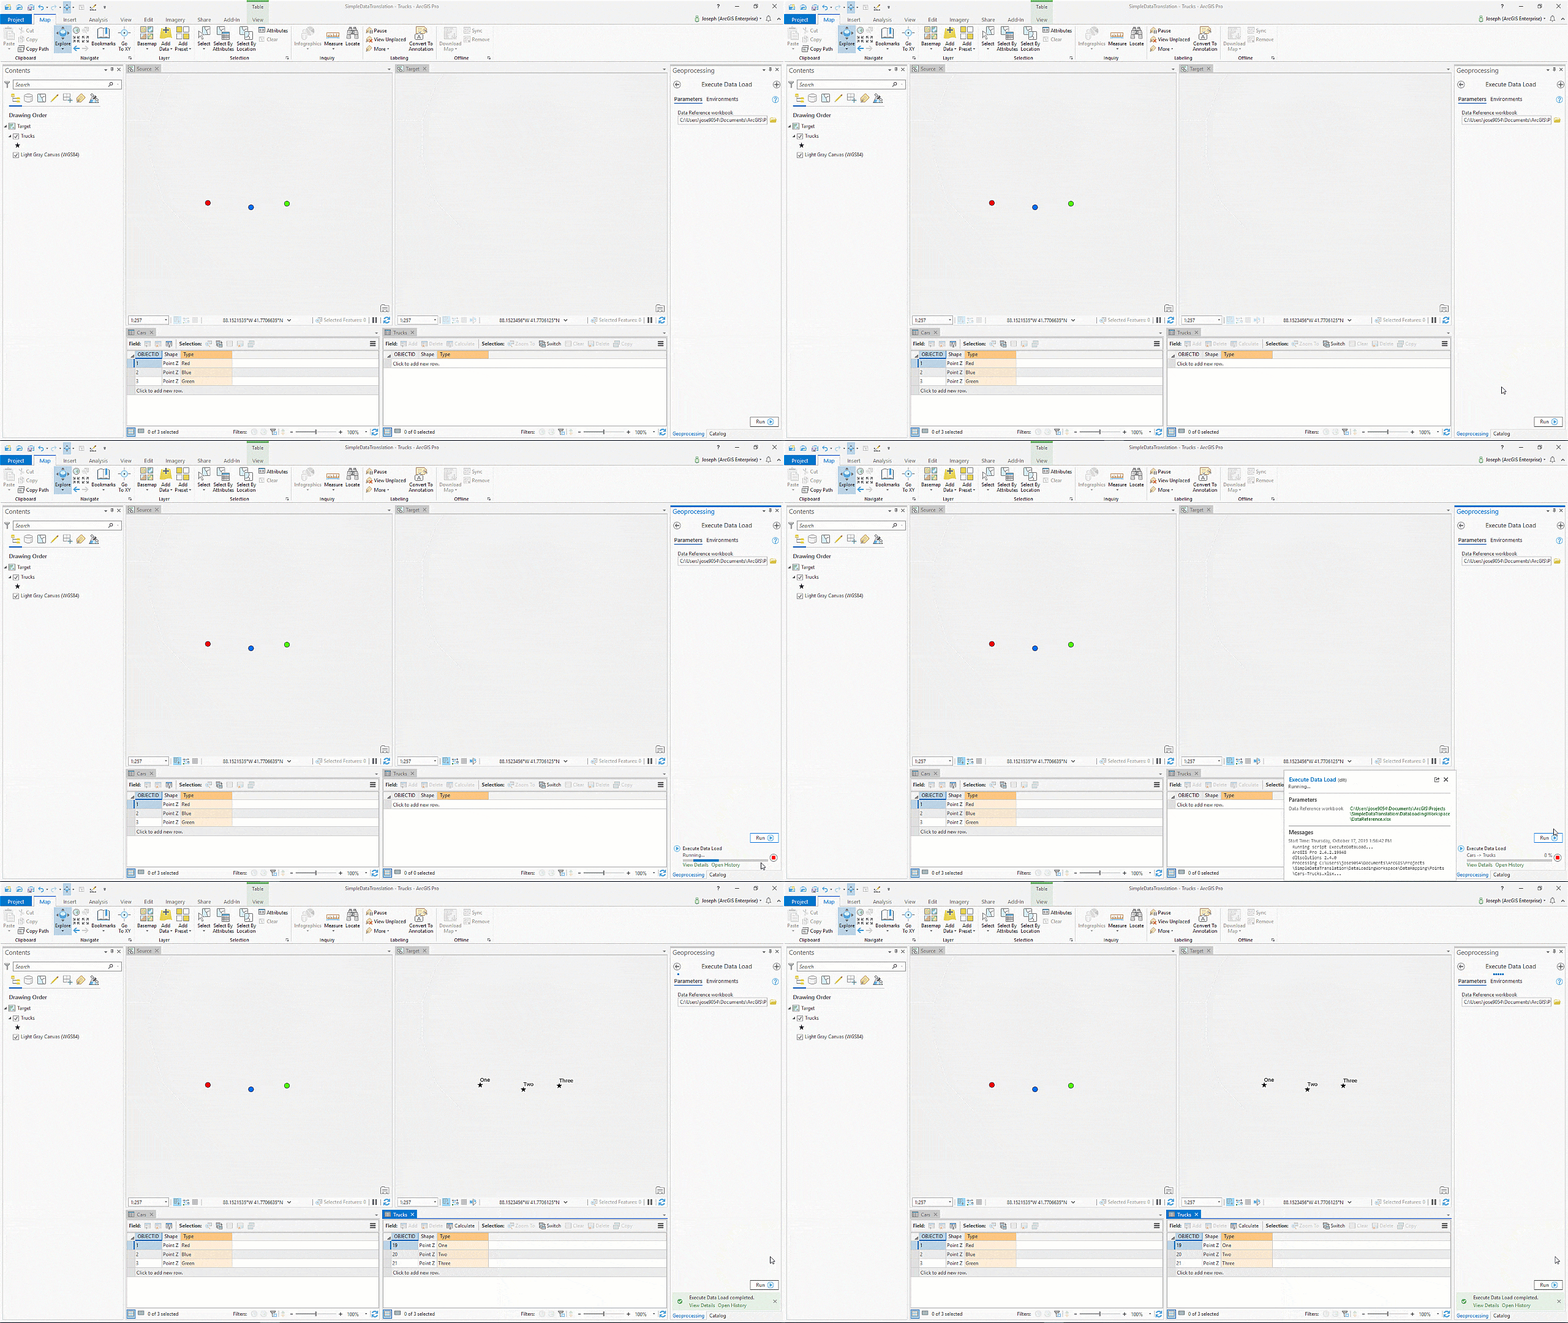
When we run this tool, we return values of 0, One, and Two.
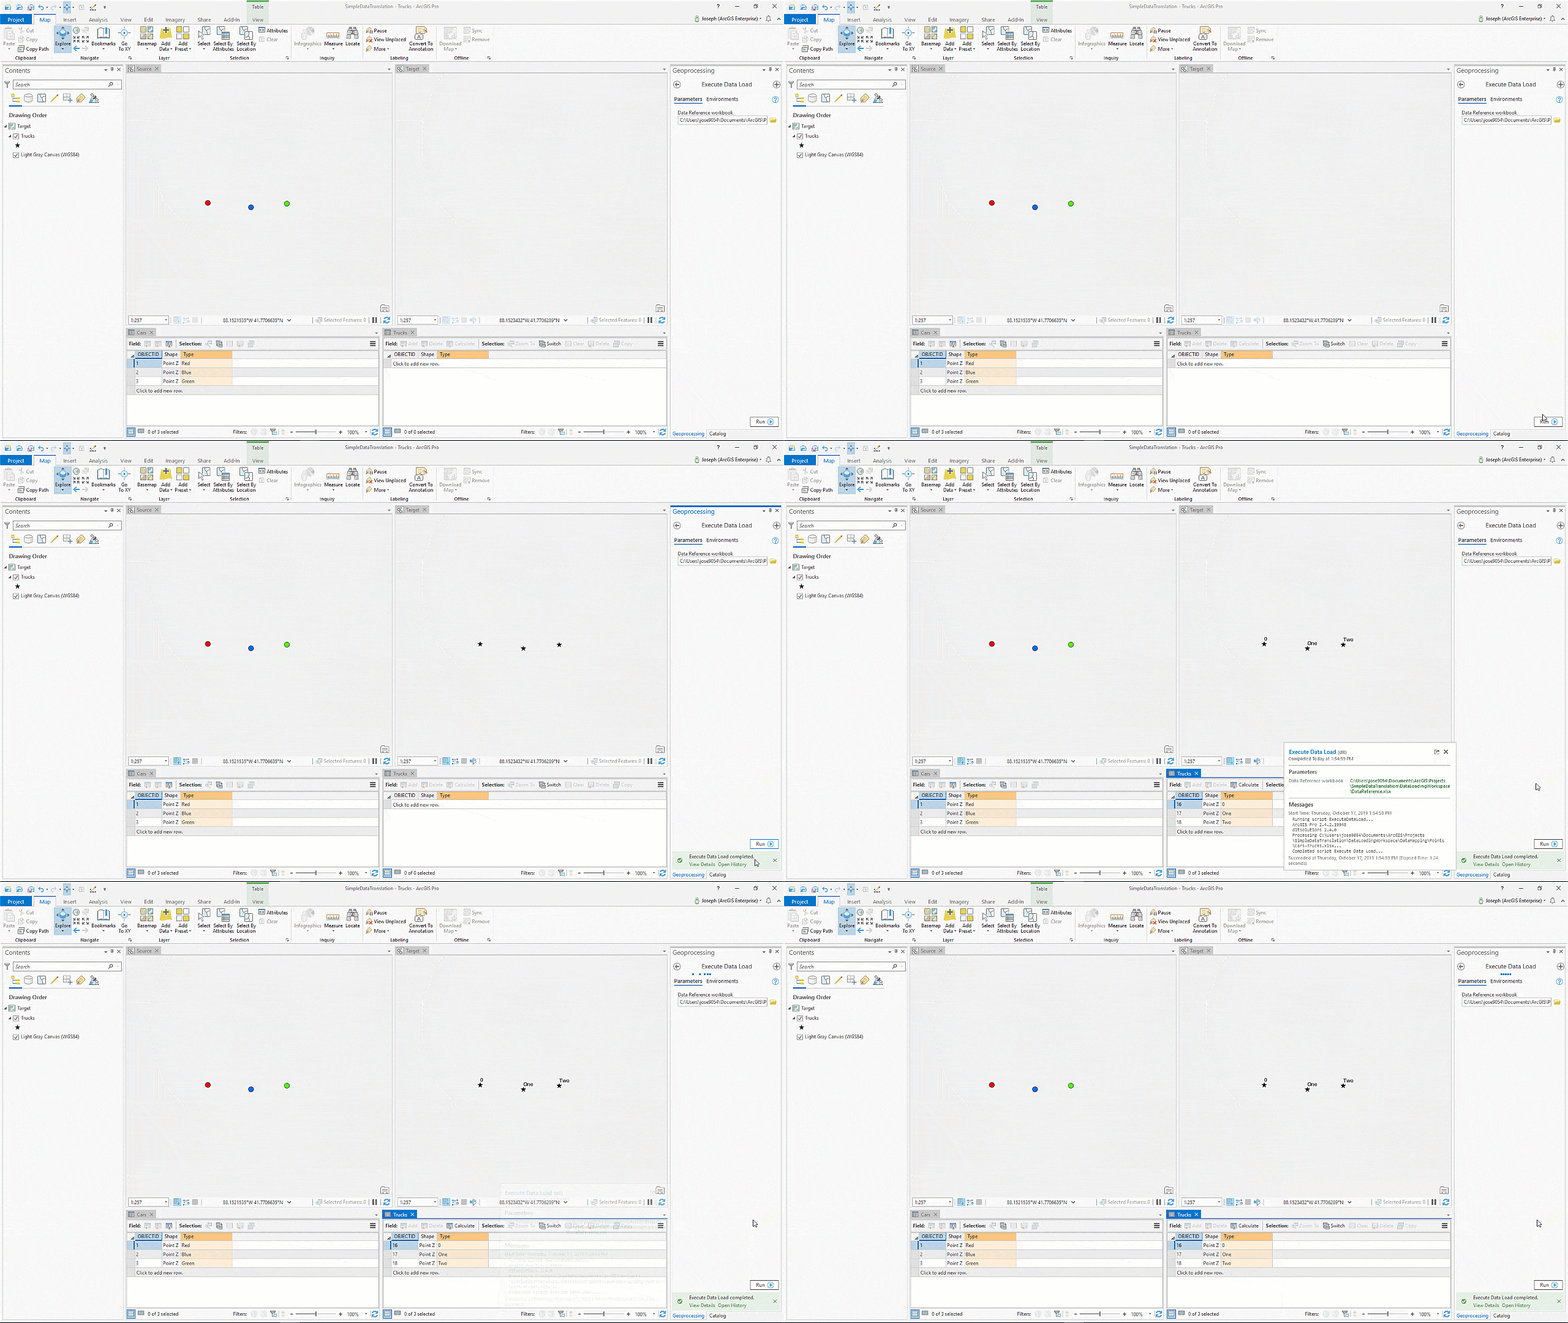
Method Two: Field Mapping with Lookup
Step 1:
Open the Cars workbook and navigate to the Mapping sheet. In this sheet, we will define what sheets and columns to use as a lookup table. Before getting started, this sheet uses conditional formatting to let you know if you are filling out the fields correctly by highlighting required value cells in red. You can use one of two choices when mapping: Field Mapping with Lookup or Expression. If you start entering information into the LookupSheet column, then you must also fill out the LookupKeys and LookupValue columns. With that in mind, if you fill out these three columns, you cannot use the Expression column on the same row.
Since I am not using the Expression field for a straight mapping, I will remove Type from the Expression column. In the LookupSheet column, “Type”, is used by the Execute Data Load tool to locate the correct excel sheet when mapping to Type. In the LookupKeys column, “Type”, is used by the Execute Data Load tool to locate the correct column(s) on the Type tab when mapping to Type. In the LookupValue column, “NewType”, is used by the Load Data from Workbook tool to locate which column to use as a lookup table on the Type tab.
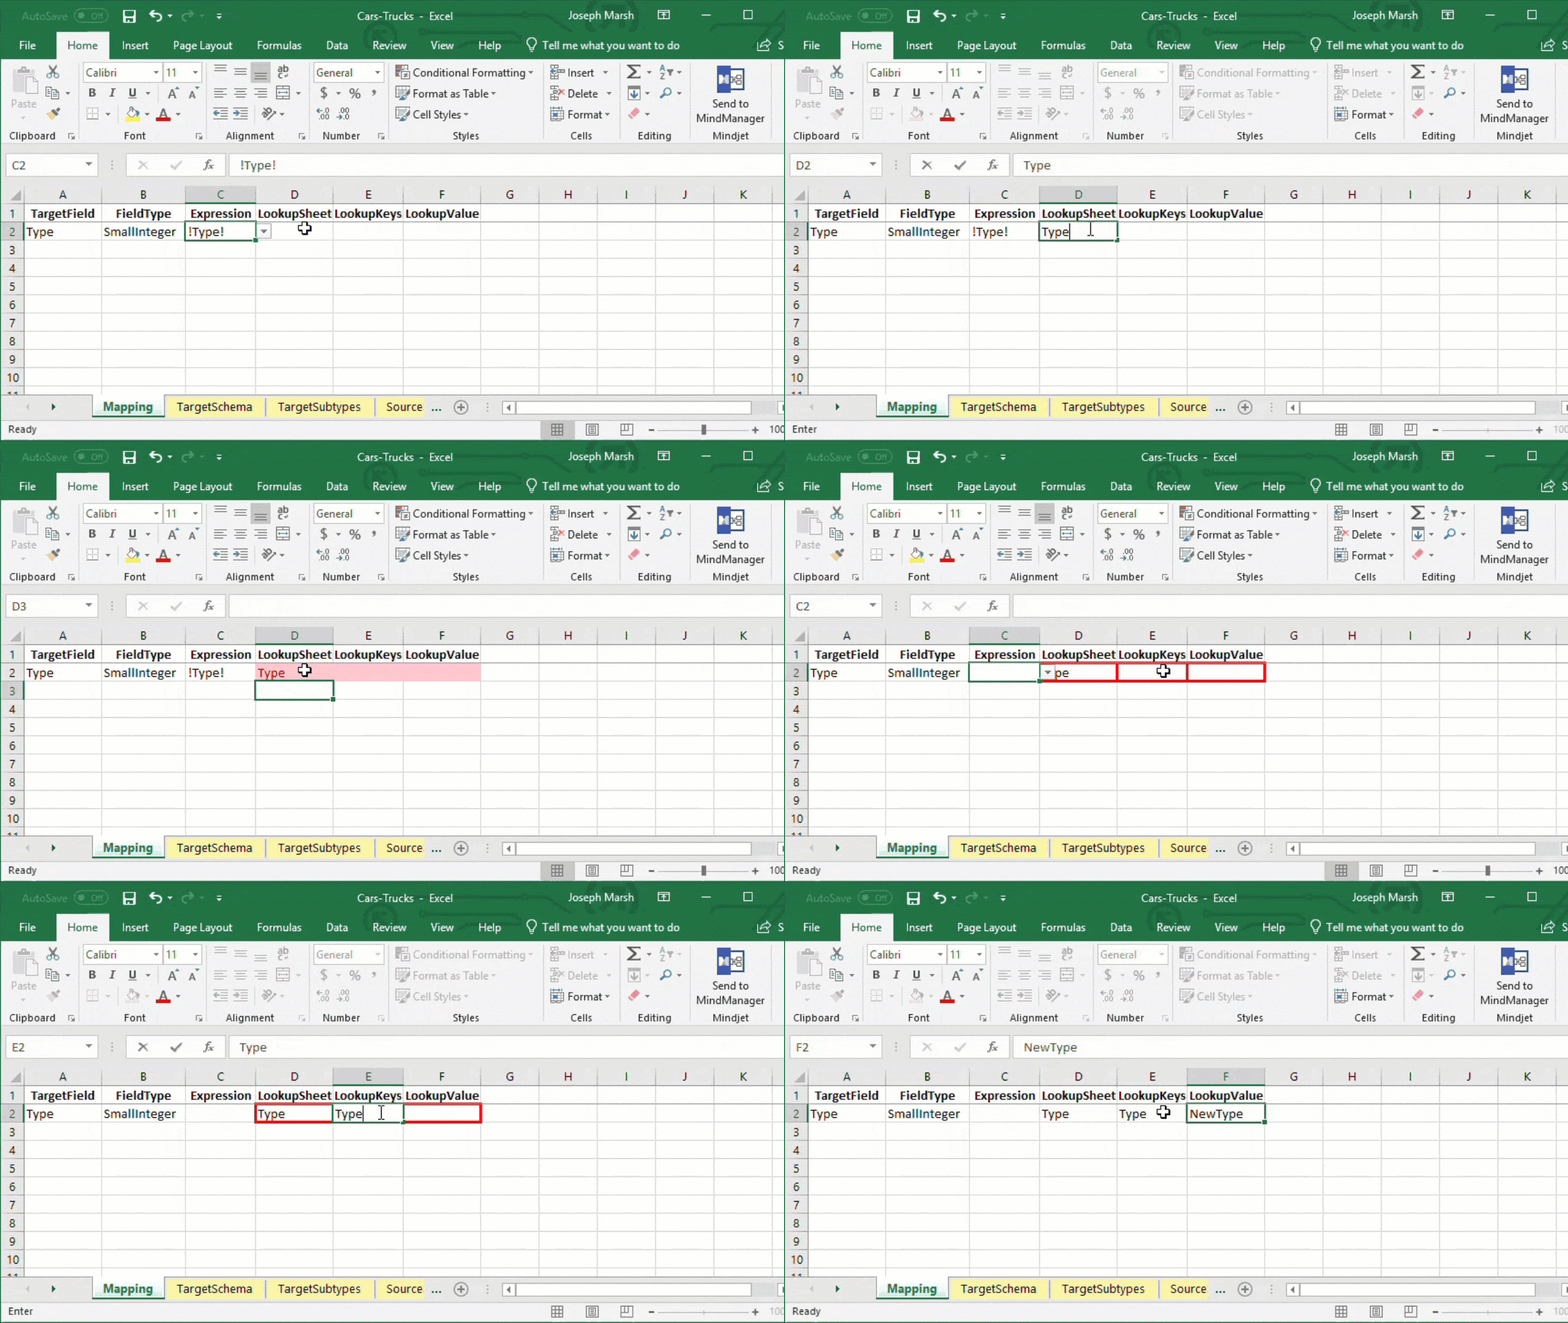
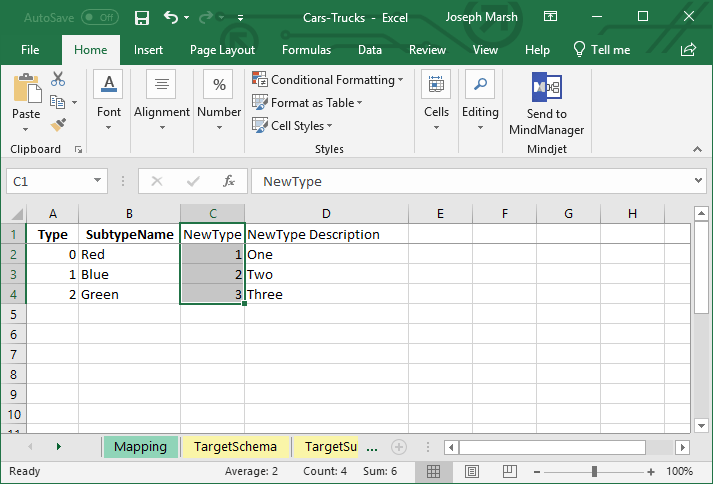
Navigating to the Type tab, the Type column is related to the user-defined column in LookupKeys on the mapping tab previously mentioned. NewType is an user defined column where I can enter in the target values for mapping. I entered the domain values 1, 2, and 3 in column C to map to Red, Blue, and Green, respectively. I have also included their domain descriptions in column D. What I have accomplished in this workbook is creating a lookup table for old domain values to new domain values. Where Red Car was using a domain value of 0 to describe Red, Truck One uses a domain value of 1 to describe One.
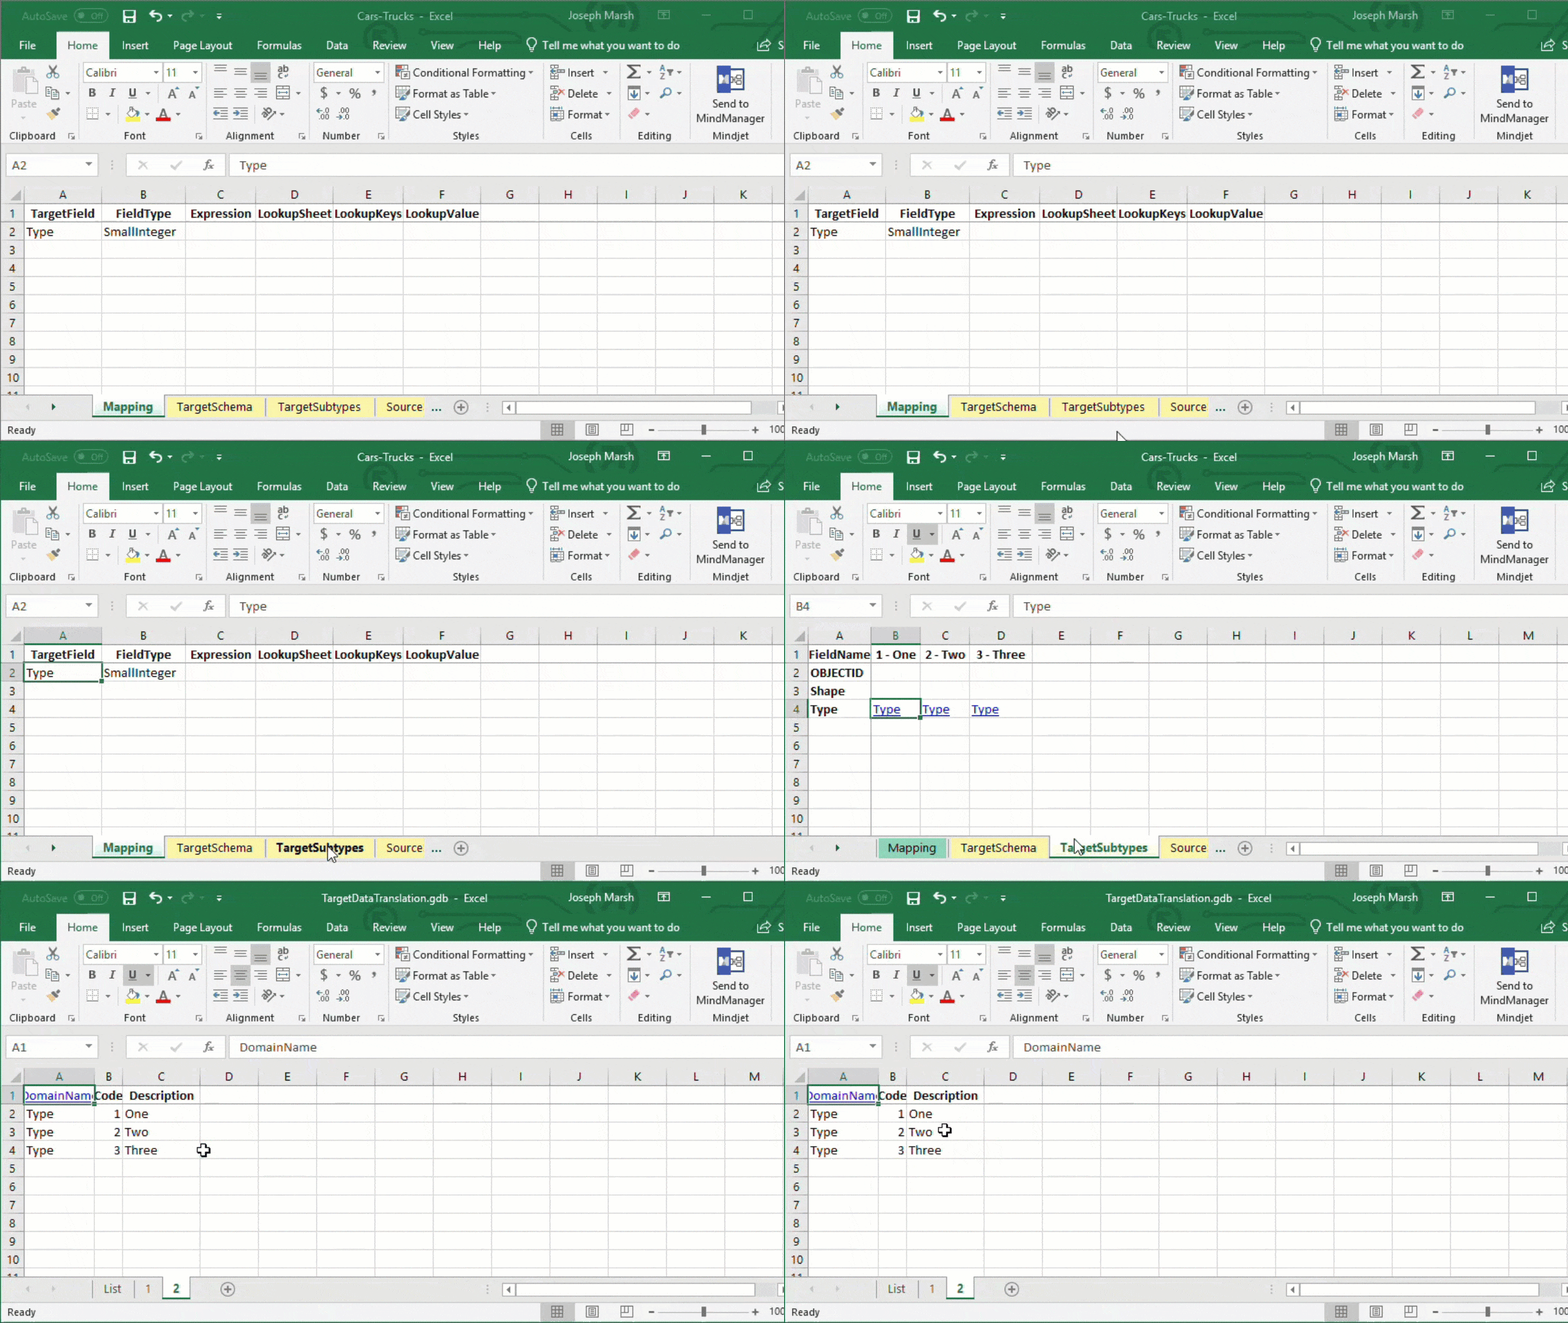
A quick way to lookup these domain values is by using the TargetSubtypes sheet. Now, all you must do is go to your TargetSubtypes sheet. Here, you can view all the domains assigned to each feature. Click on the domain you are interested in and a new workbook will open with all its values. Then, copy one or more domain values and paste it where you need it.
Repeat steps 2 and 3 above from Method One
Here is our final output.
Method Three: Expression
Step 1.
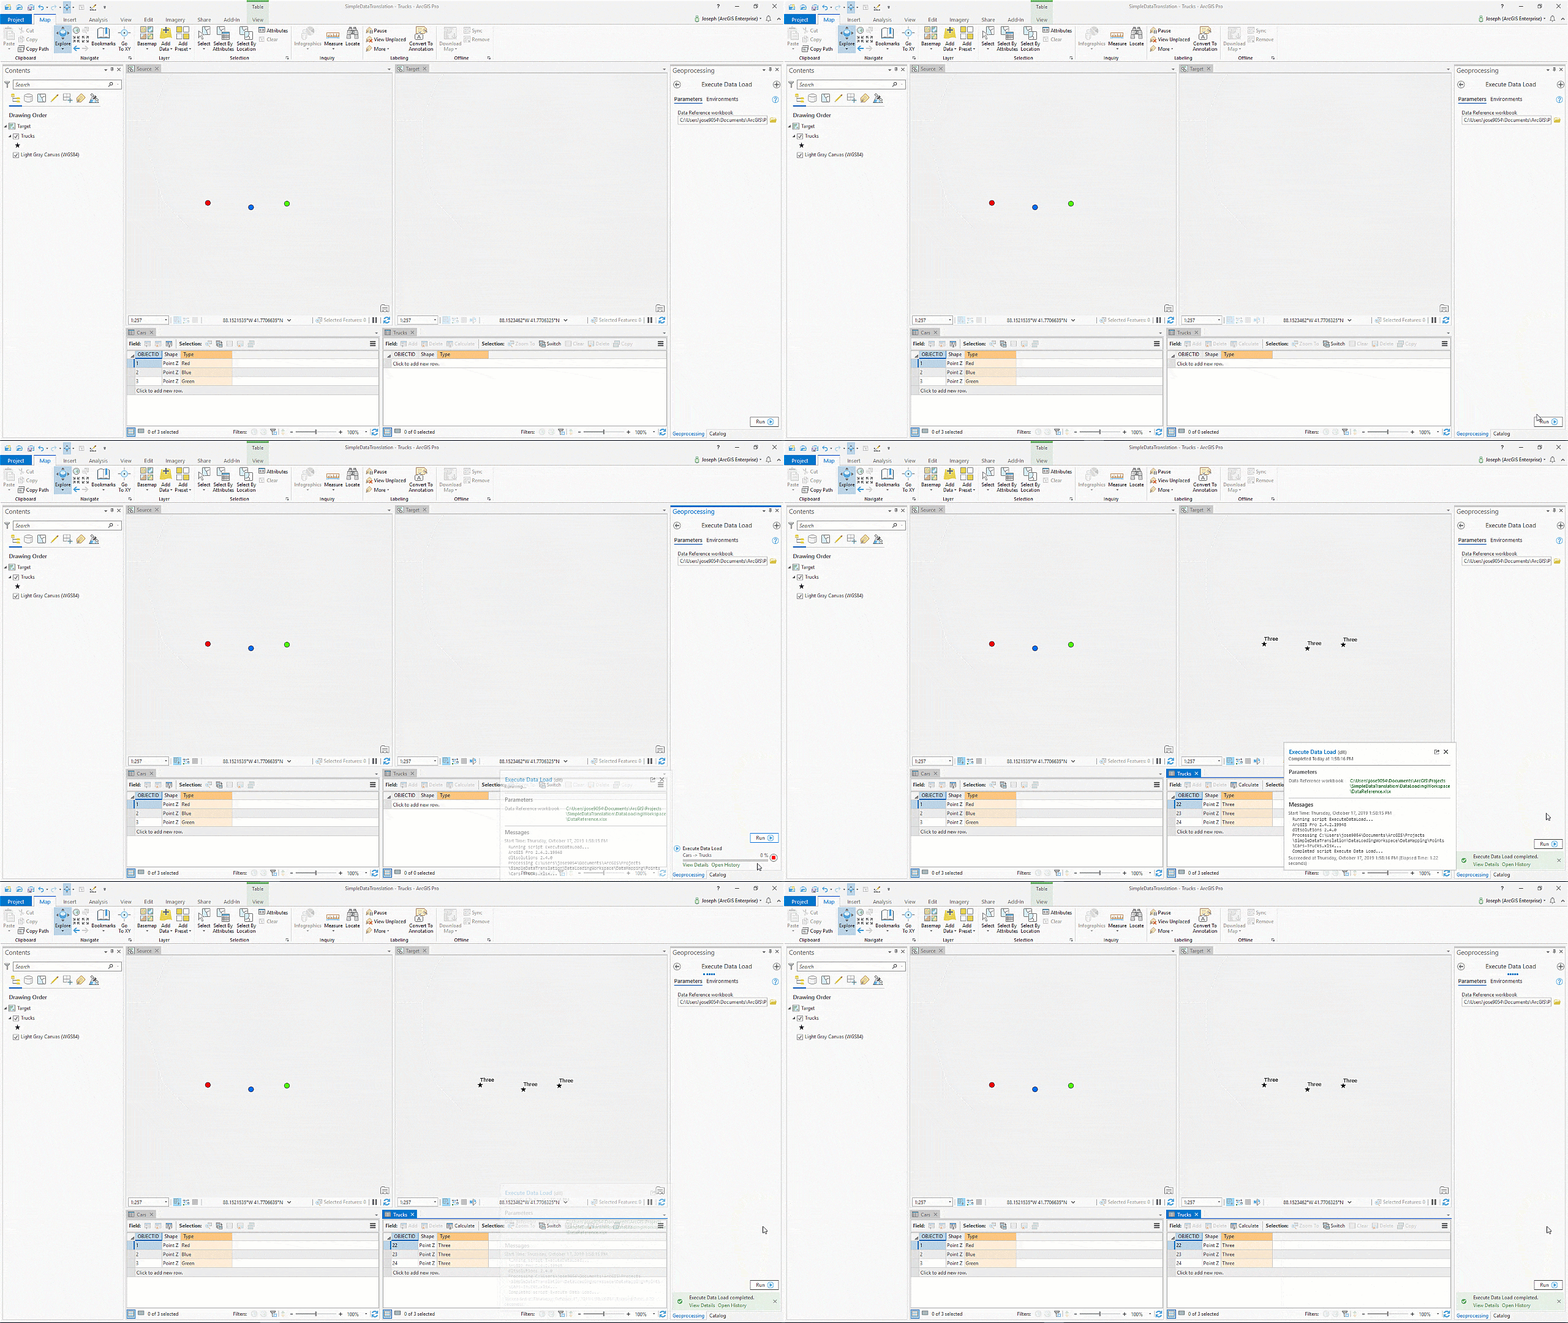
Open the Cars workbook and navigate to the Mapping sheet. In this sheet, remove all the values you entered in Method 2. We will simply enter in a hard-coded value of 3 into the expression column. This will burn-in the value of 3 for Red, Blue, and Green.
The expression column can be used to accomplish many tasks. It can be used to hard code in a value, directly map over a field with the same name and type or call a function. Using python functions in a custom library, the use of this column is limitless. Currently, we have functions to create a UUID that can be stored in a GUID field using the syntax create_guid(). It can also be used to concatenate multiple values using the syntax concatenate.

Repeat steps 2 and 3 above from Method One
Here is our final output.
Thanks for taking the time to learn about the Data Loading Tools. If you need to load data into a utility network be sure to check out the Electric Utility Network Data Loading Solution and the Water Distribution Utility Network Data Loading Solution templates because those solution templates utilize the data loading tools in industry-specific workflows.
Instructions for removing the Data Translation Tools Preview Python Package:
Remove ETLSolutions Python Package from the Data Loading Tools Preview
- Start ArcGIS Pro
- On the Project tab, click Python to access the Python Package Manager.
- In Installed Packages, click etlsolutions
- Click Uninstall
After completing the steps above follow the instructions to install the Data Loading Tools.
Commenting is not enabled for this article.