A few months ago I did a blog showing how to use Collector to create Workforce assignments in the field. Similarly, you can use Survey123 to enable mobile workers to create Workforce assignments in the field.
Why would you pick Survey123 over Collector, or Collector over Survey123? Well, it depends on the apps you are already using in your organization. If your mobile workers are familiar with Collector, use Collector. If they are already using Survey123, keep them using Survey123 for creating assignments, too.
The steps are like those we took for Collector: create a view of the assignments for the mobile workers, make a survey for use in Survey123, give mobile workers access, and then create assignments using Survey123.
1. Create a view of the assignments layer
The mobile workers creating assignments in the field don’t need access to all the data that Workforce uses. To limit the fields and types of data the mobile worker sees, create a hosted feature layer view from the assignments layer. You can do this exactly the same way as we did it for Collector (see the first section, “Create a view of the assignments layer”)—you could even use that same hosted feature layer view you created for Collector.
As a reminder, in making that view you configured a few things:
- Only unassigned assignments are included.
- Only the following fields are included: OBJECTID, Description, Status, Priority, Assignment Type, WorkOrder ID, Due Date, GlobalID, Location, CreationDate, Creator, EditDate, and Editor. Some of these are the fields the mobile worker needs to fill out when creating assignments, and when setting up the survey you’ll include these. The others are set for you by the ArcGIS platform and you’ll hide these in the survey.
- The layer is editable, and sync is enabled.
However, unlike in Collector, the pop-up isn’t used in Survey123, so you don’t need to customize it. Instead, you’ll define the layout used to create the assignments as part of creating your survey in Survey123. We’ll get into this in detail next.
2. Create a survey for Survey123
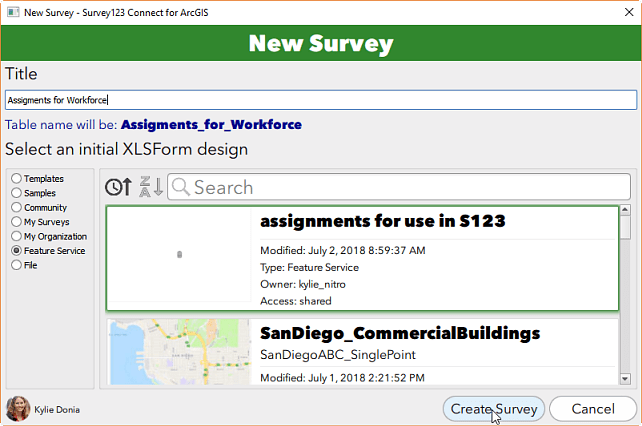
Open the Survey123 Connect desktop app to create your survey (the web app doesn’t support creating a survey from an existing hosted feature layer). Click New Survey to get started. Give the survey a name, and choose the Feature Service option. Select the hosted feature layer view you created based on your assignments layer.

A survey is created using all the fields in the view. The spreadsheet that defines the survey opens. In the Settings tab, you see the fields you included in your view. In the Choices tab, you see that the types, statuses, and priorities from Workforce are honored. Make sure not to change these.
Note: If you didn’t use a hosted feature layer view to remove some fields, you could also remove them from the survey by removing them from the spreadsheet.
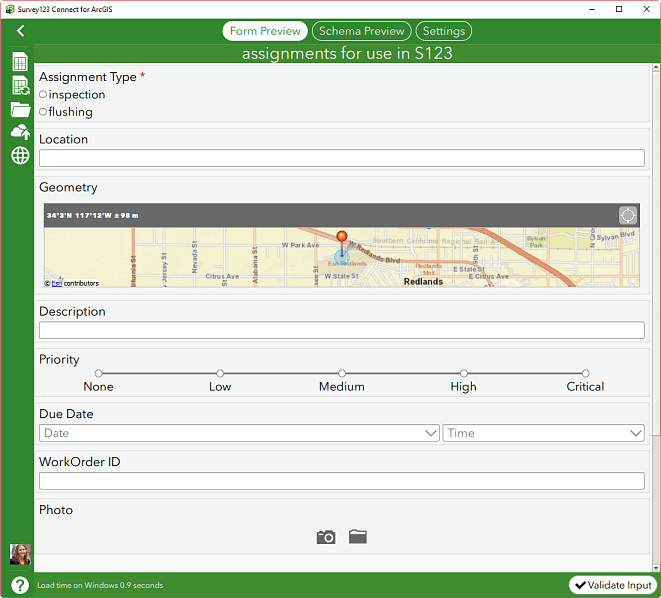
The mobile worker must give a status and assignment type, so mark them as required in the spreadsheet.

Since you don’t want the mobile workers changing the assignment status, set that field’s type to hidden, and give it a default value of 0 (unassigned).

Reorder the fields in the spreadsheet so that required and more commonly populated fields display first.

Change the appearance of Priority to likert so that the choices display as a scale as the mobile worker is filling out the survey.

Want to let your mobile workers add attachments? Add a question of type Image, with a name and label like “photo:”

Save your spreadsheet changes, and the preview of the survey in the Survey123 Connect window updates to show your changes.

3. Publish and share your survey
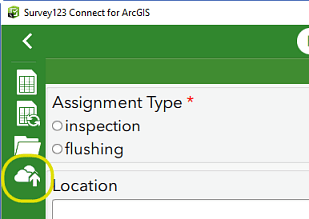
Click Publish.

You are reminded that you used an existing feature service, so a new feature service won’t be created. Click Publish Survey. Your survey is published to your ArcGIS organization in a folder of My Content that is named with “Survey-” followed by your survey name.
Think about who needs access to your survey. You’ll need to share both the survey and the hosted feature layer view with those mobile workers. Use the browser and their item detail pages to share them.
If you want all mobile workers in your Workforce project to be able to create assignments in Collector, share them with the group created with your Workforce project. Dispatchers in the project would also have access to the survey: this may or may not be useful depending on your project.
If instead you want to provide only a subset of mobile workers with access to create assignments in Survey123, create a new group (see how using either the ArcGIS Online or the ArcGIS Enterprise web site). Only add into the group mobile workers that you want using Survey123 to create assignments. After joining the group through the ArcGIS Online or ArcGIS Enterprise website (or after an admin adds them without their need for approval), these mobile workers can access any content shared with the group. To give them access to the content they need to create assignments, share with the group the survey you created for Survey123 and the hosted feature layer view.
4. Create assignments in Survey123
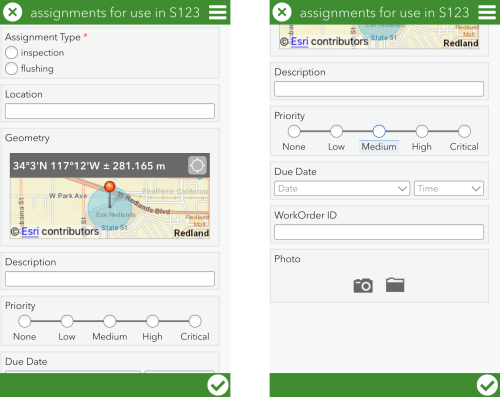
The mobile workers can download the survey in Survey123 and create assignments. Some things to keep in mind:
- The mobile workers won’t be able to use all the validation and user integration included in the Workforce web app, but only the validation you built into the survey.
- They can’t set a dispatcher ID. That’s ok, as the mobile worker might not be a dispatcher.
- Need to include an attachment? Use the camera and attach as an image.

Now your mobile workers can contribute their field findings into Workforce using an app they are already familiar with, whether Survey123 or Collector. Work they notice in the field is recorded and ready for assignment. The back office knows what needs to be done, and work is completed according to your staff’s workflow.


Commenting is not enabled for this article.