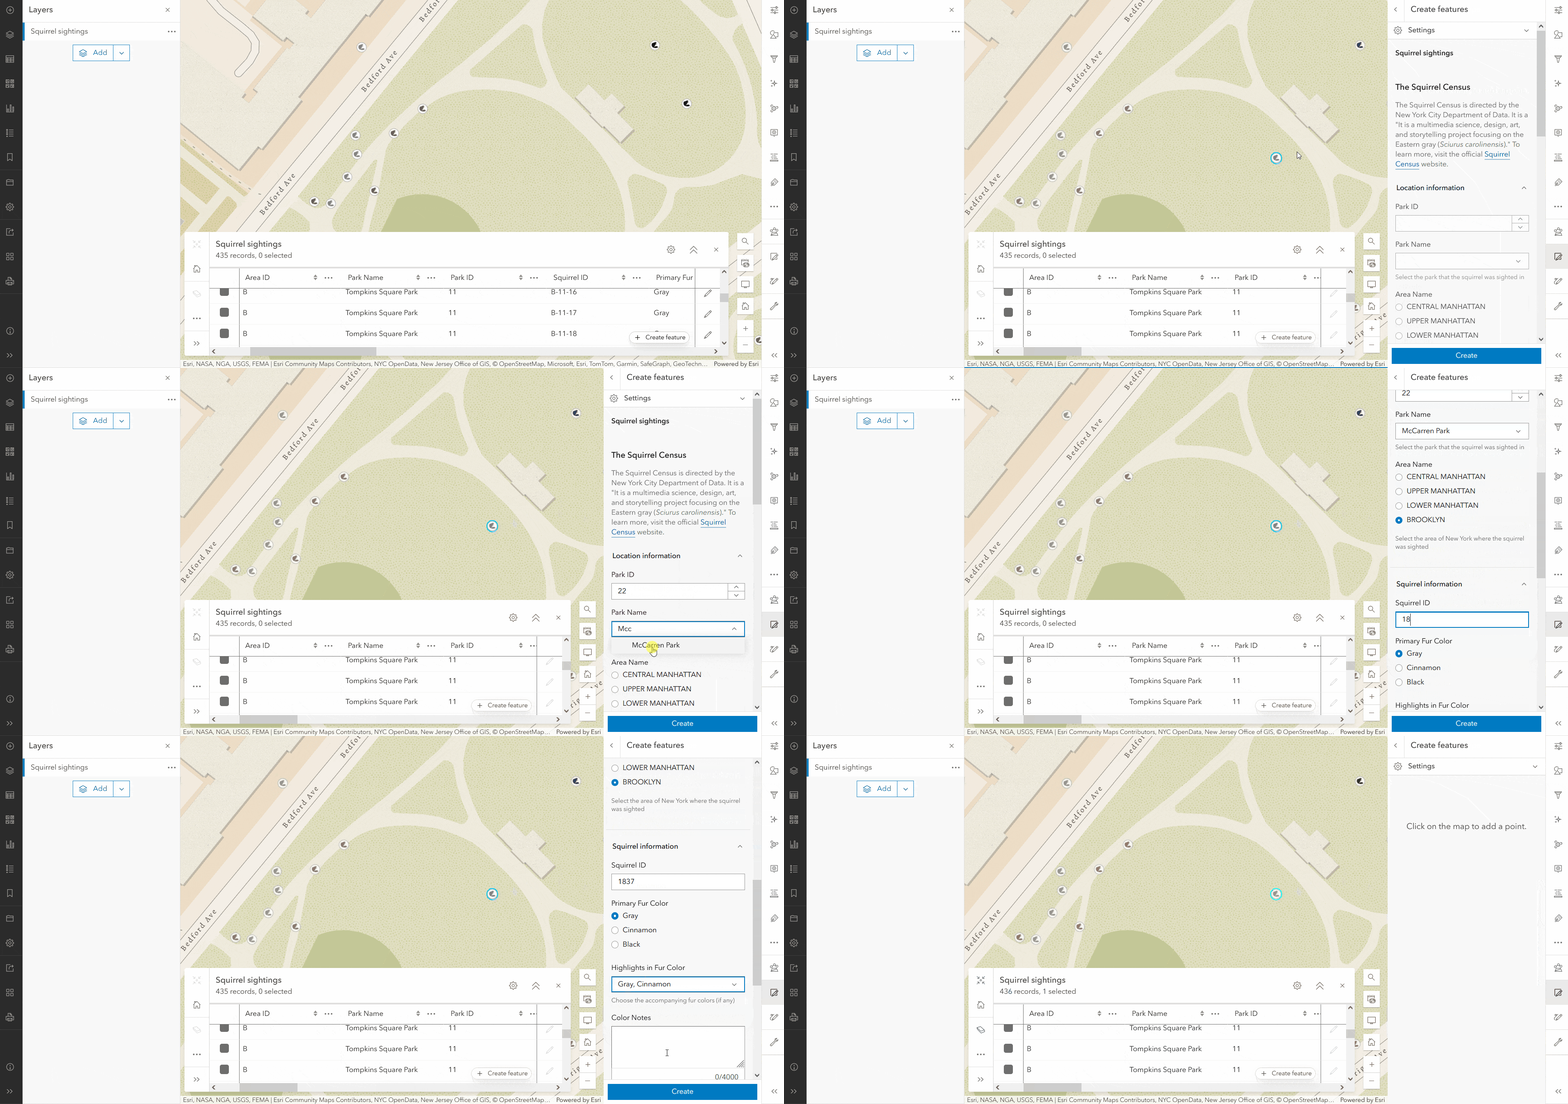
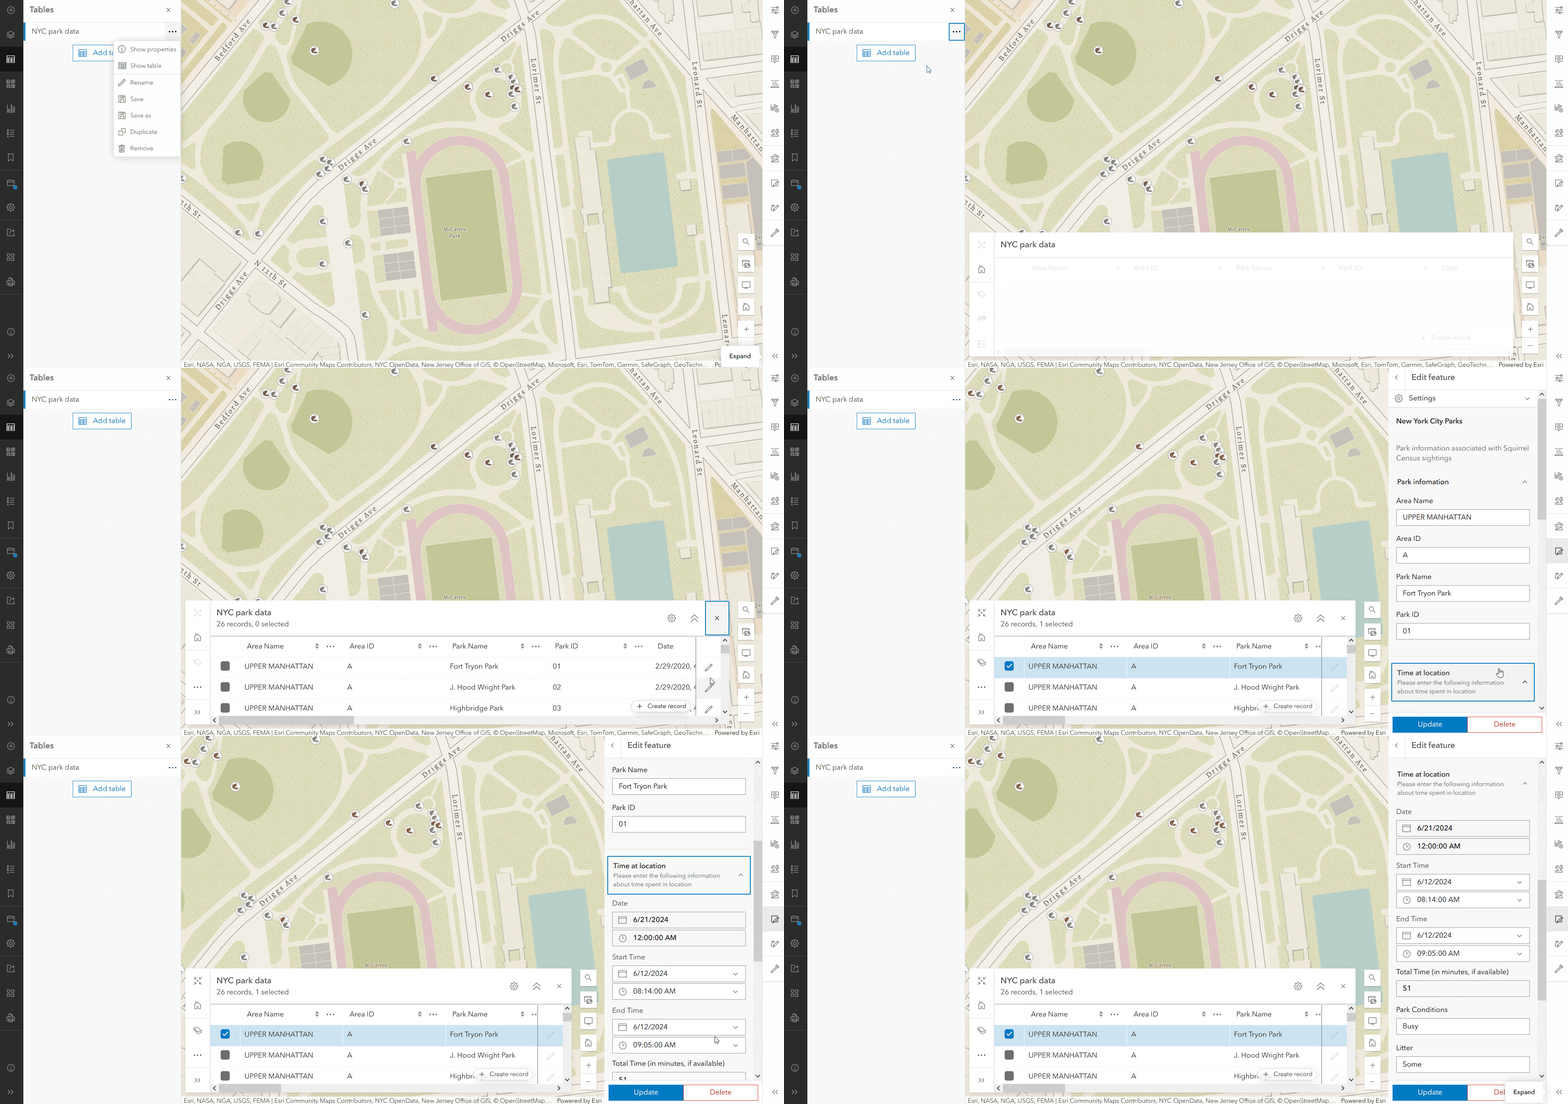
We are excited introduce two new entry points to the Editor pane from the table: Create record and Edit record. Prior to the June 2024 update of Map Viewer, you were unable add or delete non spatial records. Now using the new Create and Edit  buttons in Map Viewer, you can launch the Editor pane from the attribute table to add, update, or delete both features and records. This blog will cover how to access these features and how to leverage forms to get the most out of your editing experience.
Authoring forms for table layers
Prior to the most recent update of Map Viewer, the only way to edit non spatial data was directly within the table. This meant that you were unable to access all of the rich, attribute editing features that forms provide. Now that Map Viewer has a way to create and edit records via the table, you can also create forms for table layers. Calculated expressions, conditional visibility, inputs, and so much more can be brought to life in your table layers.
To learn more about authoring forms, check out Forms aren’t just for ArcGIS Field Maps Anymore.
Creating features and records from the table
Follow the steps below to start creating features from the table.
- Open the attribute table for a feature layer or table layer with editing enabled.
- Click the “Create feature” (or “Create record”) button in the bottom corner of the table.
- The Editor pane will open.
- If there are multiple feature templates available for your layer, choose the correct one. Optionally, start drawing your feature on the map.
- Enter the attributes in the Editor pane, then click Create.

Editing features and records from the table
Although you can edit existing features in the table by double clicking the cell, the attribute table now has a new edit column. This is particularly helpful if you want to leverage forms for a hosted layer or table, or if you simply want have an alternate view of your attributes.
Follow the steps below to start creating features or records from the table.
- Open the attribute table for a feature layer or table layer with editing enabled.
- Scroll to the desired feature or record, then click the Edit
 button in the far-right column.
 - The Editor pane will open with the attributes of your selected feature or record.
- Make any changes the attributes in the Editor pane, then click Update.

We are excited to introduce these new enhancements to make creating and editing data in the table easier. The June 2024 update of ArcGIS Online doesn’t stop here though, check out some of our other blogs linked below to explore additional features new to the attribute table.

Article Discussion: