Do you have layers that occasionally need an update? An easy pattern that we use on the environment team for our ArcGIS Living Atlas layers incorporates layer views to make updates quick, easy, and an efficient way to manage your important feature layers.
What is a Layer View?
A hosted feature layer view looks and acts much like a hosted feature layer. However, layer views don’t have data of their own. As the name implies, layer views are simply a second view of a hosted feature layer that enables you to maintain a public facing layer view while keeping the feature layer behind it hidden.
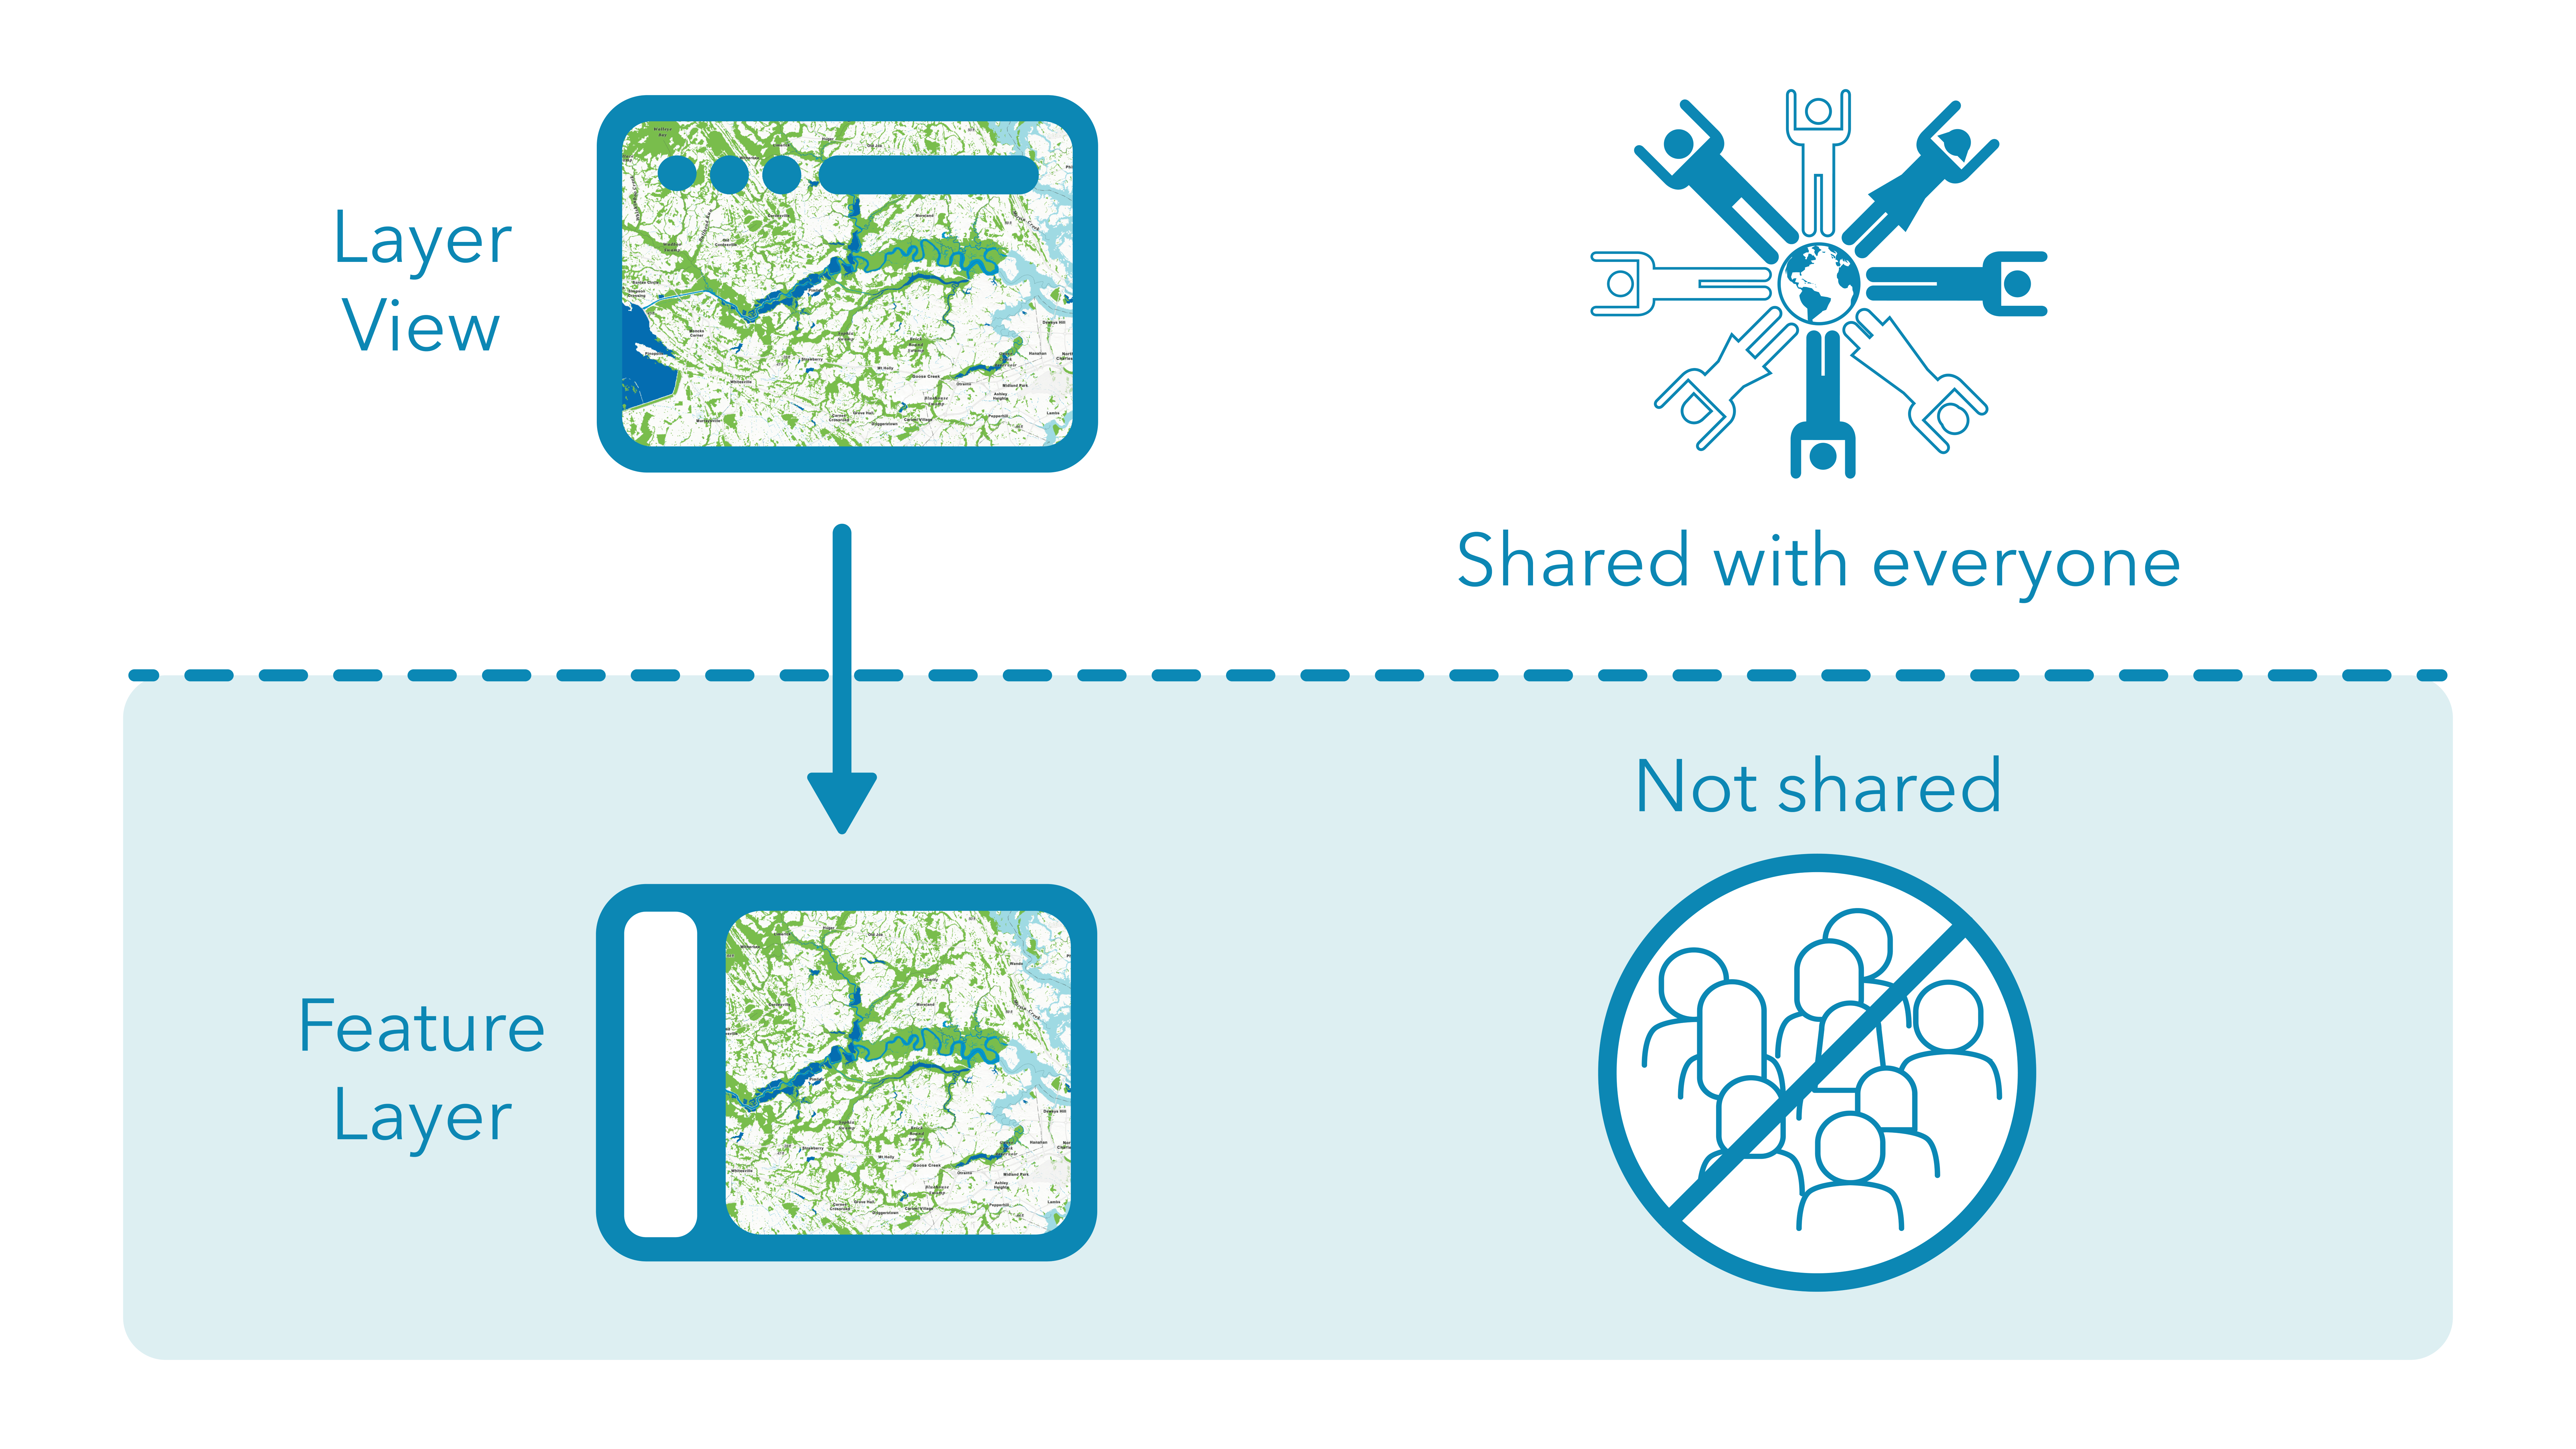
This simple architecture of a shared layer view and a hidden feature layer enables us to do updates out of sight from our users and make updates with minimal impacts. ArcGIS Online provides a simple process to switch which feature layer a layer view uses. This layer swap is a powerful tool that will make your work easier.
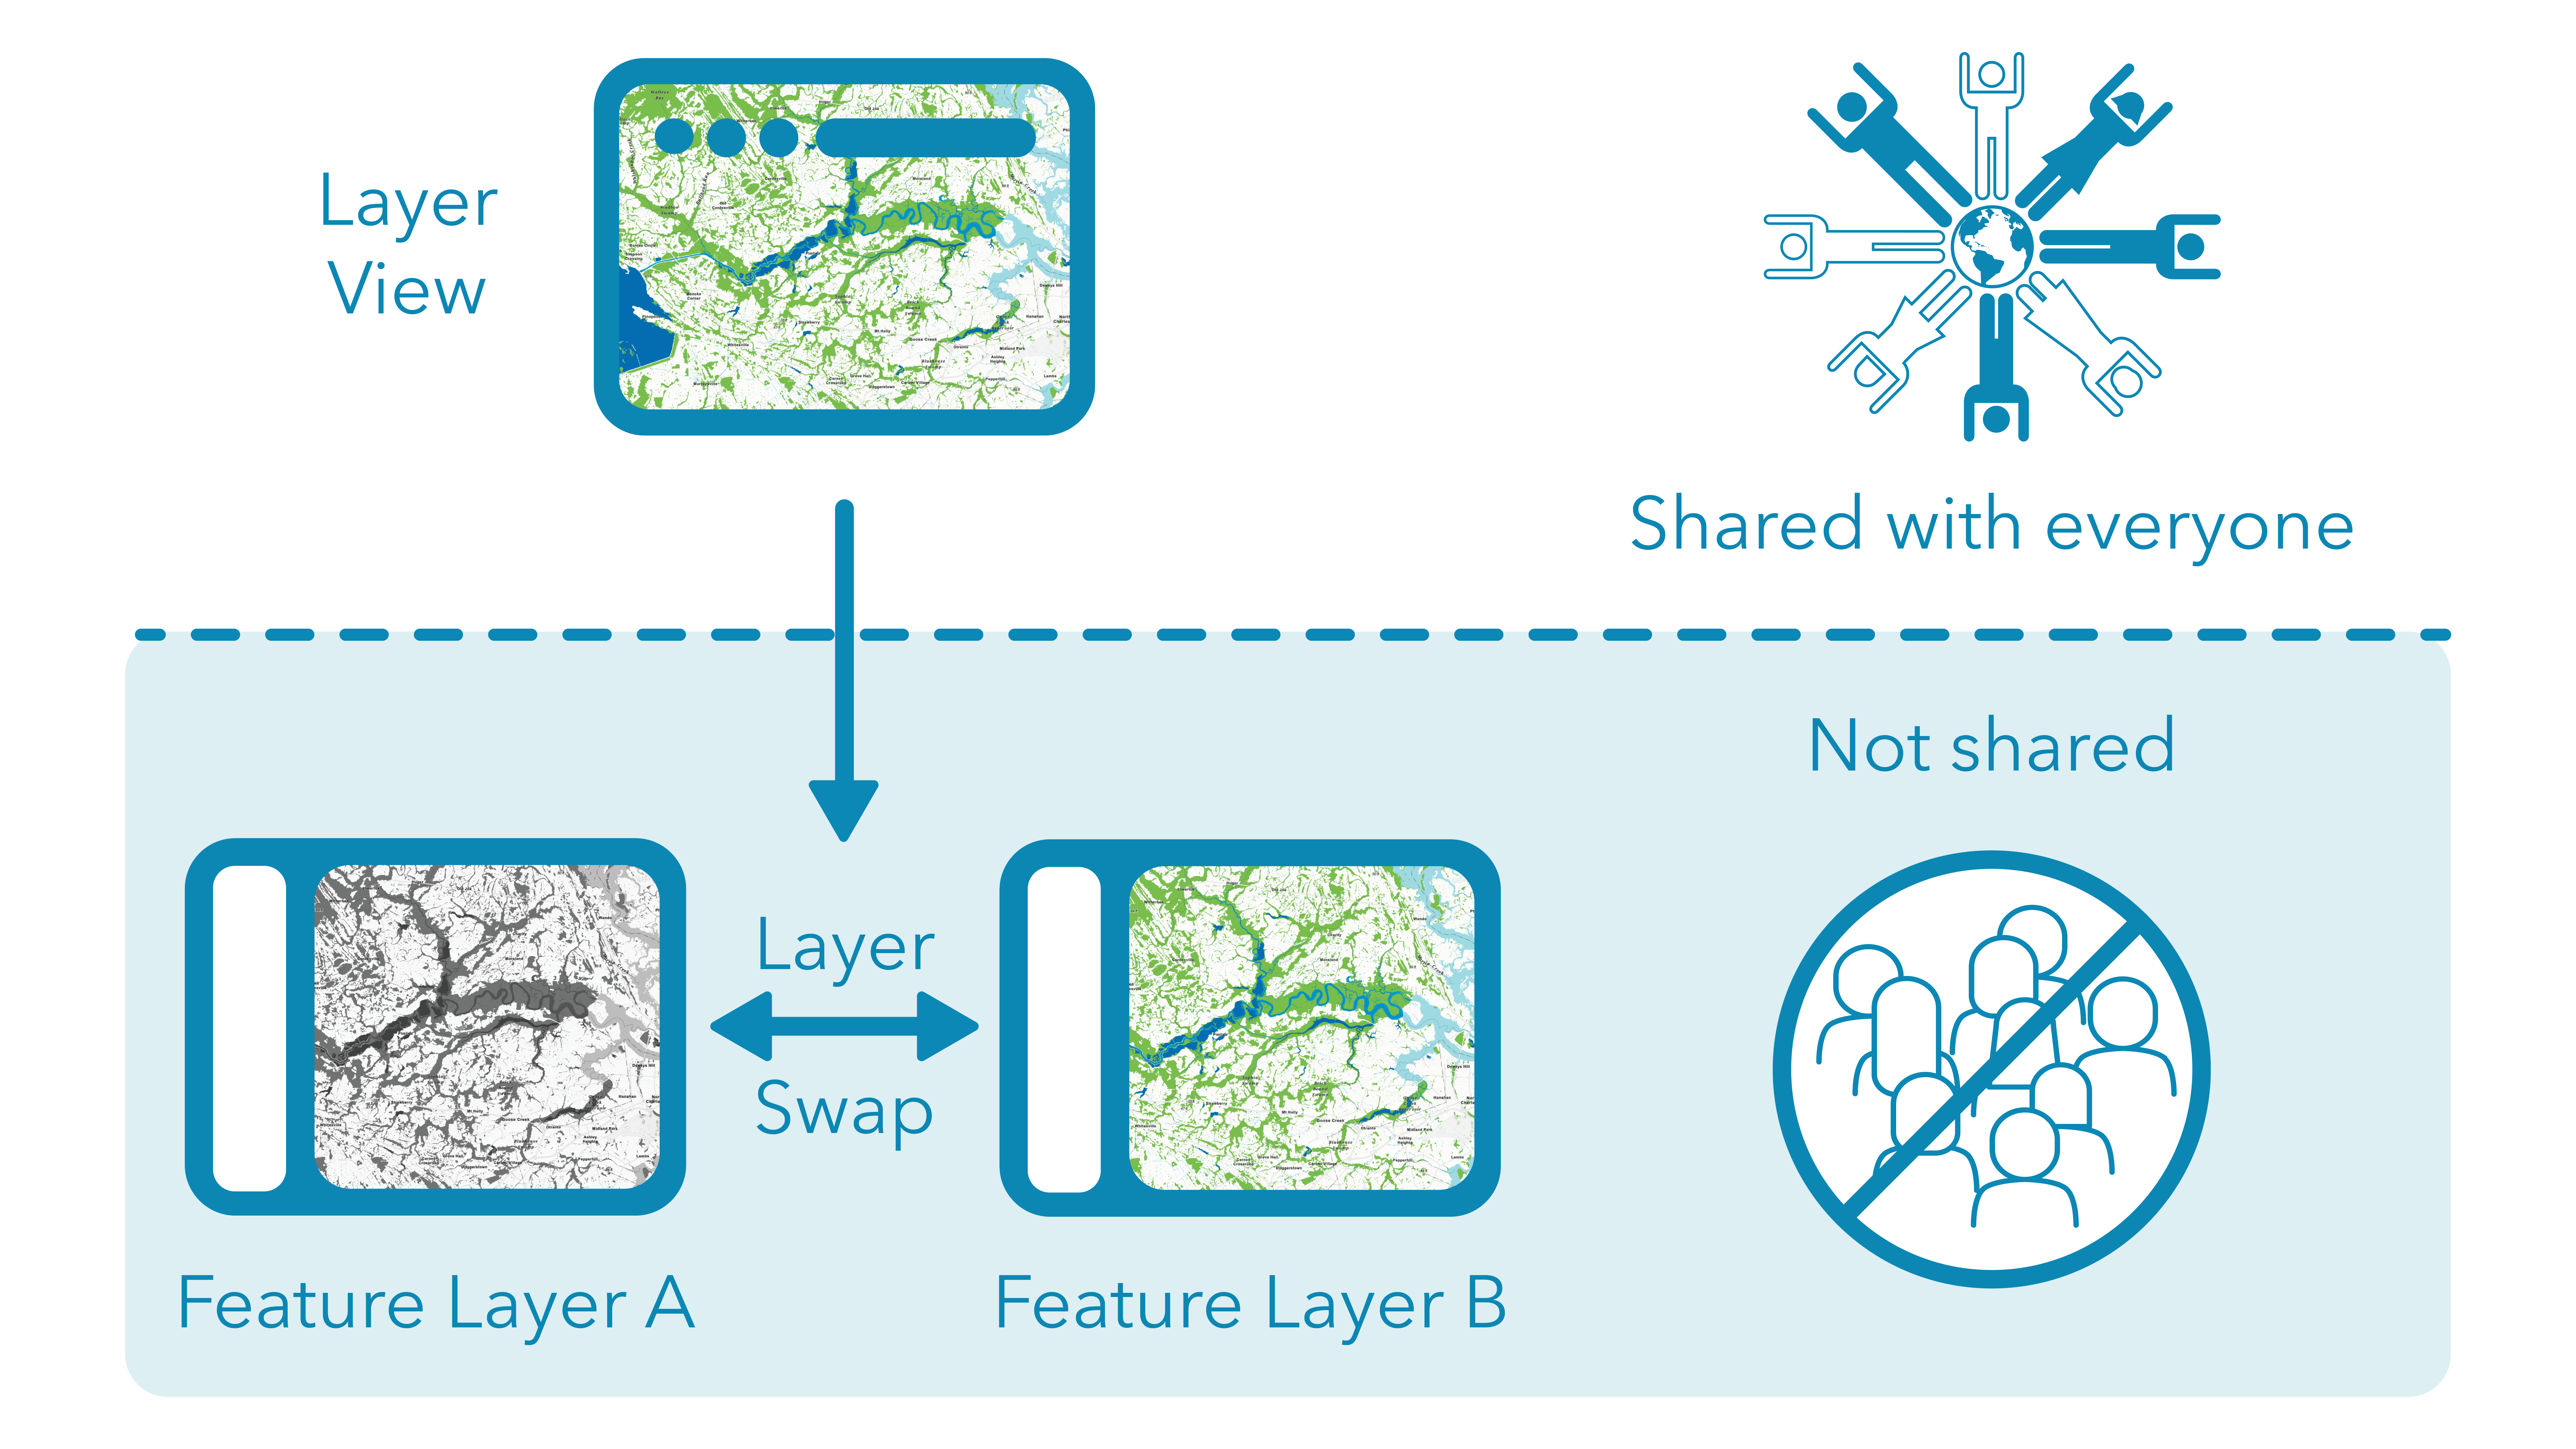
Benefits of layer swap
- Seamless and instantaneous data updates
- Hides the lengthy publishing process and gives you time to check the layer prior to making a public-facing change
- If something doesn’t look right with your update you can quickly and easily swap back – No harm no foul!
- Symbology, pop-up configuration and other properties can be saved in the layer view and will be maintained after the swap
- Maintains old feature layers leaving an archive of past versions
Layer swap architecture is particularly useful when working with large layers. Updating a very large feature service can take minutes to hours, using a layer swap enables you to hide your big layer while it publishes. This lets you take your time and check your work before sharing it with your users.
Performing a layer swap is quick and easy
Start with a view layer. If you need help creating a view layer this blog will get you started. Note that you must be the owner or administrator of a hosted feature layer to create and manage layer views from it.
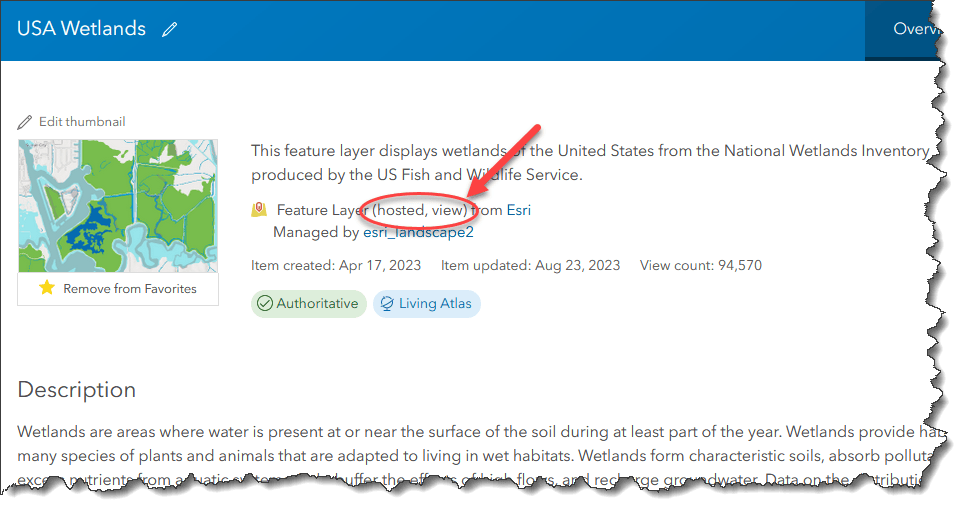
The item page tells us that this is a view layer
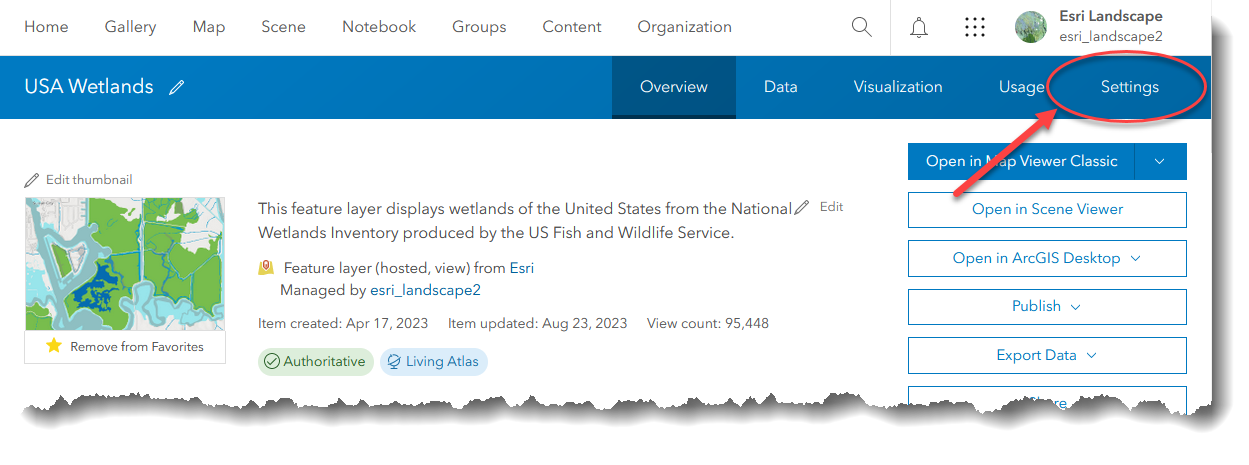
To swap layers, first click the settings tab, on the upper right of the layer view’s item page
Then scroll down and click “Update View”

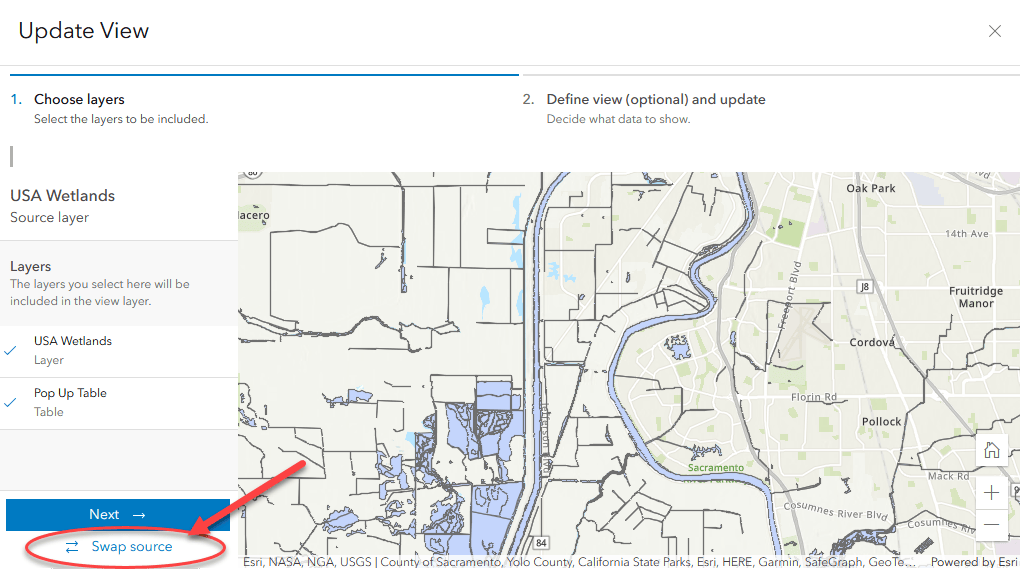
The Update View window will open. Select “Swap source” at the bottom of the window.
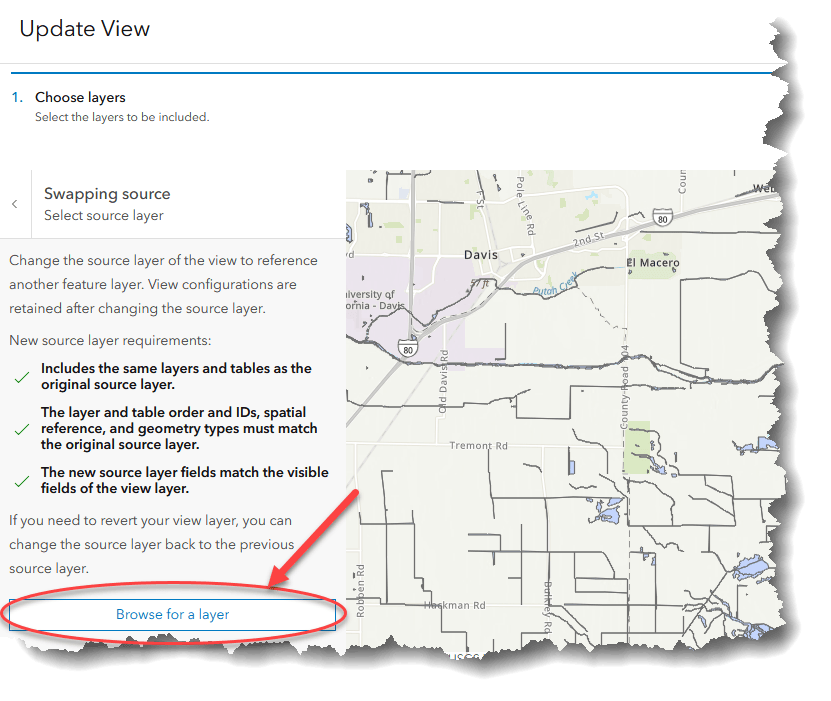
The window will remind you of the basic requirements for a layer swap to work. Click “Browse for a layer”.
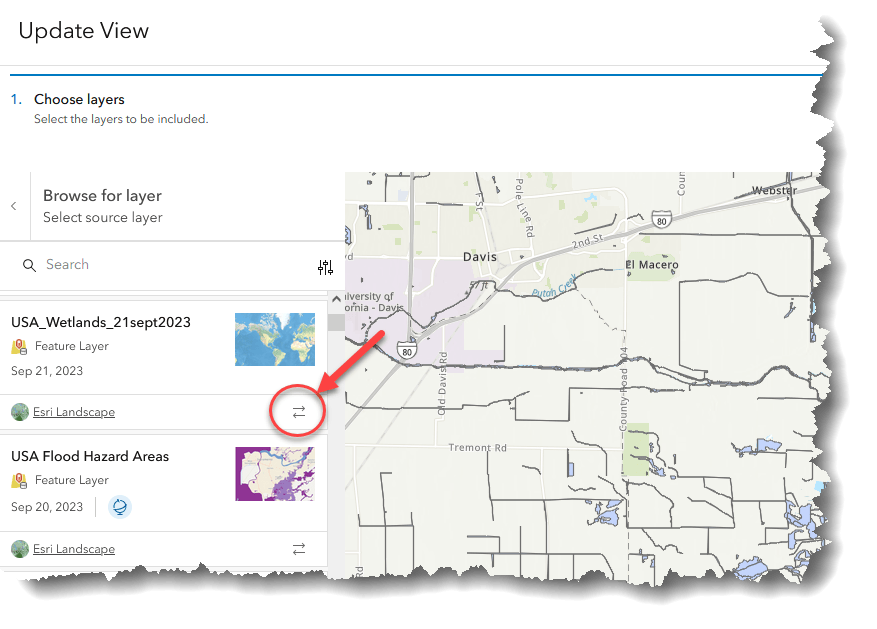
Find your replacement layer and click the arrows to swap layers.
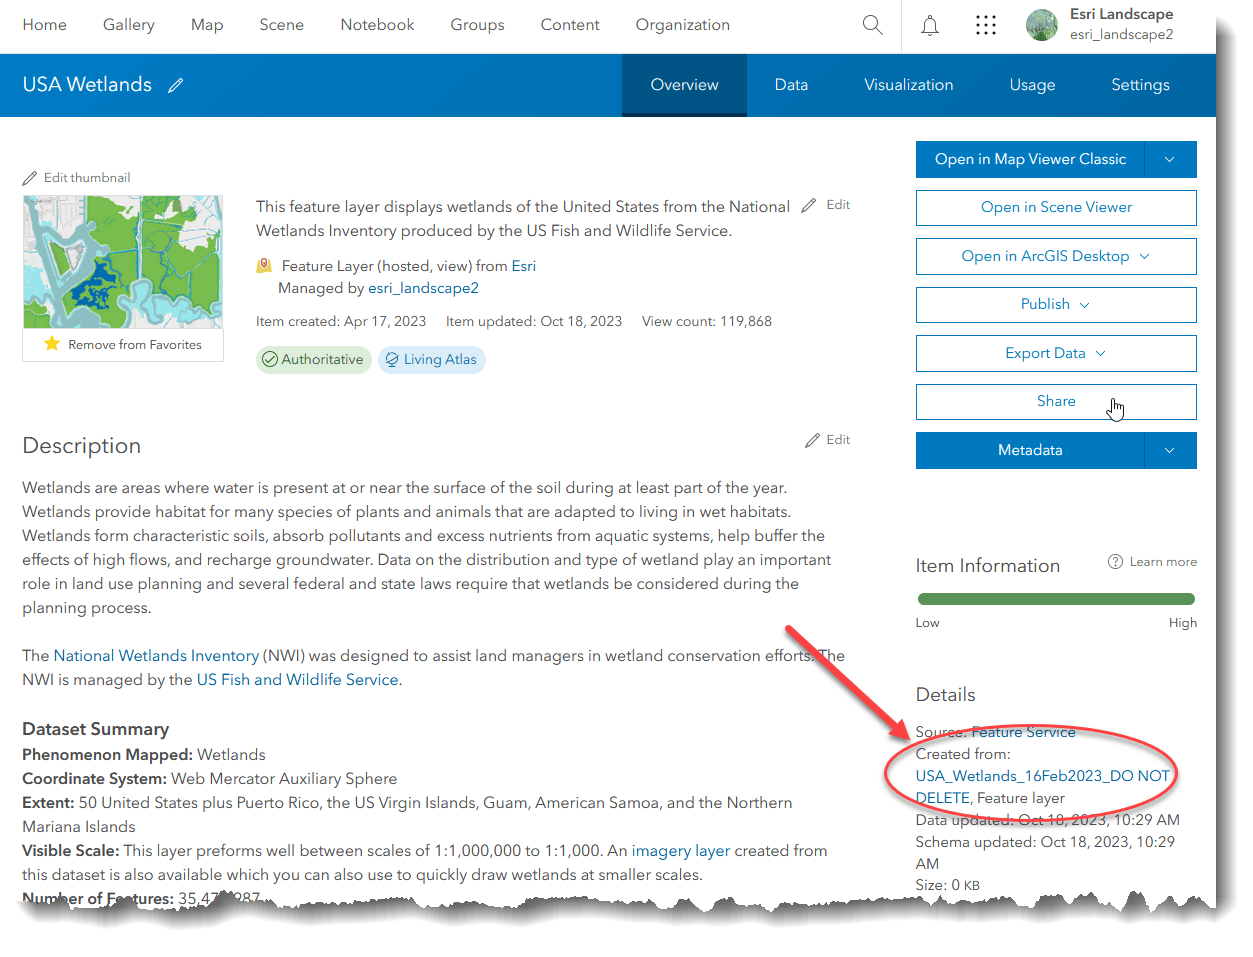
You can confirm that the layers swapped on the layer view’s page Details section where it shows the source layer. Note that you must be logged in as the owner of the item to see the created from information.
Things to know
While the layer swap is straightforward, there are a couple of things to keep in mind. The most important is that the schemas of the new and old feature layers should match. If you run into issues make sure these things are the same in both layers:
- Coordinate system
- Spatial reference
- Geometry type
- The new layer must include the same layers and tables as the original source
- Layer and table order must match
- Fields in the new attribute table must match the visible fields of the old layer
- Layer ID numbers must match
Use layer swaps in your work!
Taking the time to set up a layer view will allow you to work behind the scenes and give your maps the professional edge that users expect from a top-quality product. Keep your data up-to-date with seamless transitions to give your users the confidence that your layer will be there when they need it.


Article Discussion: