Projects in Hub are out-of-the-box items that enable you to organize, track and communicate your work towards specific goals or objectives. Projects are easy to configure and can highlight key information about your project’s target area, important milestones and timely calls to action.
Hub Premium customers can use projects to represent time-bound or location-specific efforts they are organizing to achieve a broader goal or initiative. Be it organizing tree planting projects in multiple neighborhoods to promote your vision of a greener city or sharing real time information on all your DOT (department of transportation) projects for transparency, you can now use Hub projects to represent a hierarchy of goals, efforts and actions in your Hub ecosystem.
When are Projects available to use?
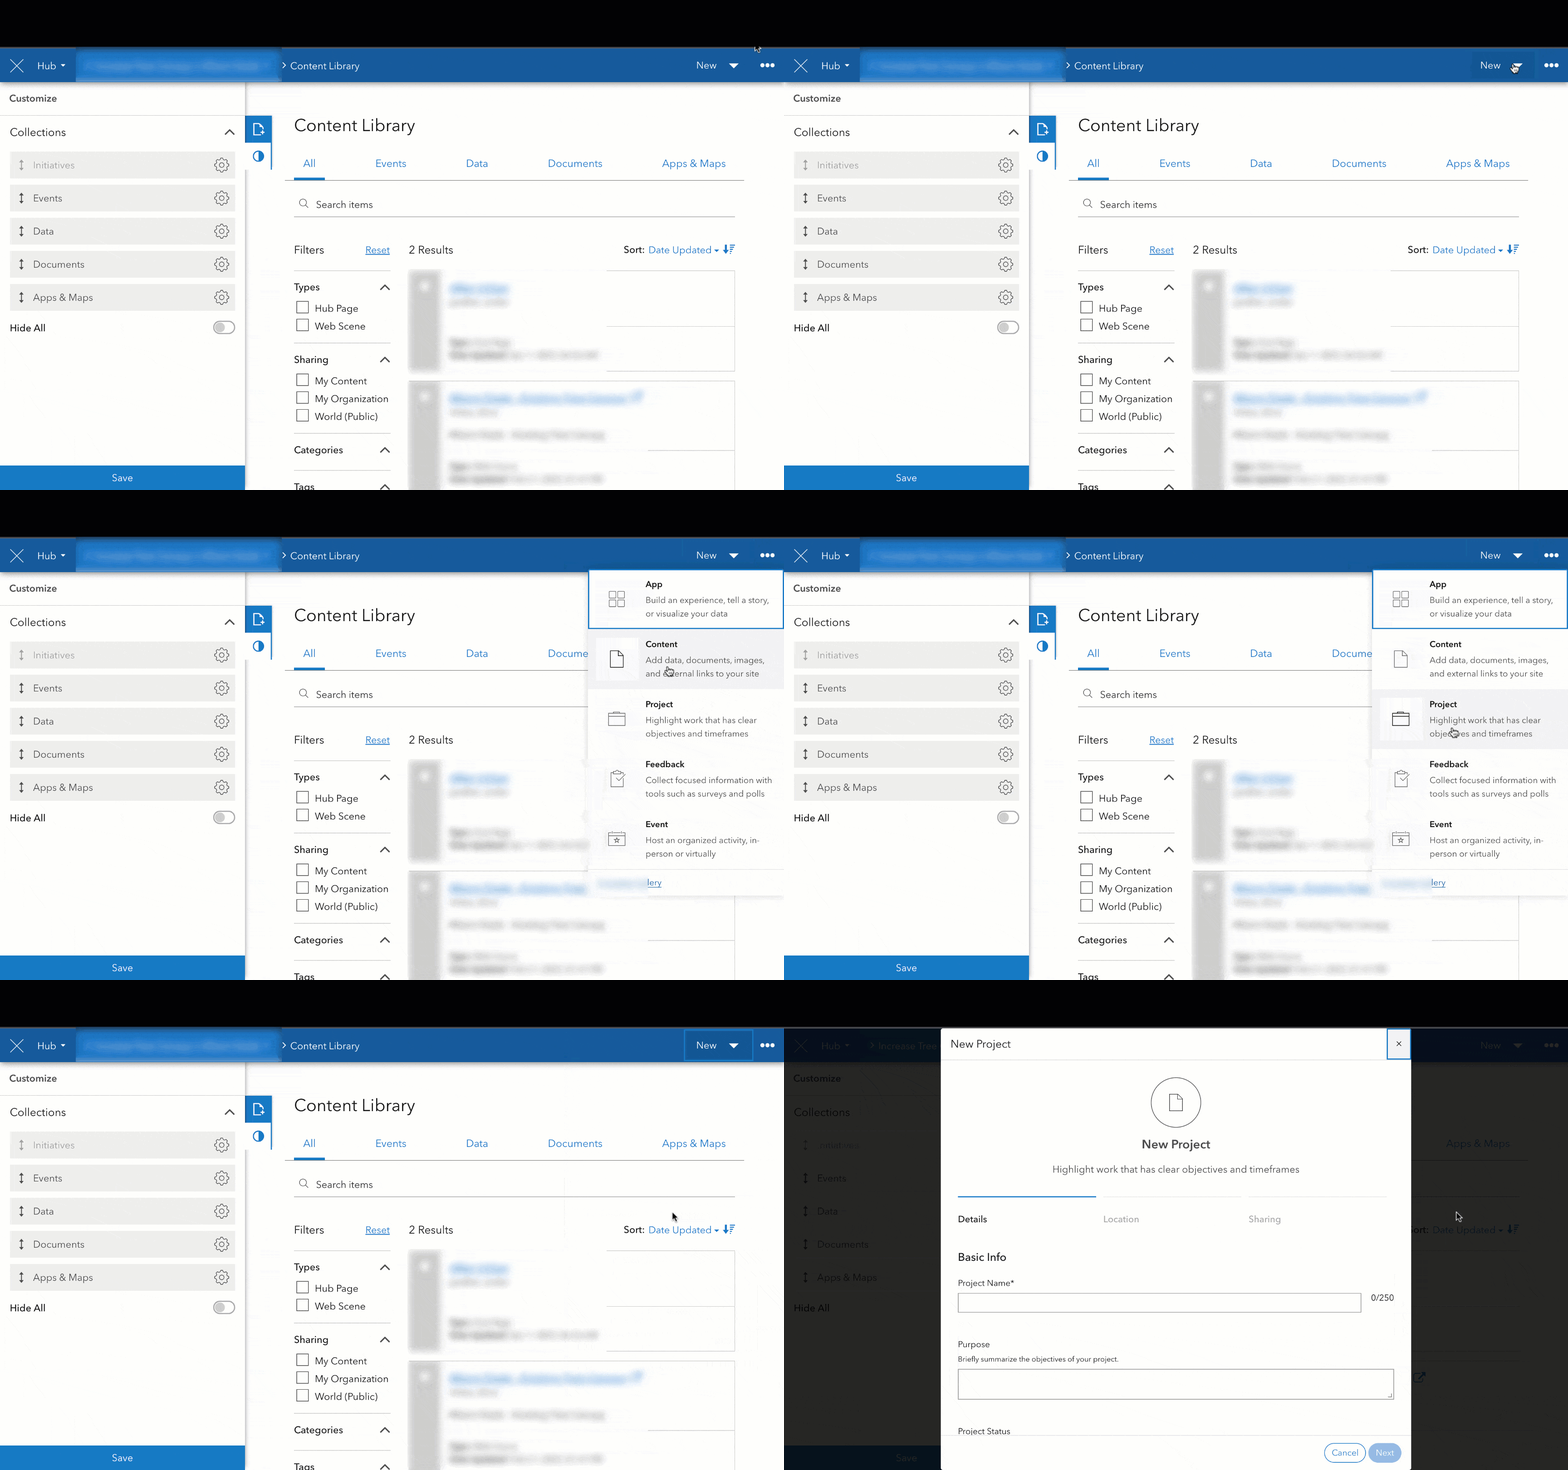
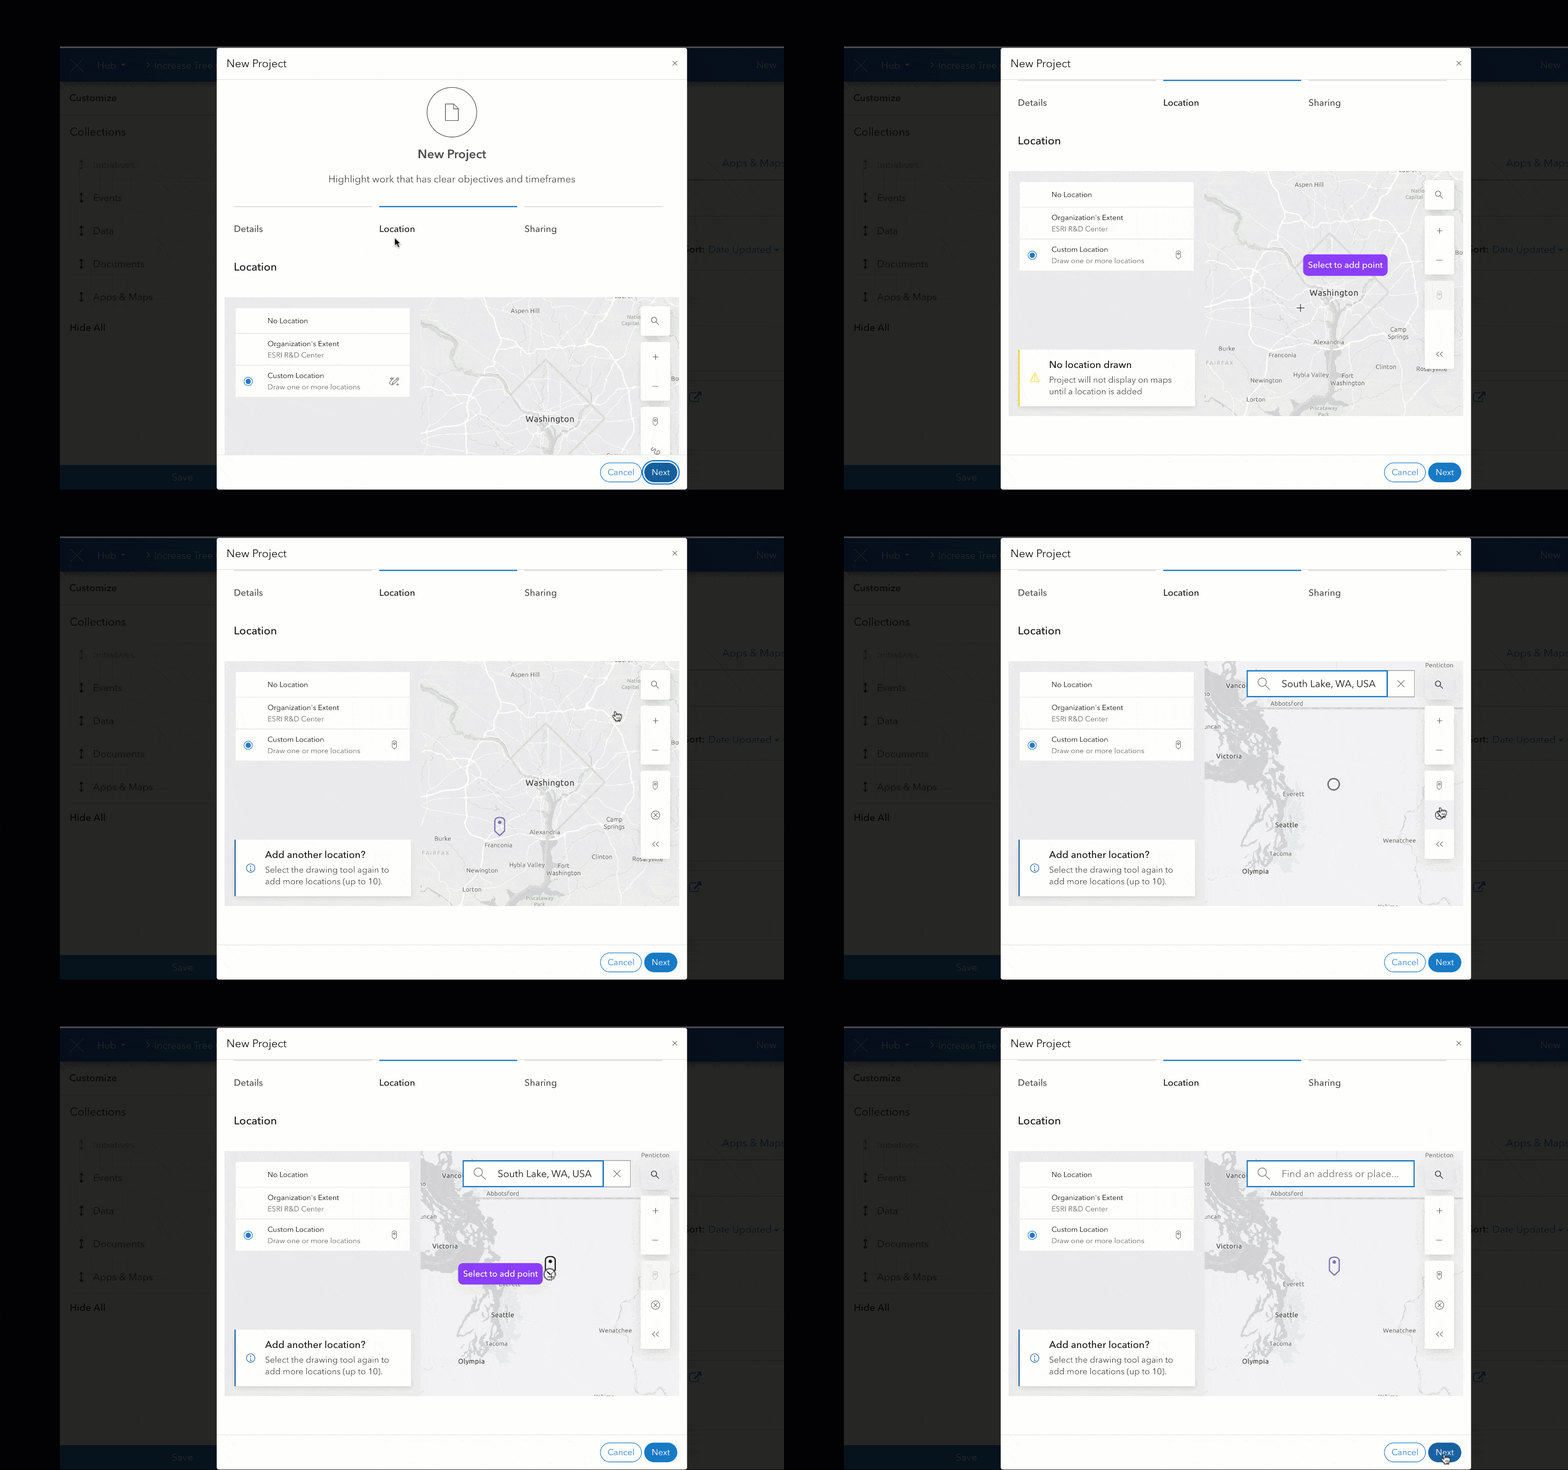
Hub Premium customers can start exploring Projects in the beta version today! Projects can be created by a site’s Core Team members via the content library or within the global navigation bar by clicking on the ‘new’ dropdown menu button.
Note: Once you create a project, you can grant privileged access to manage and edit the project to groups of collaborators by sharing the project with them.
Why Beta?
The Hub team is excited to give you early hands-on experience with projects as we actively work on new capabilities. Enhancements to the current experience will be released iteratively over the next few months.
In the meantime, you have an opportunity to influence the future of Hub projects. As you try creating and managing projects, please provide feedback about how you’re using them and what features you’d like us to add next. Your feedback will help us prioritize your needs and expand the feature to better fit your existing workflows (we have included feedback form within Hub to gather your valuable inputs)
What sets projects apart?
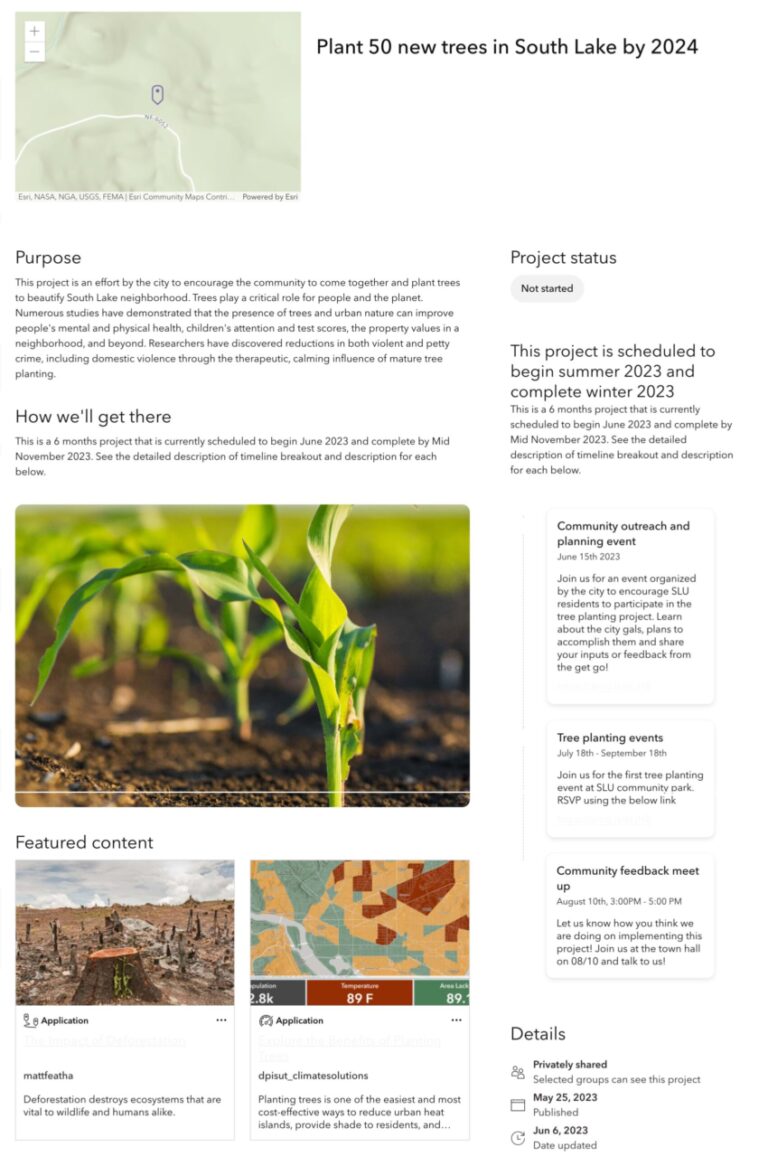
Ease of set up – Projects are structured– with just a few clicks you can launch a project and in minutes, customize it with key information such as goals, timeline, status and related content. We have focused on keeping the experience simple, intuitive and quick so you can spend less time tinkering and more time getting things done!
Promote consistency and legibility – Projects were designed to highlight the most important information first, while giving you many ways of adding context and links to detailed resources, all from the simplicity of a user-friendly form. Projects have a consistent structure and take on the theme of your site, so you don’t have to worry about inconsistencies across projects.
Fits seamlessly into your existing workflows – Projects can be used in your existing Hub ecosystems without any added effort or cost. Within an existing site, you can stand up one or more projects, share it as a header link or in an interactive gallery for your community to browse and explore. You can also link site visitors to an out-of-the-box dedicated search experience for all Projects shared with the site’s content group.
Note: Projects can also be accessed via the site’s content library to filter and explore along with your existing content items.
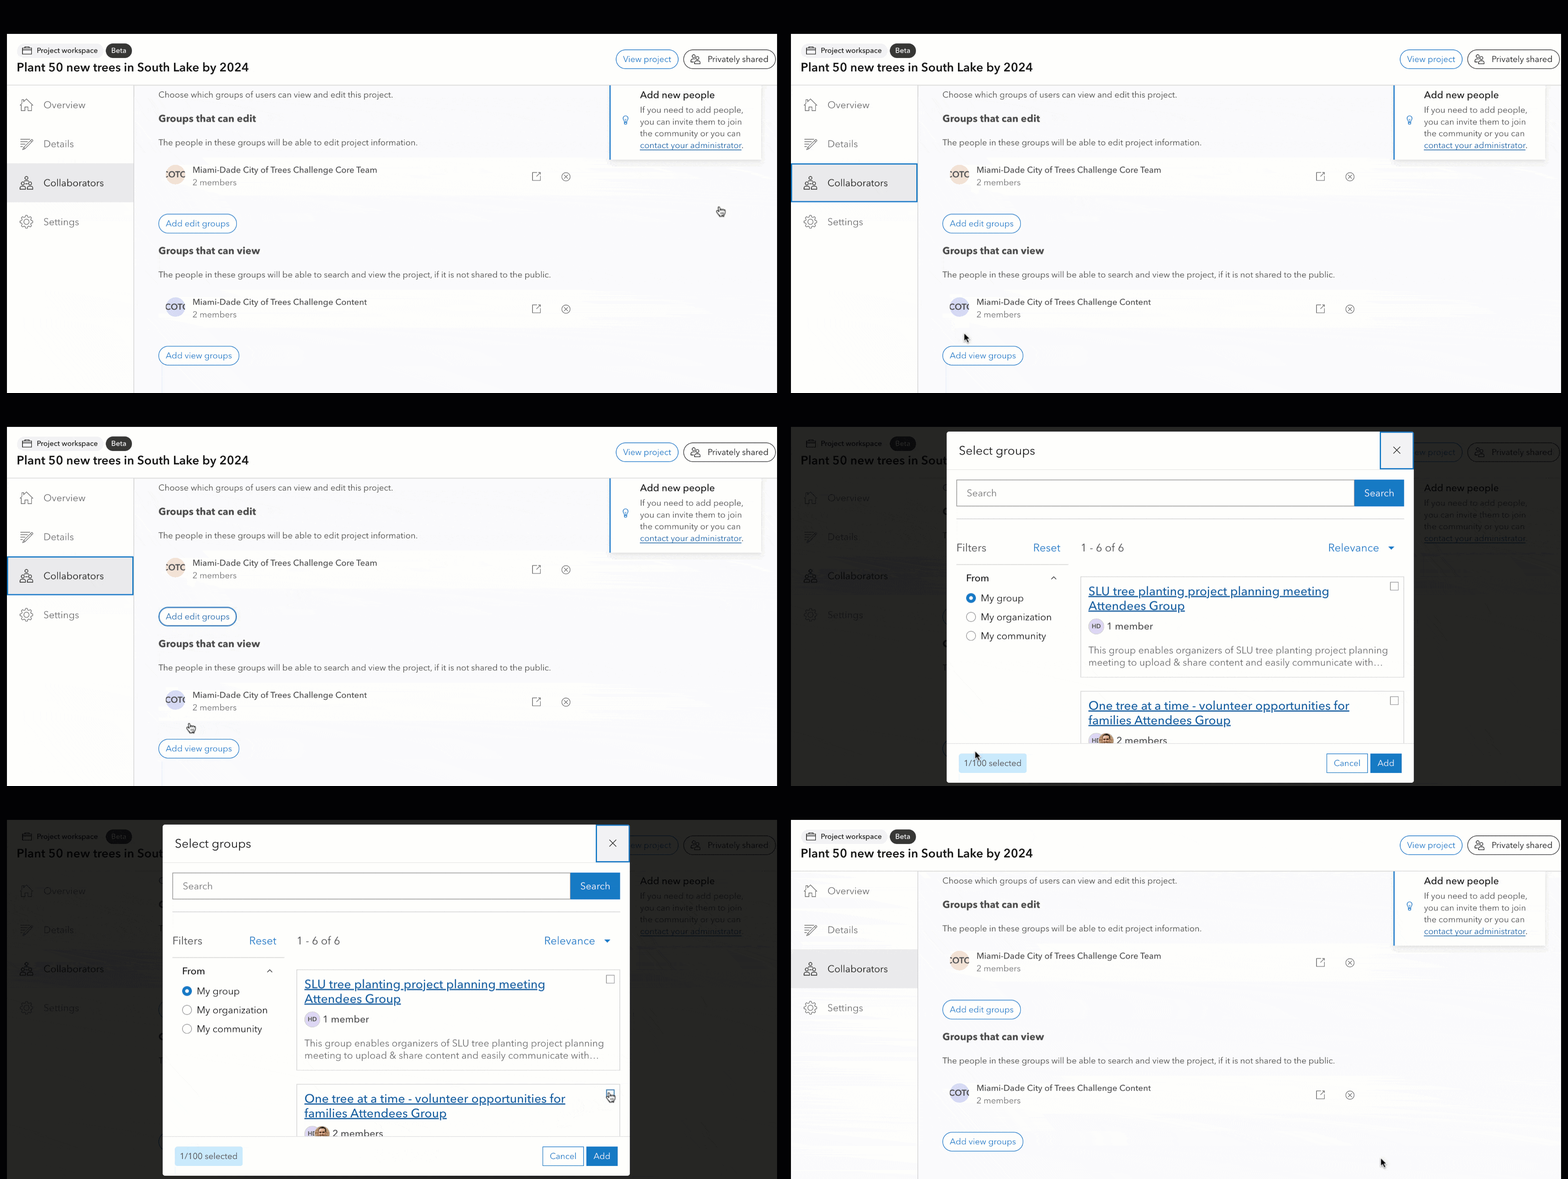
Promotes deeper collaboration with community– Projects in Hub provide a new and improved way for you to collaborate with your stakeholders and build capacity. You can add collaborators (groups of people) to a specific project which will provide them with privileges to manage and edit only that project while keeping your core team intact.
How to highlight projects in your initiative?
Projects can be displayed in your initiatives in one or all the following ways:
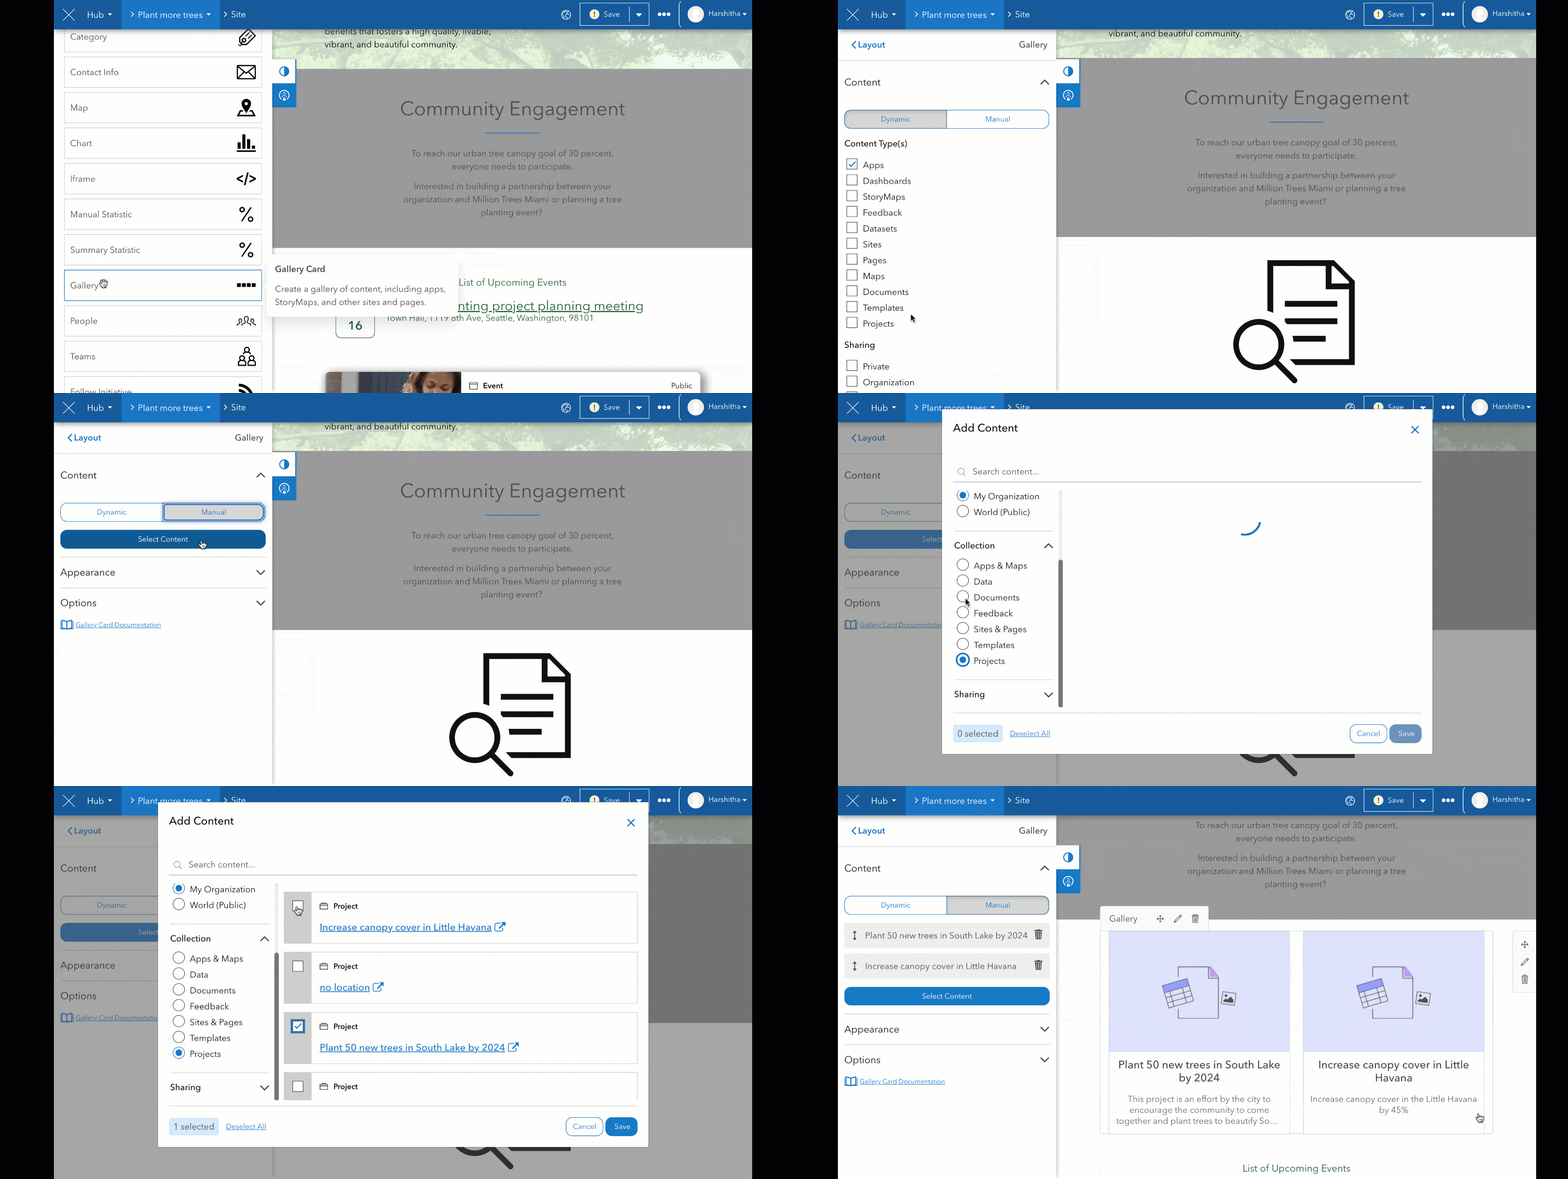
As a gallery of projects in your initiative – you can simply use the existing ‘gallery’ layout card in your Hub initiative to select from all your created projects and display them for your audiences to browse and explore.
As a link in your initiative header – For one or more projects that you want to highlight and supply easy access to, you can simply add the project as a link to the header.
Note: Projects are provided with their own search route that supplies access to a filtered view of all the content items in your initiative dedicated to projects. You can add this link as to your initiative header as well.

What are some of the key features of a Project?
- Projects put geography first – A primary aspect of Projects is the ability to add one or more locations to represent and communicate target areas of your work.
- Highlight a gallery of resources – You can integrate any of your existing items from ArcGIS Online (choose up to 4 items as a gallery of “Featured content“). You can share resources that supply background or contextual information about the project or share your desired tools for engagement such as surveys, interactive maps, events etc. for your community to take part.
- Communicate important project milestones via timeline– Project managers can create a timeline for a project, to track and show stages of work. This illustrates the project’s process and opportunities to get involved for community members and other stakeholders.
Note: Visit Projects FAQ to learn more about project features in detail
How to keep your projects up to date?
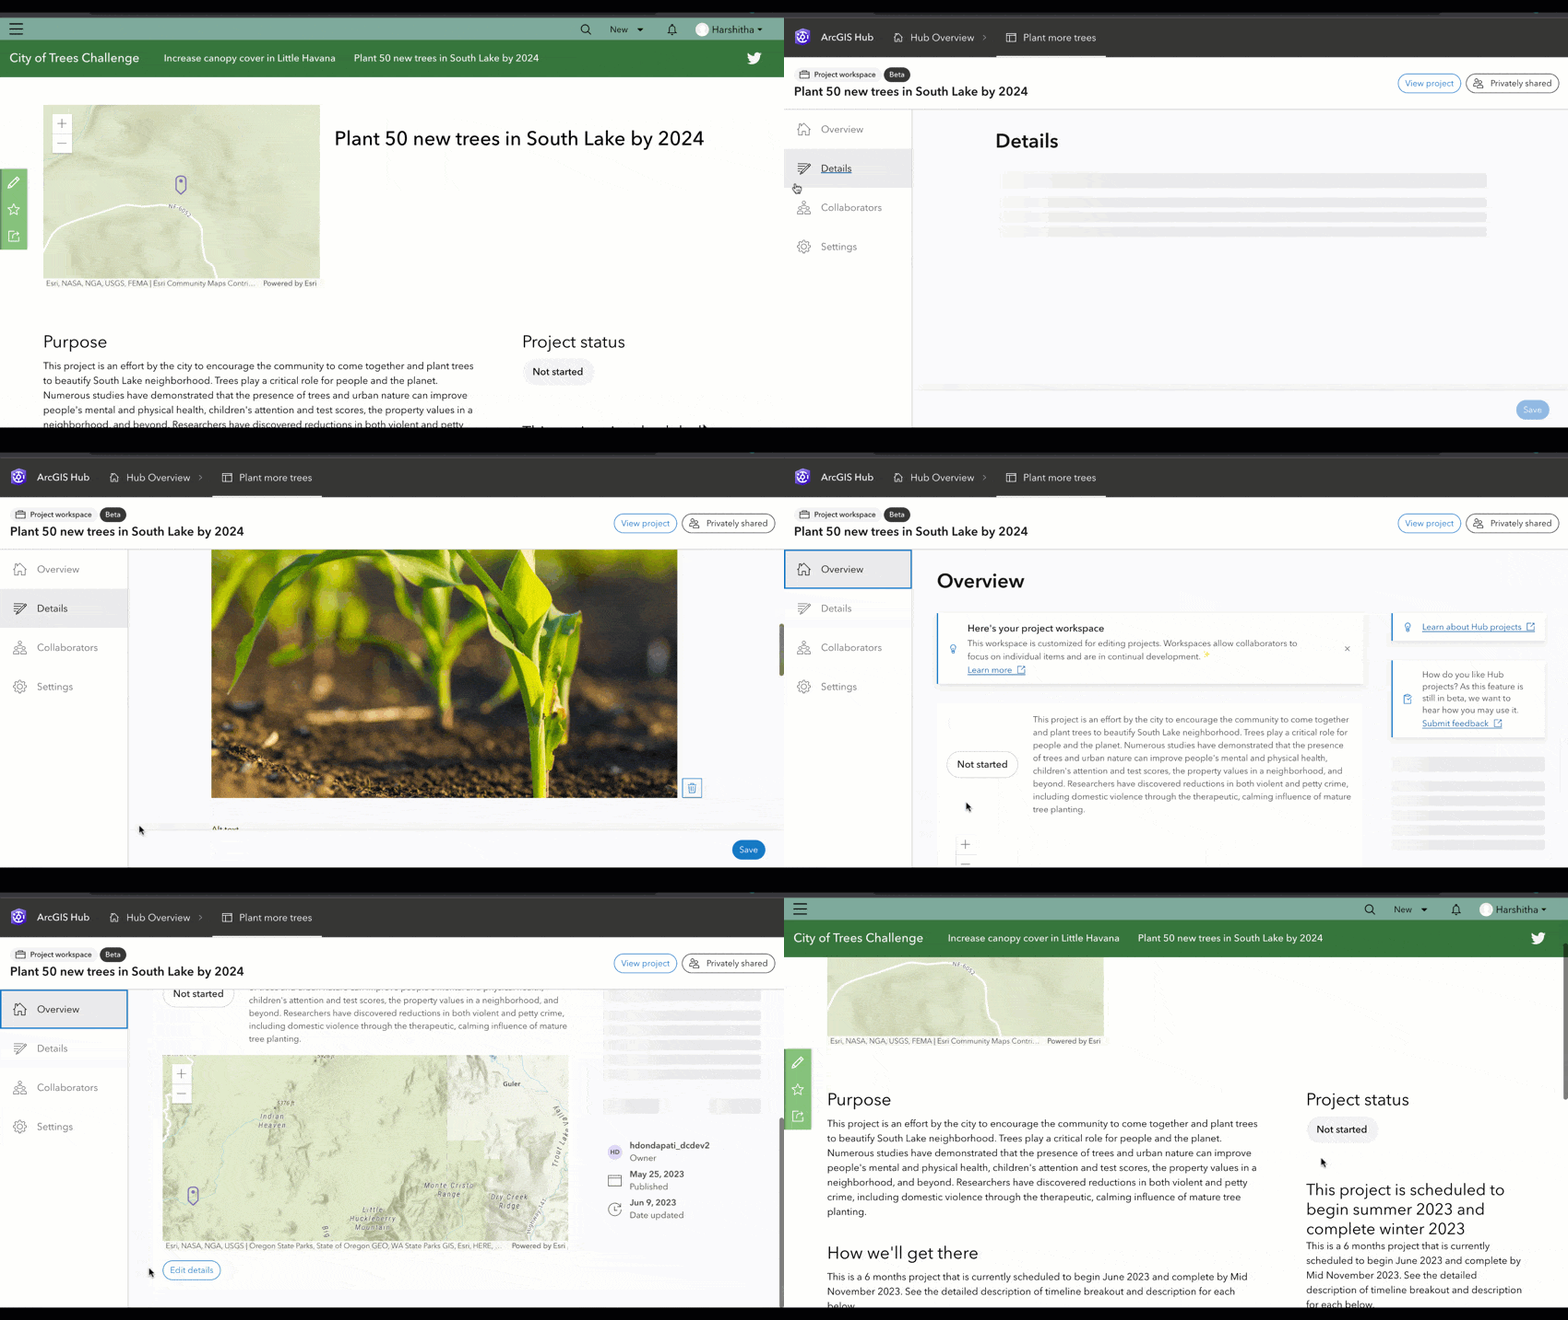
Every project in Hub is backed by a dedicated workspace which can be accessed by project owners and editors to update and manage the project.
A project workspace is where all projects edit actions can be performed, such as updating project details, adding or removing collaborators, modifying sharing level, etc. Additionally, the project workspace comes with an overview section that provides a summary of activity on the project (including the number of times the project has been viewed) The project workspace makes it easy to navigate between management panels and provides a convenient way to see the public view of the project.
Note: After the project is initially created, you will be automatically redirected to the overview section of the project workspace where you can add additional information, if desired, or simply click on the ‘View project’ button in the workspace header to go to the public view of the project.
What’s next?
This is just the first step in what we know is an exciting journey ahead of us, as we continue to enable our customers with tools to establish deep collaboration and sustained engagement with their communities. To stay up to date on the latest additions in the product, visit Hub Changelog


Article Discussion: