Survey123 smart forms let you upload signatures, photos and files of different types into ArcGIS. This content is stored in ArcGIS as ‘attachments’. Using the out of the box Survey123 module in Integromat, you can build automated workflows that use these Survey123 attachments.
Common automation workflows using attachments include:
- Automatically send an email when a survey is completed and include photos in the survey as email attachments.
- Instantly backup photos and files submitted via Survey123 into Microsoft OneDrive or other cloud storage.
This blog introduces Integromat techniques to help you work with Survey123 attachments. It is assumed you are already familiar with task automation using Survey123 and Integromat. If not, check the following resources:
- Automate workflows with Survey123 and Integromat (Video Tutorial)
- Getting started with Survey123 and Integromat
- Survey123 tricks of the trade: Integromat
Downloading files with the Integromat HTTP module
Before you can work with Survey123 attachments in Integromat, you must download them first. The animation below shows how to use the HTTP module and its Get a file operation to download a Survey123 attachment.
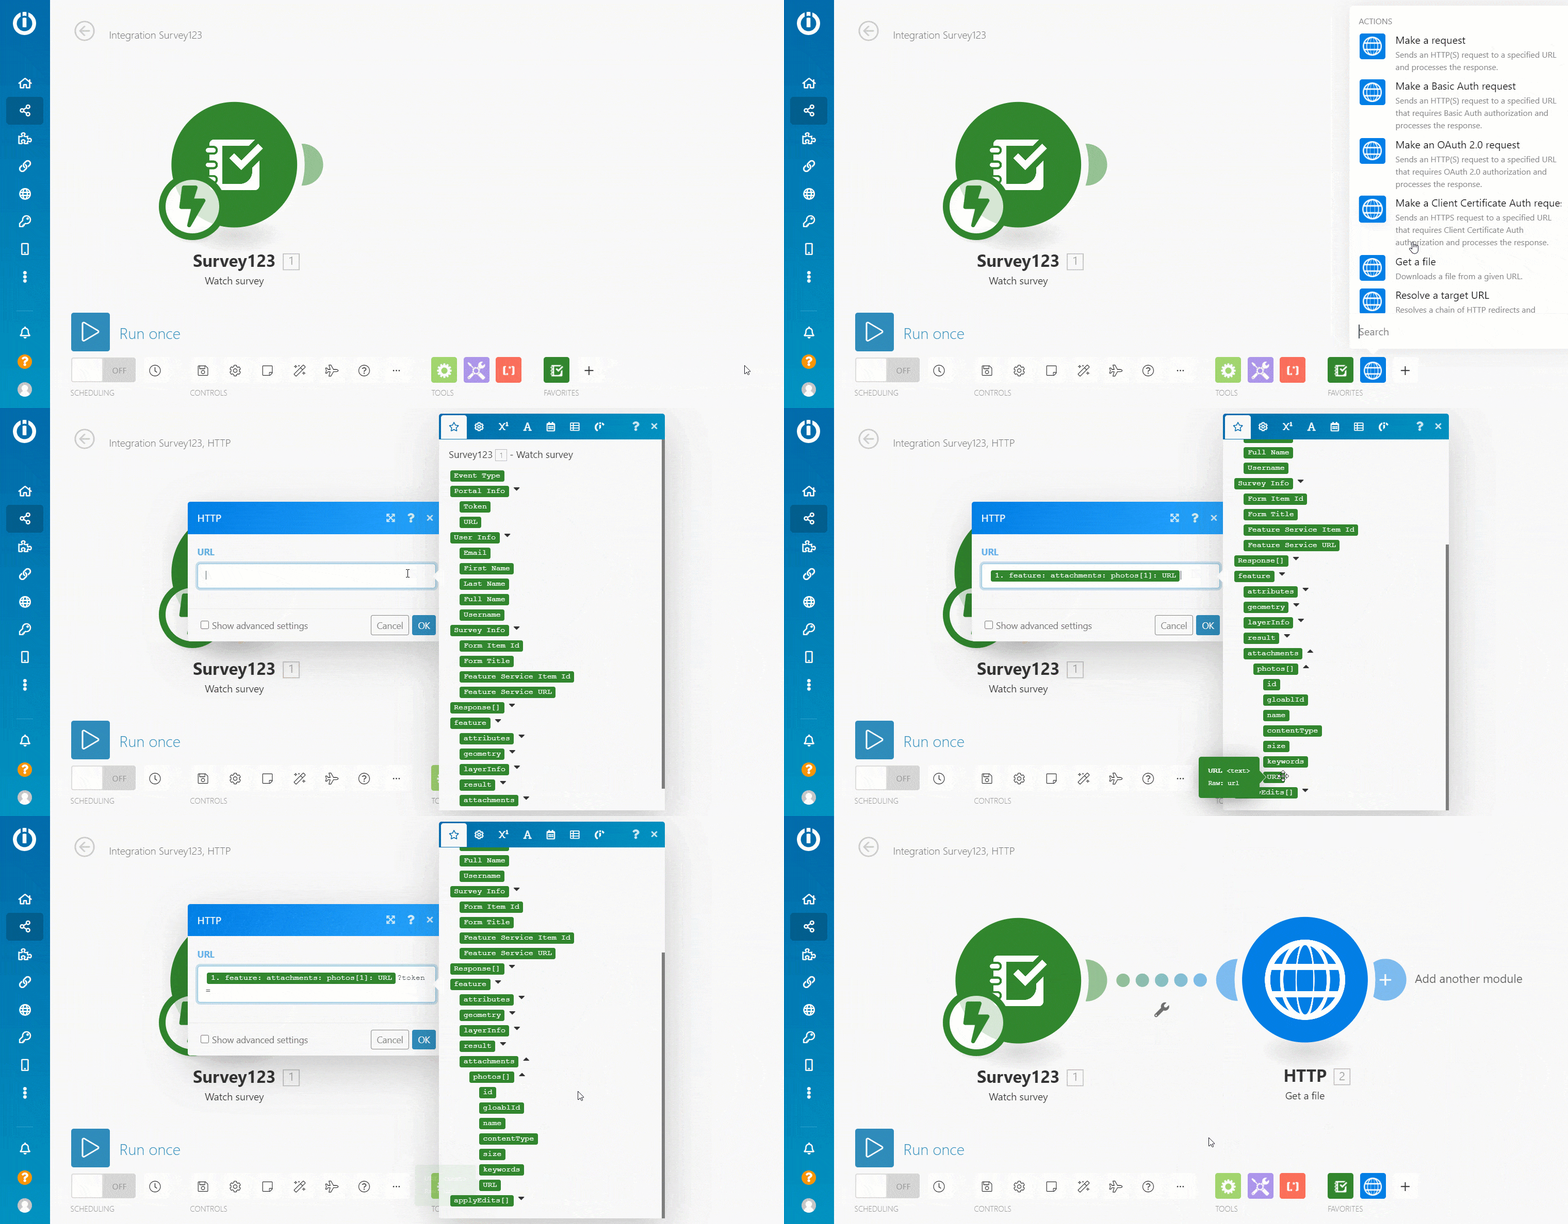
As you can tell from the animation, the Survey123 attachment URL is provided by the Survey123 module. If your survey feature layer is secured, you also need to provide a valid ArcGIS token, otherwise Integromat will not be able download the file. The token can also be fetched from the Survey123 module.
Once the file is downloaded, you can work with it. In the animation below the file is added into a new email message as an attachment.
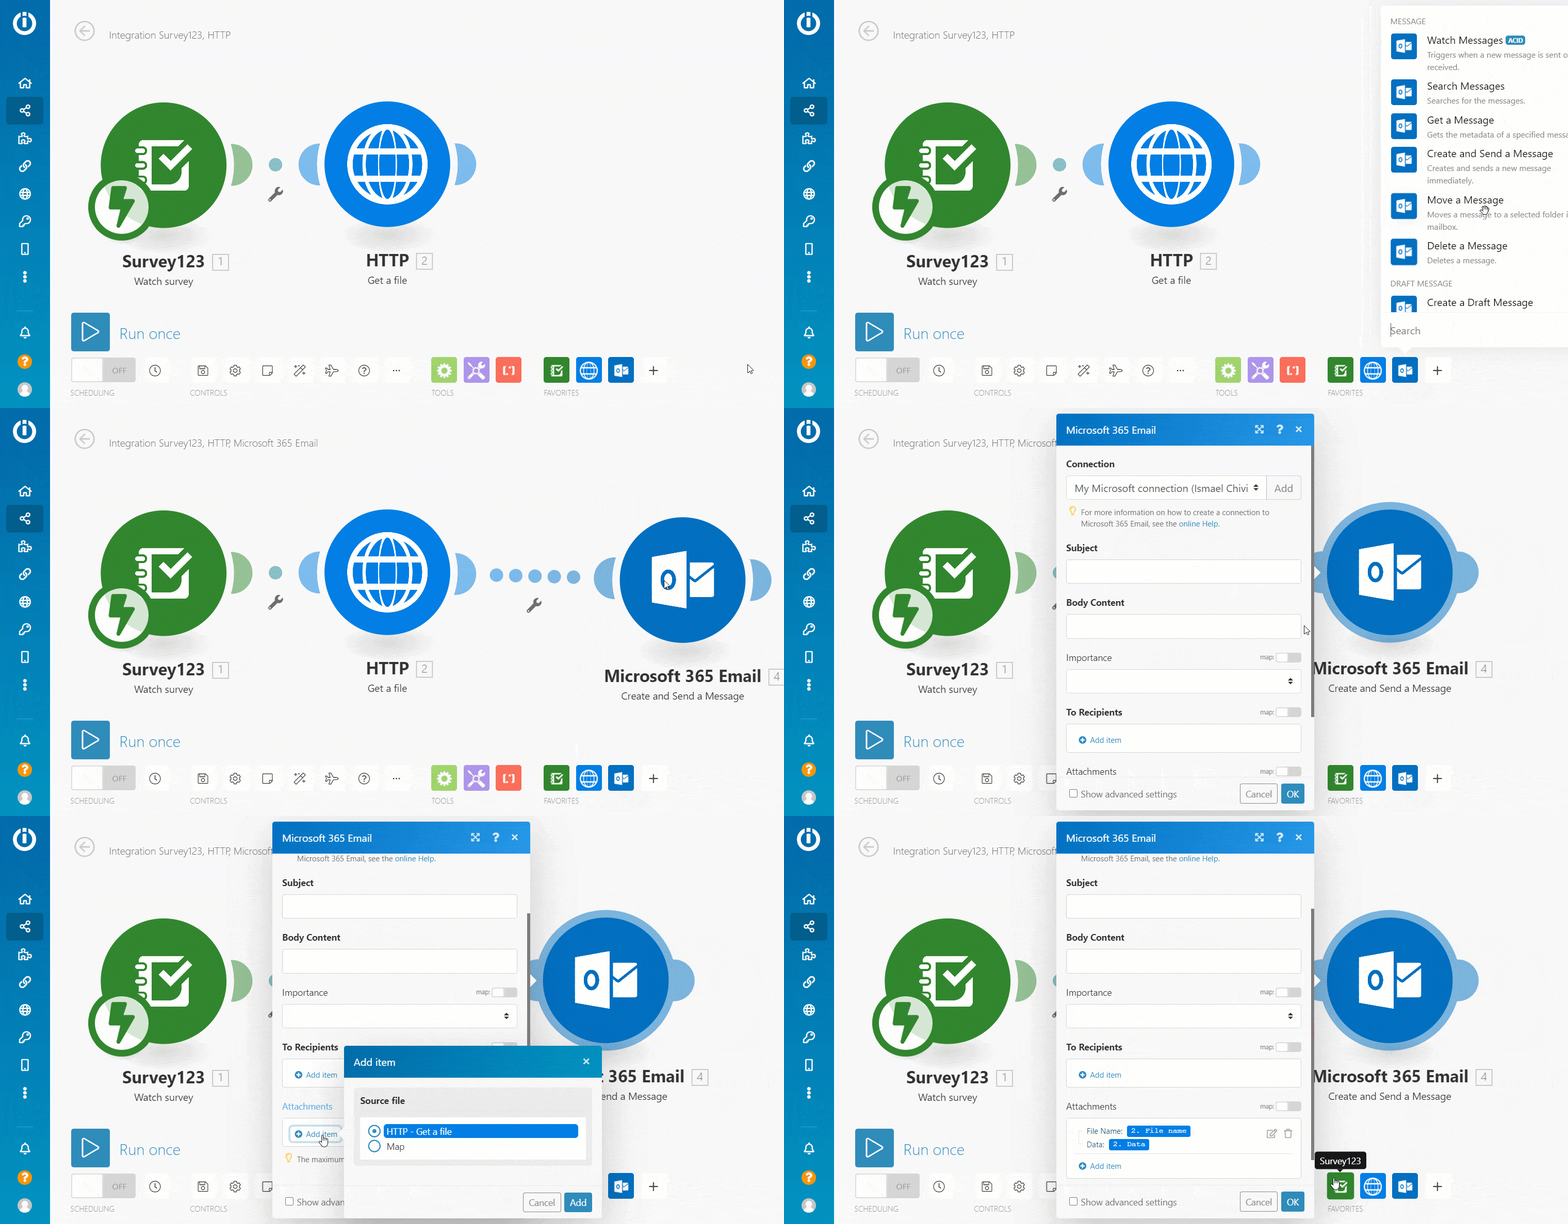
Similarly, you could use other Integromat modules to upload the file into cloud storage, convert the file into another format or extract some file metadata.
The scenario described so far is the simplest possible: A survey configured with a question where the user can only upload one photo or file.
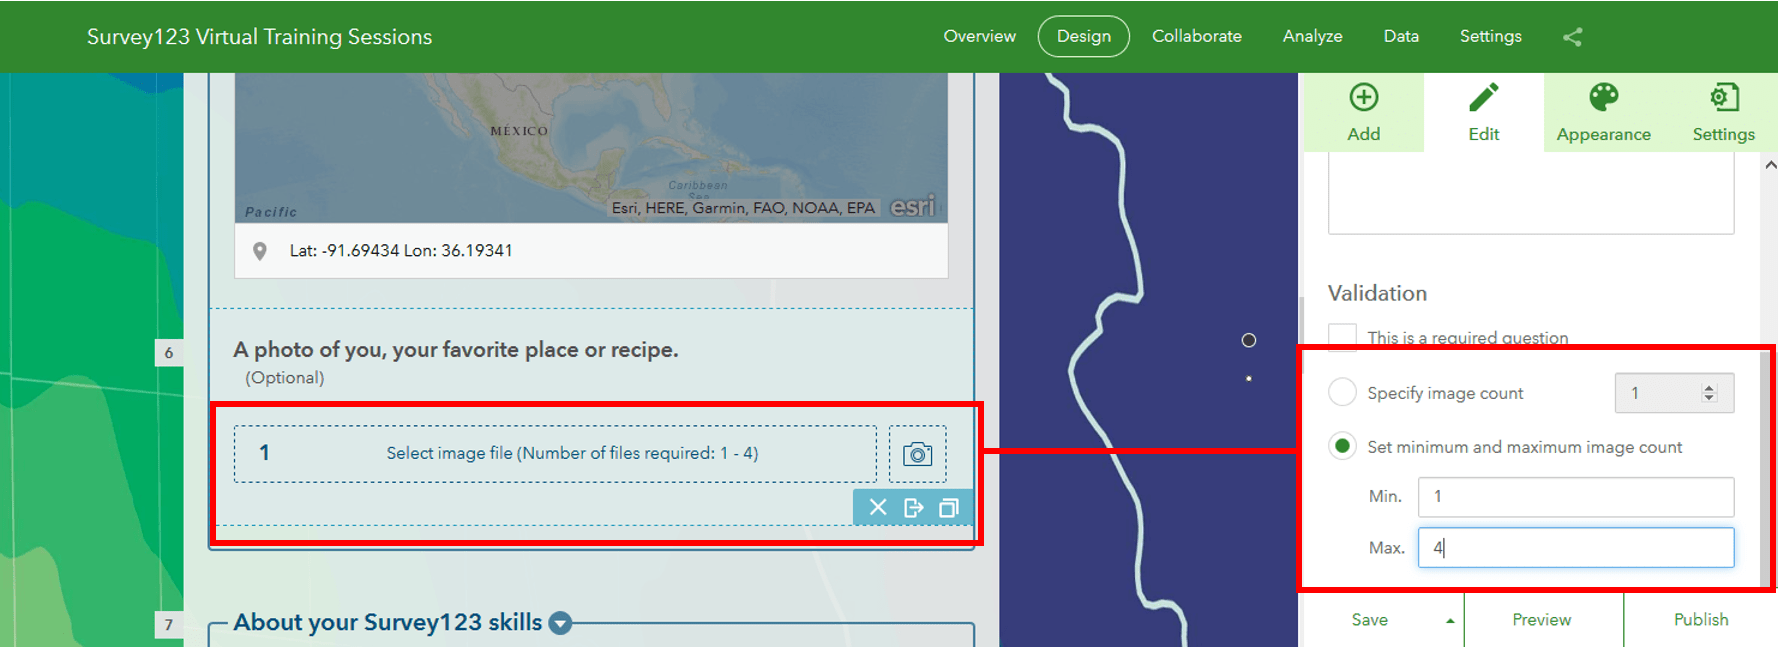
As the author of a Survey123 smart form, you can decide how many photos or files should be uploaded with questions in your survey. The screenshot below shows an image question in the Survey123 designer configured for users to upload a minimum of 1 photo and a maximum of 4.
The blog post Survey123 tricks of the trade: Photos describes more advanced techniques to capture multiple files or photos with a single question using Survey123 Connect.
If the survey question is configured to accept multiple photos or files, things get a bit more complicated. Let’s have a look at how to handle that.
Attaching multiple files to an email
If a survey question is configured to accept more than one file or photo, you will want to use the Integromat Iterator and Array aggregator modules to handle the collection of files.
Attachment collections are modeled in the Survey123 module as arrays. Let’s have a look at how you can use the Iterator module to download multiple attachments.
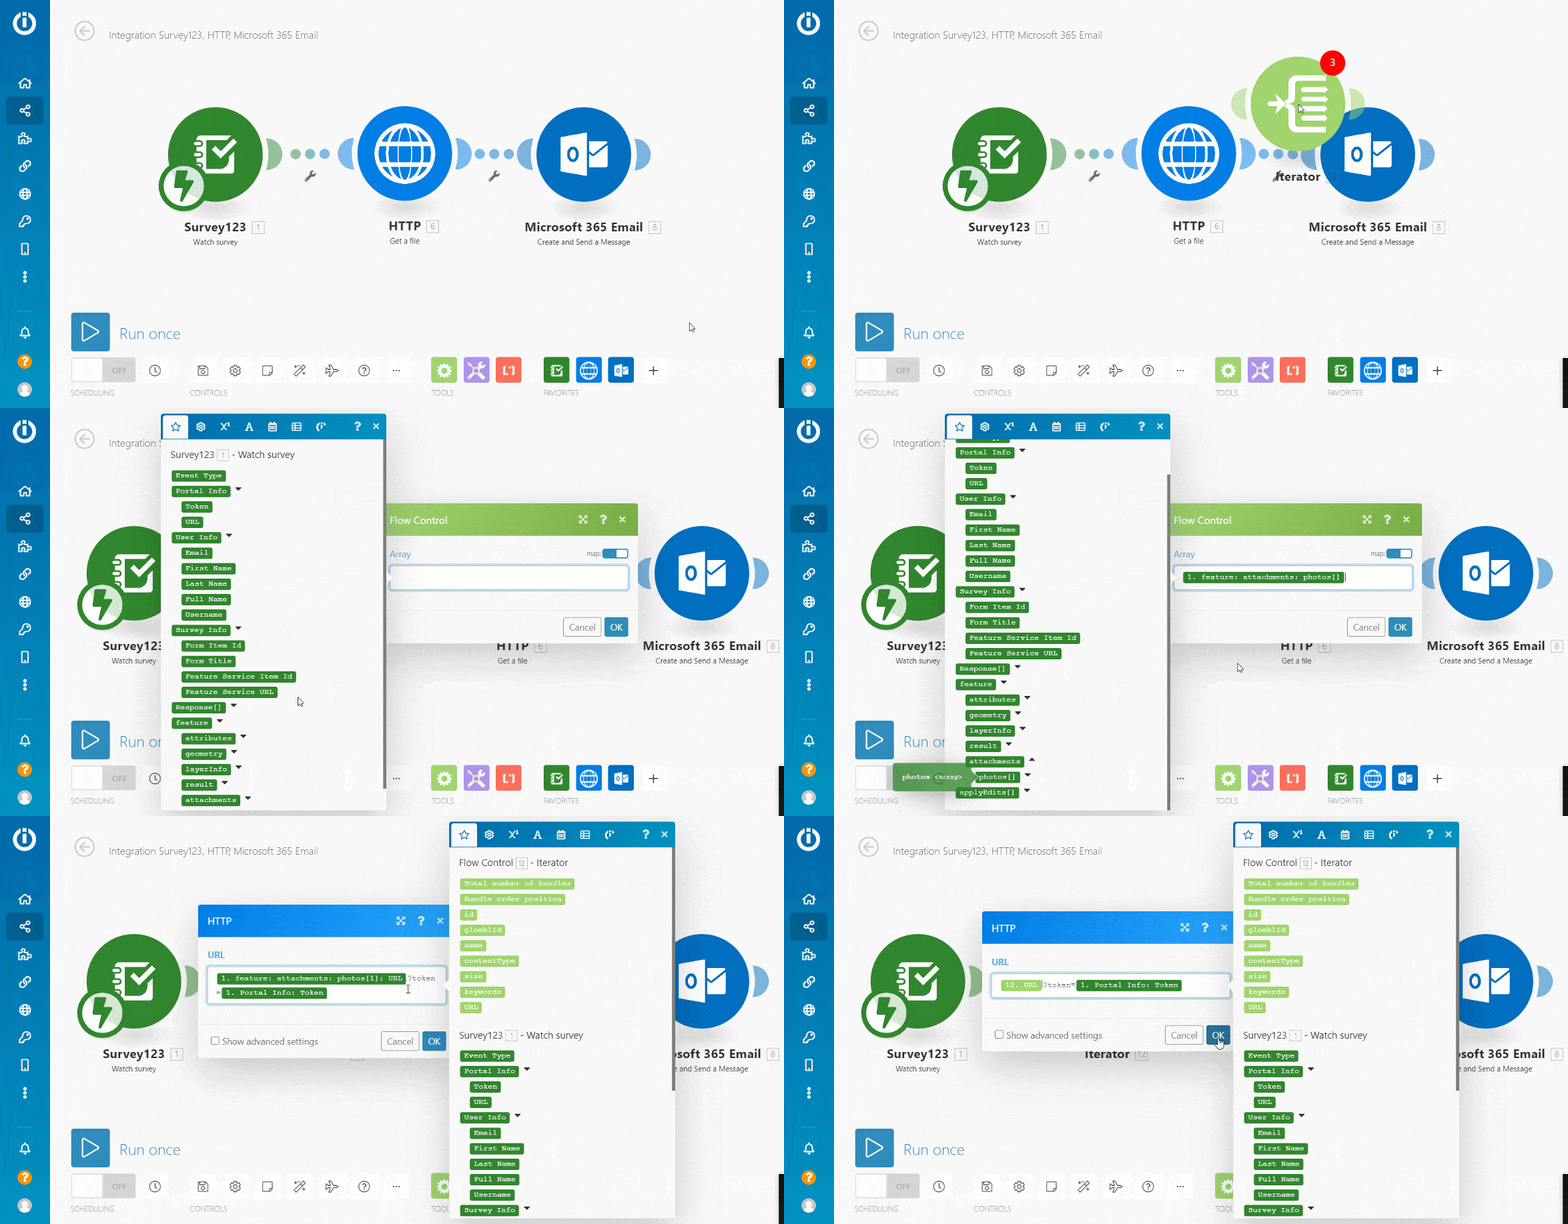
Note that the Iterator module must be configured to target the array of attachments you want to process in the Survey123 module. Also, the Get a file operation will no longer target the attachment URL in the Survey123 module. Instead, it will target the attachment URL in the Iterator module.
If we were to run the Integromat scenario at this point, one email would be sent for every attachment found in the survey record. This is not what we want. We want to send a single email with multiple attachments in it. This is where the Array aggregator module comes into play.
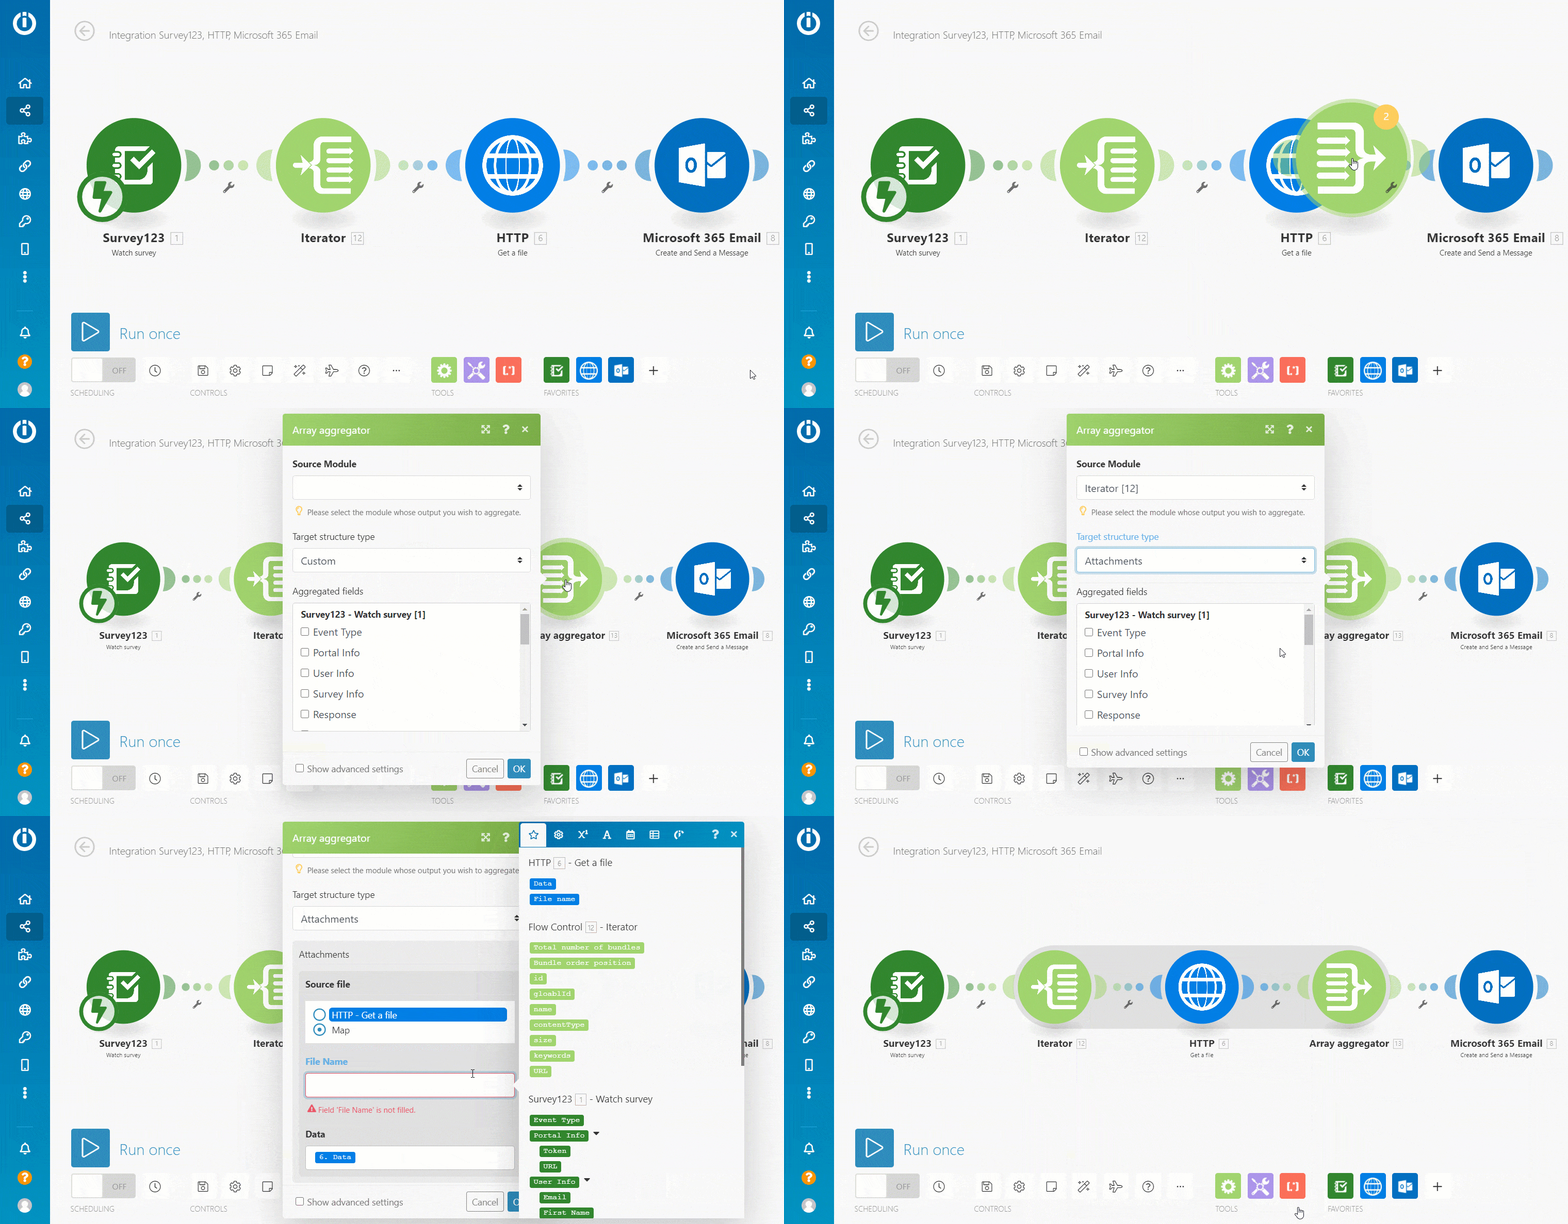
The key considerations to configure the Array aggregator are:
- Set the Iterator as the source module.
- Set the Target structure type to the module property that will receive the output of the Array aggregator. In our case, we want to use the aggregated array to populate the attachments property of the Microsoft 365 Email module.
- When configuring how the target structure will be populated, make sure you use the Map option, so you can get the Data property from the HTTP Get a file operation and the File Name from the name property of the Iterator.
Note that as you finish configuring the Array aggregator, a gray indicator will wrap all the modules involved by the iterator. The Microsoft 365 Email module will be outside of that group, indicating that it will run only when the output of the Array aggregator is ready.
The next step is to have the Microsoft 365 Email module use the output structure of the Array aggregator to populate the email attachments.
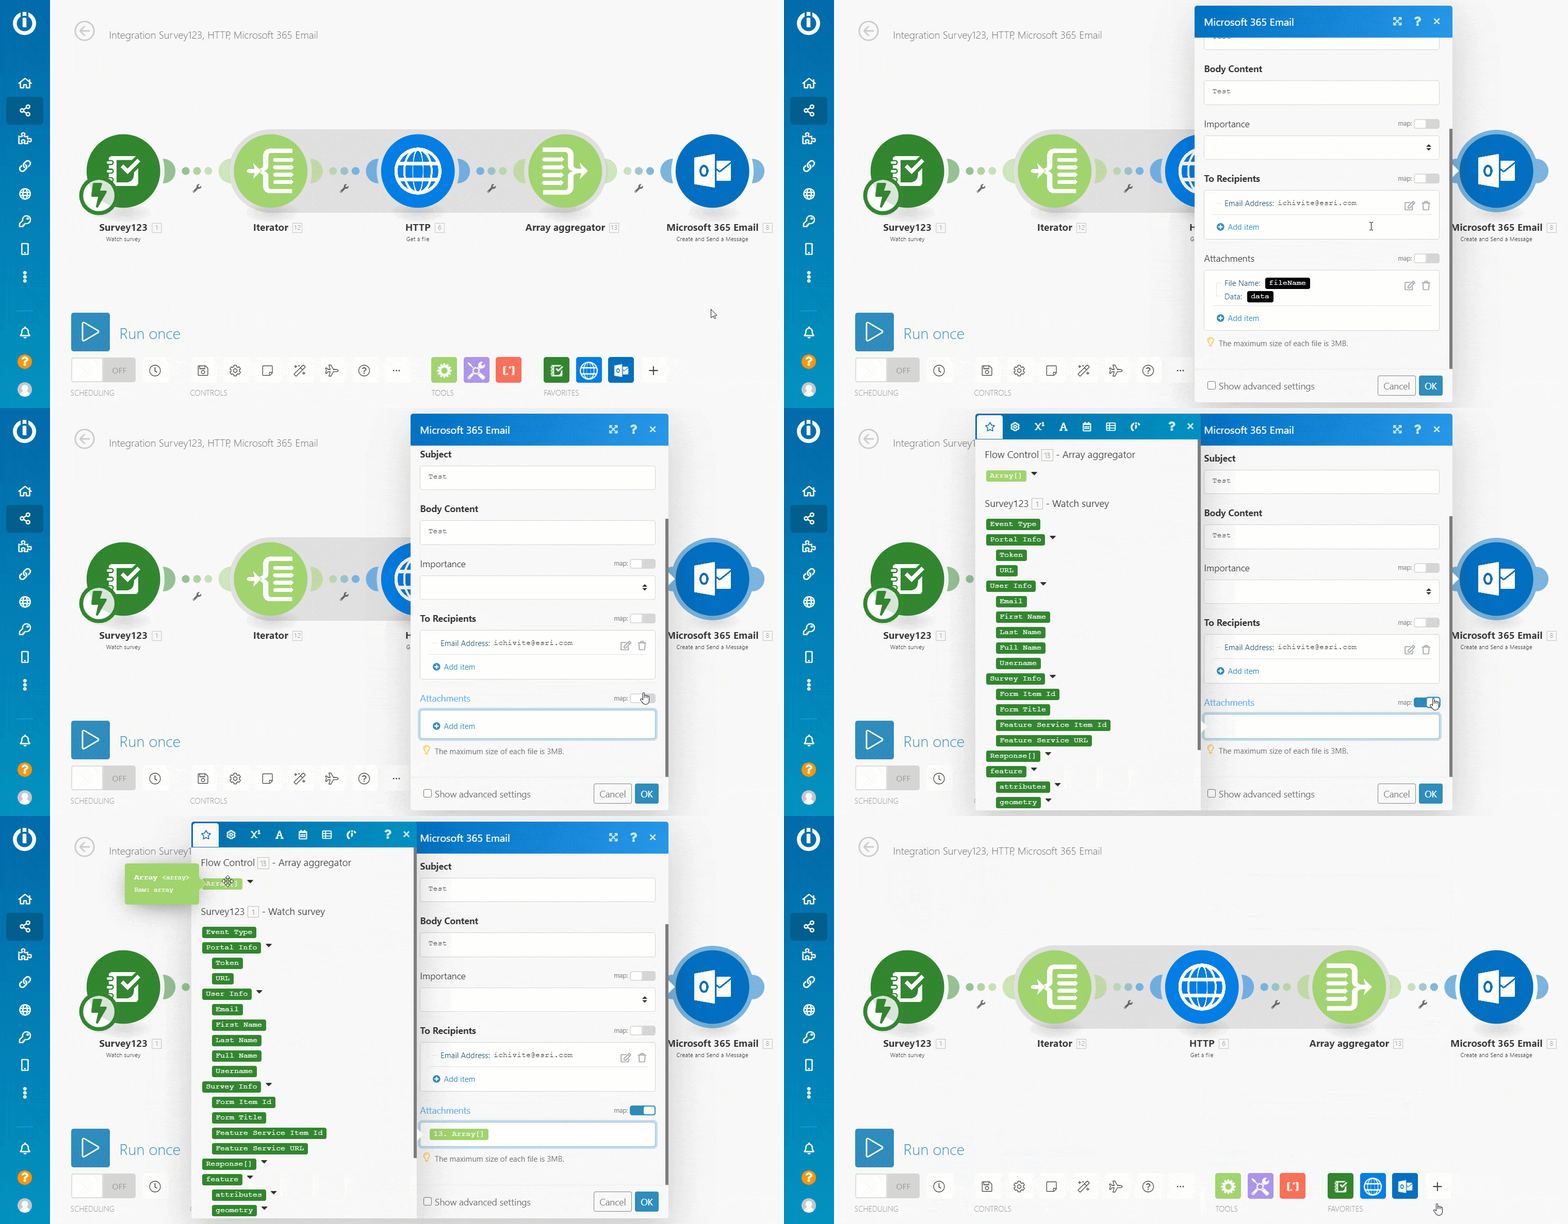
As shown in the animation, you need to enable the map option of the attachments property before you can target the output of the Array aggregator.
I hope this guide was useful to you!


Article Discussion: