This blog article was originally published on January 25, 2021, and has been updated. The last previous update was April 4, 2023.
We often compare layers or maps visually to understand differences and gain insight. ArcGIS Online offers many ways to create or use apps that enable you to swipe or compare maps or layers. Here’s a compilation of current options, with examples.

Quick links
Use the links below to jump to sections of interest.
ArcGIS Instant Apps and configurable apps
App builders
Imagery apps
Stories
Media Map
Media Map is intended for anyone that wants to display and showcase an interactive map with basic tools and map navigation. It’s a compact, simple, and useful configurable app. Media Map is an ArcGIS Instant App that supports both express and full setup modes.
Configure the app
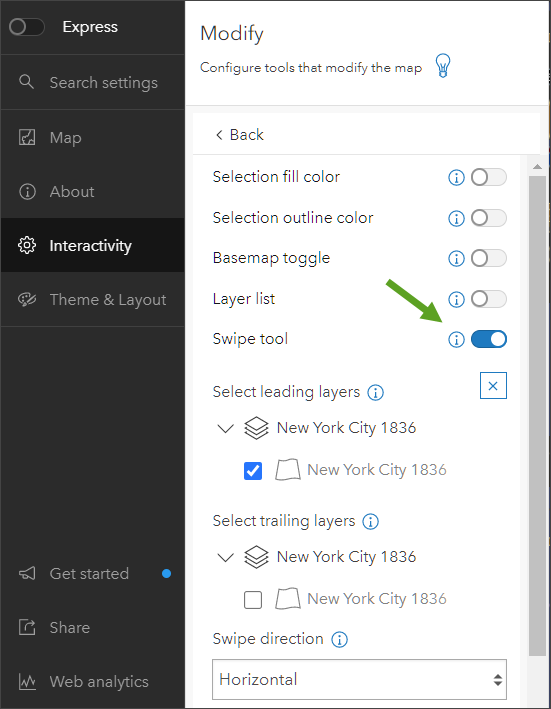
Media Map includes a swipe tool that can be configured when in full setup mode. Open the Interactivity section, then click Modify. Toggle the Swipe tool on and select the leading and trailing layers. You can also configure the swipe direction and position.
Use the app
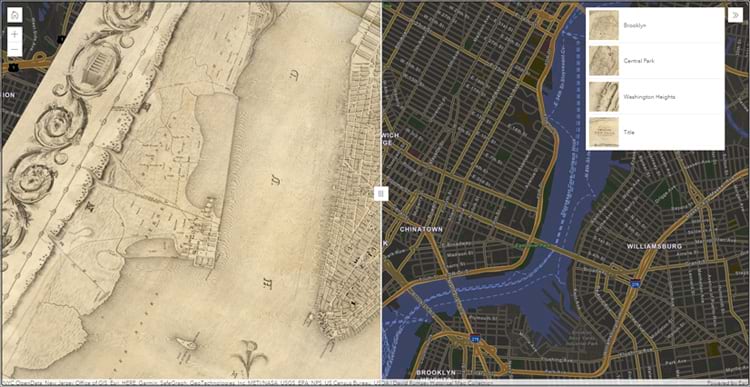
Open the New York City Media Map Swipe app, then click and hold the swipe slider to move it. Note the available bookmarks tool in the upper right.
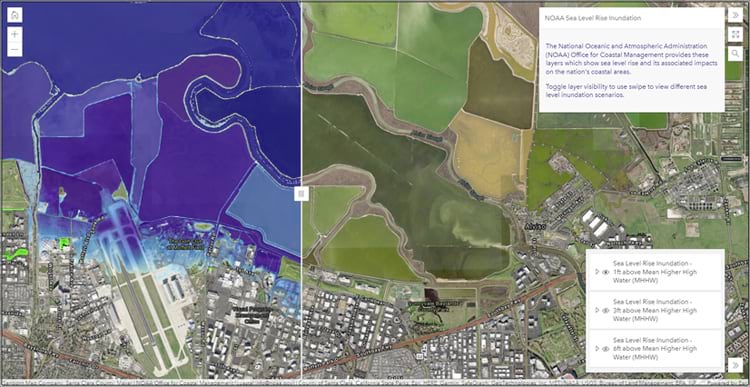
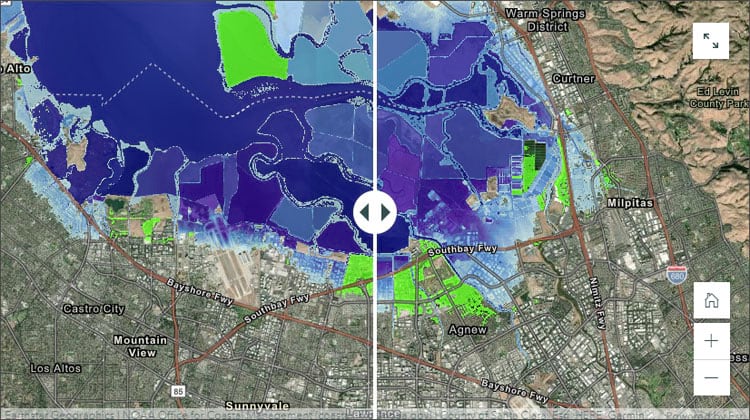
This second Media Map swipe example shows NOAA sea level rise and adds configuration options to toggle layer visibility across multiple layers, each showing different sea level rise inundation areas. It also adds an information panel, fullscreen button, and bookmarks.
View the first example map and second example map used in the apps. For more information, see Use swipe in Media Map.
Imagery Viewer
Imagery Viewer is an ArcGIS Instant App that supports both express and full setup modes. It allows users to visualize, explore, and interpret imagery through time and space. It includes tools for navigating through time, recording locations, measurement, and more. When using maps with two or more imagery layers, Imagery Viewer can be configured with a swipe tool that enables users to compare the layers.
Configure the app
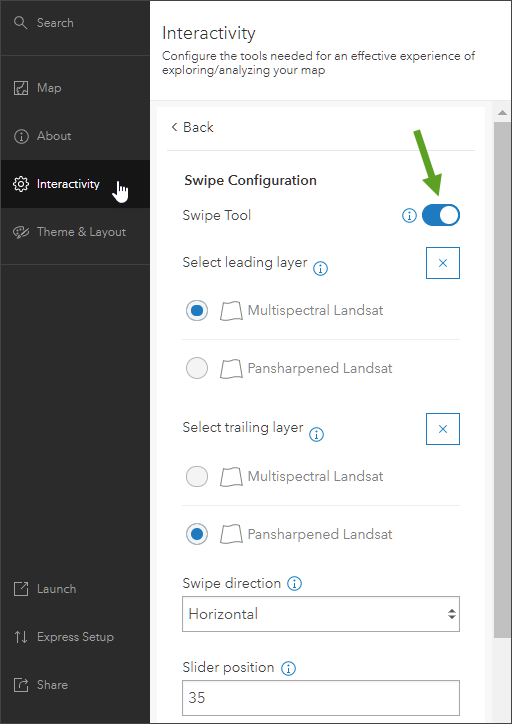
In express setup mode, go to the Interactivity section. Toggle the Swipe Tool on and select the leading and trailing layers. You can also configure the swipe direction and position when in full setup mode, shown below.
Use the app
Open the Imagery Viewer app shown below, then click and hold the swipe slider to move it. Open the Imagery Viewer settings to choose different rendering options.
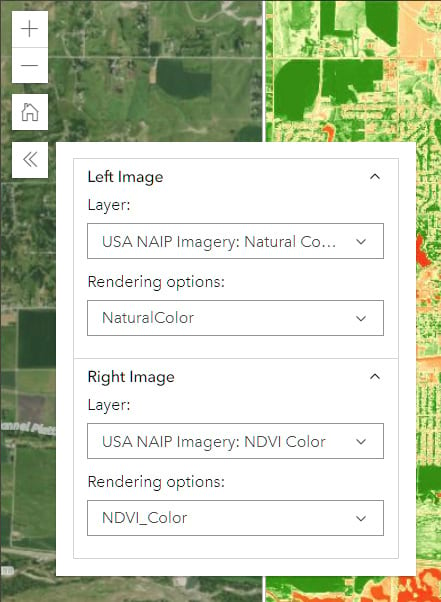
The bookmarks tool has also been enabled and is located in the upper right of the app.
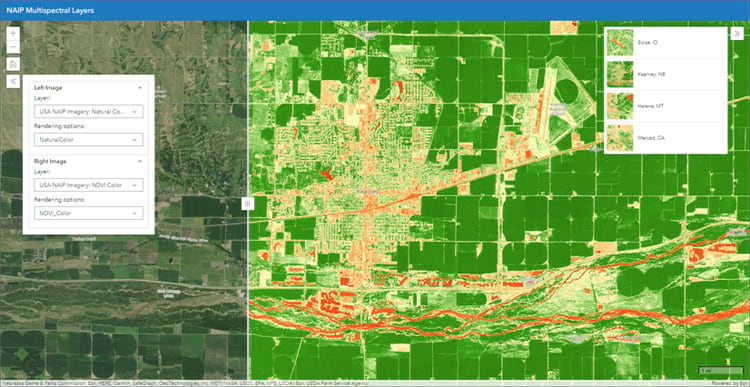
View the example map used in the app. Note that because the map uses subscriber content, you will be prompted to authenticate with your ArcGIS account. For more information, see the Imagery Viewer item overview.
Atlas
Atlas is an ArcGIS Instant App that can be configured with a group of content or individual maps or layers for viewers to explore. The app can be configured with tools such as a basemap gallery, measure, sketch, 2D/3D toggle, and more. Viewers can add layers, adjust transparency, view data as a table, and export the map as an image or PDF.
Configure the app
Atlas includes a built-in swipe tool that can be applied to any layer in the map. No additional configuration is necessary.
Use the app
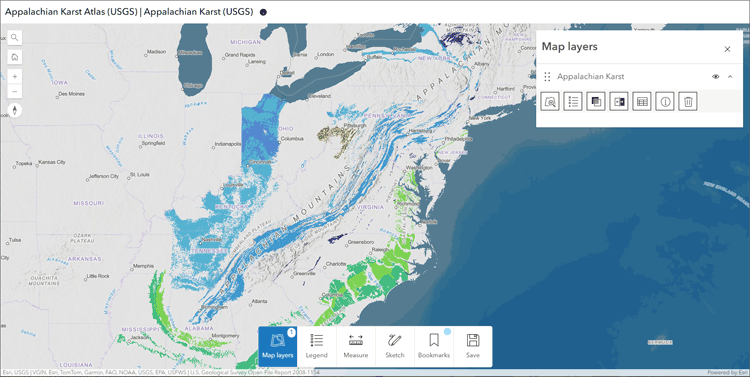
Open the Appalachian Karst Atlas shown below. The app has been configured with a single map and the Map layers pane will automatically open.
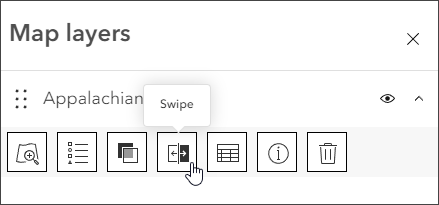
Click the Swipe tool, then drag the swipe handle. Click the Swipe tool again to dismiss it. Bookmarks are also included for navigation. View the example map used in the app.
National Geographic MapMaker, intended for educators and students, is an example of a fully configured Atlas Instant App. Click Open map to choose a map, then click Map layers to open the Map layers pane. Note the MapMaker Help link in the upper right of the app.
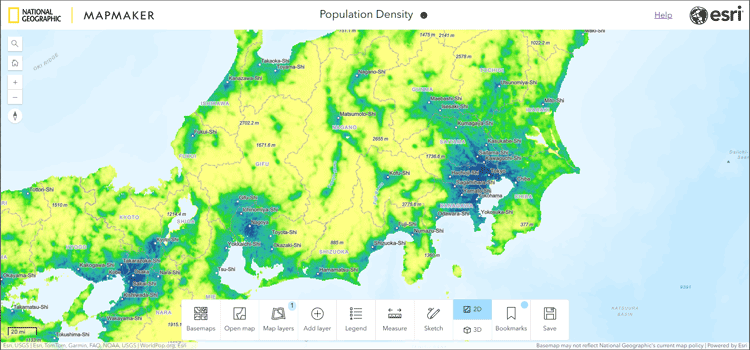
For more information, see the Atlas item overview.
Portfolio
Portfolio is an ArcGIS Instant App that allows you to showcase different types of ArcGIS Online content in one app. For comparisons, you can use a collection of maps showing different content that the viewer can interactively choose. It supports multiple layouts; configure with a carousel, tabbed, or accordion layout to display your content.
Configure the app
In the General tab, select the layout that you want, then add new sections containing the maps you want to display.
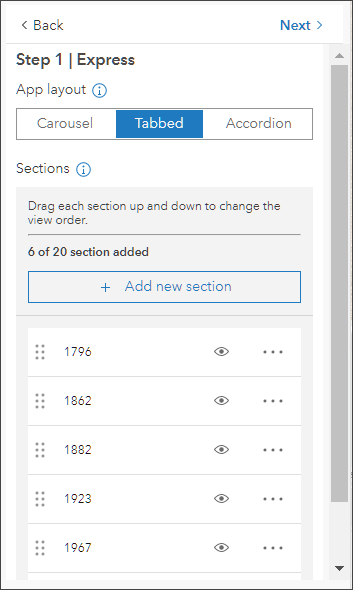
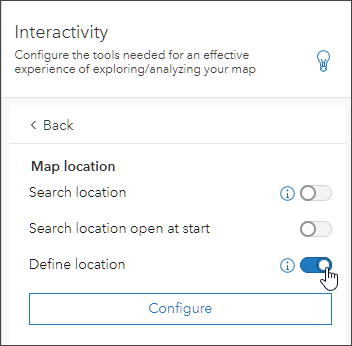
Portfolio will open each map at its saved extent, however in full setup mode you can define the location to be used across all maps.
Use the app
Open the Pittsburgh Portfolio app shown below. A cover page has been configured to introduce the topic. Scroll down from the cover page then click the tabs across the top to view change over time.
The app has been configured so that all maps open at the same location and it includes advance and play buttons in the upper right. A layer tool has also been added so you can view the basemap beneath the imagery.
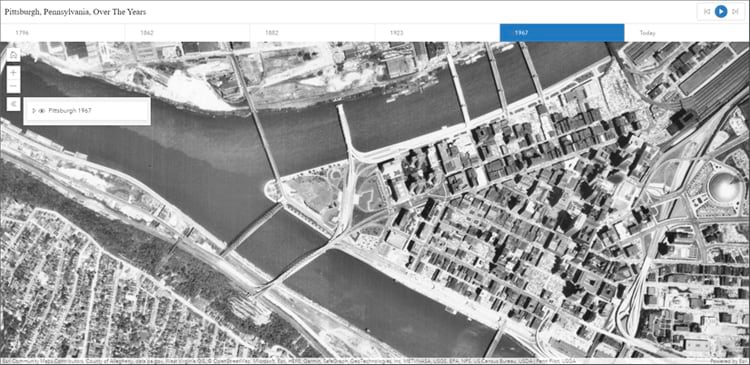
For more information, see the Portfolio item details.
Exhibit
Exhibit is an ArcGIS Instant App that can be used by app authors to tell a linear, interactive story with a single map. App viewers can move through slides defined by the app author to gain new information about the map and its data. While designed for presentations, it can also be used to compare content in maps.
Configure the app
In express setup mode, new slides were added that toggle the layer visibility between the historical map and underlying basemap. Slide notes were omitted but could have been used to provide details about the maps shown.
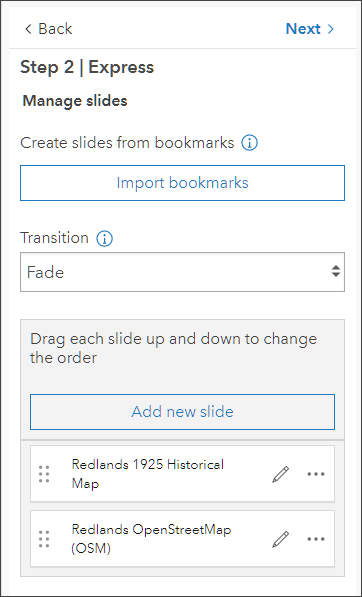
Use the app
Open the Redlands 1925 Exhibit app shown below, then click to advance slides using the tools in the upper right. An information panel has been configured to clarify how the app is used.
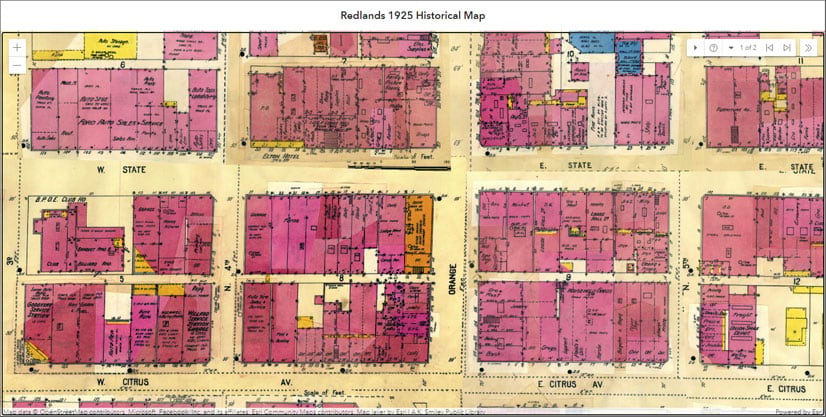
Note that the slide titles are unique and have been centered, helping the user understand the maps that are shown.
View the sample map used in the app. For more information, see the Exhibit item overview.
Compare
Compare is a configurable app template that supports the side-by-side or stacked comparison of two maps or scenes. It can be configured to compare two scenes, two maps, or one of each. The two views can be linked or unlinked depending on whether you want to view the same location.
Configure the app
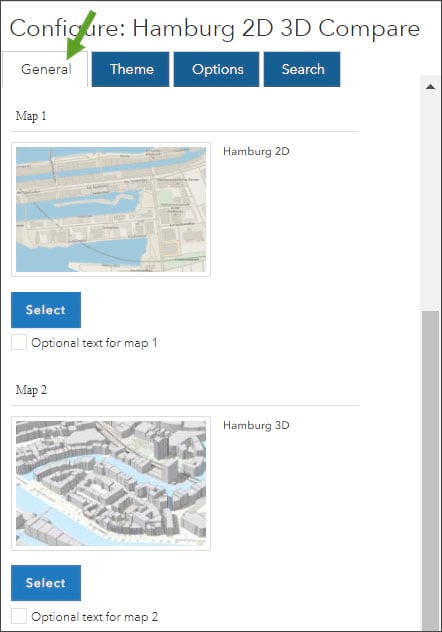
In the General tab, select the maps or scenes you want to compare.
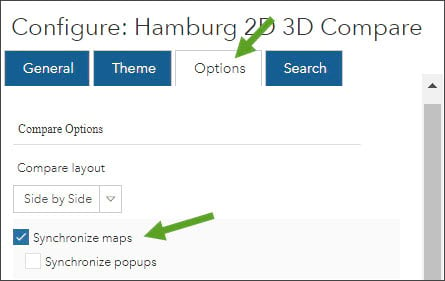
Open the Options tab to synchronize the maps. You can also change the layout from Side by Side to Stacked, add an expand button, include a basemap toggle, and more.
Use the app
Open the Hamburg 2D/3D Compare configurable app shown below, which uses both a 2D map and 3D scene. Pan, zoom, or tilt to compare the two, or click and hold the comparison slider to change your map focus.
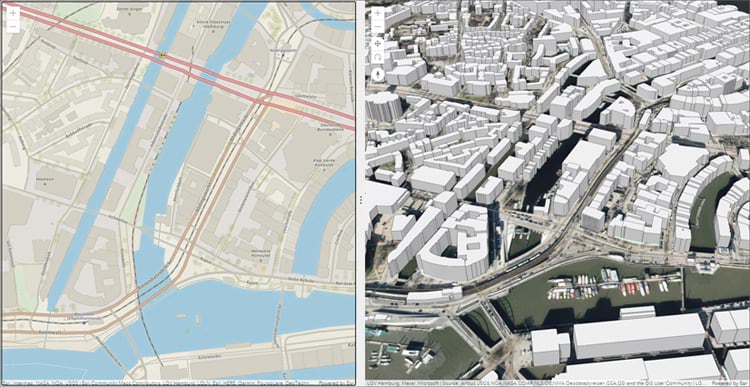
View the sample 2D map and sample 3D scene used in the application. For more information, view the Compare app item overview.
Web AppBuilder
ArcGIS Web AppBuilder is a WYSIWYG app builder that lets you build 2D and 3D web apps, no coding required. Start by choosing a layout, then add configurable widgets to create your app.
Configure the app
Web AppBuilder includes a swipe widget that can be found in the widget library. Start by choosing a theme, style, and layout. Then add the swipe widget from the widget gallery.
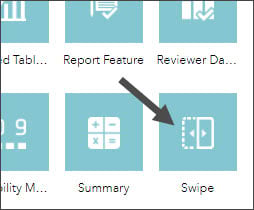
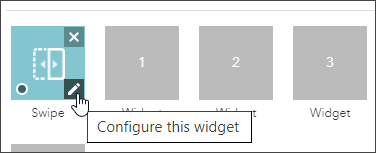
Once added to a toolbar, click the dot in the lower left to automatically enable the widget when the app is opened, then click the pencil to open the configuration panel.
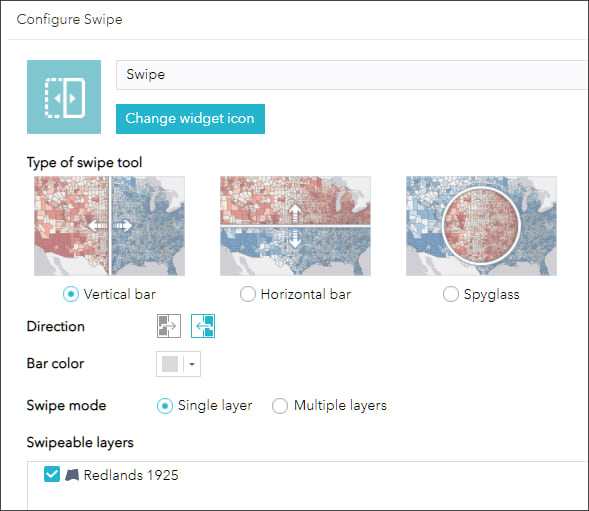
The widget can be configured in a variety of ways. You can choose vertical, horizontal, or spyglass swipe mode, and can set the direction, color, and which layer in your map to swipe. Below is shown the configuration used in the sample app.
Use the app
Open the Czech Land Survey Web AppBuilder app. Since the app is configured with the swipe tool enabled and desired layer already set, all you need to do is grab the handle and swipe. The swipe tool is located just beneath Search in the app.
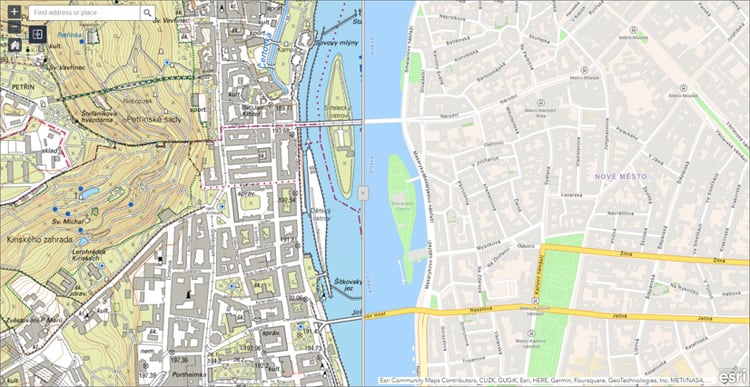
View the sample map used in the app. For more information, see Swipe widget.
ArcGIS Experience Builder
ArcGIS Experience Builder lets you deliver responsive web experiences without writing any code. You can create apps and/or pages that contain 2D and 3D maps, text, and media. Experiences can focus on one type of content or can combine and link many types of content to create a complete experience and destination for your audience. Experience Builder can be used to build experiences that contain multiple maps, 2D or 3D, that can be synced.
Experience Builder includes a Swipe widget that can be configured in a variety of ways. You can also build an experience that compares maps using triggers and actions. Examples of each are covered below.
Use the Swipe widget
Build the experience
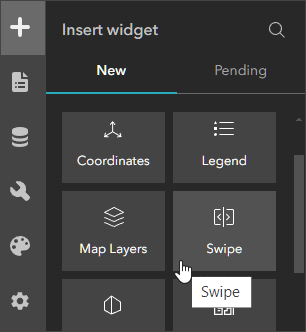
The Swipe widget allows you to compare layers and maps. The widget transitions from one map or layer to another by moving, or swiping, a divider across the map. The Swipe widget can be found in the Insert widget gallery, drag and drop it onto into your experience, then use the Content and Style tabs to configure the widget as desired. For more information, see Swipe widget.
Use the experience
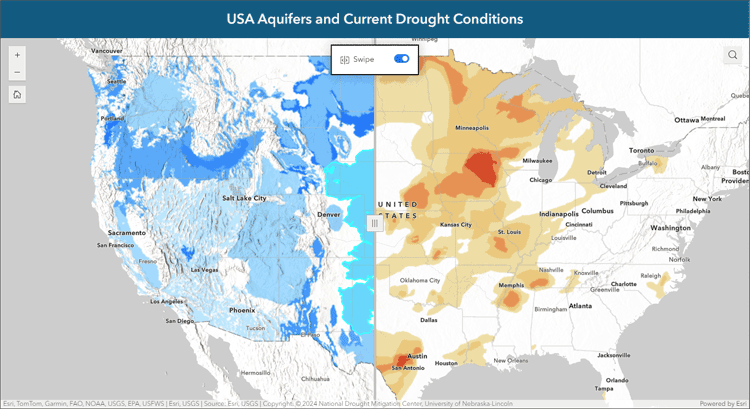
Open the USA Aquifers and Current Drought Conditions experience shown below. The experience has been configured using a single map with two layers. The swipe tool is centered and activated automatically when the app is opened.
Comparison using triggers and actions
Build the experience
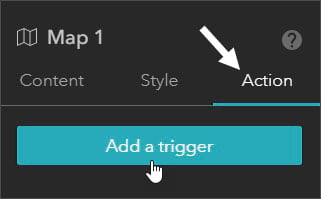
To link two or more maps or scenes, use triggers and actions. Widget actions are in response to linked trigger actions in other widgets. Select a widget and open the Action tab to add a trigger, then specify the target and action. To sync two maps or scenes, apply the trigger and action in reverse. See Add action triggers to widgets for more information.
Use the experience
Experience Builder provides lots of flexibility in creating the experience you want, so there is no specific way that comparison apps will work; it depends on how you build it.
In the Portland 2D/3D experience below, a 2D map and 3D Scene have been synced using triggers and actions. Pan, zoom, or tilt to compare the two.
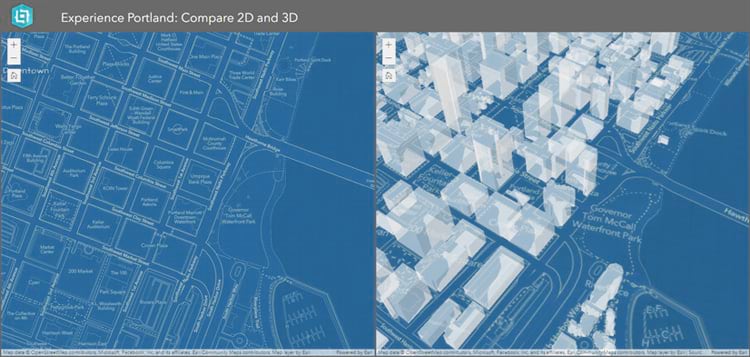
View the 2d map and 3d scene used in the experience. For more information, see Get started with ArcGIS Experience Builder: sync 2D and 3D maps.
World Imagery Wayback
While you can’t use the Wayback app to swipe your own layers, it can be used against any layers in the Wayback Imagery archive. Wayback Imagery is a digital archive of the World Imagery basemap that enables you to access more than 100 versions of world imagery captured over the years. The World Imagery Wayback app is the best way to browse these archived versions and includes swipe and animate modes to compare versions.
Use Wayback swipe
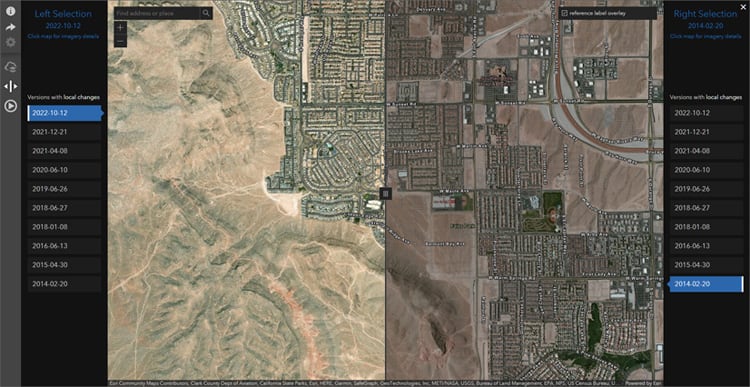
Open the Wayback app, zoom to an area of interest, and enable the swipe tool. Available layers will be shown on the left and right. Turn on the desired layers by clicking them in the left and right columns, then use the swipe tool to compare.
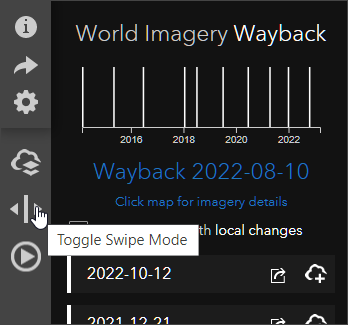
Use the app
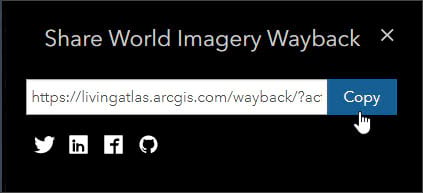
A handy feature of the Wayback app is that you can share the current swipe settings, including the selected imagery and map extent, by clicking the share button in the upper left.
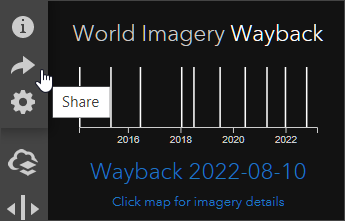
Copy the URL to share with others.
Click the map below to view a shared Wayback swipe comparison of 2023 and 2014 imagery showing development over time in the Las Vegas, Nevada, area.
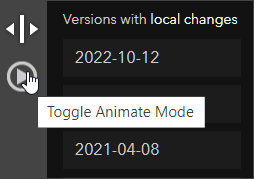
You can also toggle Animate Mode to create an animation of change over time.
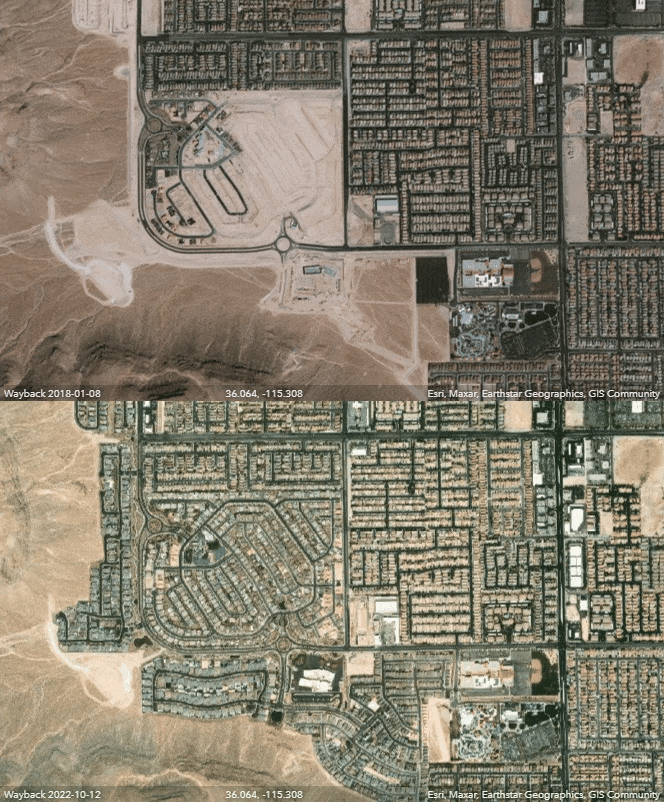
Below is an example of a saved GIF animation for the Las Vegas area from World Imagery Wayback.
For more information, see Use World Imagery Wayback.
Sentinel-2 Land Cover Explorer
Land use land cover (LULC) maps are an increasingly important tool for decision-makers in many industry sectors and developing nations around the world. The information provided by these maps helps inform policy and land management decisions by better understanding and quantifying the impacts of earth processes and human activity.
One of the foremost capabilities of this app is the dynamic change analysis. The app provides dynamic visual and statistical change by comparing annual slices of the Sentinel-2 10m Land Use/Land Cover data as you explore the map.
Use the app
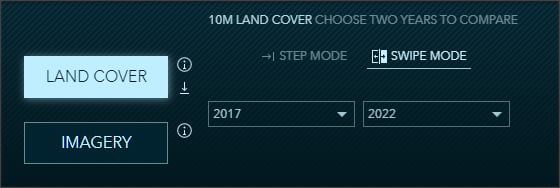
Open the Land Cover Explorer, zoom to an area of interest, and choose either Land Cover or Imagery.
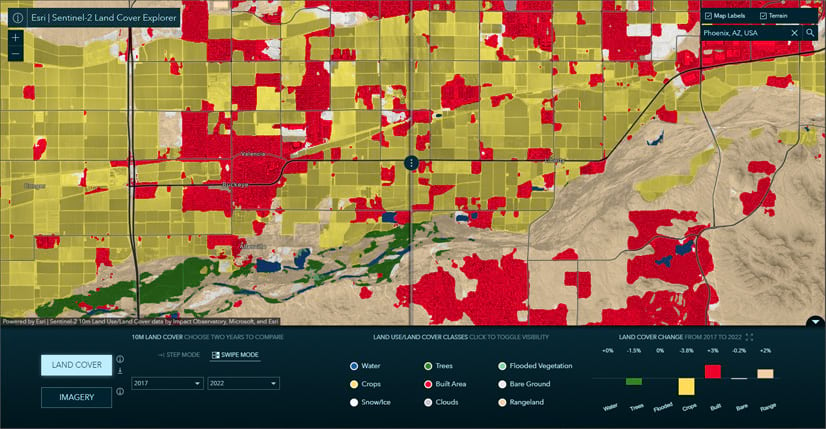
Use step or swipe mode
Enable the step or swipe tool to begin exploring.
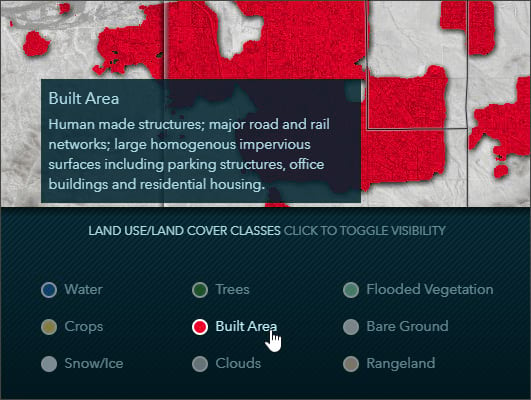
When Land Cover is chosen, you can view the legend and click to highlight specific land use and land cover classifications.
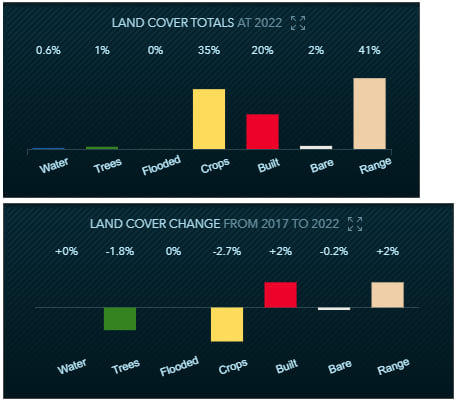
A graph shows the selected year land cover totals in step mode, or the land cover change between the selected years in swipe mode.
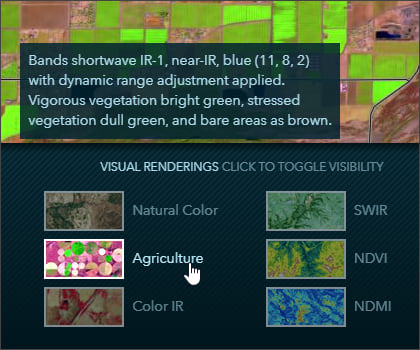
When Imagery is chosen, you can choose different renderings to highlight characteristics of the multispectral image.
As before, a graph shows the selected year land cover totals in step mode, or the land cover change between the selected years in swipe mode.
Copy the URL that you see at the top of the app when you are finished setting things up. This allows you to share your animations and comparisons with others. Here’s some examples:
- 2017 – 2022 Lake Mead (Nevada/Arizona) water levels swipe
- 2017-2022 Braunlage (Germany) land cover step mode
- 2027-2022 Ramadi (Iraq) land cover swipe
For more informaton, see Global land cover revealed.
Landsat Explorer
Landsat Explorer lets you apply a variety of tools against Landsat imagery, accessed directly from the Landsat collection on Amazon Web Services (AWS) that is updated daily. The imagery is rendered on-the-fly and available for visualization and analytics via the app. Landsat Explorer makes it easy for anyone to access and analyze more than 40 years of multispectral imagery from the Landsat satellite missions covering the planet’s geology, vegetation, agriculture, and cities. Use swipe mode or animate mode to visualize change over time.
Use Landsat Explorer swipe
Landsat Explorer includes a swipe tool which can be used to compare Landsat imagery from different dates and using different renderers. To use swipe, navigate to your area of interest and click Swipe. Select the left and right side boxes, choosing imagery and renders for each.
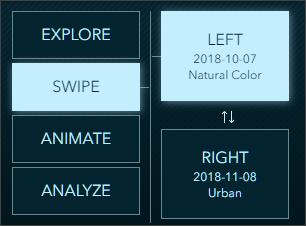
You can copy the URL at the top of the app and share it with others to share your current swipe settings. Examples:
Use Landsat Explorer Animate
To use animation, navigate to your area of interest and click Animate. You can collect scenes from different dates that use different renderers to deliver the desired animation. Click + Add A Scene to chose scenes of a specific date and apply the desired renderer. When your collection is complete, click the play button.
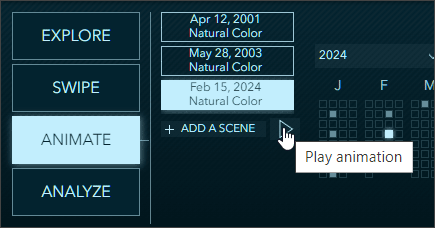
You can copy the URL at the top of the app and share it with others to share your current animation settings, or during play click the link icon. Examples:
For more information, see Landsat Explorer: Earth science and observation for all.
Sentinel Explorer
Using Sentinel Explorer, you can apply a variety of tools against Sentinel-2 imagery, accessed directly from the Sentinel-2 collection on Amazon Web Services (AWS) and updated daily. Sentinel-2, 10, 20, and 60m multispectral, multitemporal, 13-band imagery is rendered on-the-fly and available for visualization and analytics via the app.
Use Sentinel Explorer swipe
Sentinel Explorer includes a swipe tool which can be used to compare Sentinel imagery against the basemap, or imagery from different dates and different renderers. Open Sentinel Explorer and sign in to your account.
To use the swipe, navigate to your area of interest and render the imagery as desired. Then follow these steps:
Step 1 — Open the time selector to choose a date and add the layer to the swipe by clicking Set current as secondary layer. The secondary layer will appear on the left when you open the swipe tool with the current renderer.
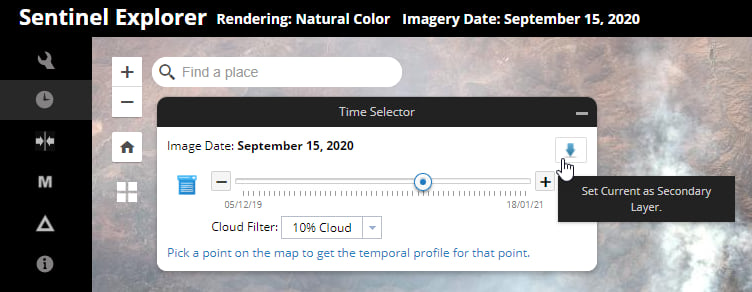
Step 2 — Move the time selector to a different date. You can also change the renderer.
Step 3 — Dismiss the time selector and click the swipe tool to interactively compare the two dates of imagery. The chosen dates appear at the top of the application.
Tip: Click the App Tutorial tool and select Time, Swipe, and Change from the dropdown list to review the steps above and learn more.
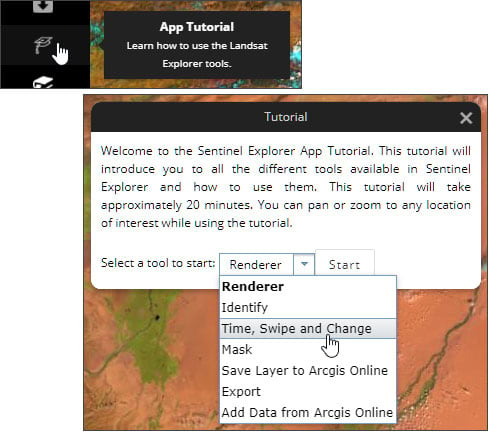
Use Sentinel Explorer
Open the app below to begin exploring Sentinel imagery. Begin by exploring the dynamic renderers that can be applied, then use swipe to compare imagery. Use the tutorial to learn about using masks, change detection, and other available tools.
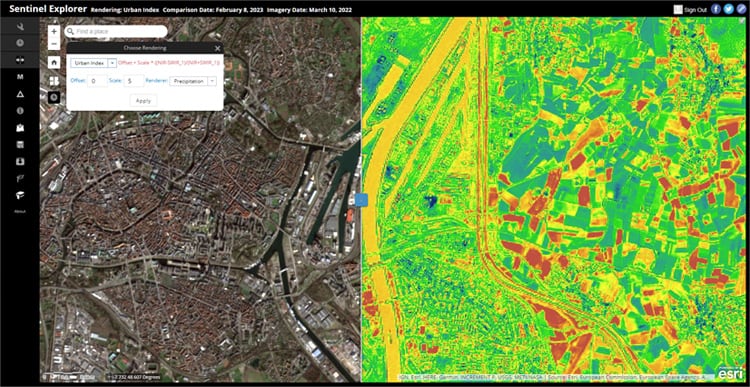
For more information, see the Sentinel Explorer item overview.
ArcGIS StoryMaps
ArcGIS StoryMaps make it easy to create inspiring, immersive stories by combining text, interactive maps, and other multimedia content. A story is authored using a builder that let’s you add blocks to your story to include text, maps, video, and more.
Using StoryMaps swipe
Swipe is one of the blocks that you can add to any story that lets you compare two maps, or two images.
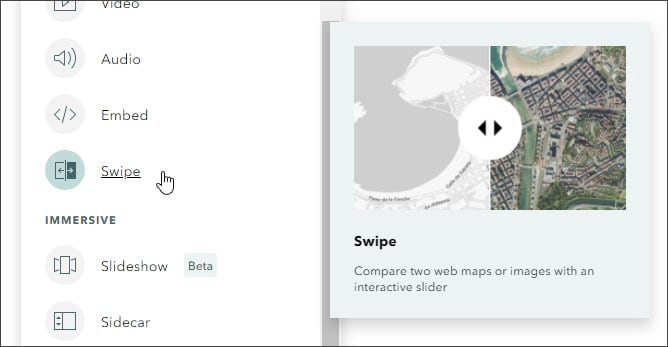
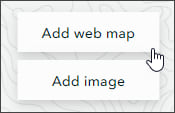
After you add the swipe block, choose Map.
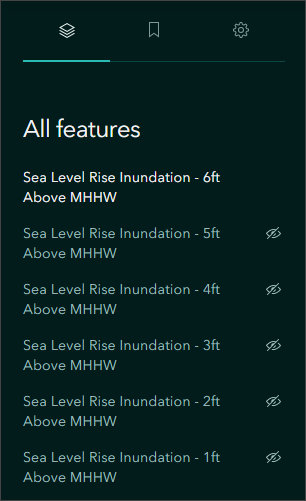
You can choose different maps for the left and right side of the swipe, or can choose the same map and toggle layer visibility on the left and right side to compare layers.
Use the story
The sample story below uses a swipe block to compare 1-foot and 6-foot sea level rise scenarios. The same map is used on either side of the swipe, but layer visibility is toggled to show the 1-foot scenario on the left and the 6-foot scenario on the right.
Sidecar and Timeline blocks may also be configured to show comparisons. In addition, any of the apps discussed above can be embedded in a story.
View the map used in the story. For more information, see ArcGIS StoryMaps Overview and Resources.
Summary
ArcGIS Online offers many ways to create or use apps that enable you to swipe or compare layers and maps. The above list is not entirely exhaustive, but offers a variety of ways to enable visual comparison of your GIS content.


Commenting is not enabled for this article.