Place Common Tools at Your Fingertips
The fastest but most frequently overlooked way to reach the commands you often use in ArcGIS Pro is through a customized Quick Access Toolbar.
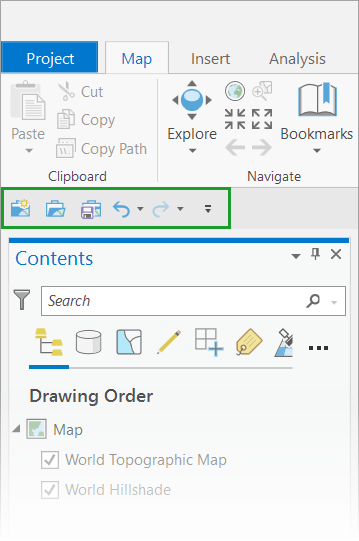
The Quick Access Toolbar, located above the ribbon in ArcGIS Pro and marked by a green box in the graphic below, is an easily accessible toolbar to which you can add commands that you often need. This toolbar puts those commands at your fingertips.
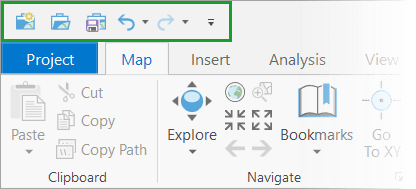
To work with the Quick Access Toolbar, you need to customize the commands on the toolbar, reposition them, reset the toolbar, and reposition it.
Customize the Toolbar
There are multiple ways to customize the Quick Access Toolbar. You can add or remove commands by using the dialog box, from clicking a selected tool, or by searching for a tool.
Use the Dialog Box to Add Select Commands
Step 1: Click the dialog box launcher on the Quick Access Toolbar—this is the small arrow at the right of the toolbar.

Step 2: On the drop-down list, click a command with no check mark, because that means that it is not currently on the toolbar. For example, click the Explore command.

Note that the command appears to the right of the other commands on the toolbar.

Add Commands from a Selected Tool
You can also add commands to the Quick Access Toolbar directly from a selected tool.
Step 1: Right-click a command, such as Select.

Step 2: Choose Add to Quick Access Toolbar.

Note that the command is added to the right of the other commands on the toolbar.

Search for a Tool and Add It
You can also use the Quick Access Toolbar dialog box to search for tools and add them to the toolbar.
Step 1: Click the dialog box launcher on the Quick Access Toolbar.
Step 2: Choose Customize the Ribbon.
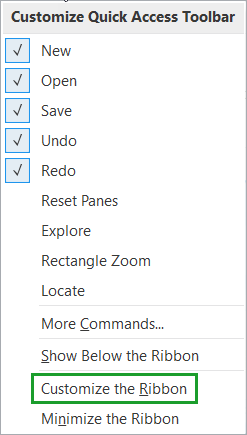
The Options window opens.
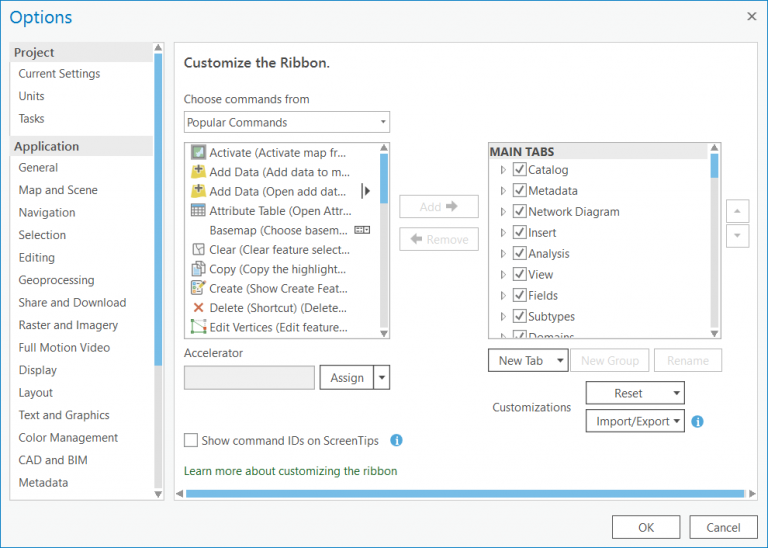
Note: You can also access this window from the project settings by clicking Options.
Step 3: Scroll to the bottom of the window on the left and choose Quick Access Toolbar.
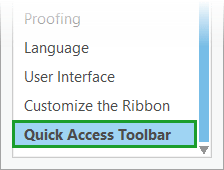
The window on the right shows the tools currently on the toolbar.

Step 4: Click the down arrow under Choose commands from.

To select commands from their current locations on the ribbon, choose List of Tabs. Choose All Commands to see an alphabetical list of commands. Choose All Geoprocessing Tools to select geoprocessing tools. Starting in ArcGIS Pro 2.6, there is also the option to choose commands from the following lists: Popular Commands and Popular Geoprocessing Tools.
For example, you may want to add the Match Layer Symbology to a Style tool. Since it is a geoprocessing tool, it is shown in the Geoprocessing Tools list.
Step 5: Choose All Geoprocessing Tools. A search box becomes available.
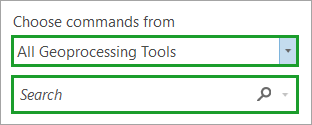
Step 6: Start typing the name of the command to see command names that include that text, then select the command—in this case, Match Layer Symbology To A Style—from the list.

Step 7: Click the Add button to add the command to the toolbar.

To remove a command, select it in the window at the right and click the remove button.
Step 8: Click OK at the bottom of the Options window to see that the command is added to the right of the other commands on the toolbar.

Reposition the Tools
You can also use the Options window to reposition the commands.
Step 1: In the window at the right of the Customize the Quick Access toolbar window, select the command to reposition.
Step 2: Click the arrow buttons to reposition the command on the toolbar.

Step 3: Click OK at the bottom right of the Options window to see that the command is repositioned on the toolbar.

Reset the Quick Access Toolbar
Use the Options window to reset the Quick Access Toolbar to its default state.
In the Options window, toward the lower right, click Reset.
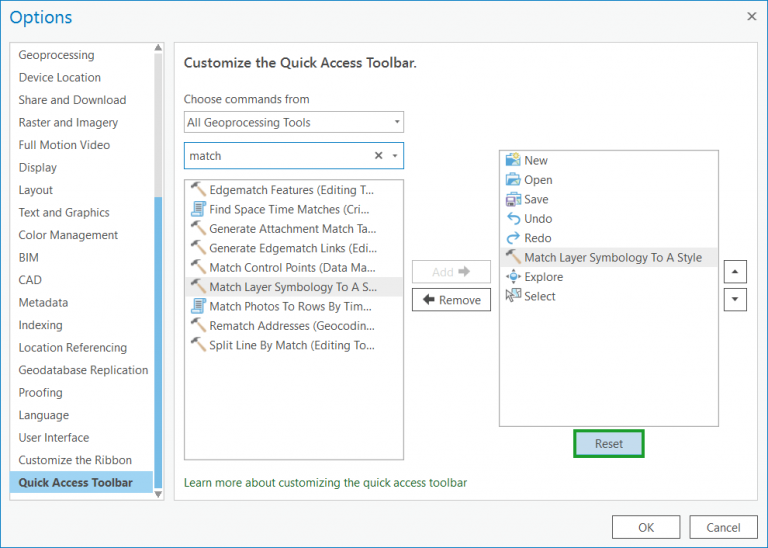
Note that the Quick Access Toolbar is reset.

Reposition the Quick Access Toolbar
If you find yourself using this toolbar often, you can position it closer to the work area so that you can quickly click on its contents.
Step 1: Click the Quick Access Toolbar dialog box launcher.
Step 2: Choose Show Below the Ribbon.

Note that the toolbar now appears above the Contents pane, closer to the main map window.
Even though most users have probably used the Quick Access Toolbar for such tasks as opening or saving a project, fewer know just how versatile it is or how much time and effort it can save. Next time you are working in ArcGIS Pro, try adding some of your favorite or most commonly used tools to the toolbar to see how it can streamline your work!
To learn more, see this online help topic for ArcGIS Pro.

