Drones are becoming increasingly valuable in the inspection of assets. They reach areas that are inaccessible to people and enable new capabilities such as quickly capturing detailed photos that would previously been difficult or impossible. Organizations that maintain hundreds or even thousands of assets can use drones to quickly review the condition of their assets and make decisions based on the imagery.
ArcGIS Drone2Map allows you to accomplish this task through an inspection workflow.
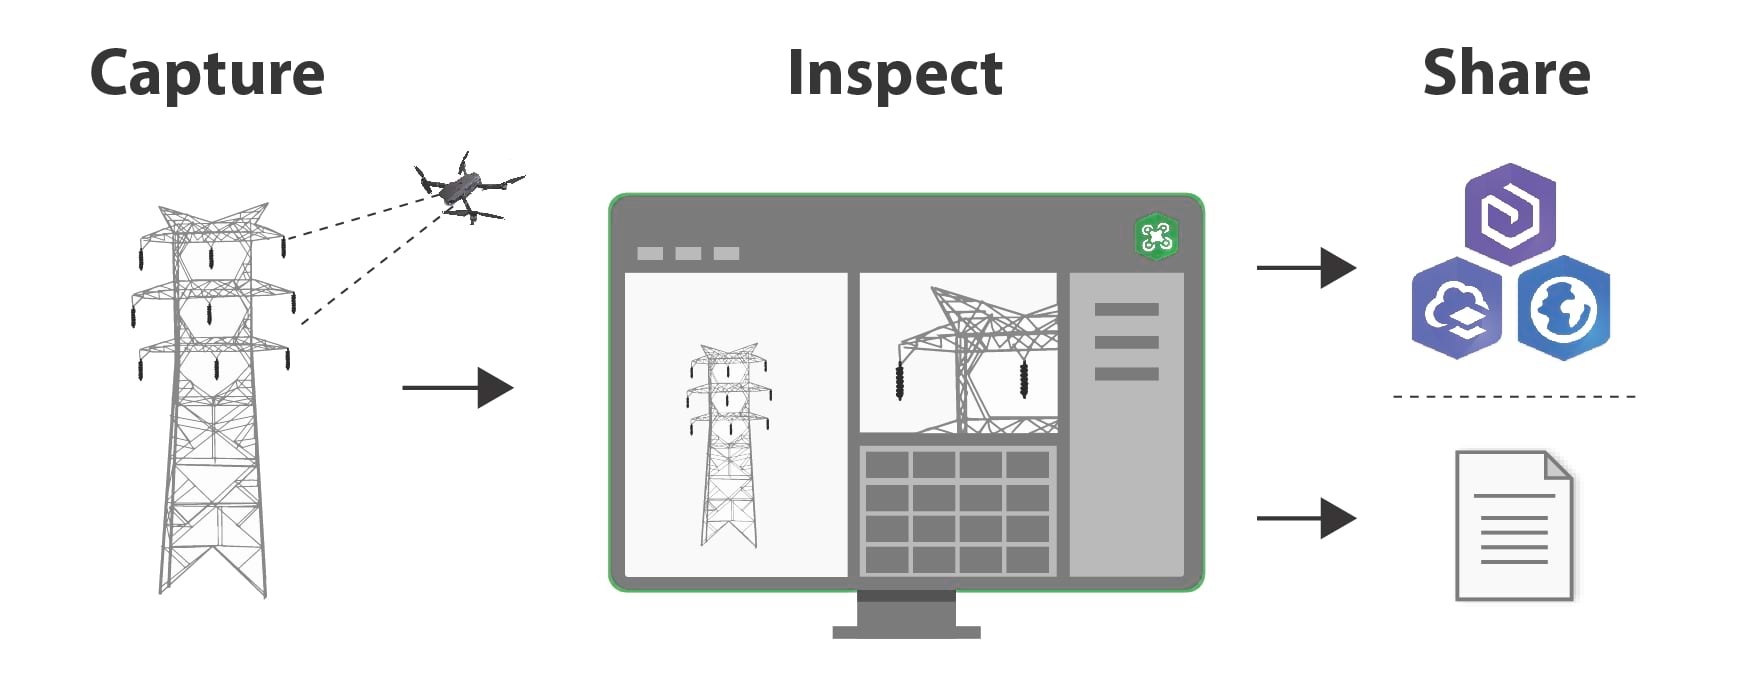
Inspection terminology
An inspection is a combination of many different components. Some key terminology has been outlined below:
Session – A dedicated user experience for creating and managing inspection features and reports.
Schema – The fields used to describe or categorize the assets being inspected.
Sketches – Graphic based drawings done on the original drone images.
Snapshots – An exported image from the inspection viewer containing the sketch overlaid on the drone image.
Features – Geographic features stored in a file geodatabase with associated attributes and snapshot attachments.
Report – A sharable PDF of the inspection features and snapshots created in the session.
To fully understand the inspection process, we will go into some more detail on the key components of inspections in ArcGIS Drone2Map.
Inspection session
The inspection session takes a user-defined or predefined schema and allows you to record inspection features to a file geodatabase or report for sharing. Inspections can be created immediately after you have loaded your imagery into a new project. However, by running the adjustment step or completing the processing of 2D or 3D products, you will gain some additional capabilities within an inspection such as map interaction.

Inspection schema
One of the biggest benefits of doing an inspection in Drone2Map is that you can import your own schema. If you are part of an organization that prefers to track assets in extensive detail, you can do so in an inspection session.
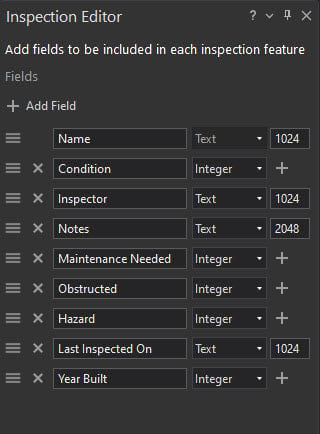
Inspections support text, integer, and float field types. Fields can also be configured to offer a multiple choice drop-down with a specific symbology for each value. This can be quite useful if you are tracking the condition of many different assets over the same area and need to quickly visualize trends.
Inspection features
There are two components of an inspection that are used in tandem to create inspection features: the inspection editor and inspection viewer.
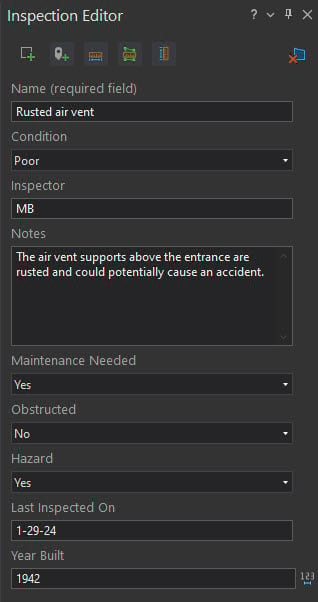
The inspection editor is where all the fields that are specified from your inspection schema appear. The editor provides the tools to create new polygon or point inspection features, along with some basic mensuration tools for estimating length, height, and area.
The inspection viewer is where the assets are inspected, and sketches drawn. The viewer presents your selected drone image in its full resolution. Features that are created within the inspection viewer will use orientation information to estimate their location and appear on either a 2D or 3D map. Additionally, you can sync the viewer to the project map so that the map updates it orientation based on the image you are viewing.
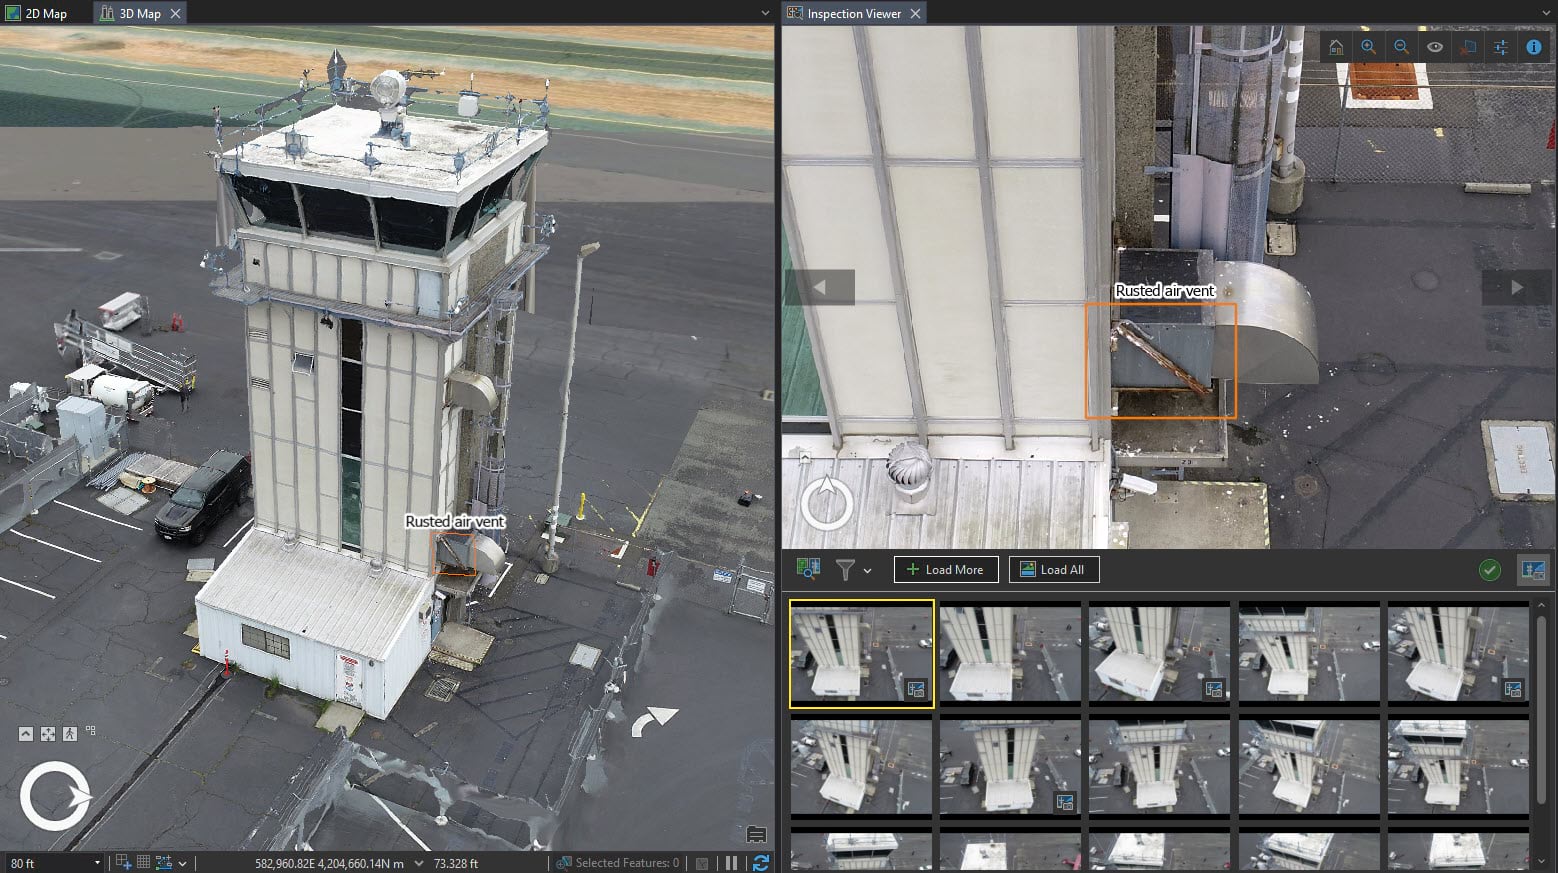
When creating new inspection features, snapshots are saved for use in the report or as an attachment to the feature class or hosted feature layer.
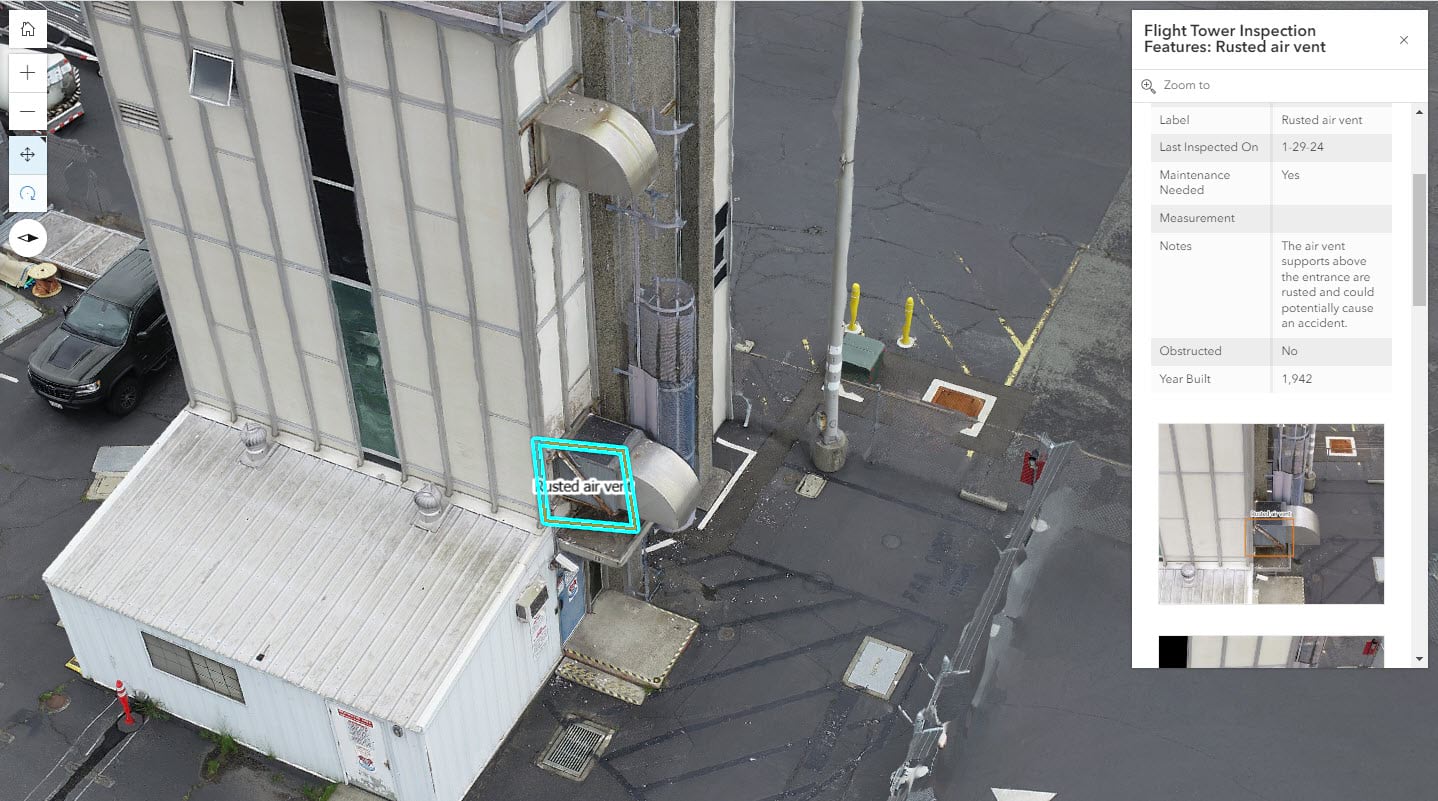
Inspection report
The inspection report is a crucial part of the inspection process. It summarizes your findings for others to easily review. The cover page of an inspection report can be customized to suit your organization. The report can be generated at any time during an inspection. Any newly created inspection features will appear in the inspection report. A table of contents with hyperlinks to each inspection feature is generated for the report.
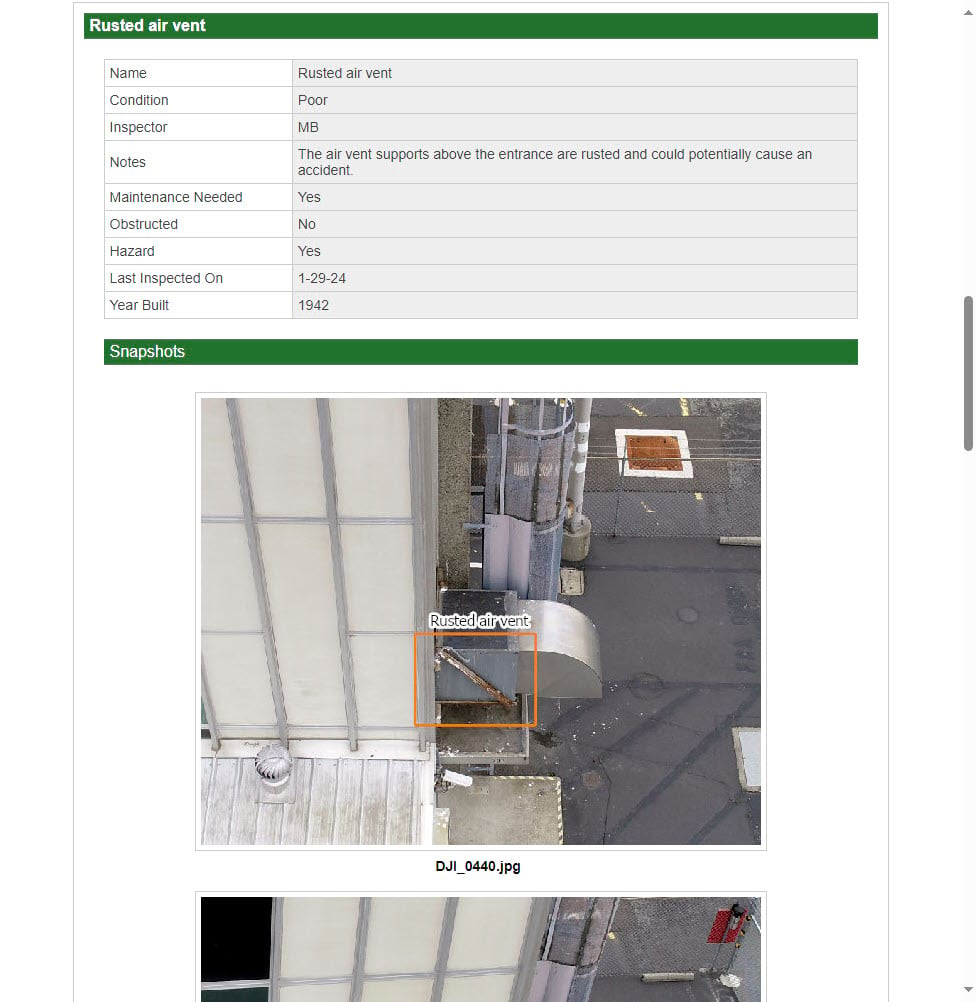
The result of the report shows each feature along with the details provided in the fields when creating that feature. Every snapshot that was added to the feature is also included. Snapshots are captured at the exact zoom level the image was in at the time of pressing the snapshot button. This allows you to have multiple viewpoints for an inspection feature in the inspection report.
Inspections can be a powerful tool for any organization that is looking to monitor their assets and keep them in proper working condition. For more information on how to start performing inspections see the following: Using inspection tools

Article Discussion: