Tutorial: Data exchange between Esri CityEngine and Autodesk Infraworks
Versions: CityEngine 2018.1 and Infraworks 2019.2
Introduction
This tutorial provides an overview of how to exchange data between Esri CityEngine and Autodesk Infraworks in both directions. While it does not give any details on how to use the two applications, it gives step-by-step export / import instructions based on an initial CityEngine example project.
To get started, this tutorial assumes that you have installed both CityEngine (2018.1 or later) and Infraworks (2019.2 or later). For both applications, fully functional trial versions are available from Esri or Autodesk, respectively.
In this tutorial, we use the “Redlands Redevelopment” example, which is available as a download within CityEngine. First, launch CityEngine and download the example project used in this tutorial:
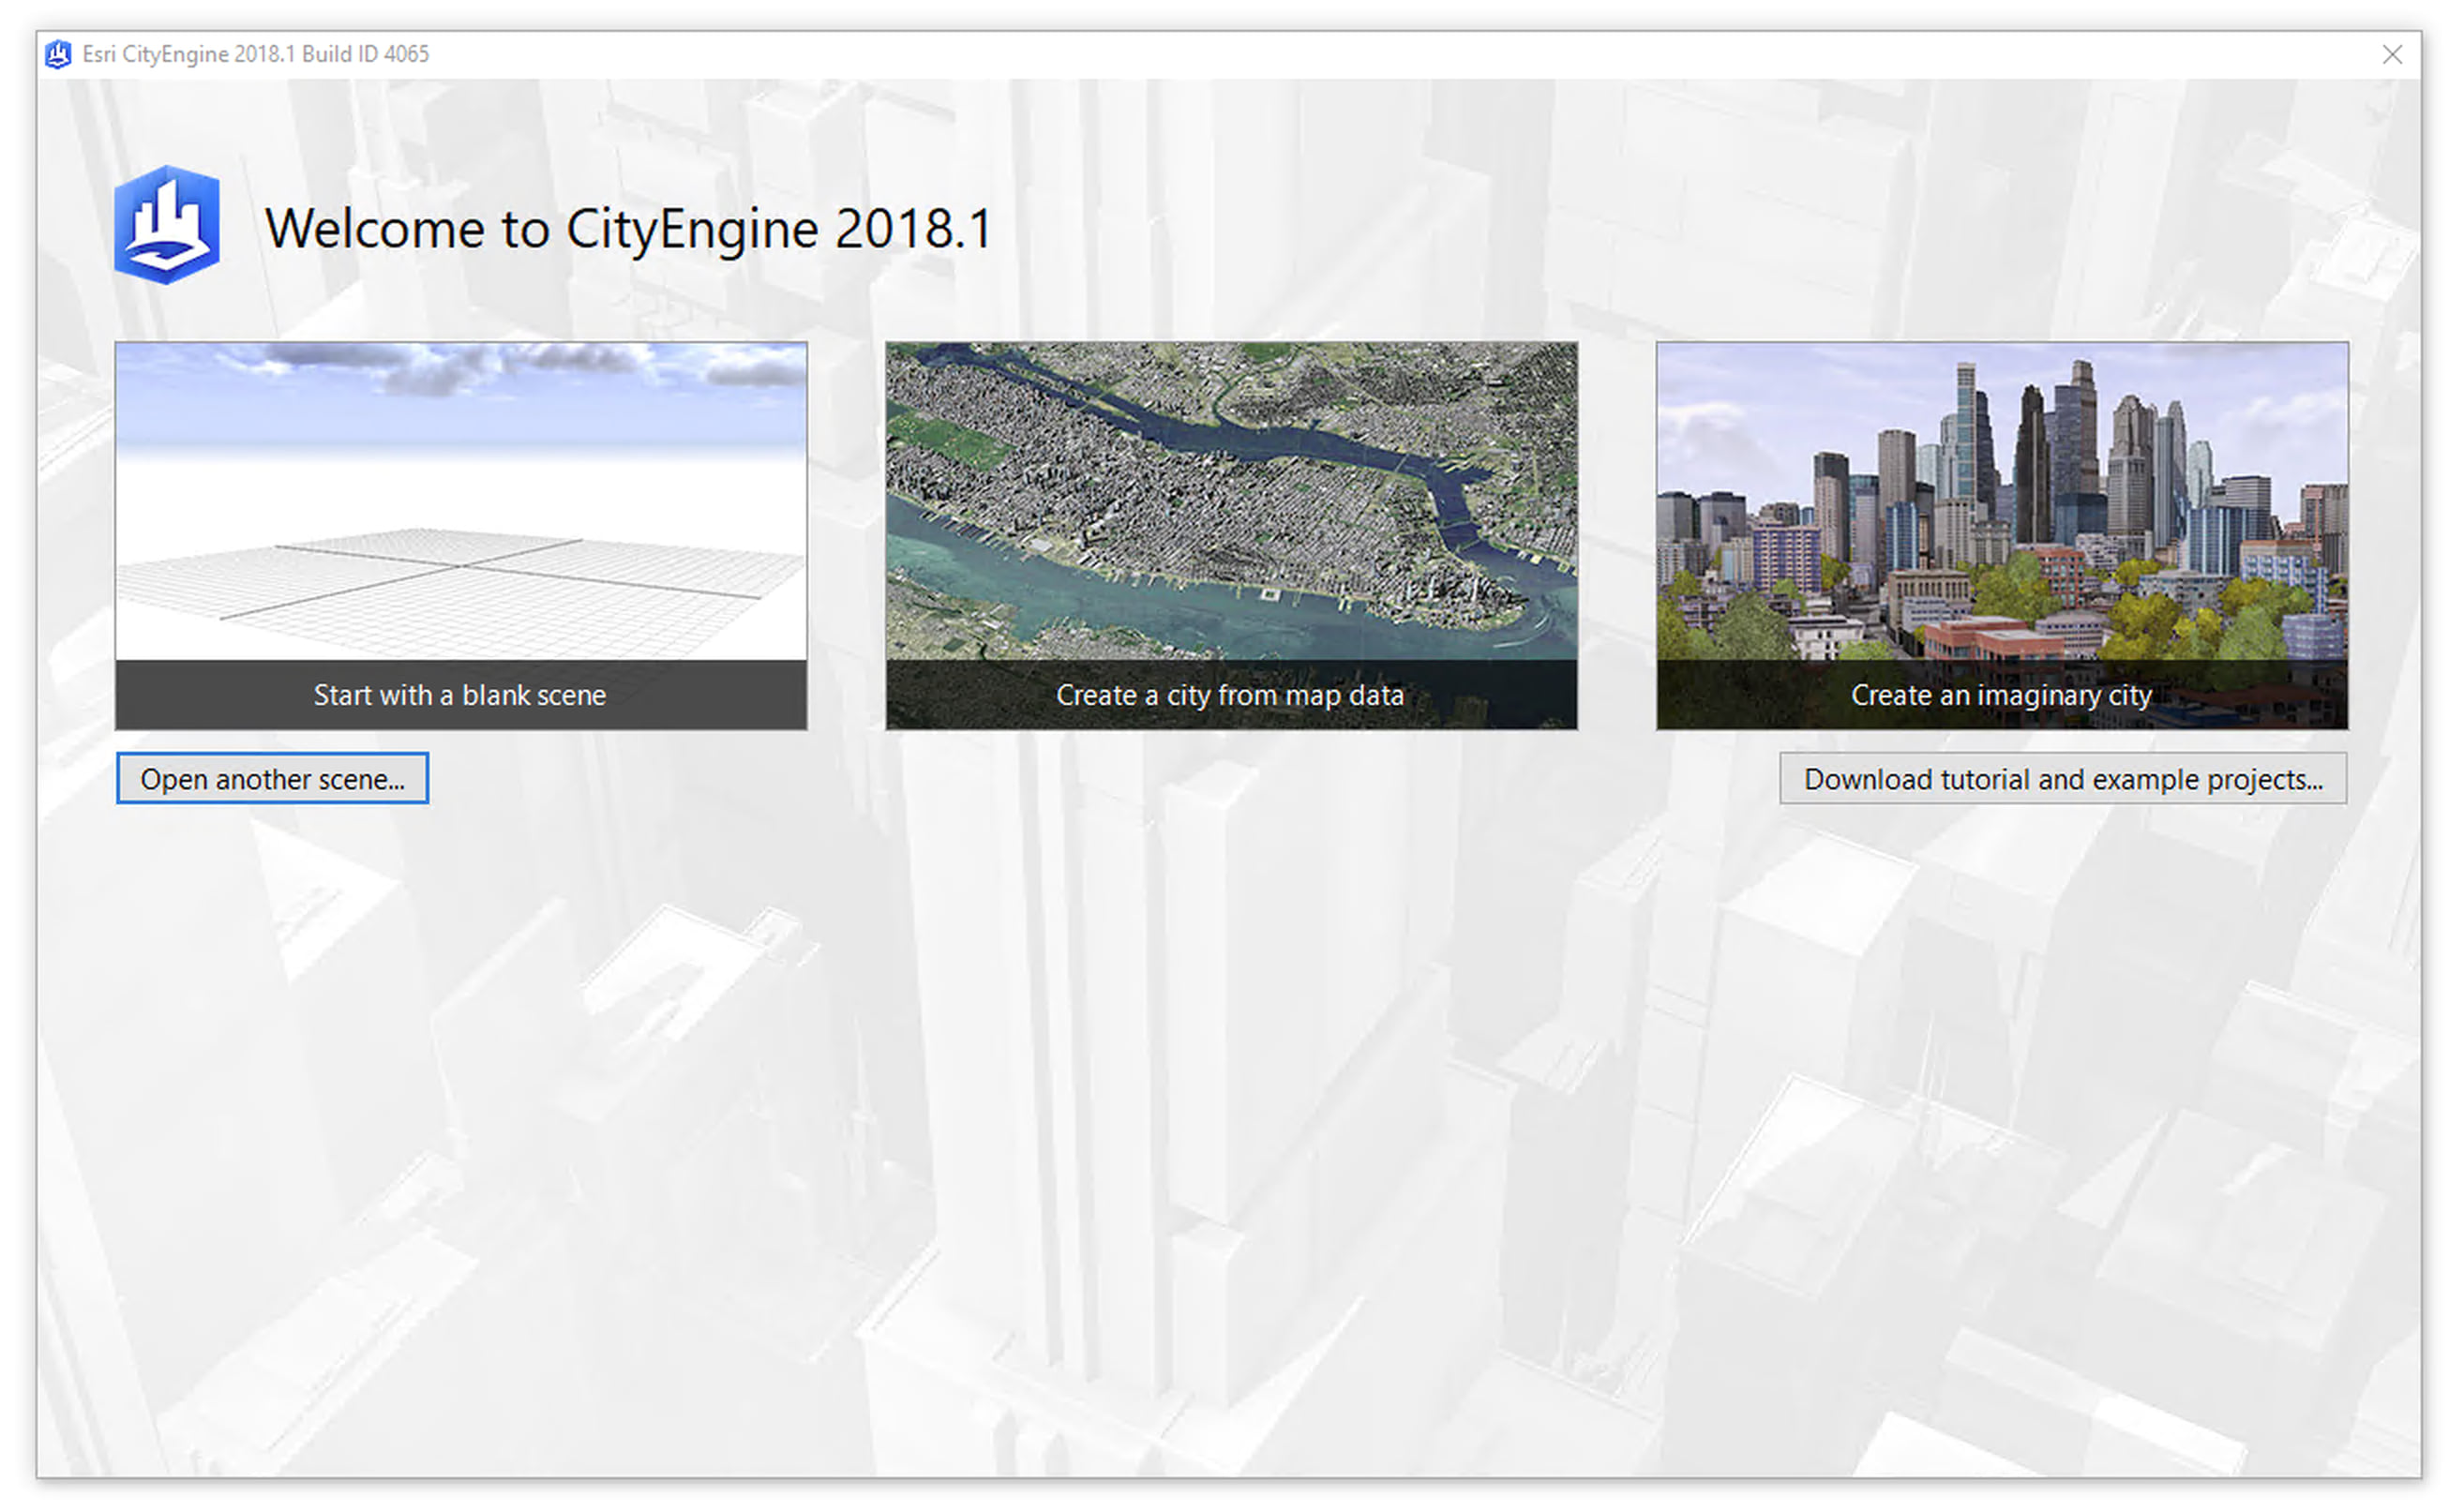
- On the startup screen, select “Download tutorial and example projects…”
(figure 1).
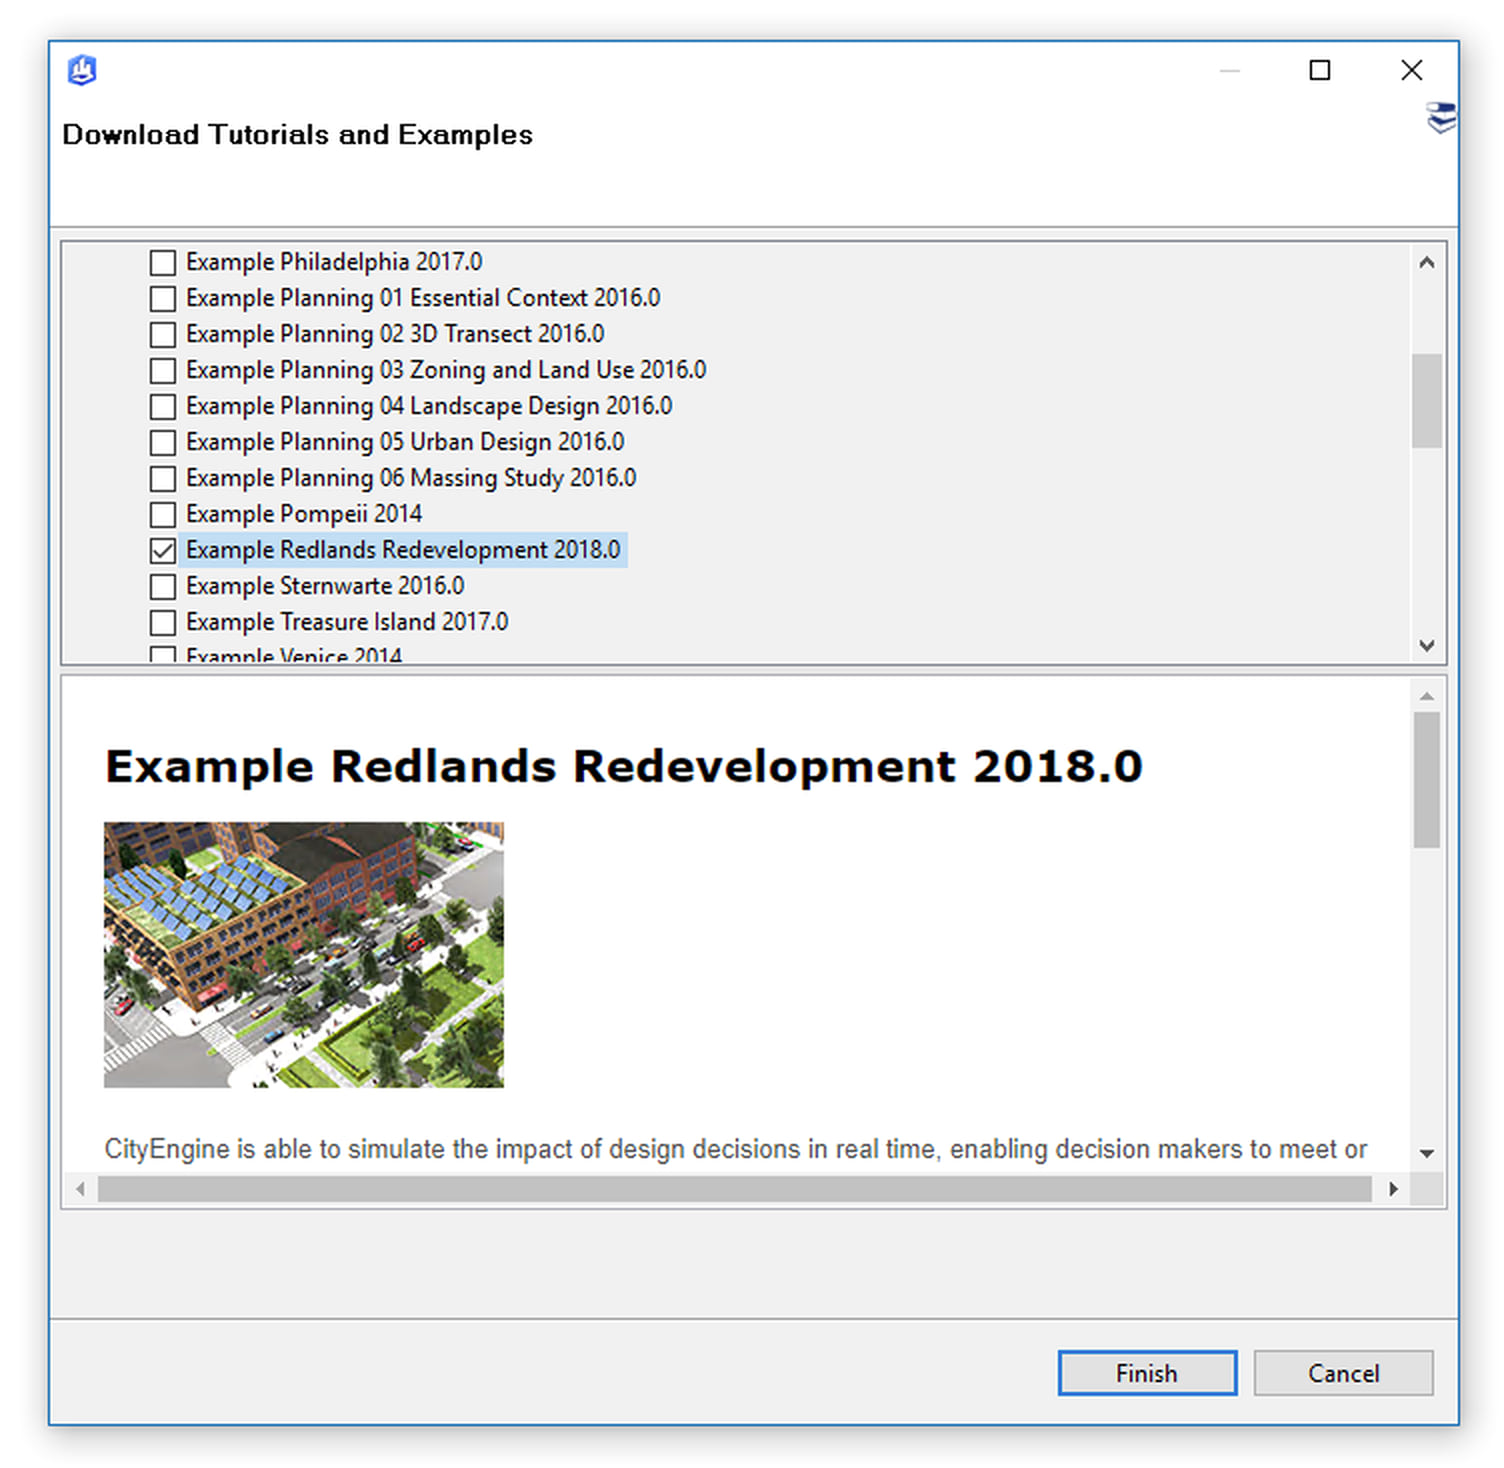
- Select the “Redlands Redevelopment 2018.0” example and hit “Finish” to download the project (figure 2.)
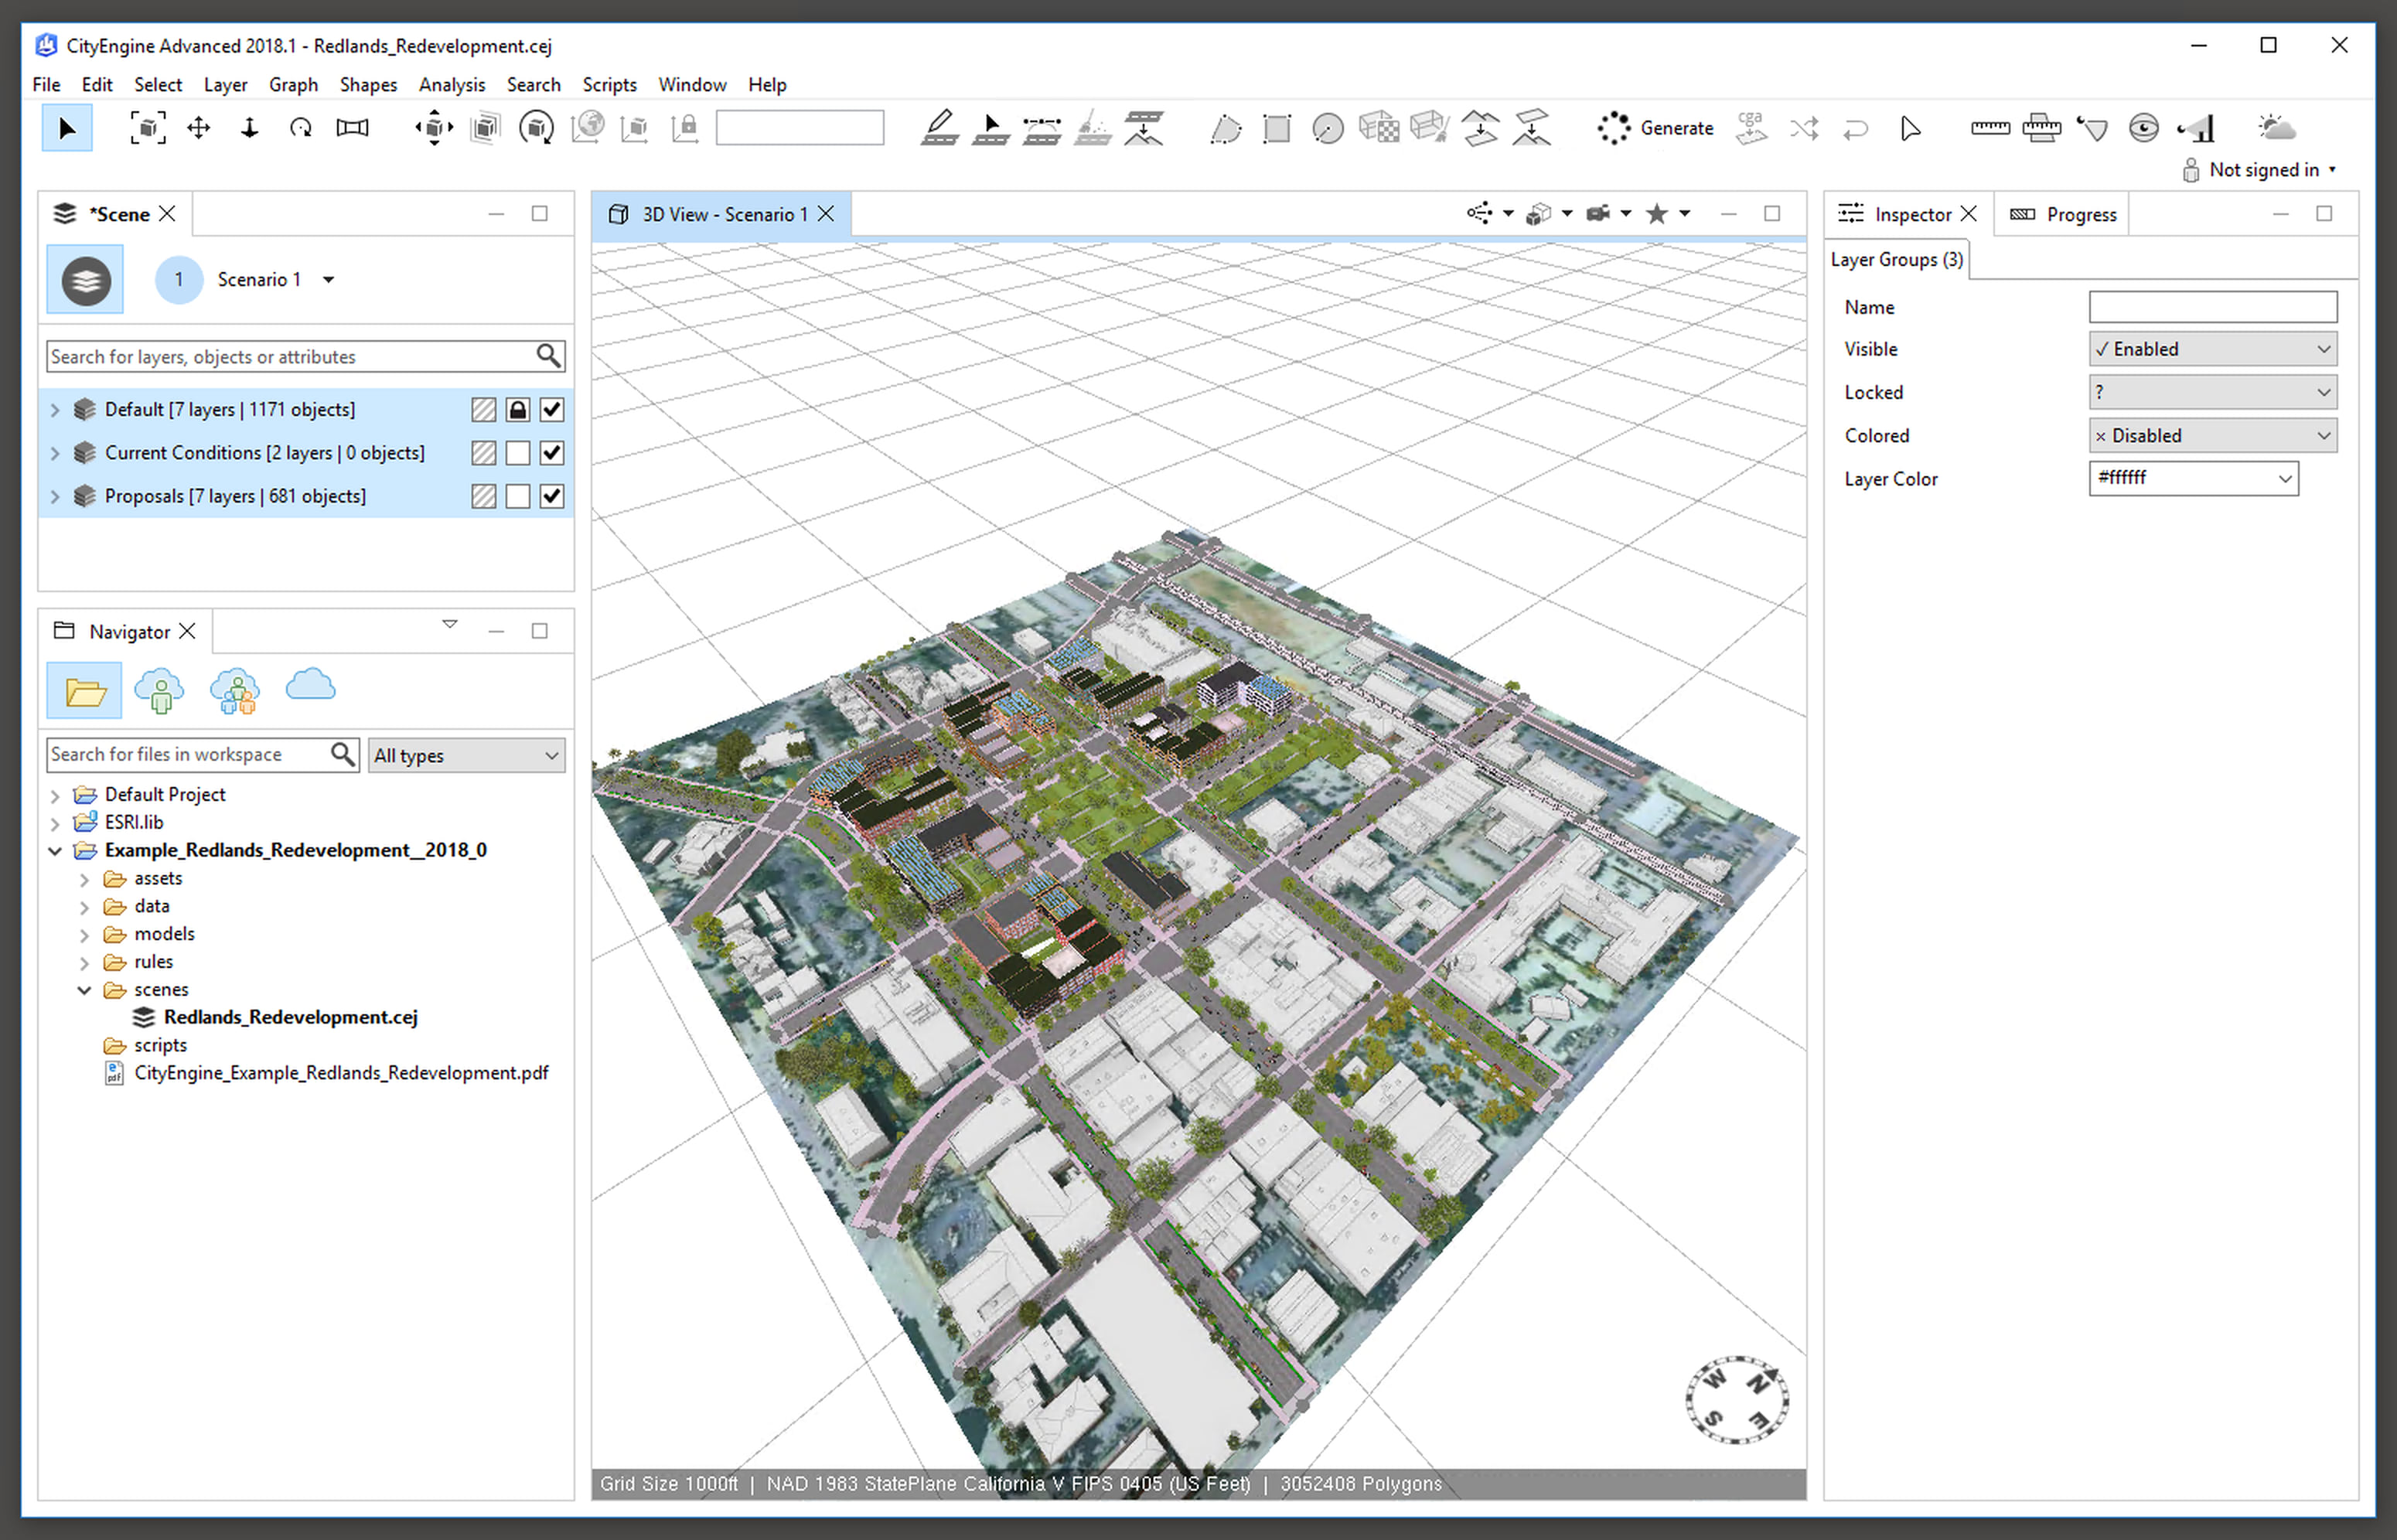
- The project then appears in CityEngine’s Navigator. Open the “scenes” folder and double click on “Redlands_Redevelopment.cej, which opens the scene.
- When asked to regenerate the generated models, hit “Yes”.
- The models are now generated, and the scene is displayed (figure 3).
From here, we will illustrate how to bring CityEngine models into Infraworks via FBX and from Infraworks to CityEngine via FBX or OBJ.
Exporting CityEngine models to Infraworks via FBX
This section shows how to export CityEngine models using the FBX format and import the models into Infraworks.
To start with, continue with the open “Redlands Redevelopment” example in CityEngine:
- In the scene navigator, select the all three layers (holding the Shift key, as shown in figure 3 on the top left).
- Choose the “File” menu and select “Export Models…”.
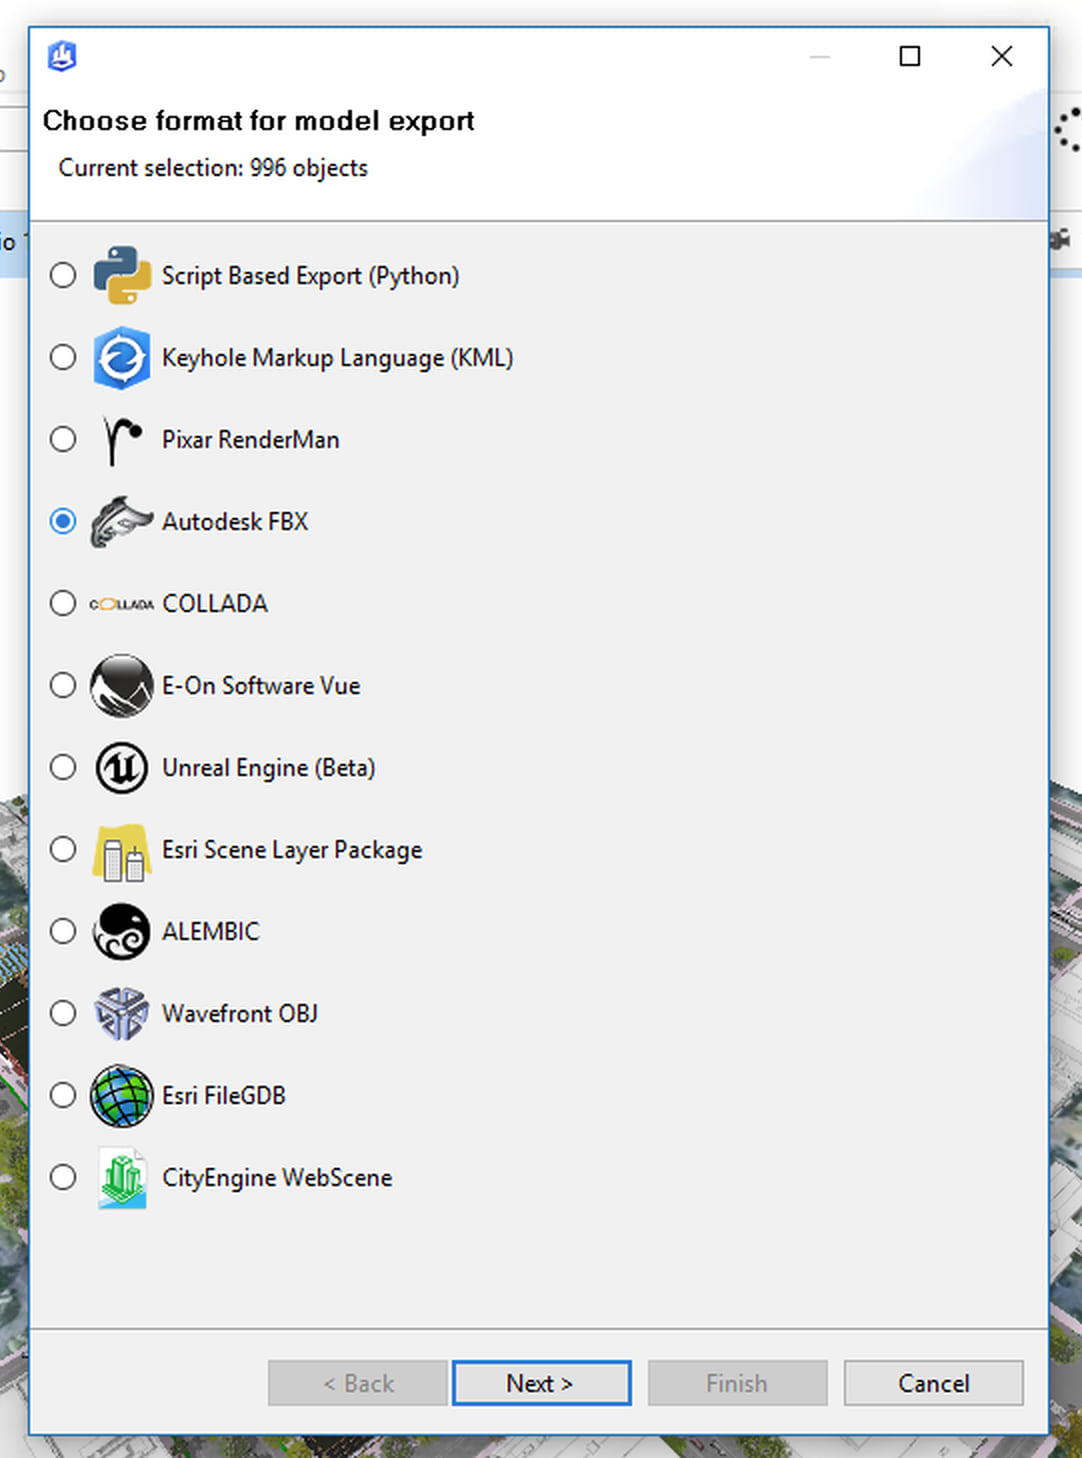
- From the dialog, select “Autodesk FBX” and hit “Next” (figure 4).
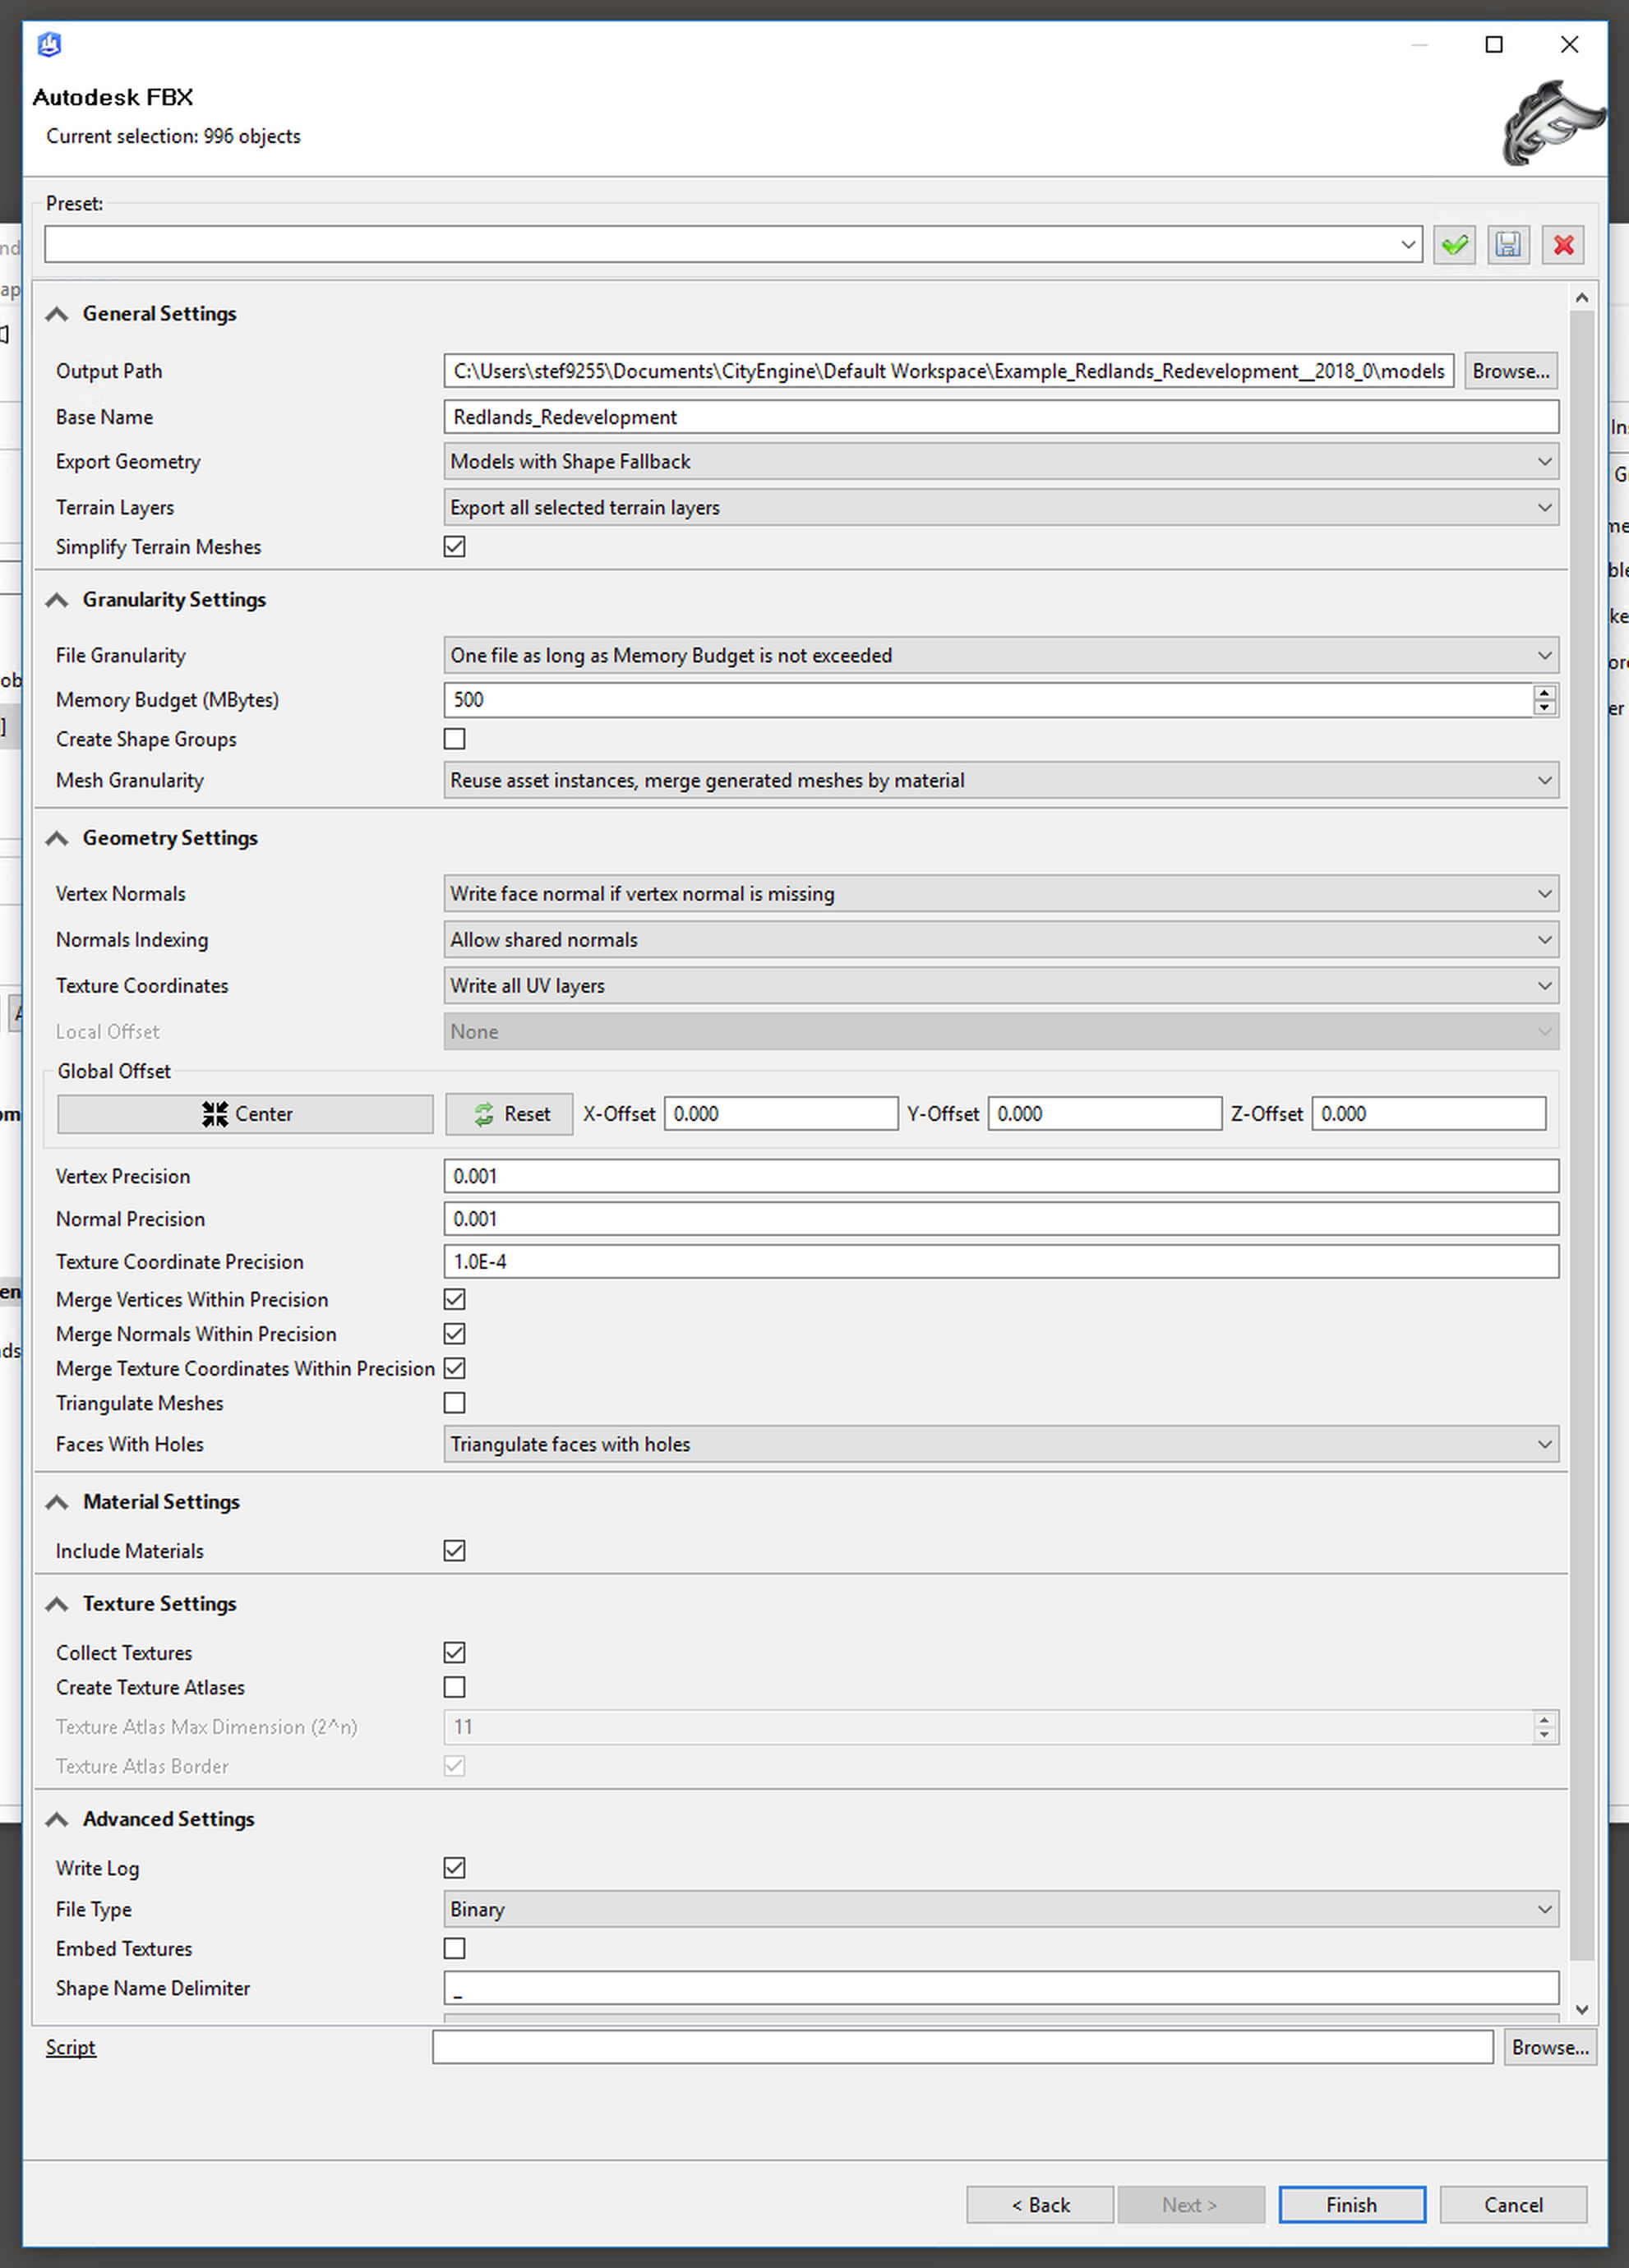
- The export options dialog opens (figure 5). Leave the default options and hit “Finish”.
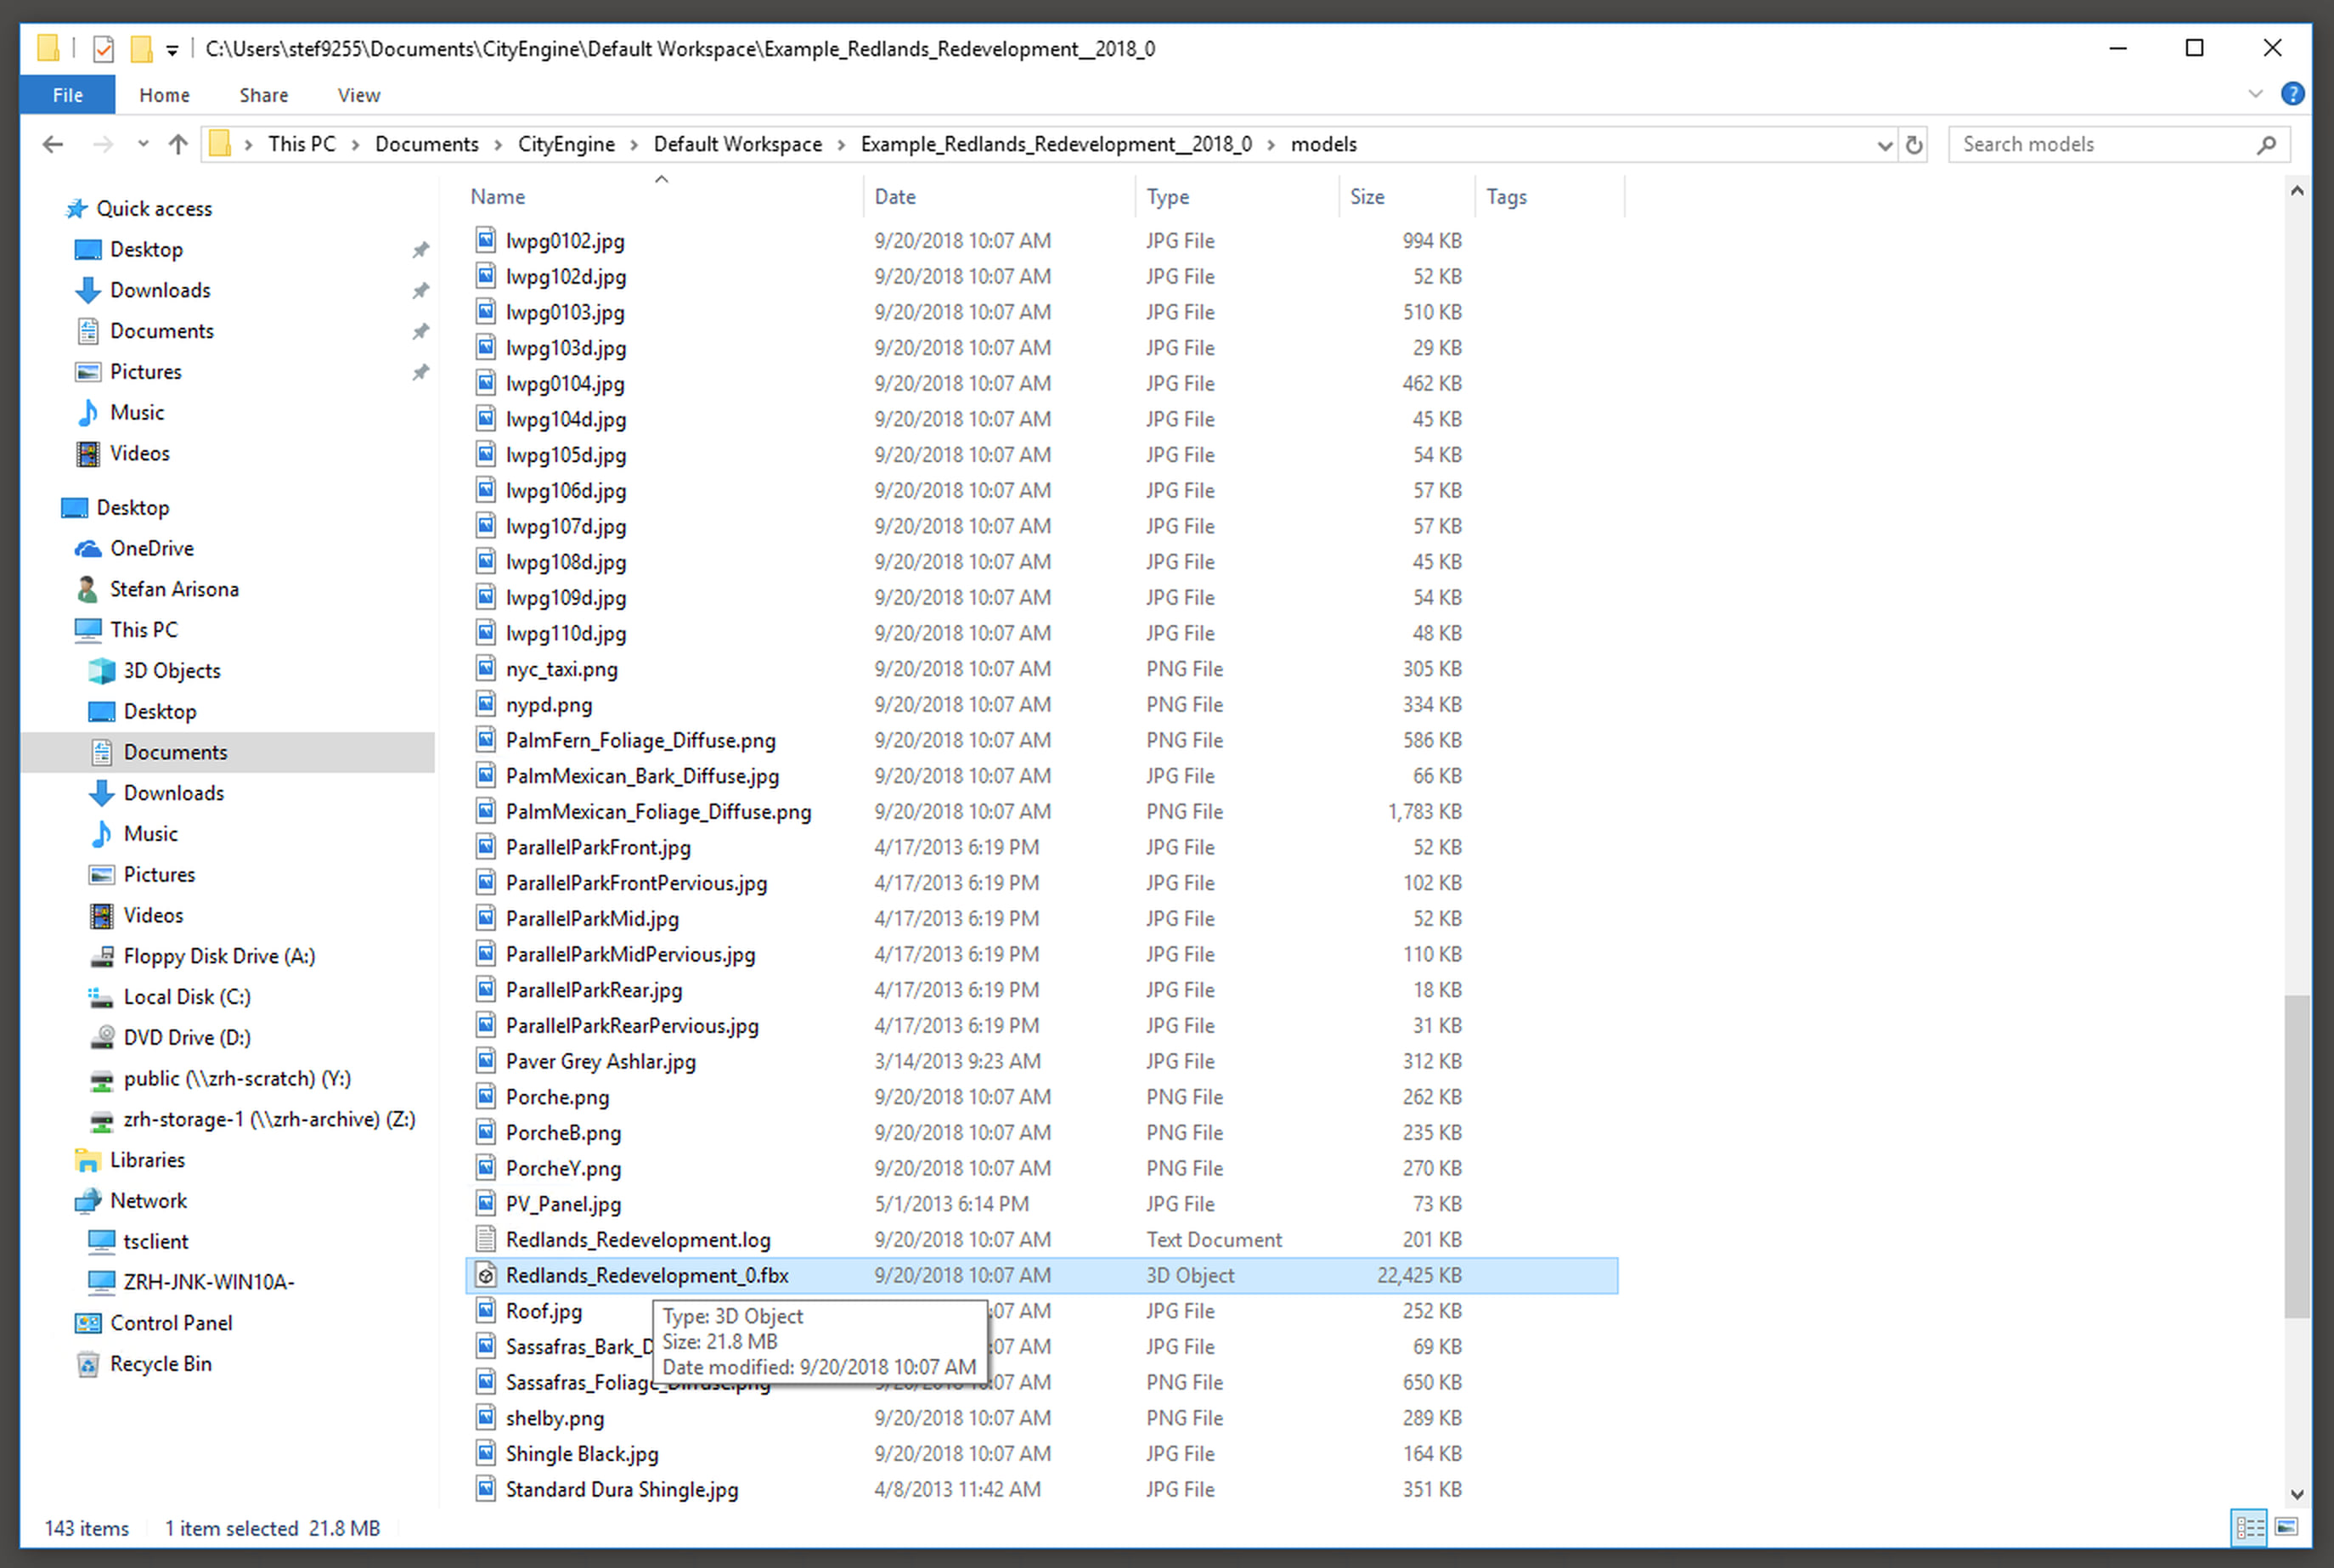
- The geometry is written to an FBX file, with texture assets in the same folder, as shown in figure 6. Note the default file path used by CityEngine in the Windows navigator.
- As a final step, we need to know, which coordinate system the scene uses. For this, select the 3D View, and press “D” twice, which shows the information display containing the current coordinate system (“NAD 1983 StatePlane California V FIPS 0405 (US Feet)”) in this case (bottom of figure 3). This information will be needed to use the correct coordinate system in Infraworks later on.
Now, we are ready to import the exported models into Infraworks:
- Launch Infraworks.
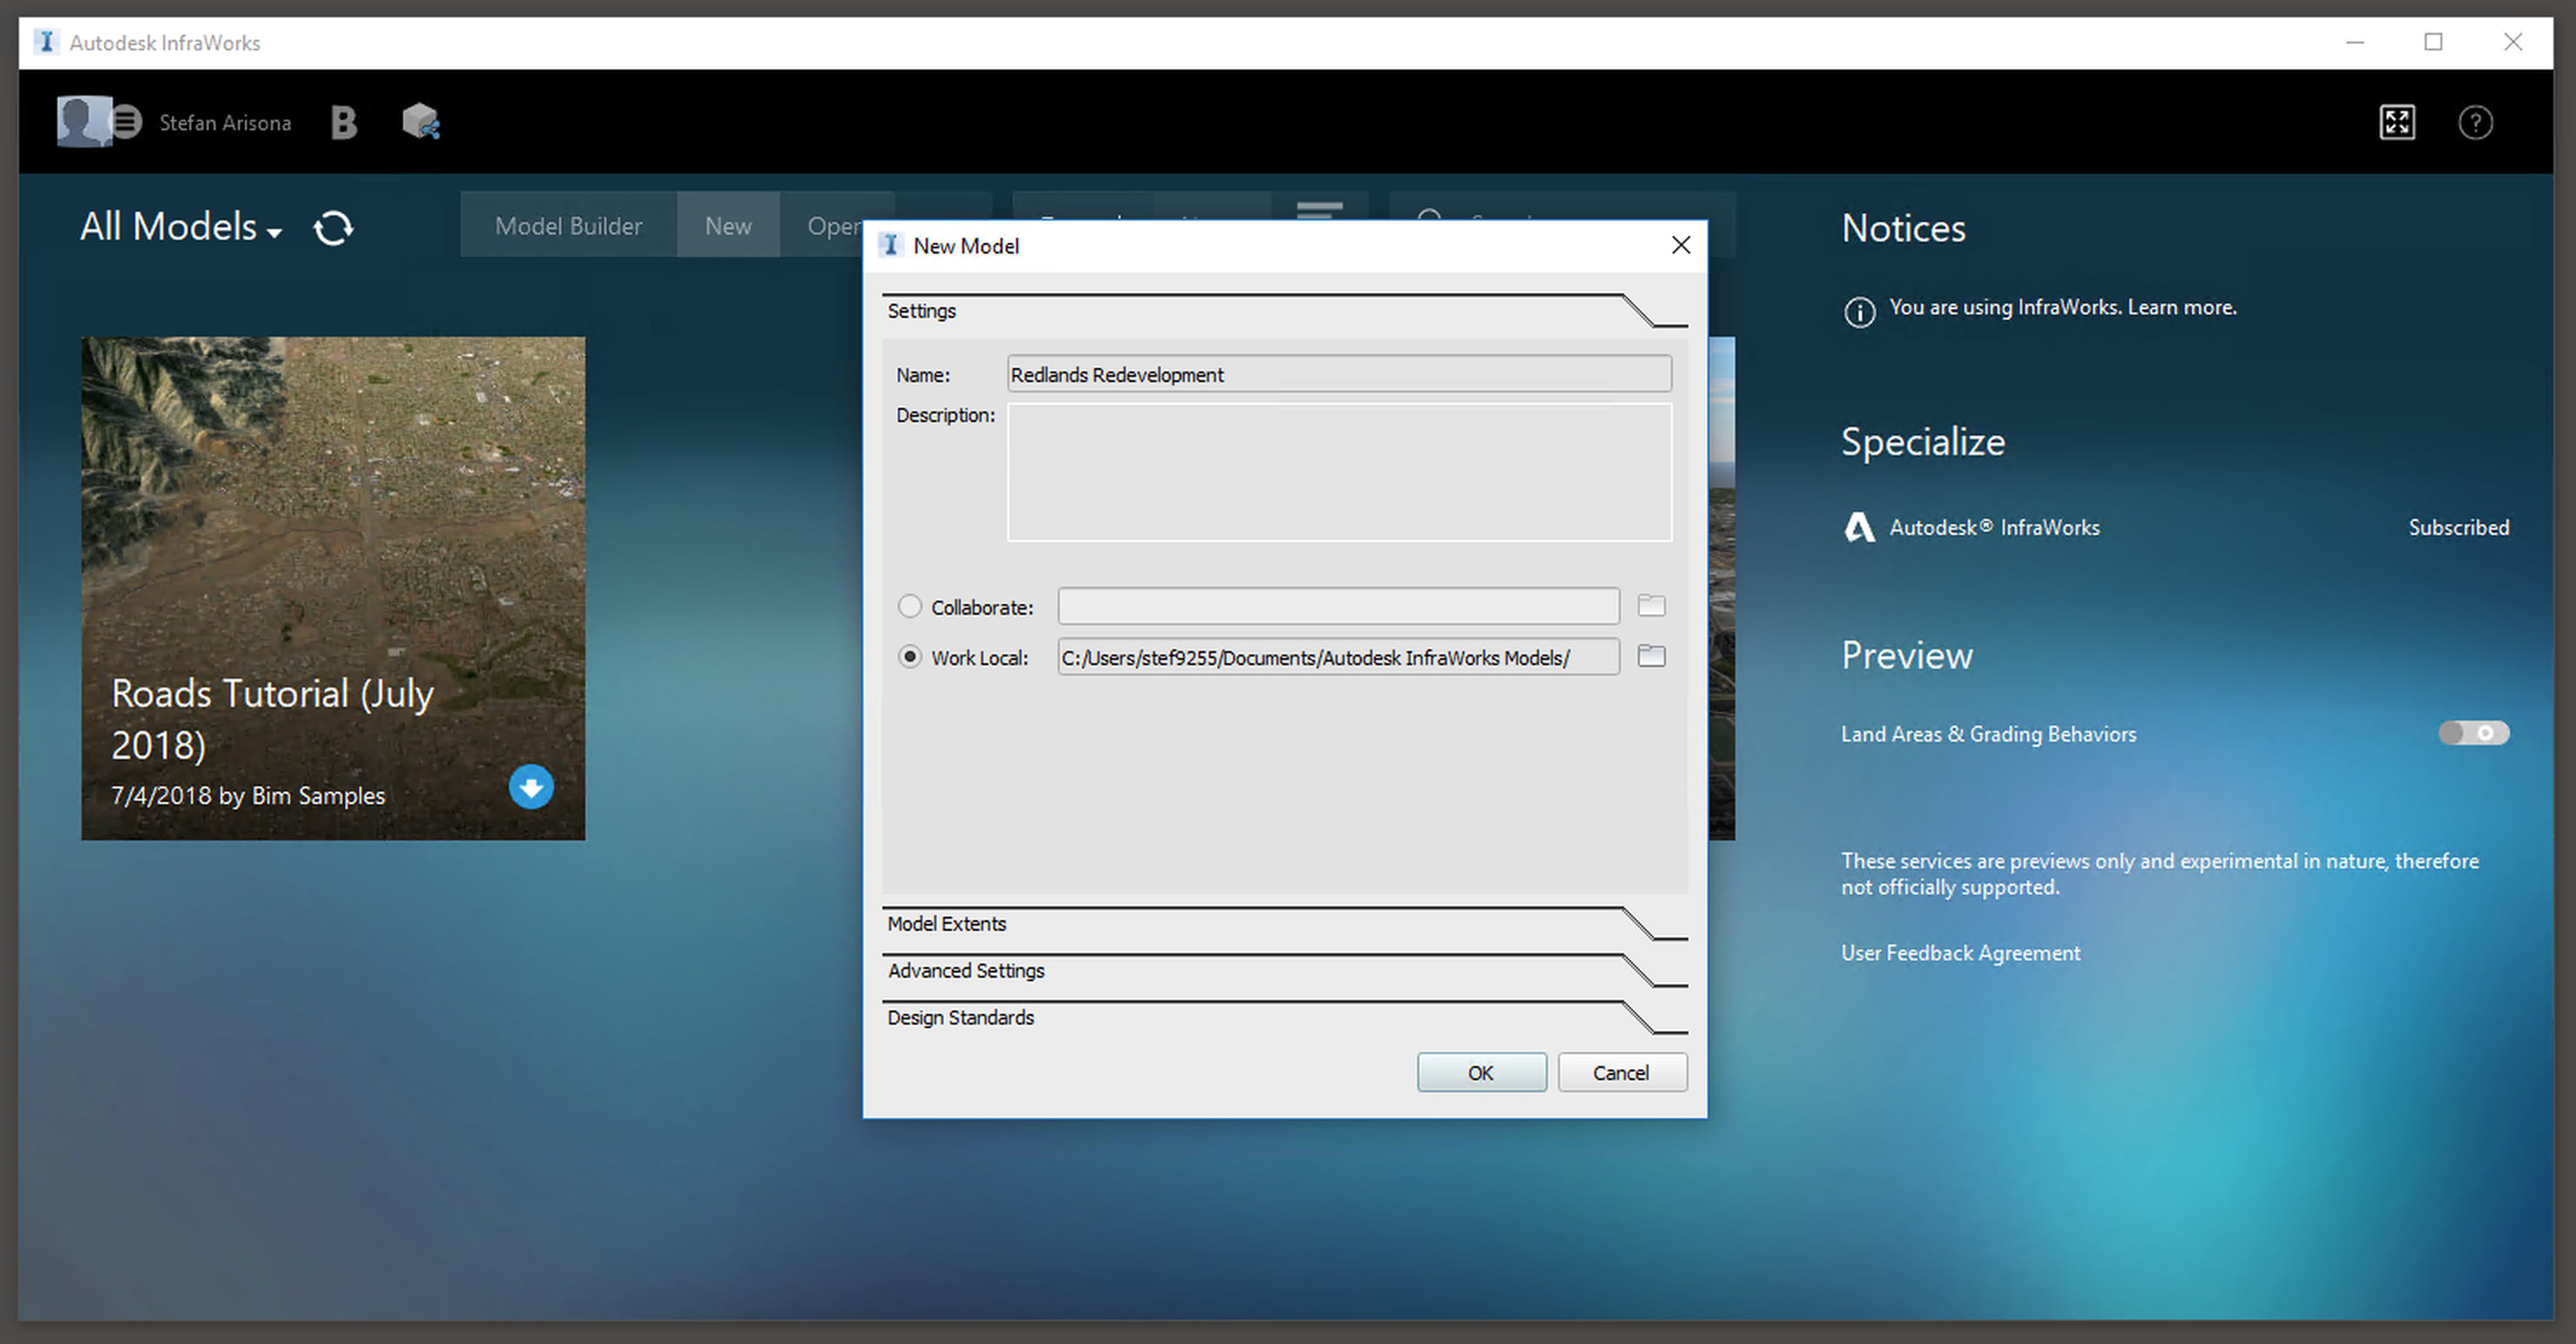
- In the start screen, select “New”. Enter a model name in the “New Model” dialog (figure 7).
- Go to the “Advanced Settings” tab, and select the appropriate coordinate system in the UCS field. In our case, select “CA83-V / NAD83 California State Planes, Zone V, US Foot”. Note that the coordinate system names may slightly differ from the ones used in CityEngine (figure 8).
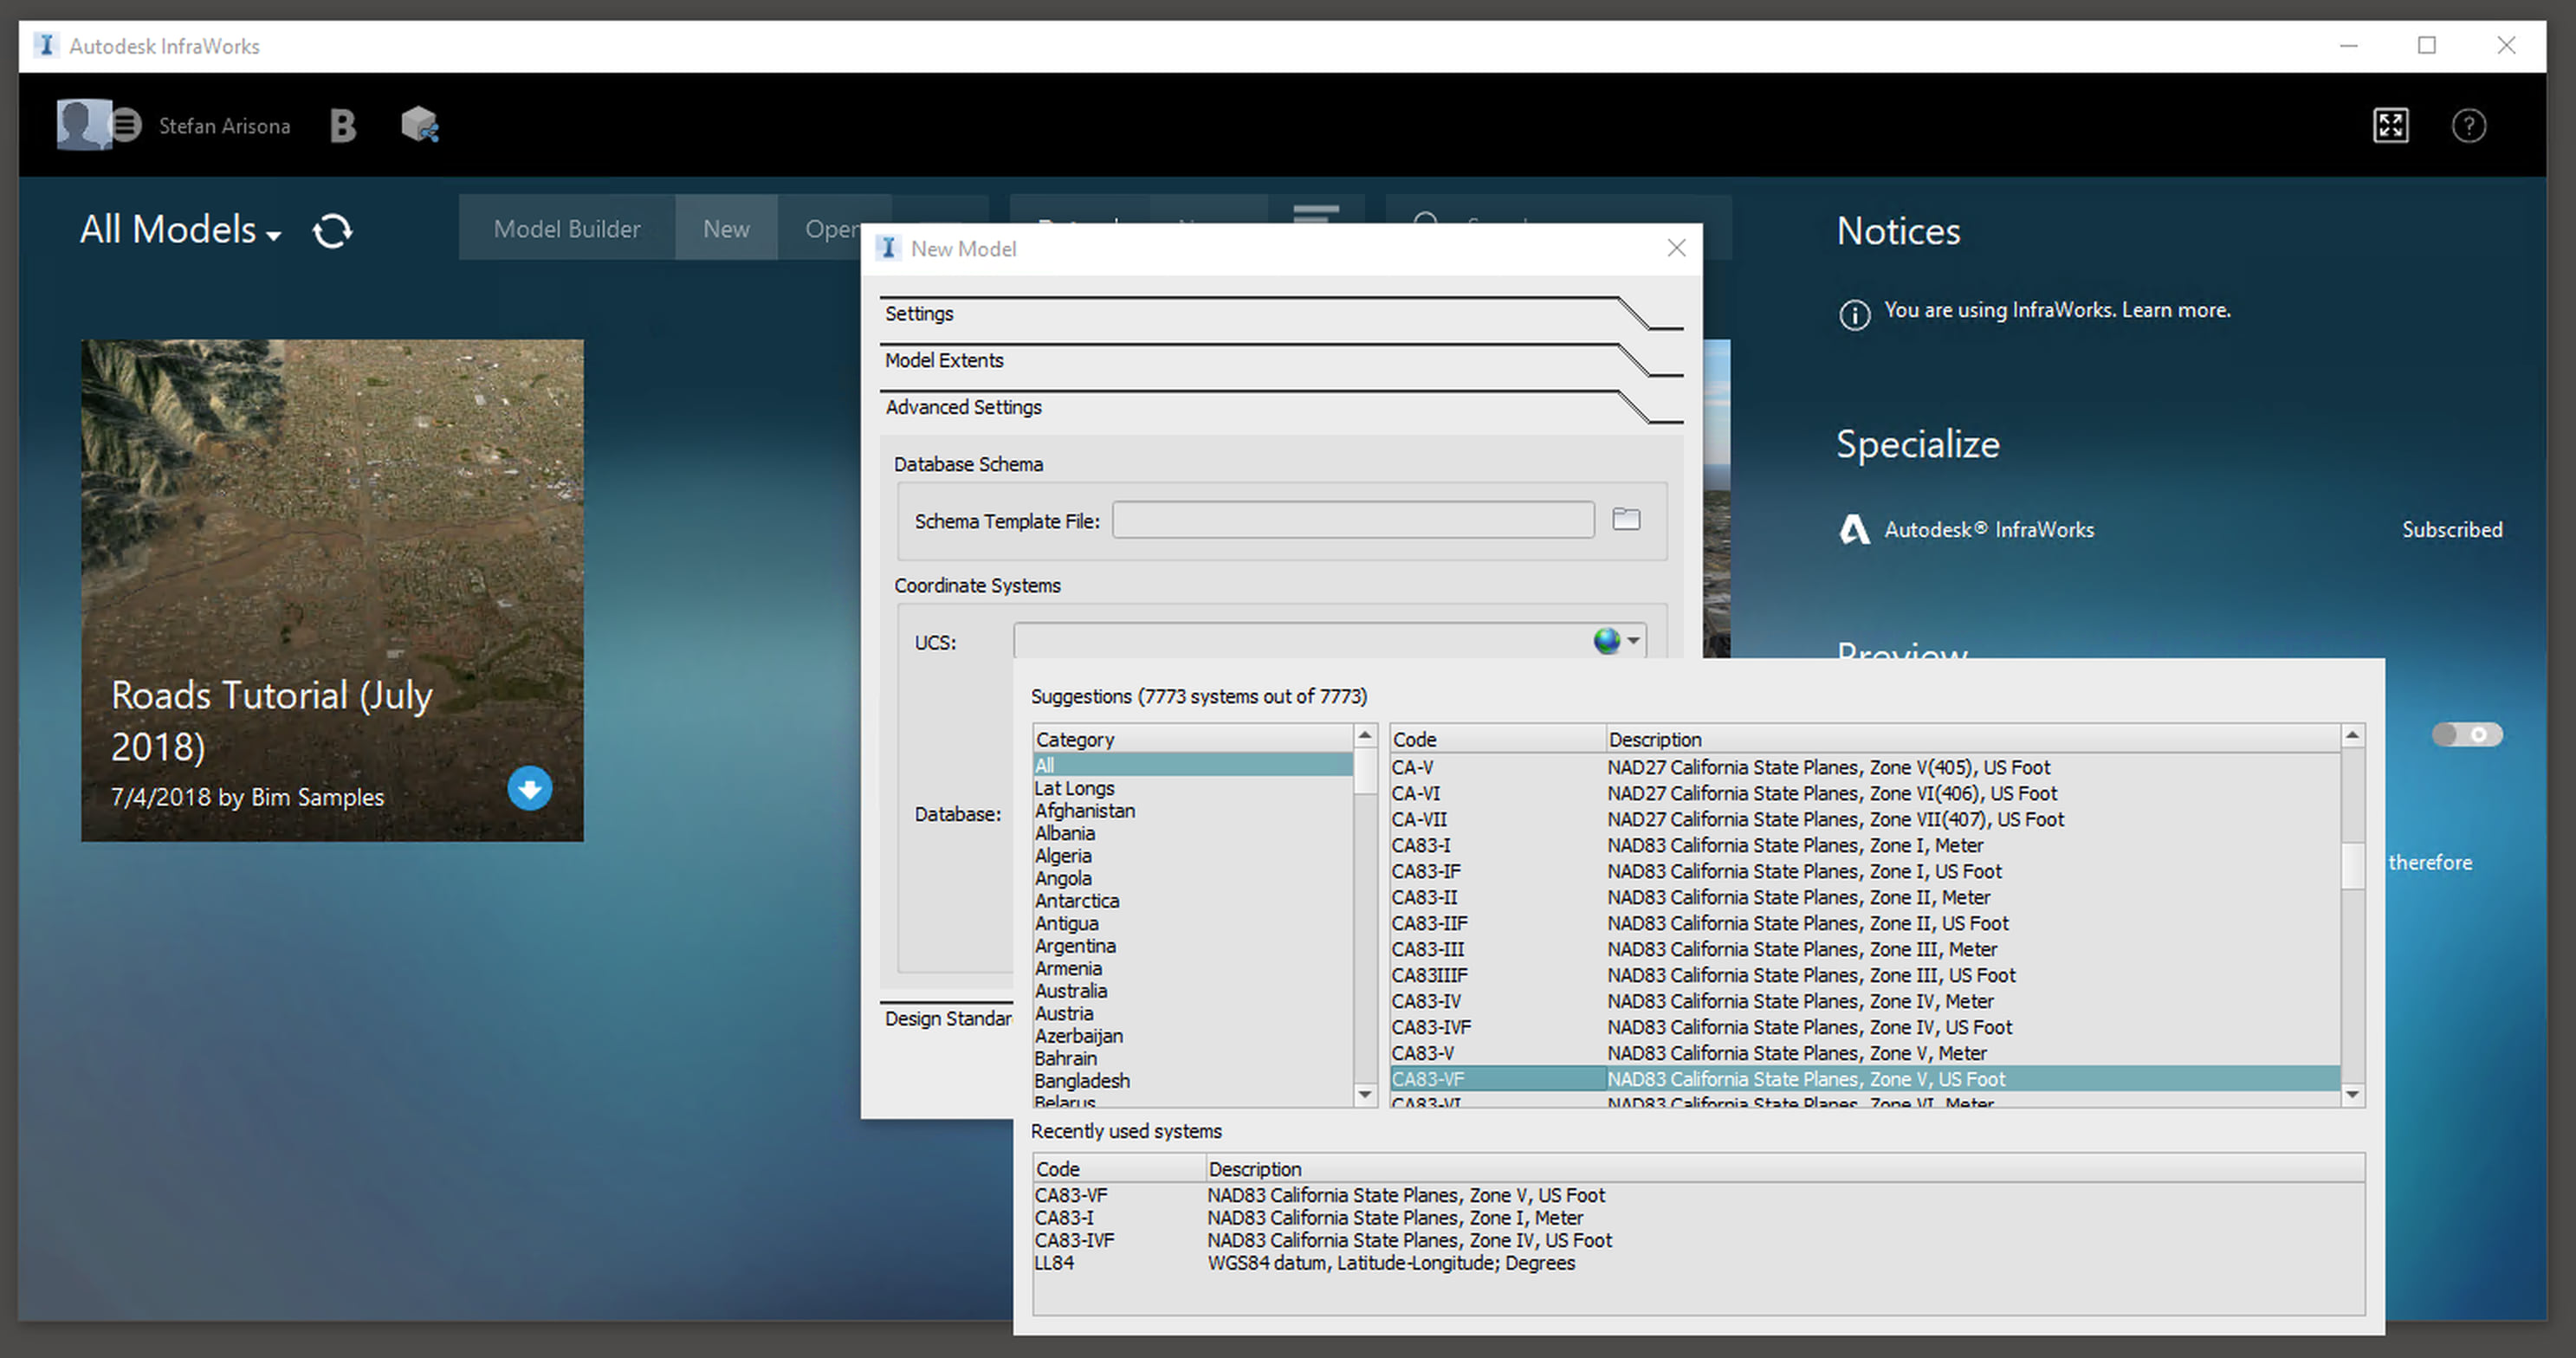
- Leave the database coordinate system in its default setting (“LL84”).
- Hit “Ok” to create the new model. The new and empty model opens (figure 9).
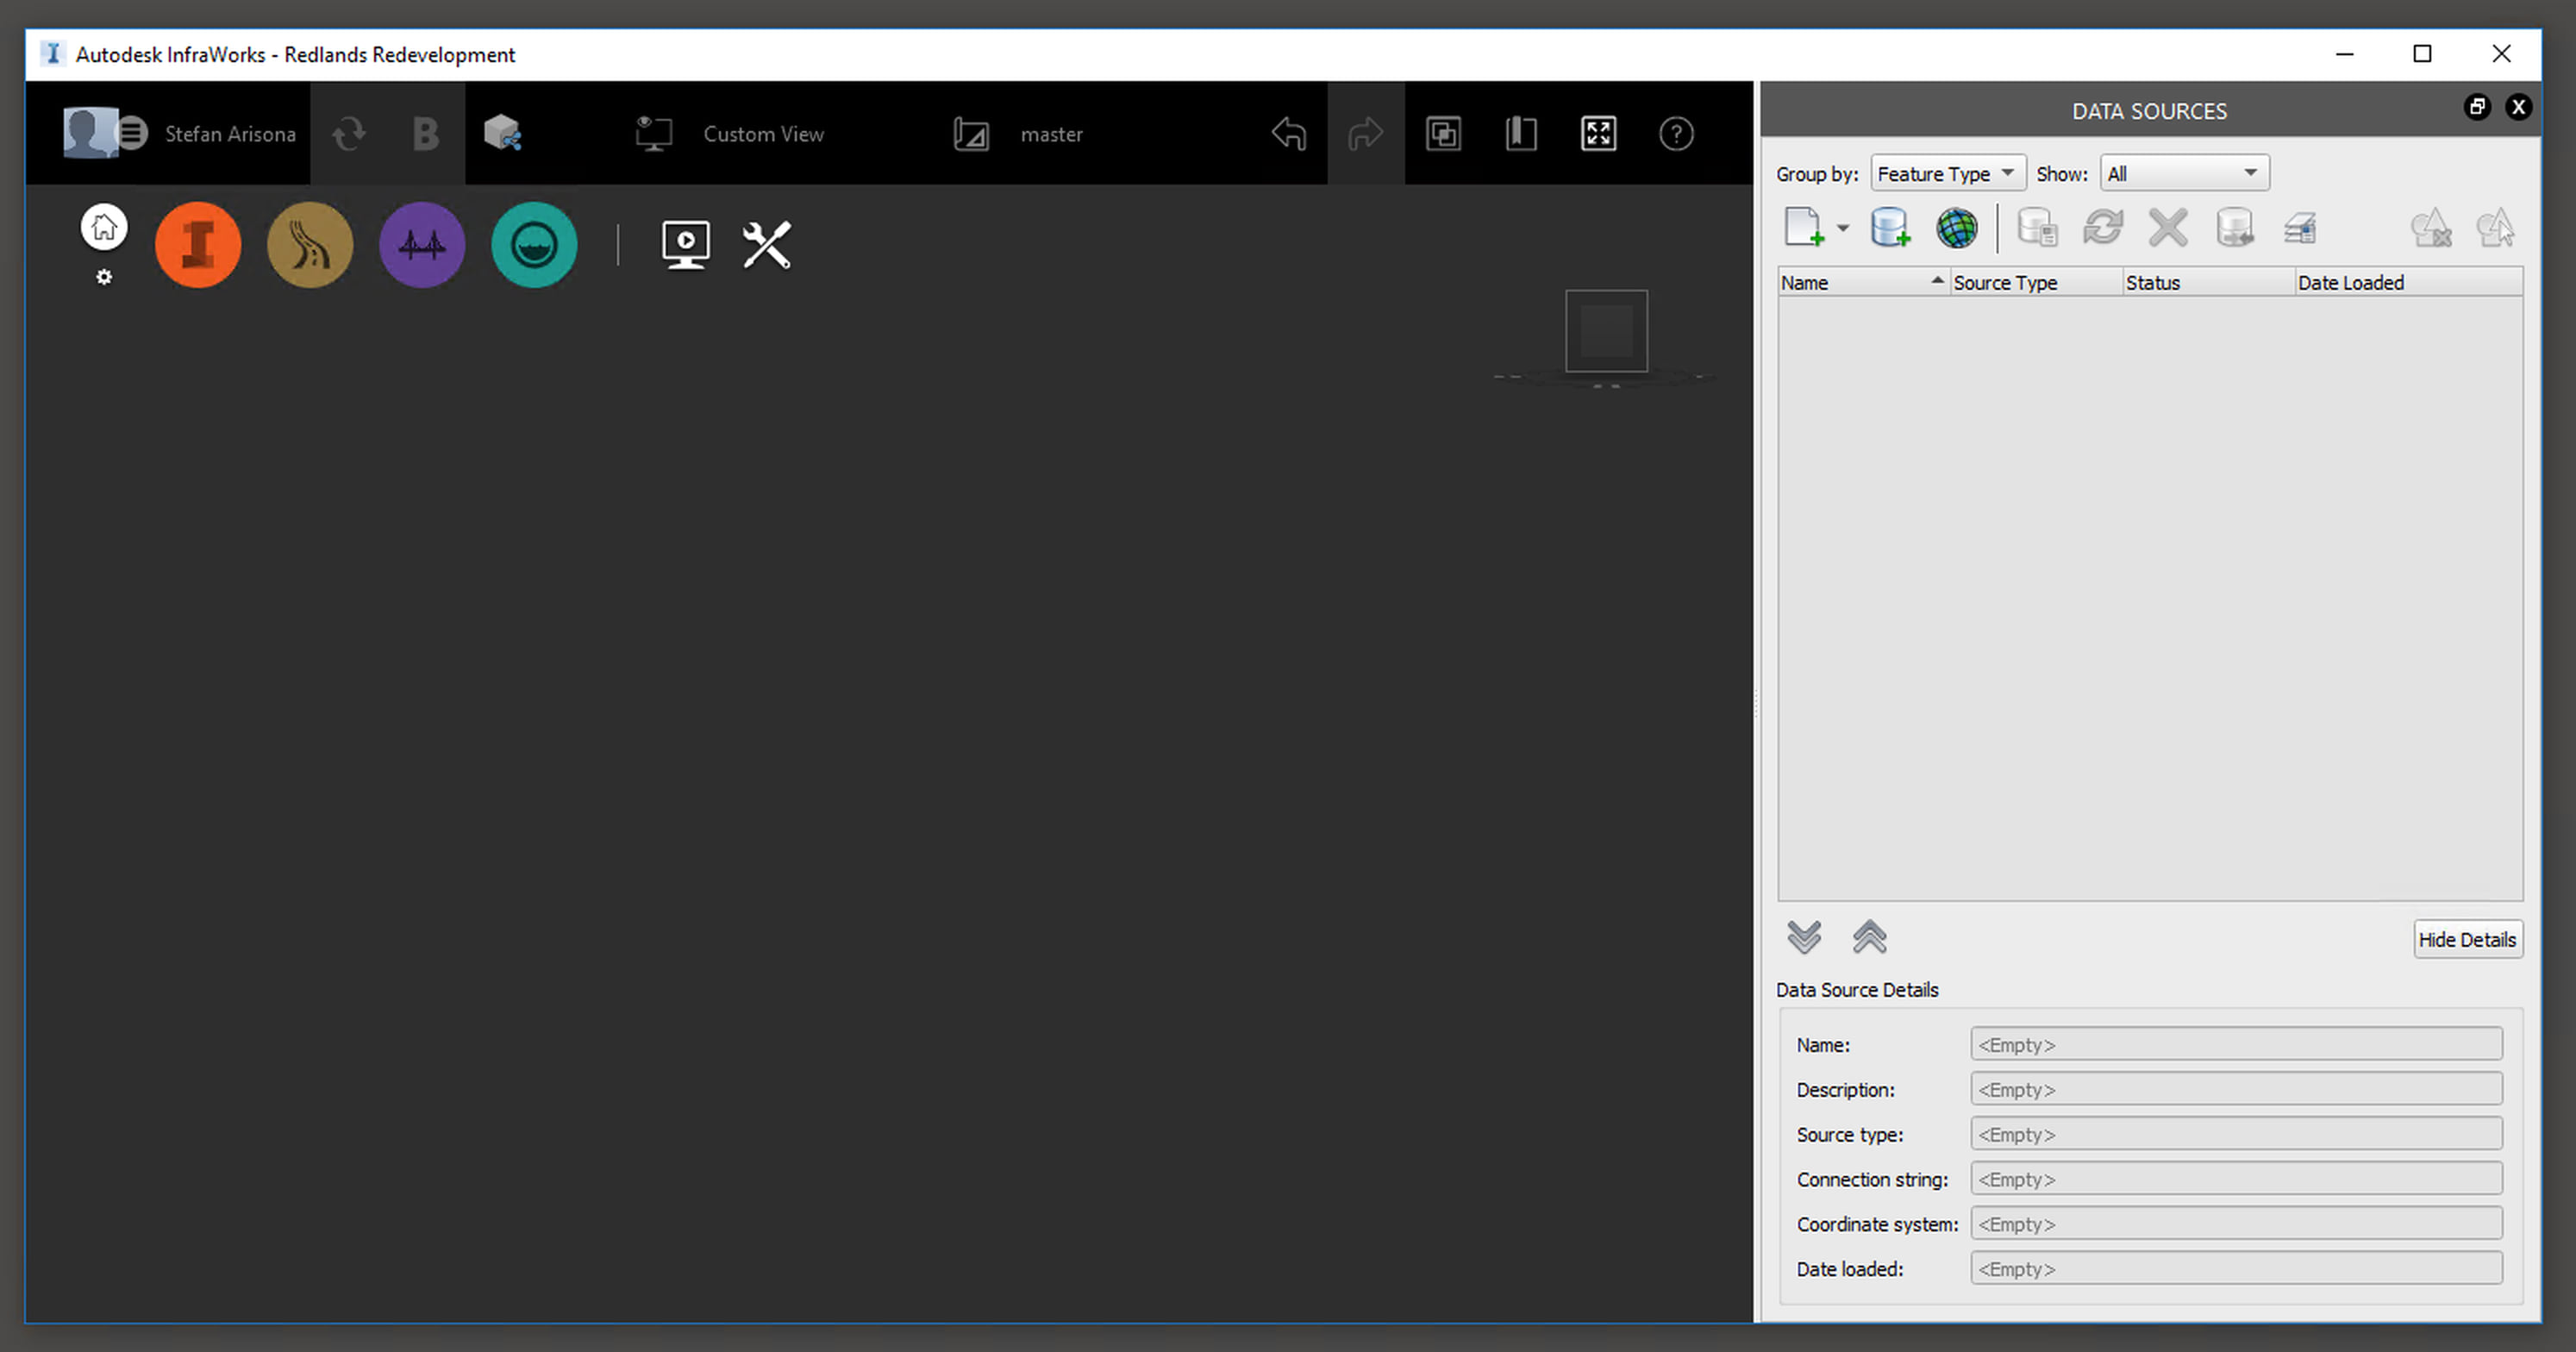
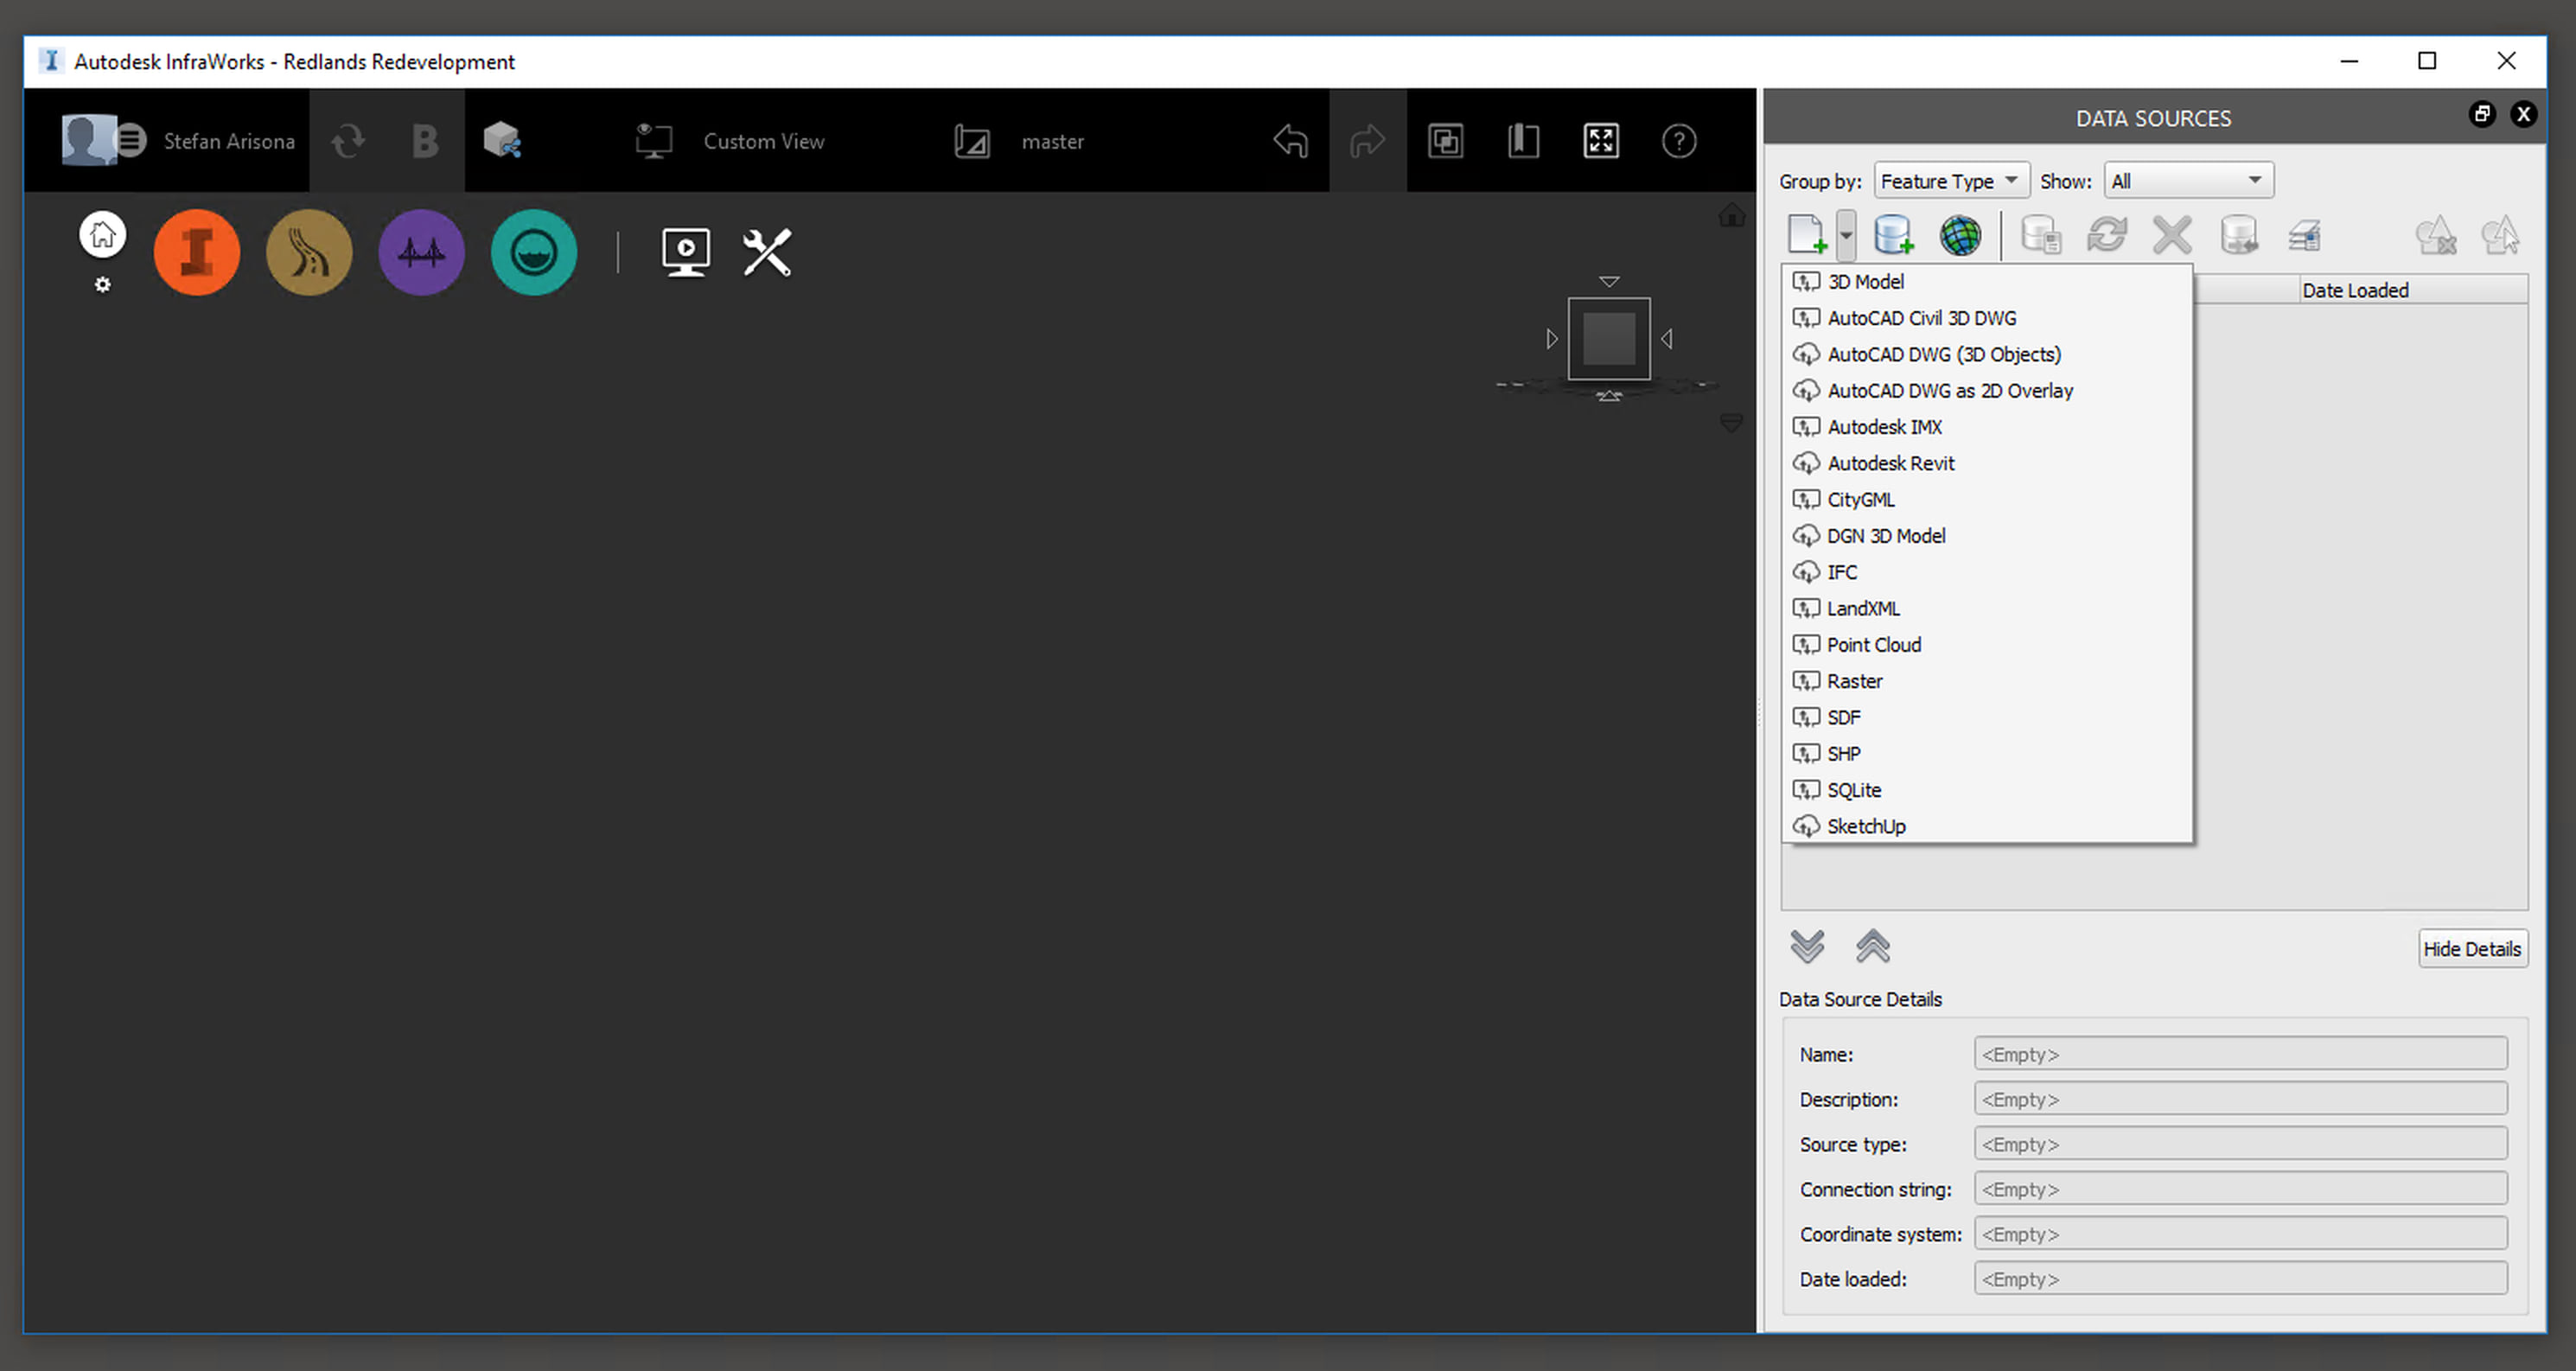
- In the “Data Sources” inspector on the right, select the file icon drop down menu (“Add file data source…”), and select “3D Model” (figure 10).
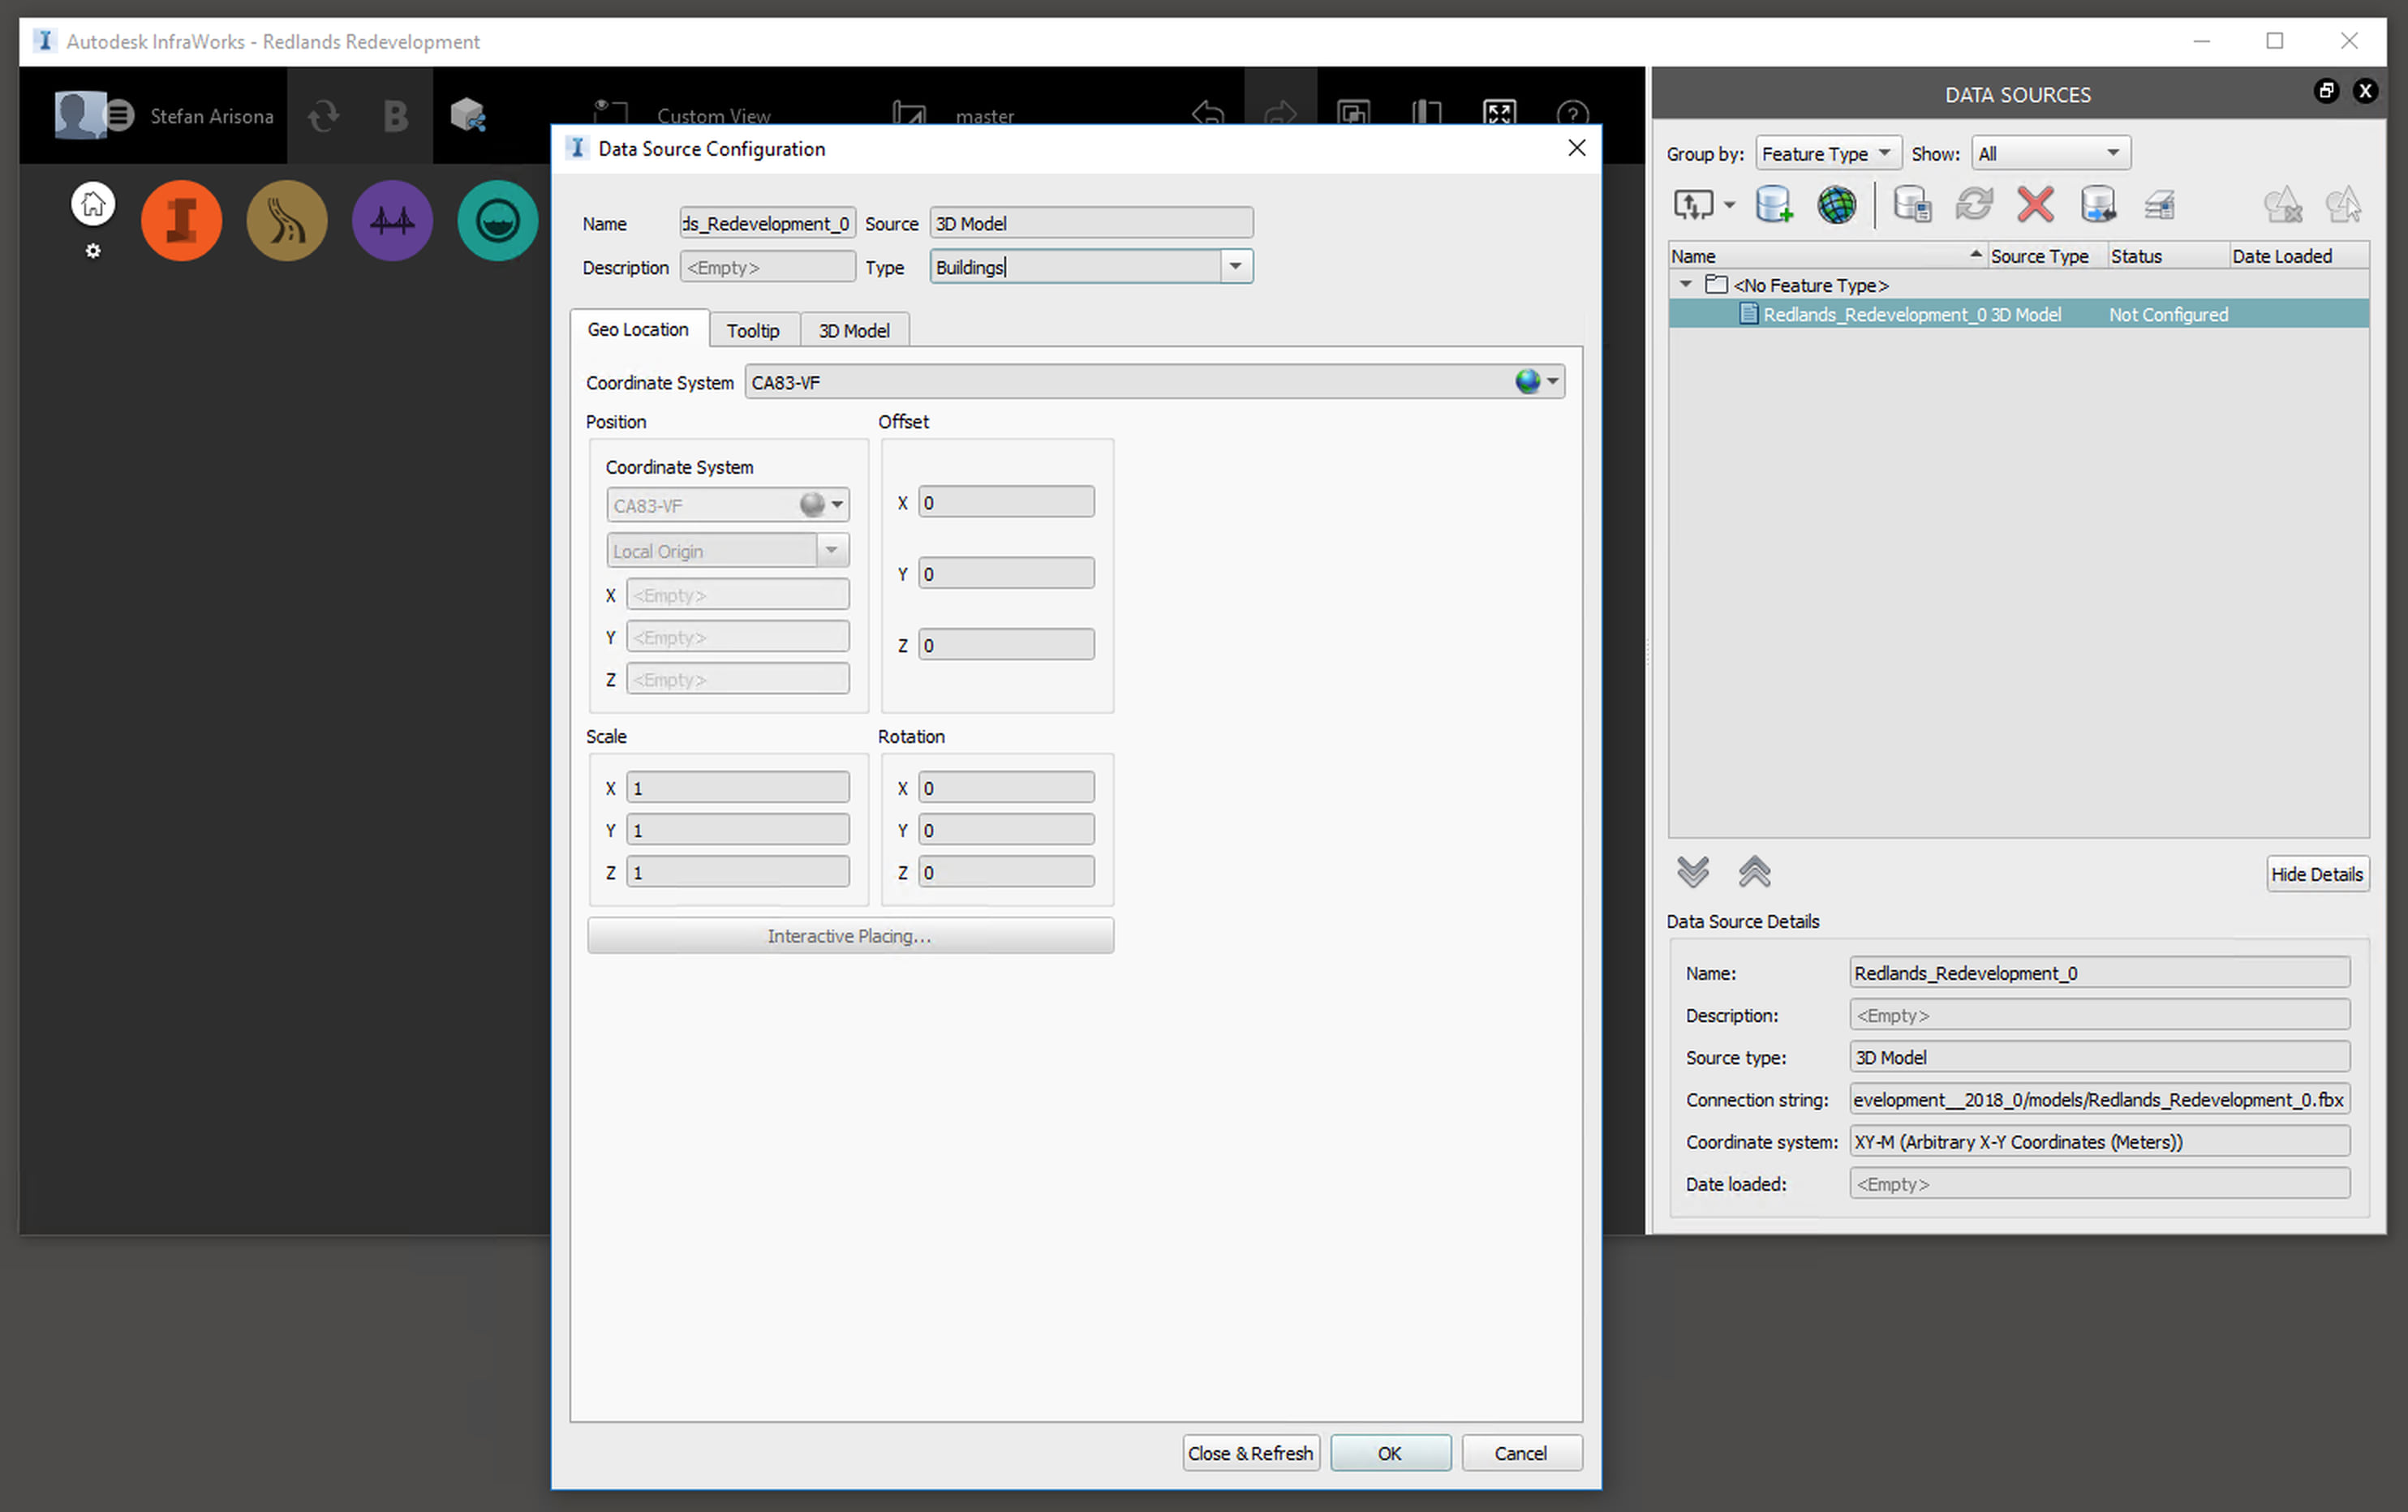
- Use the file selector to navigate to the directory where the CityEngine models were exported to (figure 6), select the “Redlands_Redevelopment_0.fbx” file, and hit “Open”.
- Again, in the “Data Sources” inspector, double-click on the newly added source to open the configuration dialog.
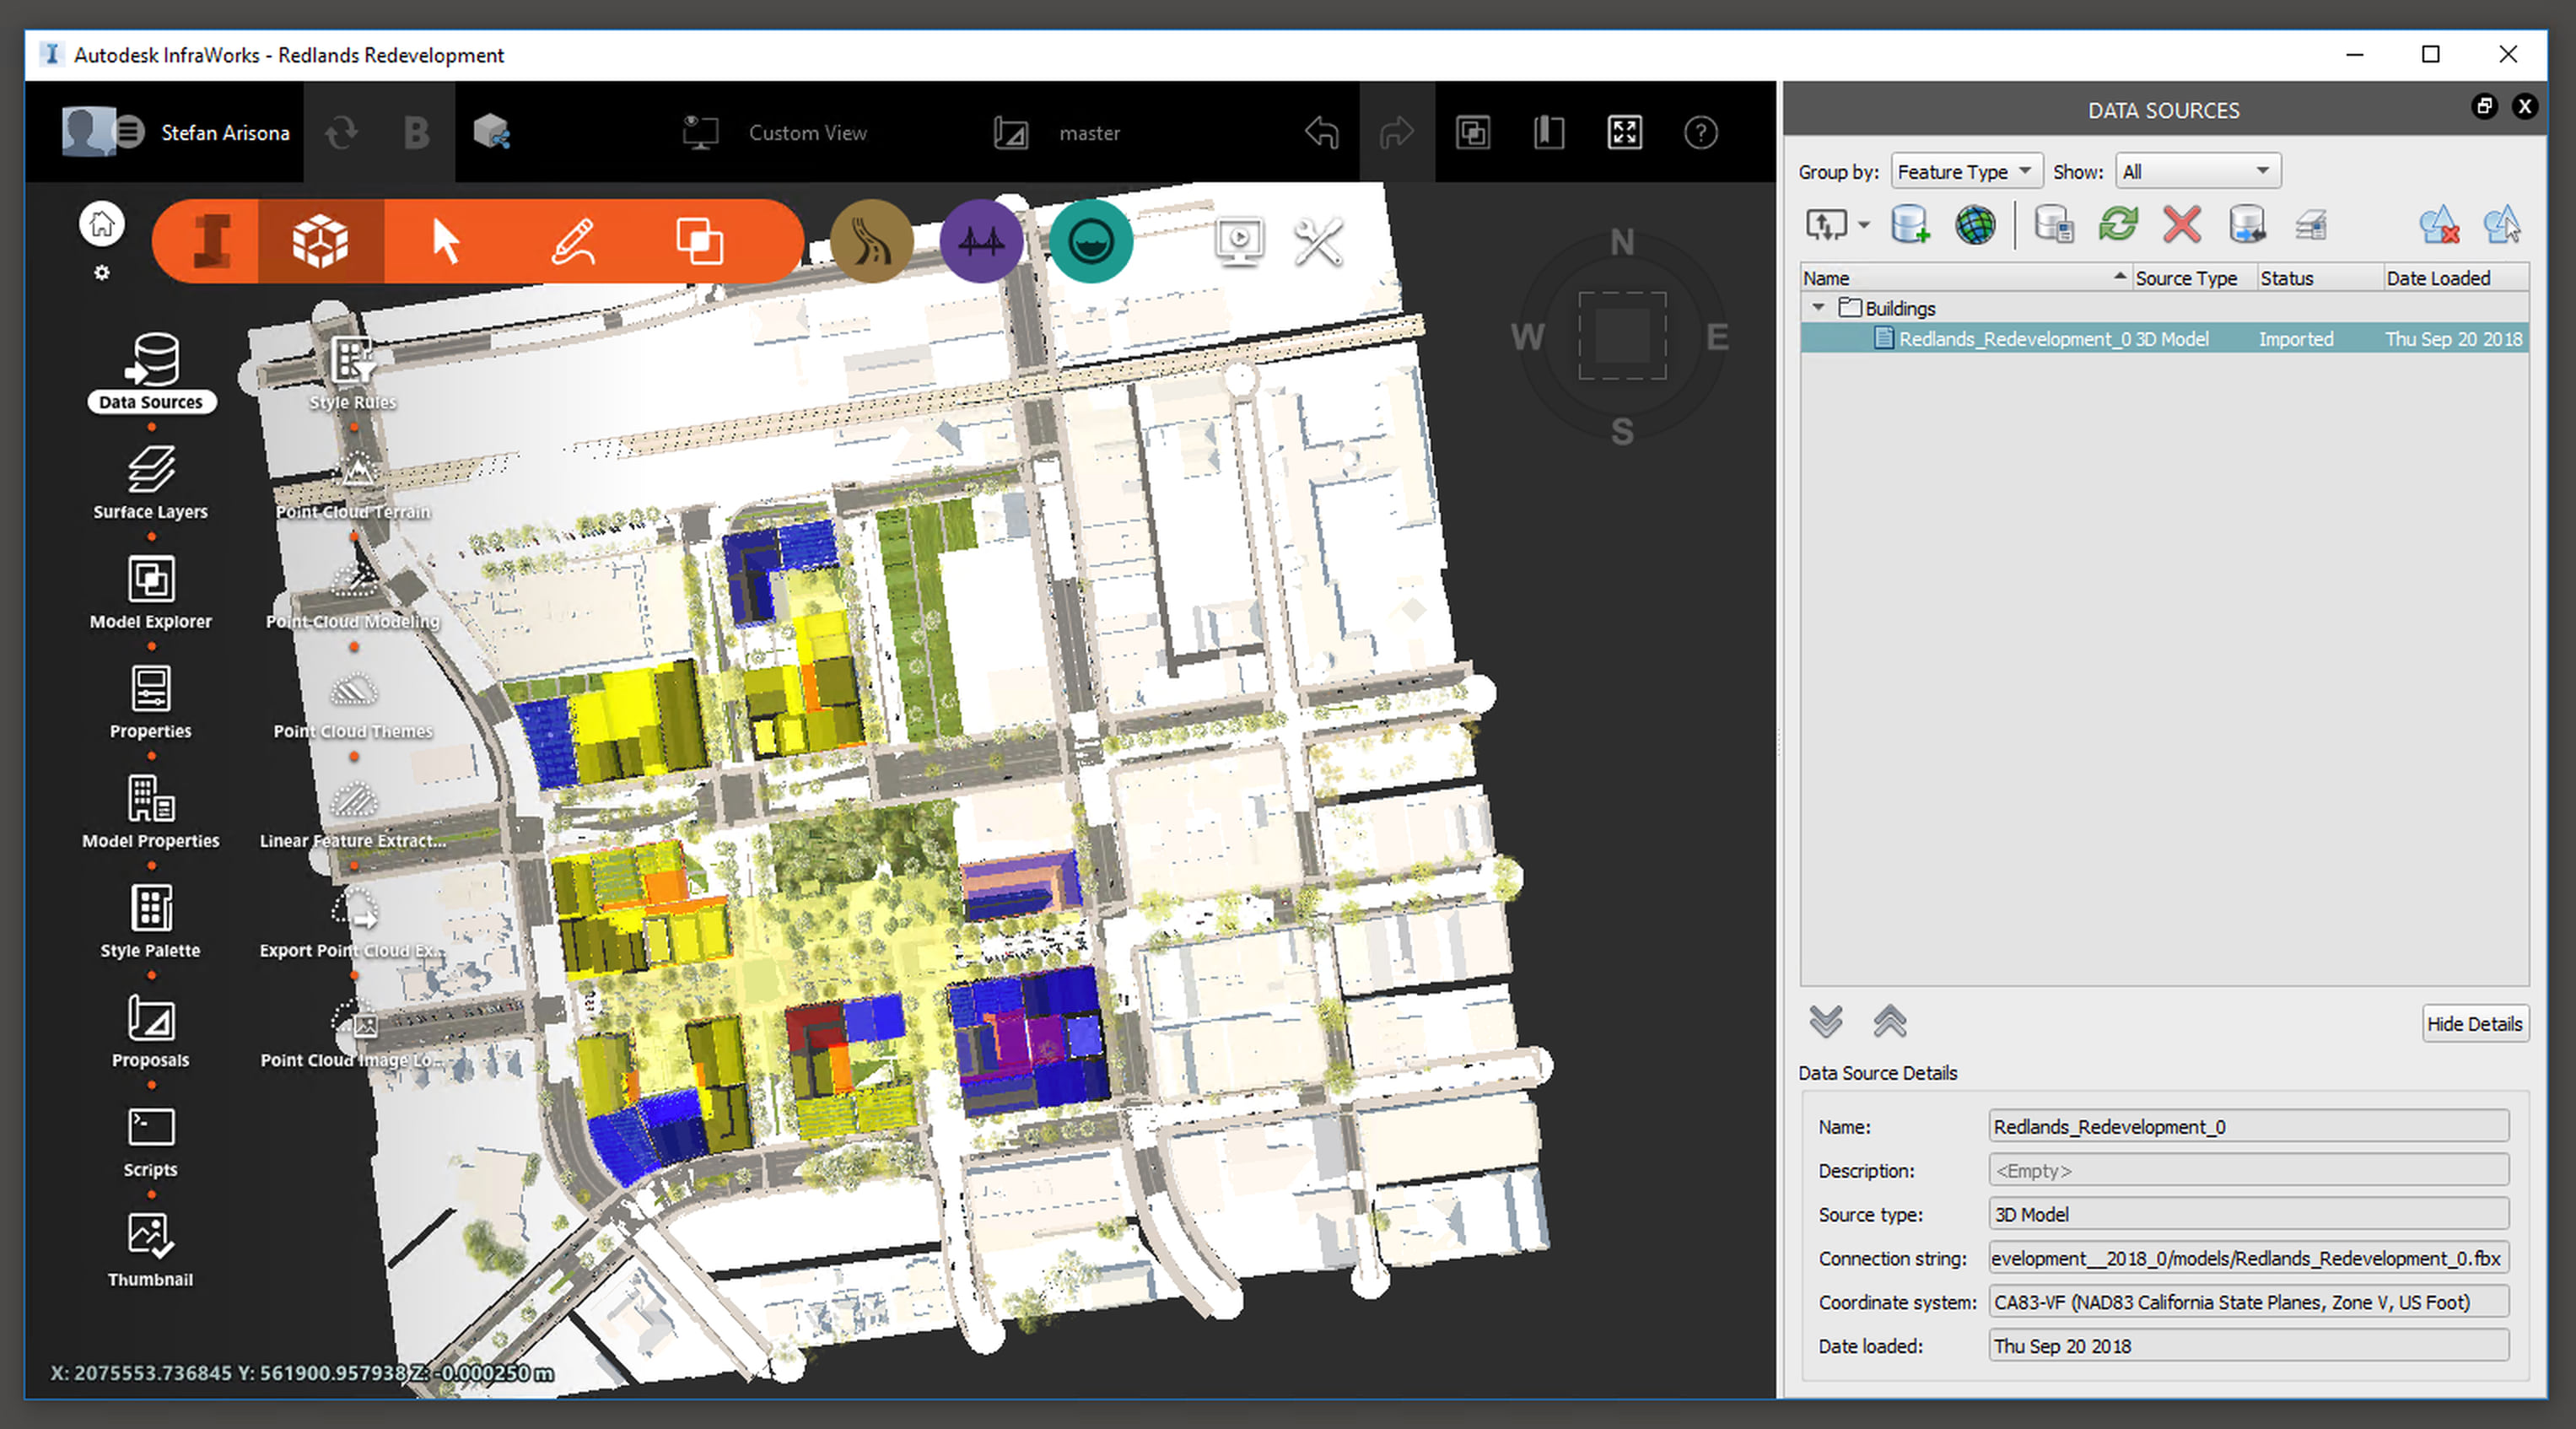
- Select the data source type (“Buildings”), the coordinate system (“CA83-VF”), and select “Close and refresh” (figure 11). The data source is now configured and will be displayed (figure 12).
Note: for simplicity, in this example, we use only the “Building” type. For more advanced examples, you can export different CityEngine layers separately (buildings, streets, trees), import them individually and select the source type accordingly.
Exporting Infraworks models to CityEngine via FBX or OBJ
For the workflow from Infraworks to CityEngine, we use the “Charlotte NC” example that comes with the default Infraworks installation.
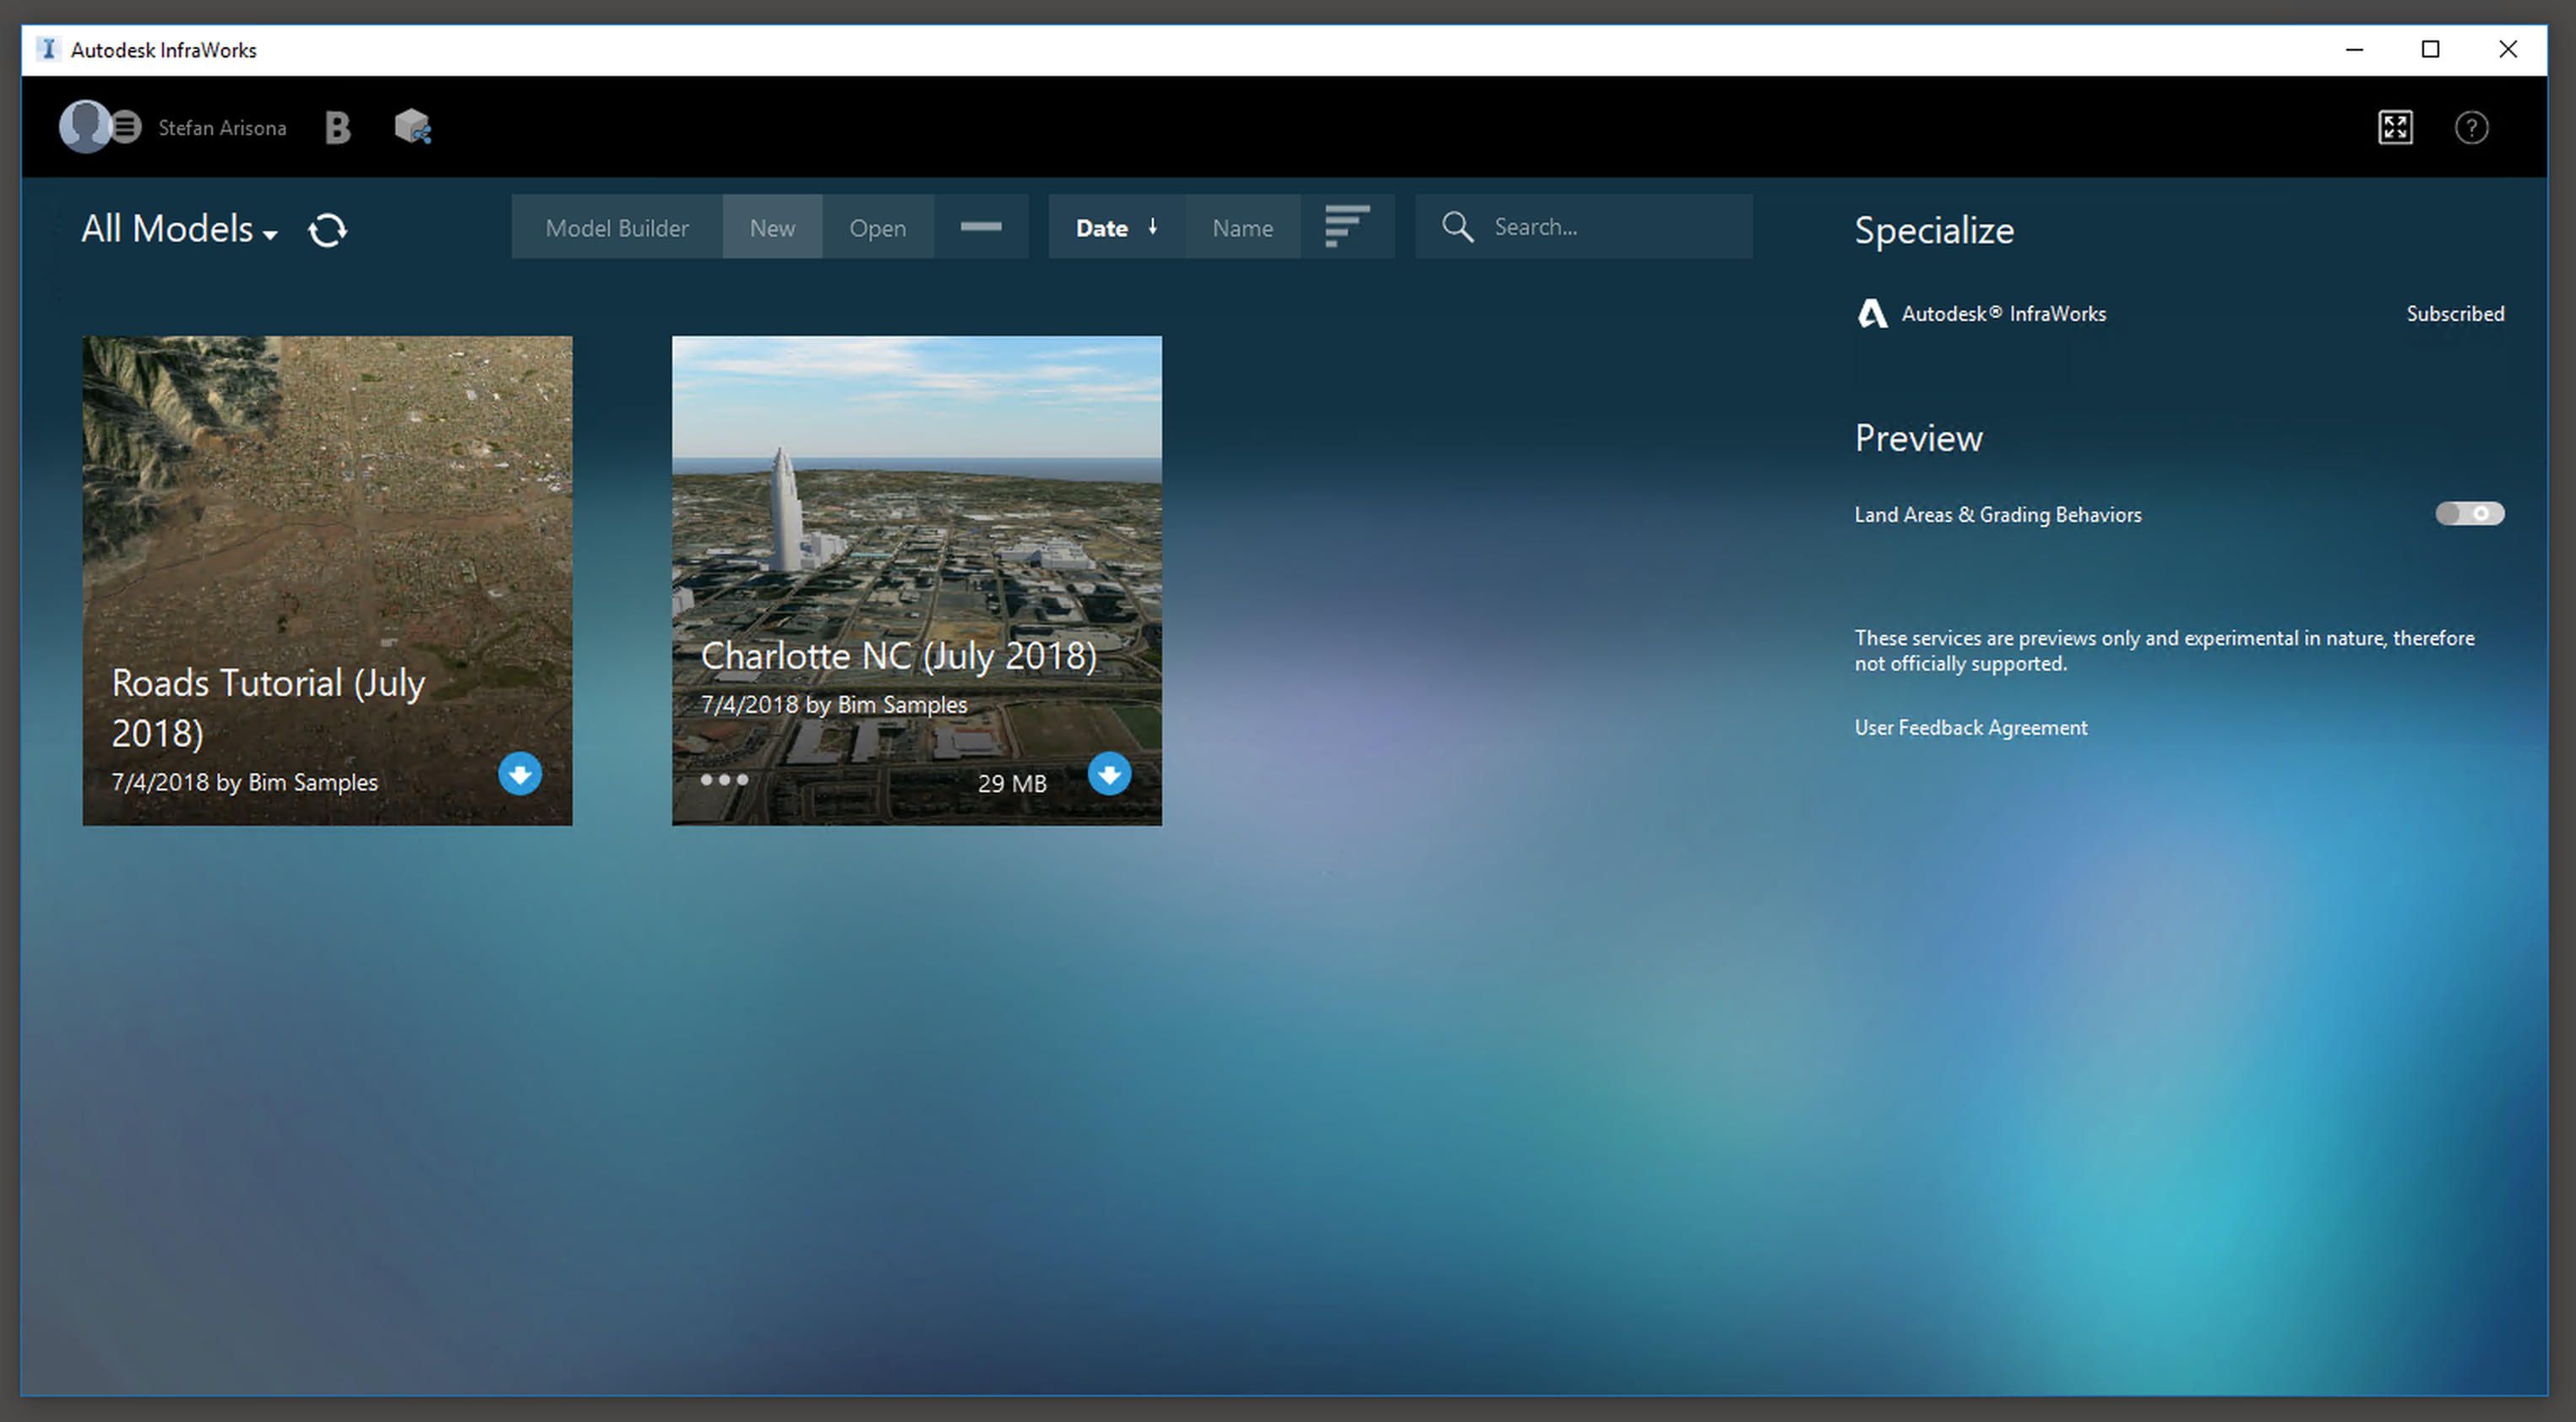
- On the Infraworks start screen, select the example, and create a new model (figure 13). This will download the necessary data and instantiate the model locally.
- Opening the model will show the scene as illustrated in figure 14.
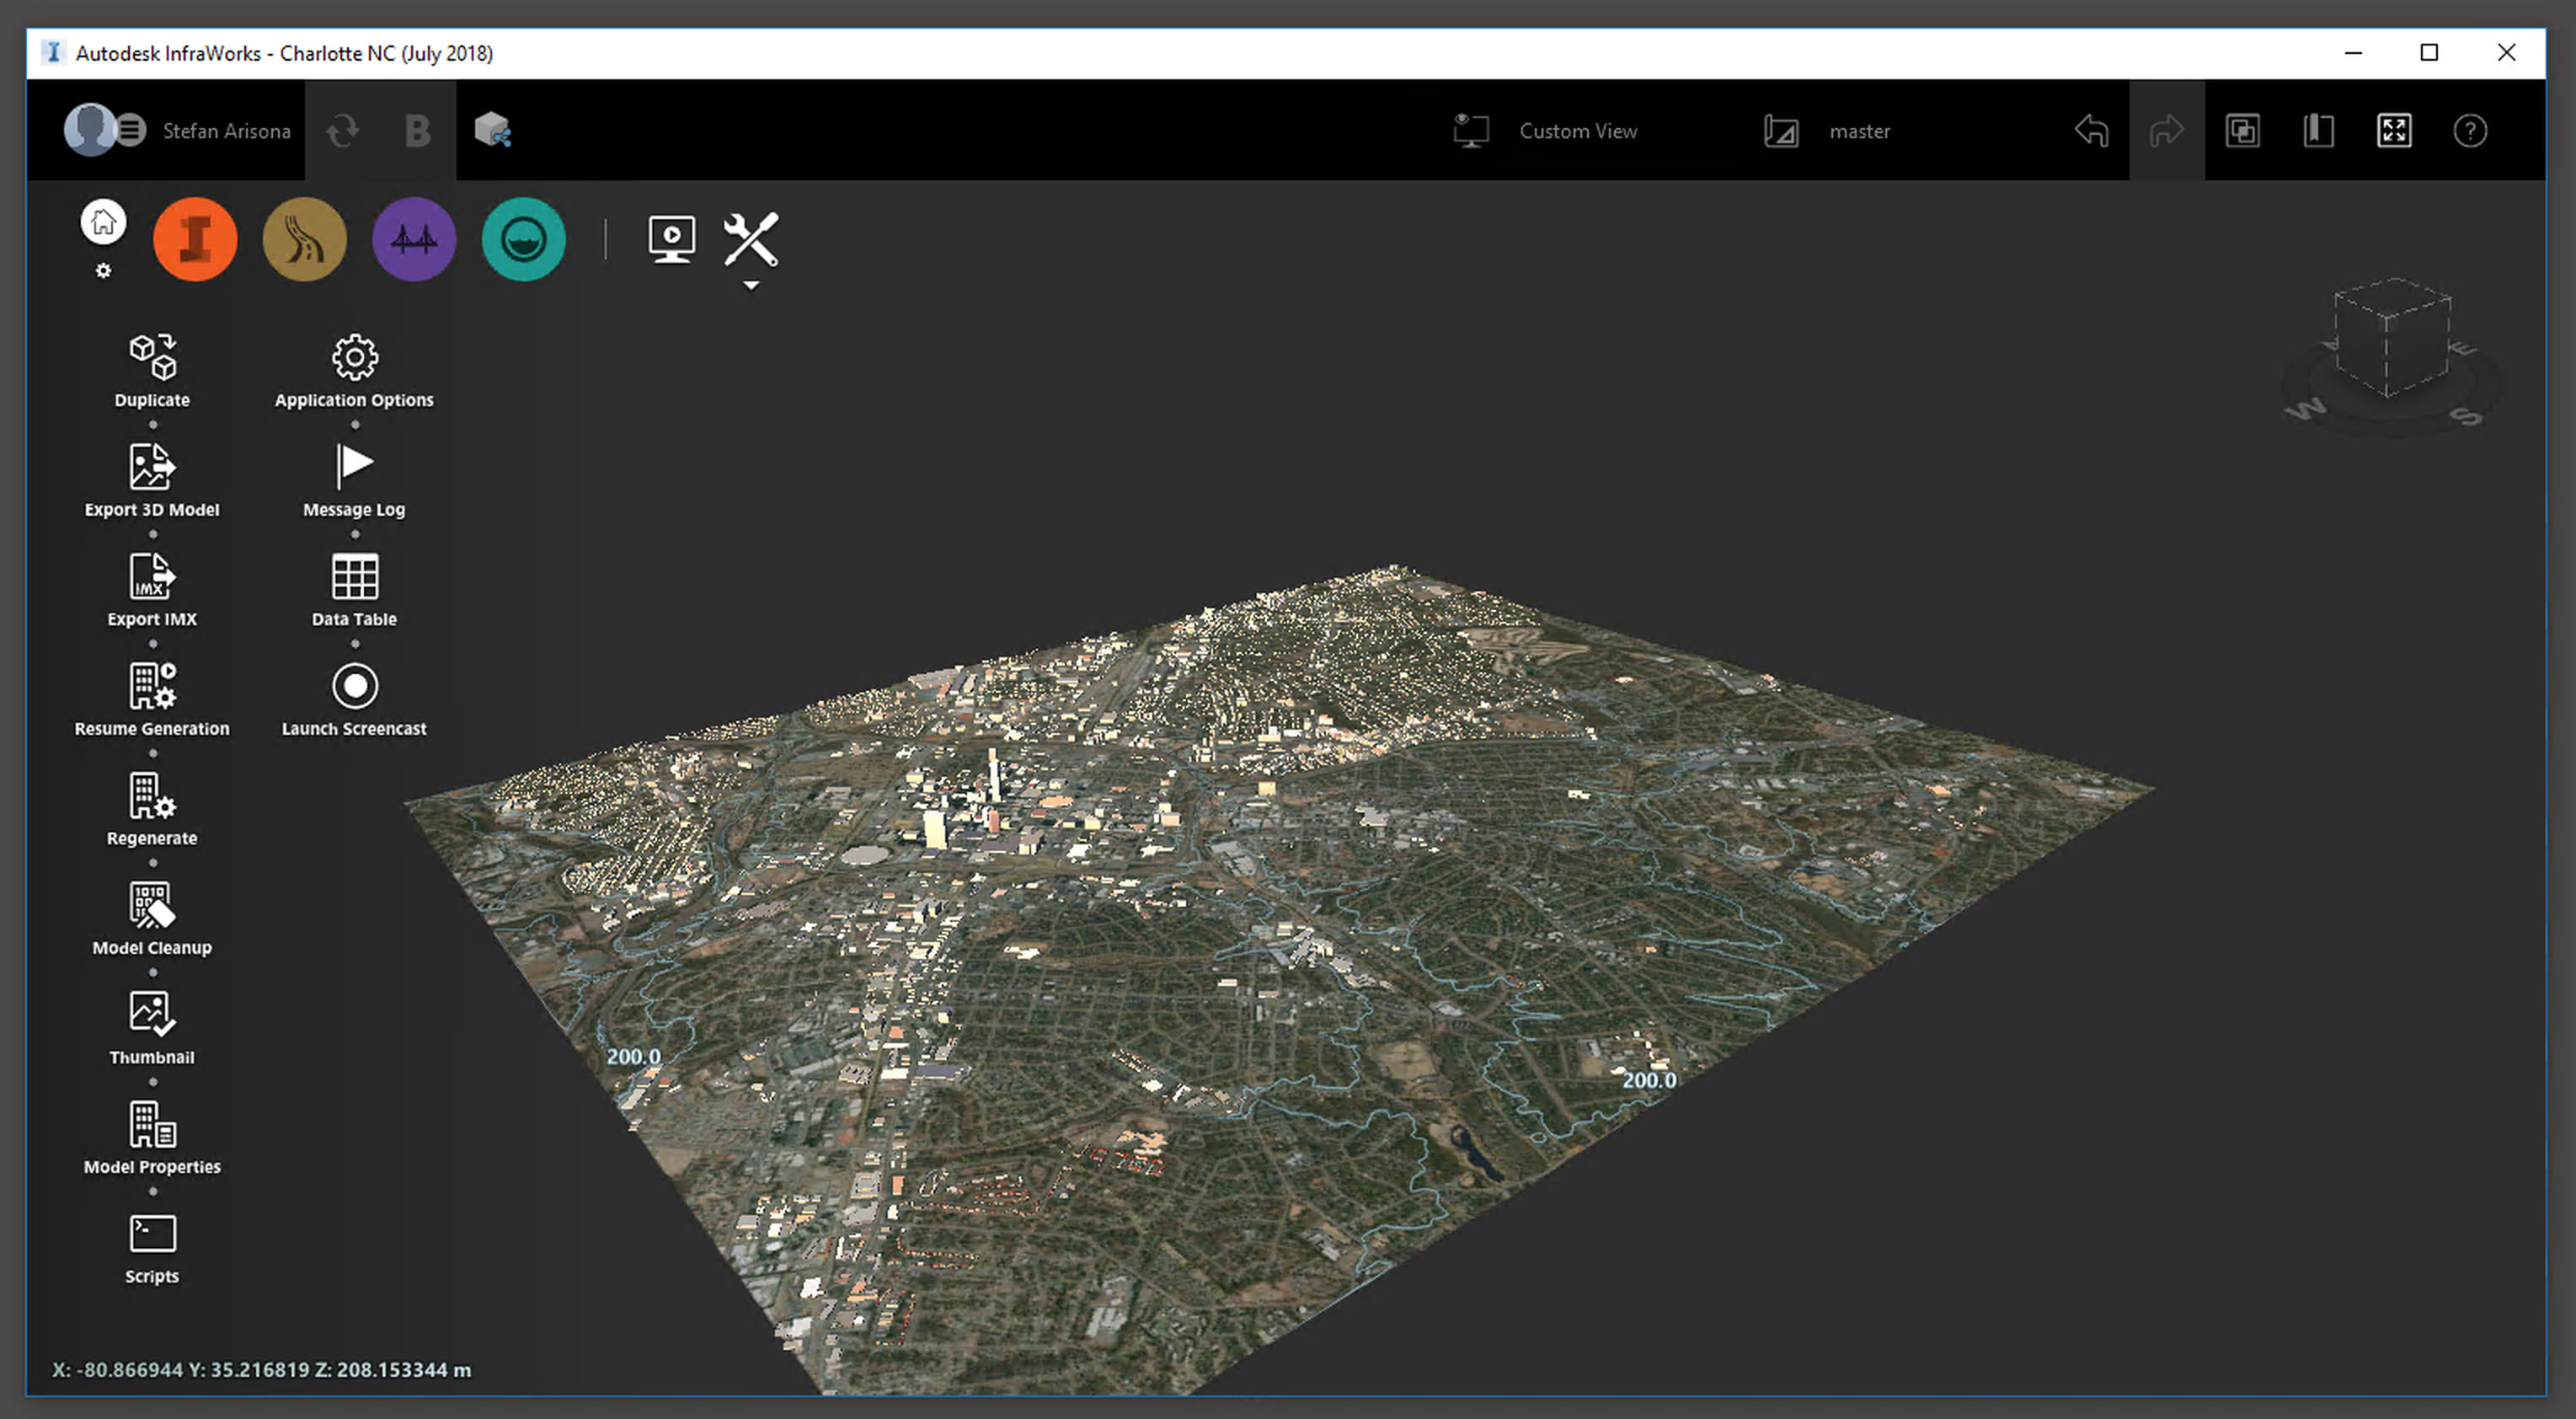
- To export Infraworks geometry, click the tools icon (the rightmost icon in the icon toolbar shown in figure 14), which will show settings and utilities.
- Clicking the “Export 3D Model” brings up the export dialog (figure 15).
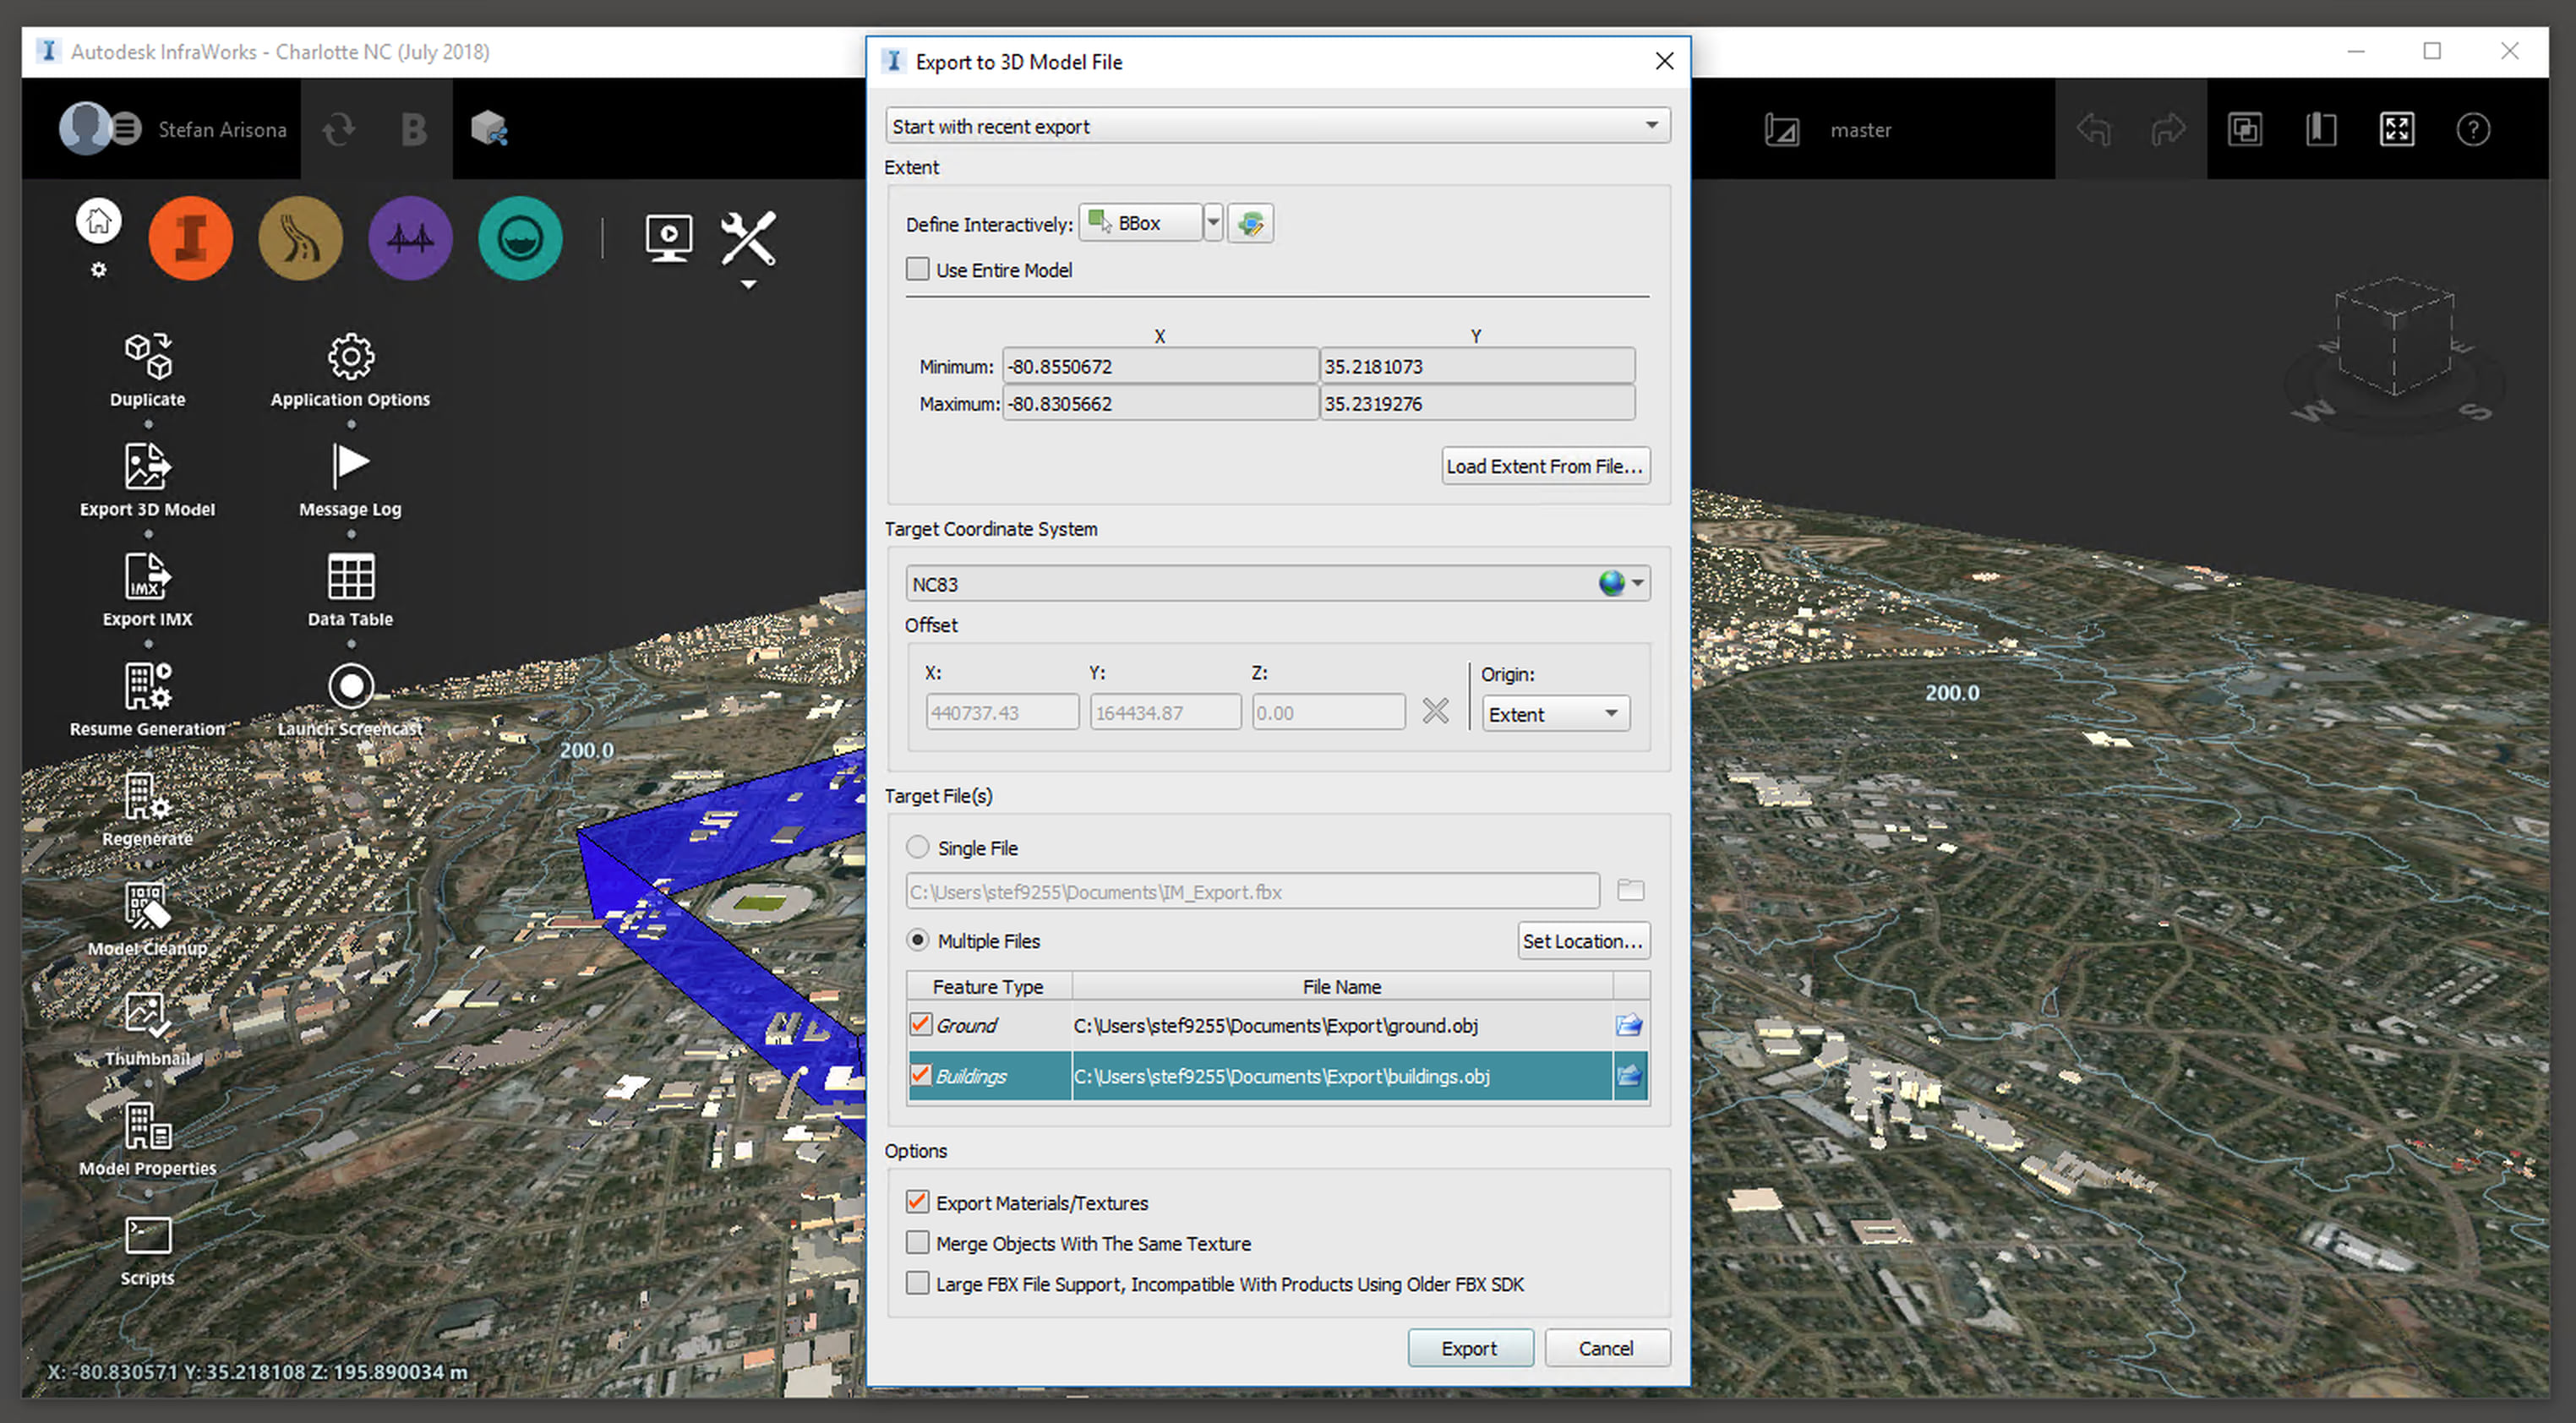
- In the “Extent” section, you can choose to export the entire model (default), to interactively select an extent (polygon or bounding box) or to enter the extent manually.
- If you already have a CityEngine scene with a coordinate system set, you can choose the same coordinate system in the “Target Coordinate System” section. Otherwise, you can choose to leave the setting as is. In our example, we chose “NC83” which we will reuse in our CityEngine import (figure 16).
- In the “Target File(s)” section you can set to export everything as a single file, or to export different feature types individually (i.e. as individual files). Click on the small folder icons to set the export path and also the export file type (in our case FBX or OBJ). Important: If you want to import textures into CityEngine, make sure you use the OBJ format, due to limitations of the CityEngine FBX importer.
- Set the check boxes in the “Options” section according to your needs, however make sure that “Large FBX File Support” is disabled.
- Select “Export” to export the selected extent.
Now the Infraworks data can be imported into CityEngine as follows:
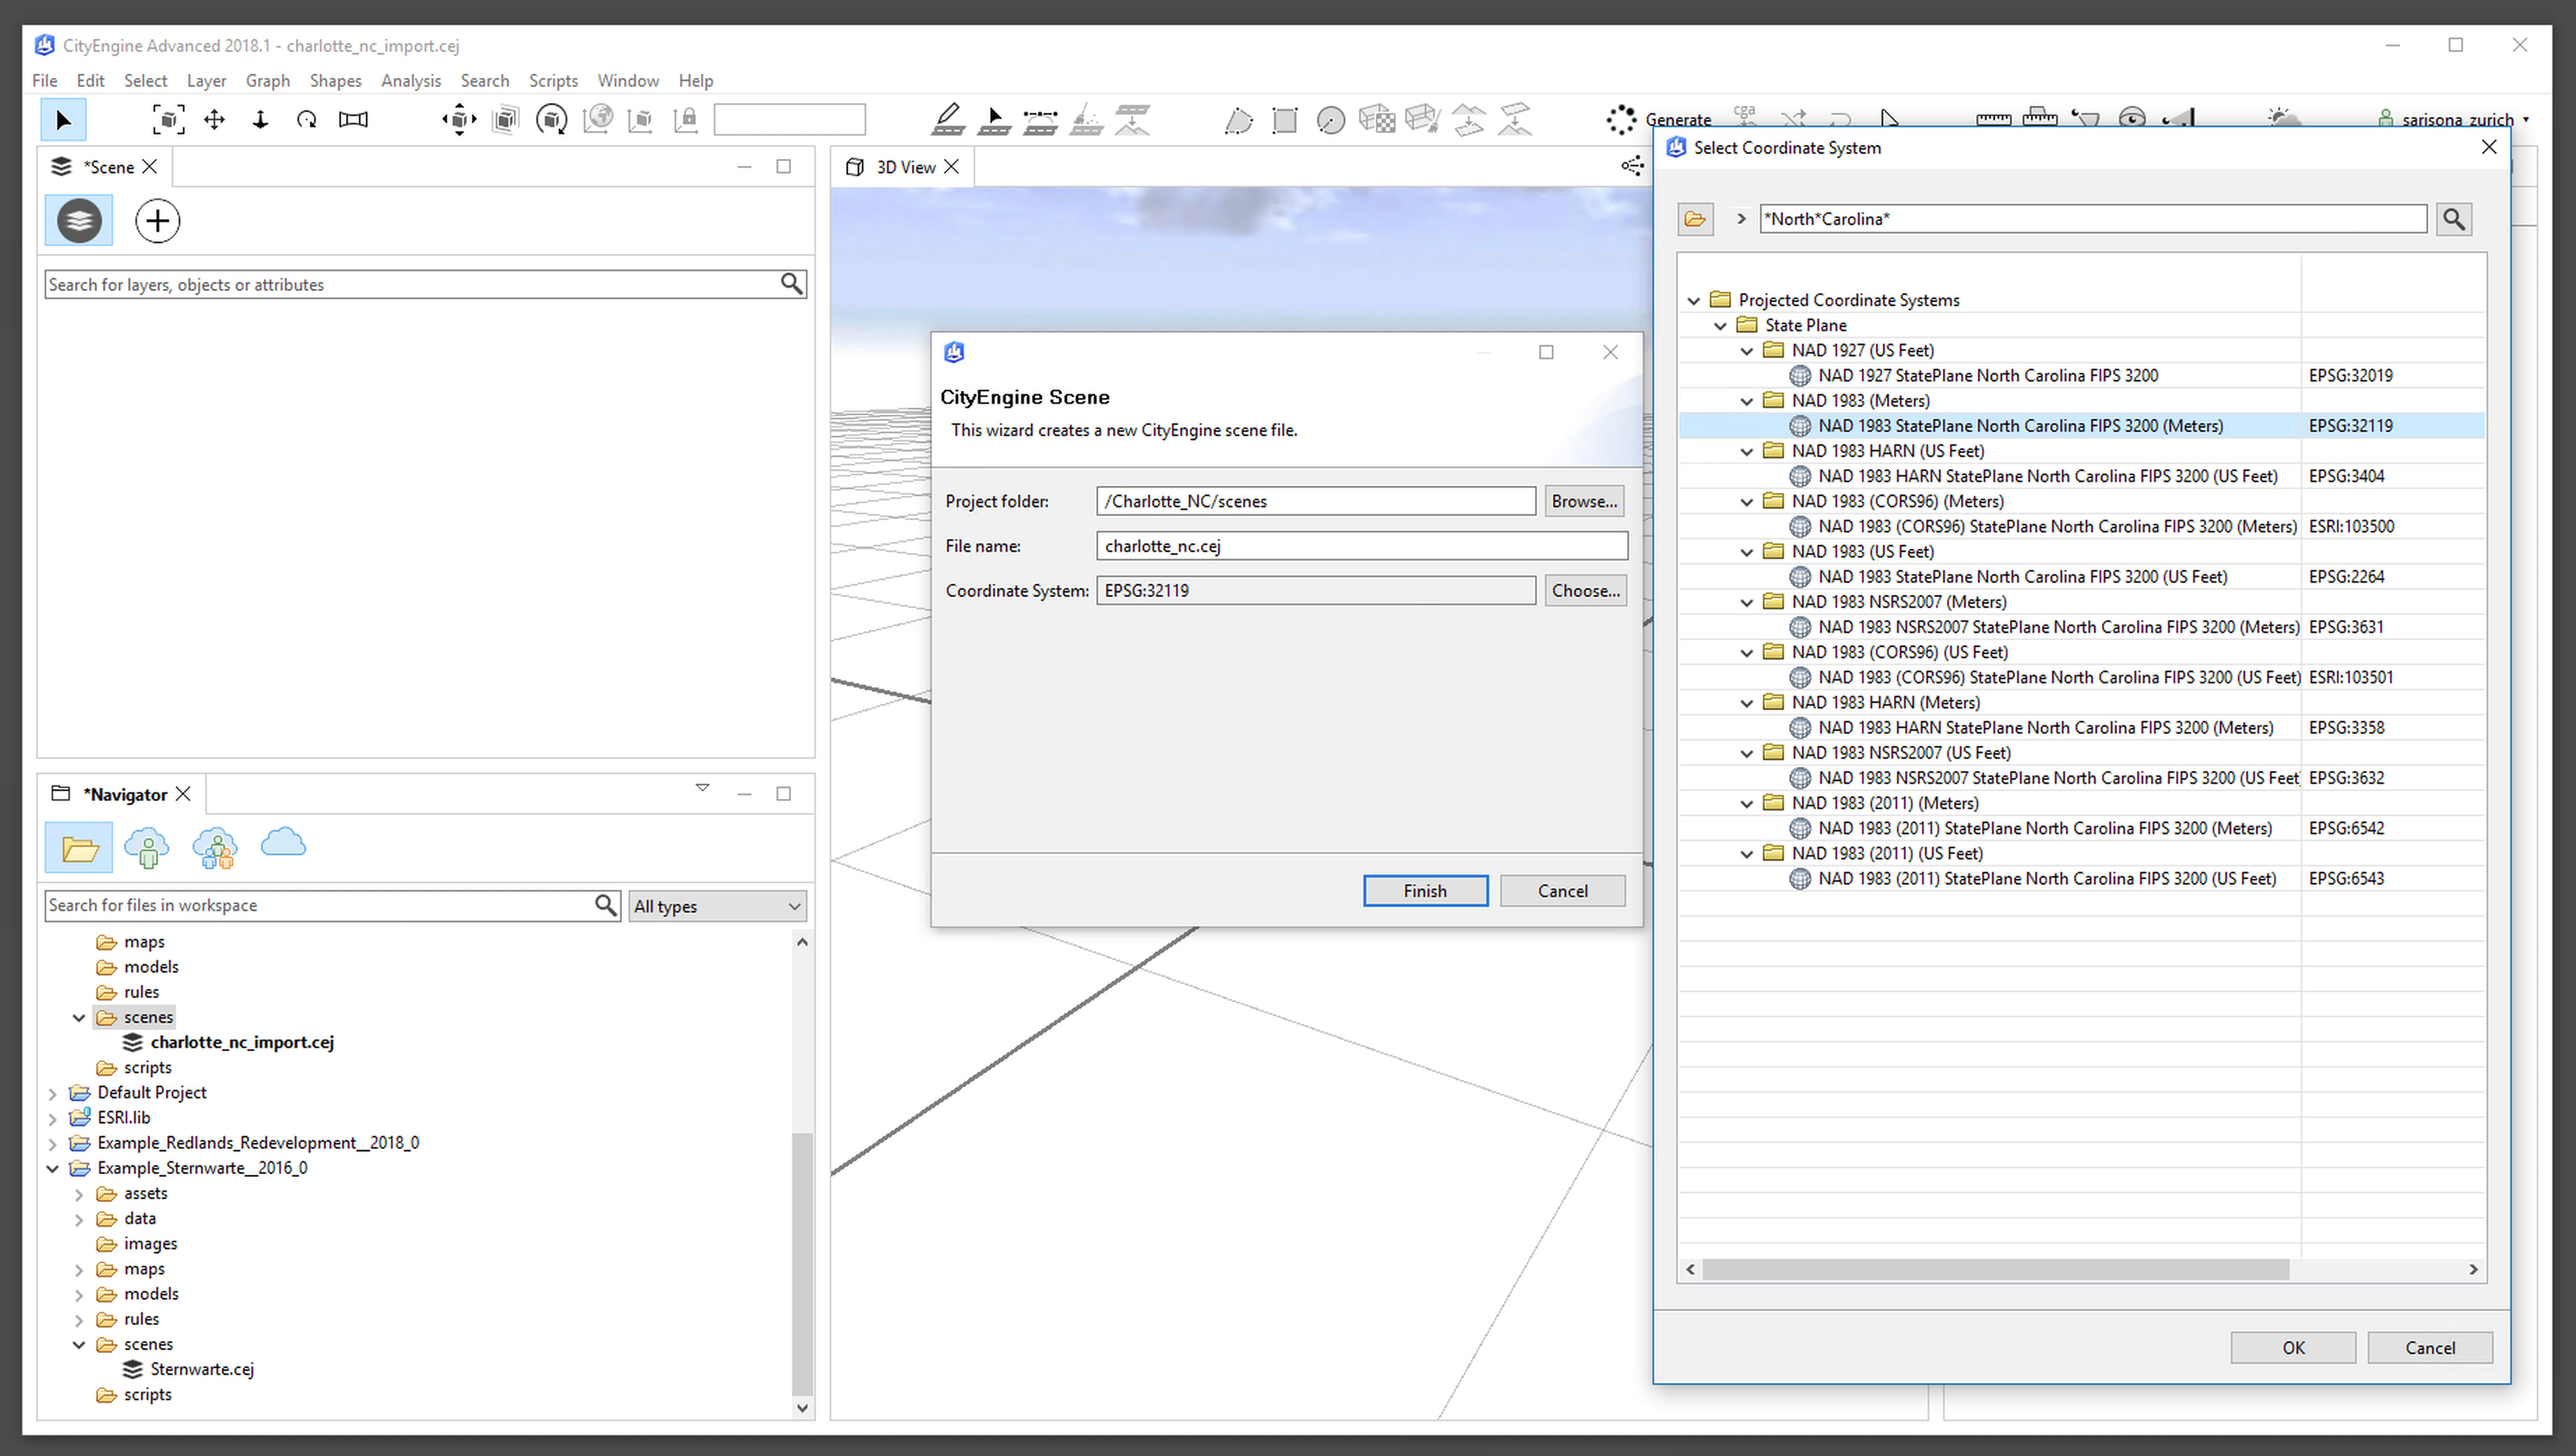
- Launch CityEngine and create a new CityEngine project and scene.
- Since this is a new scene, make sure to select the appropriate coordinate system (in this case: NAD 1983 StatePlane North Carolina FIPS 3200 (Meters)).
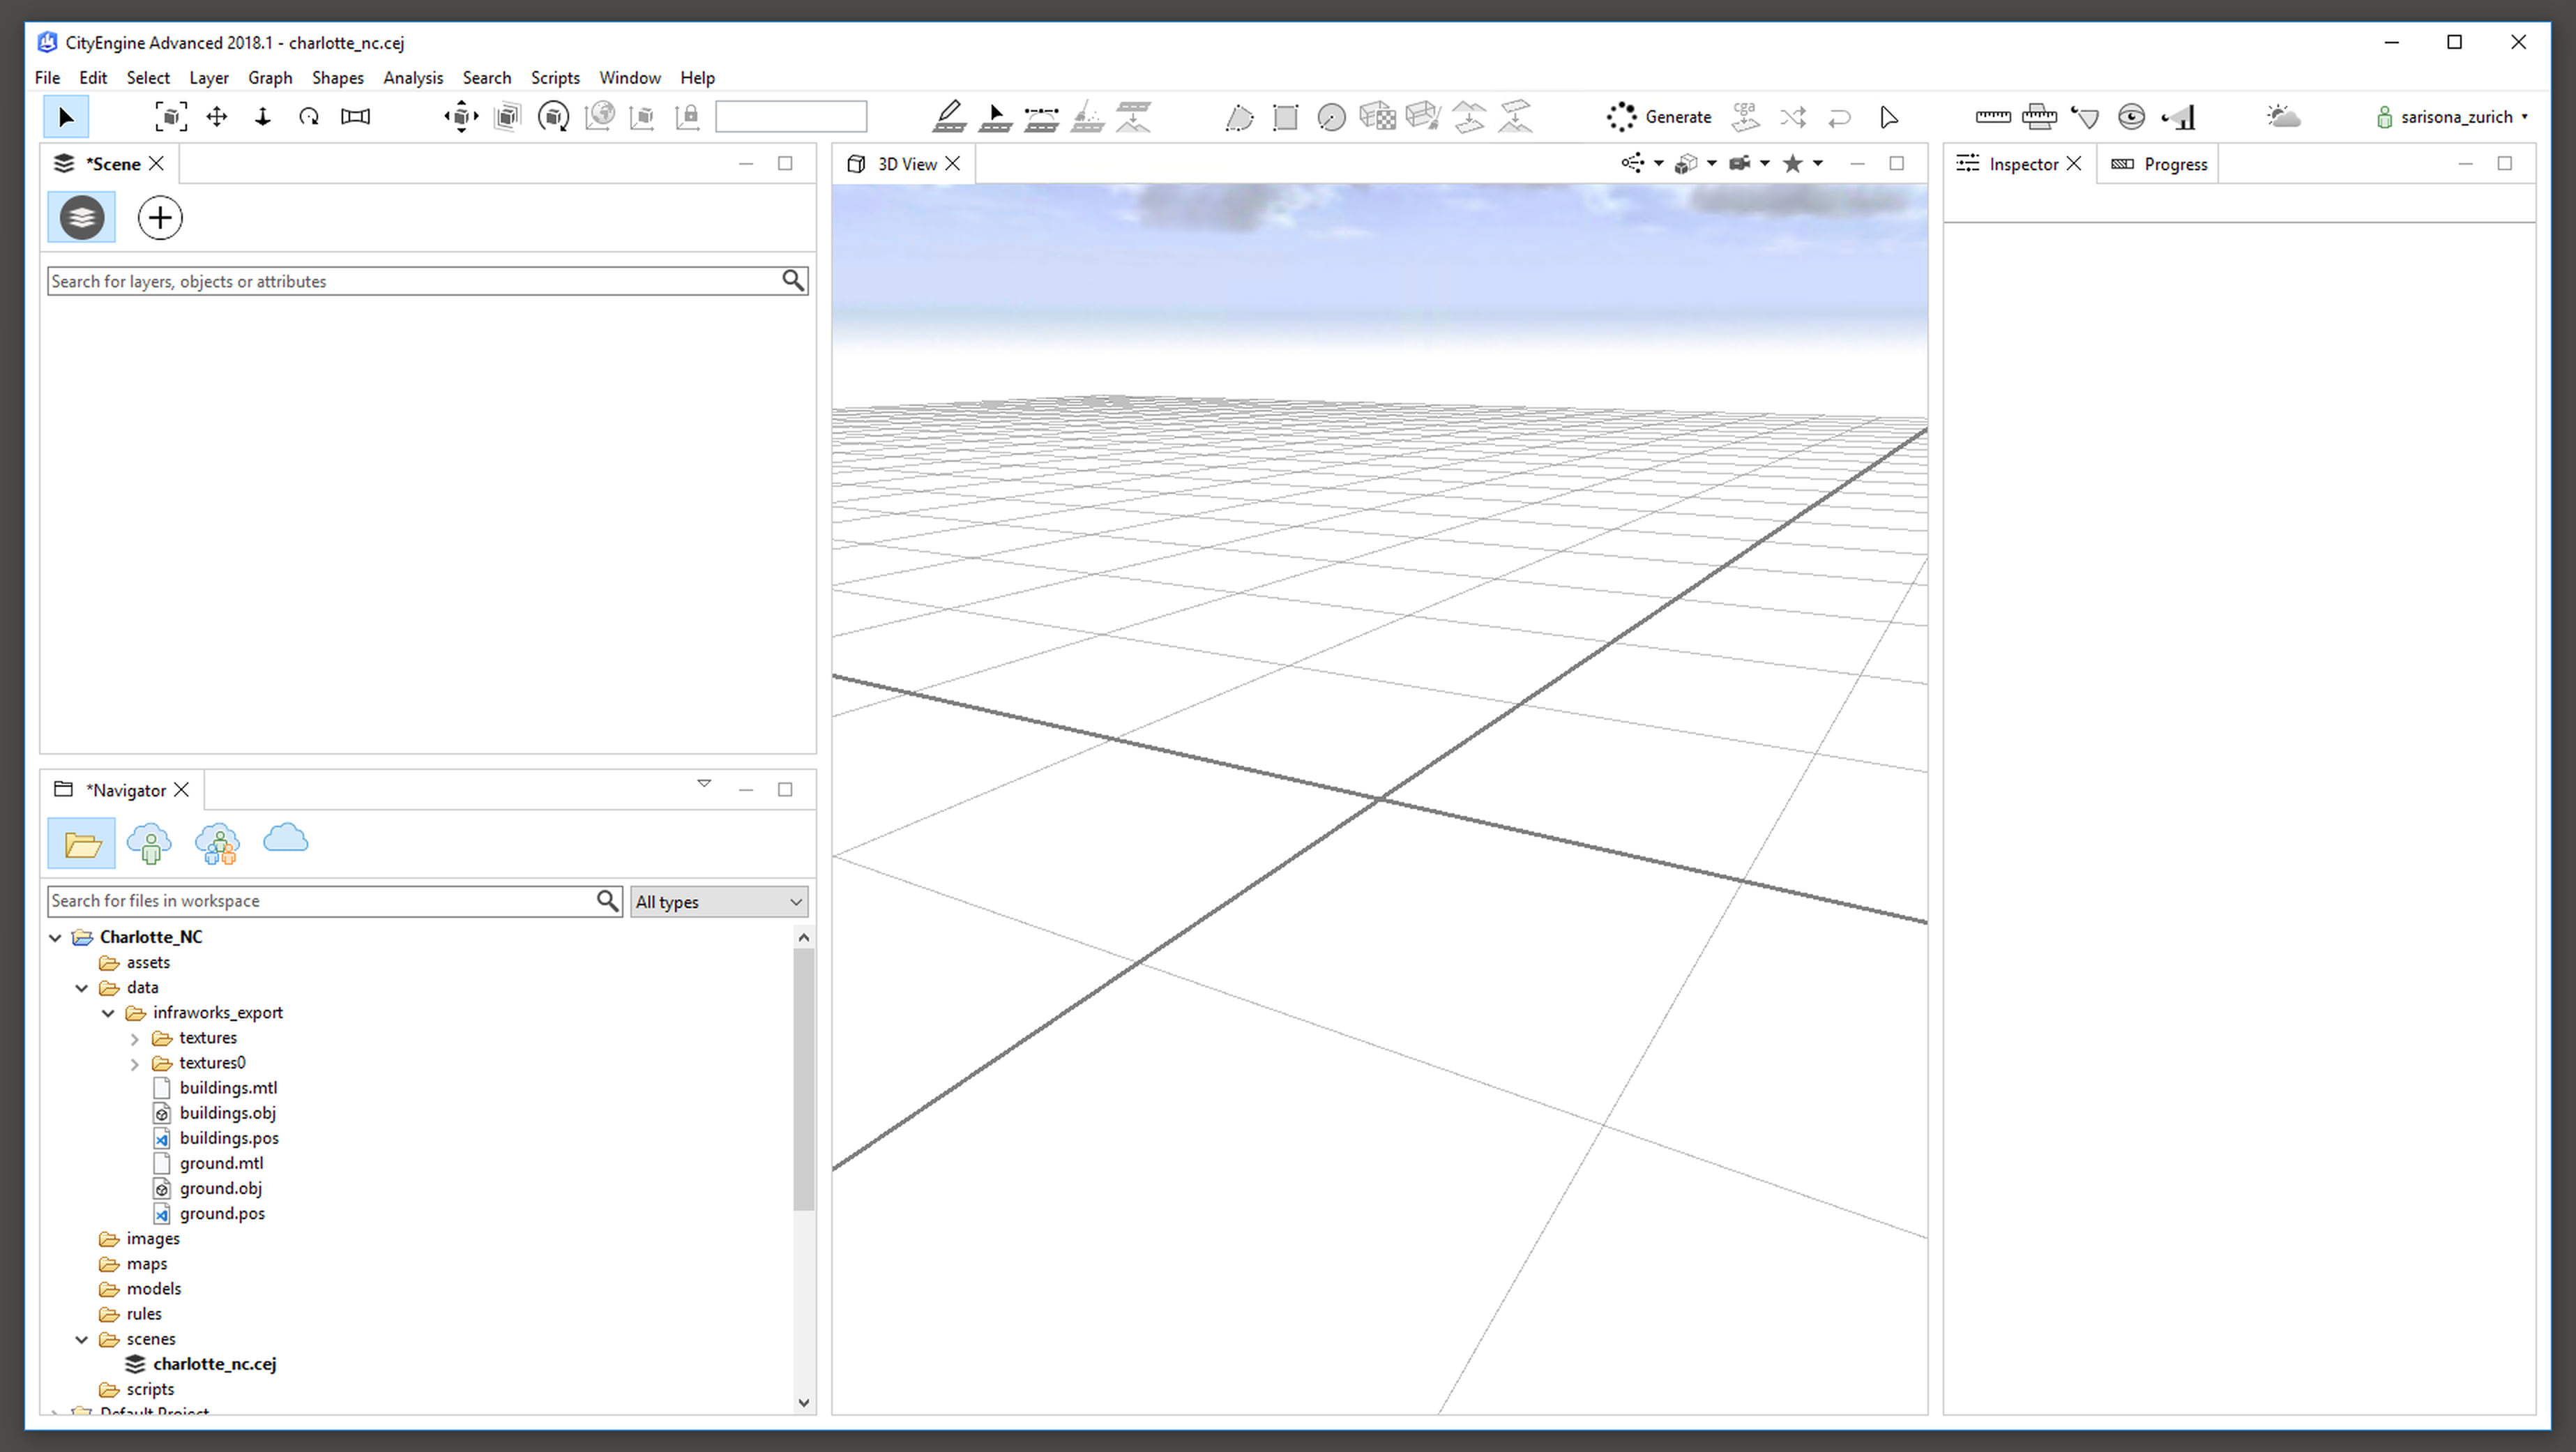
- In order to make the exported data accessible to the CityEngine importer, you first need to copy it into the current CityEngine workspace. For example, in figure 17, the exported dataset was copied into the Charlote_NC project’s data folder.
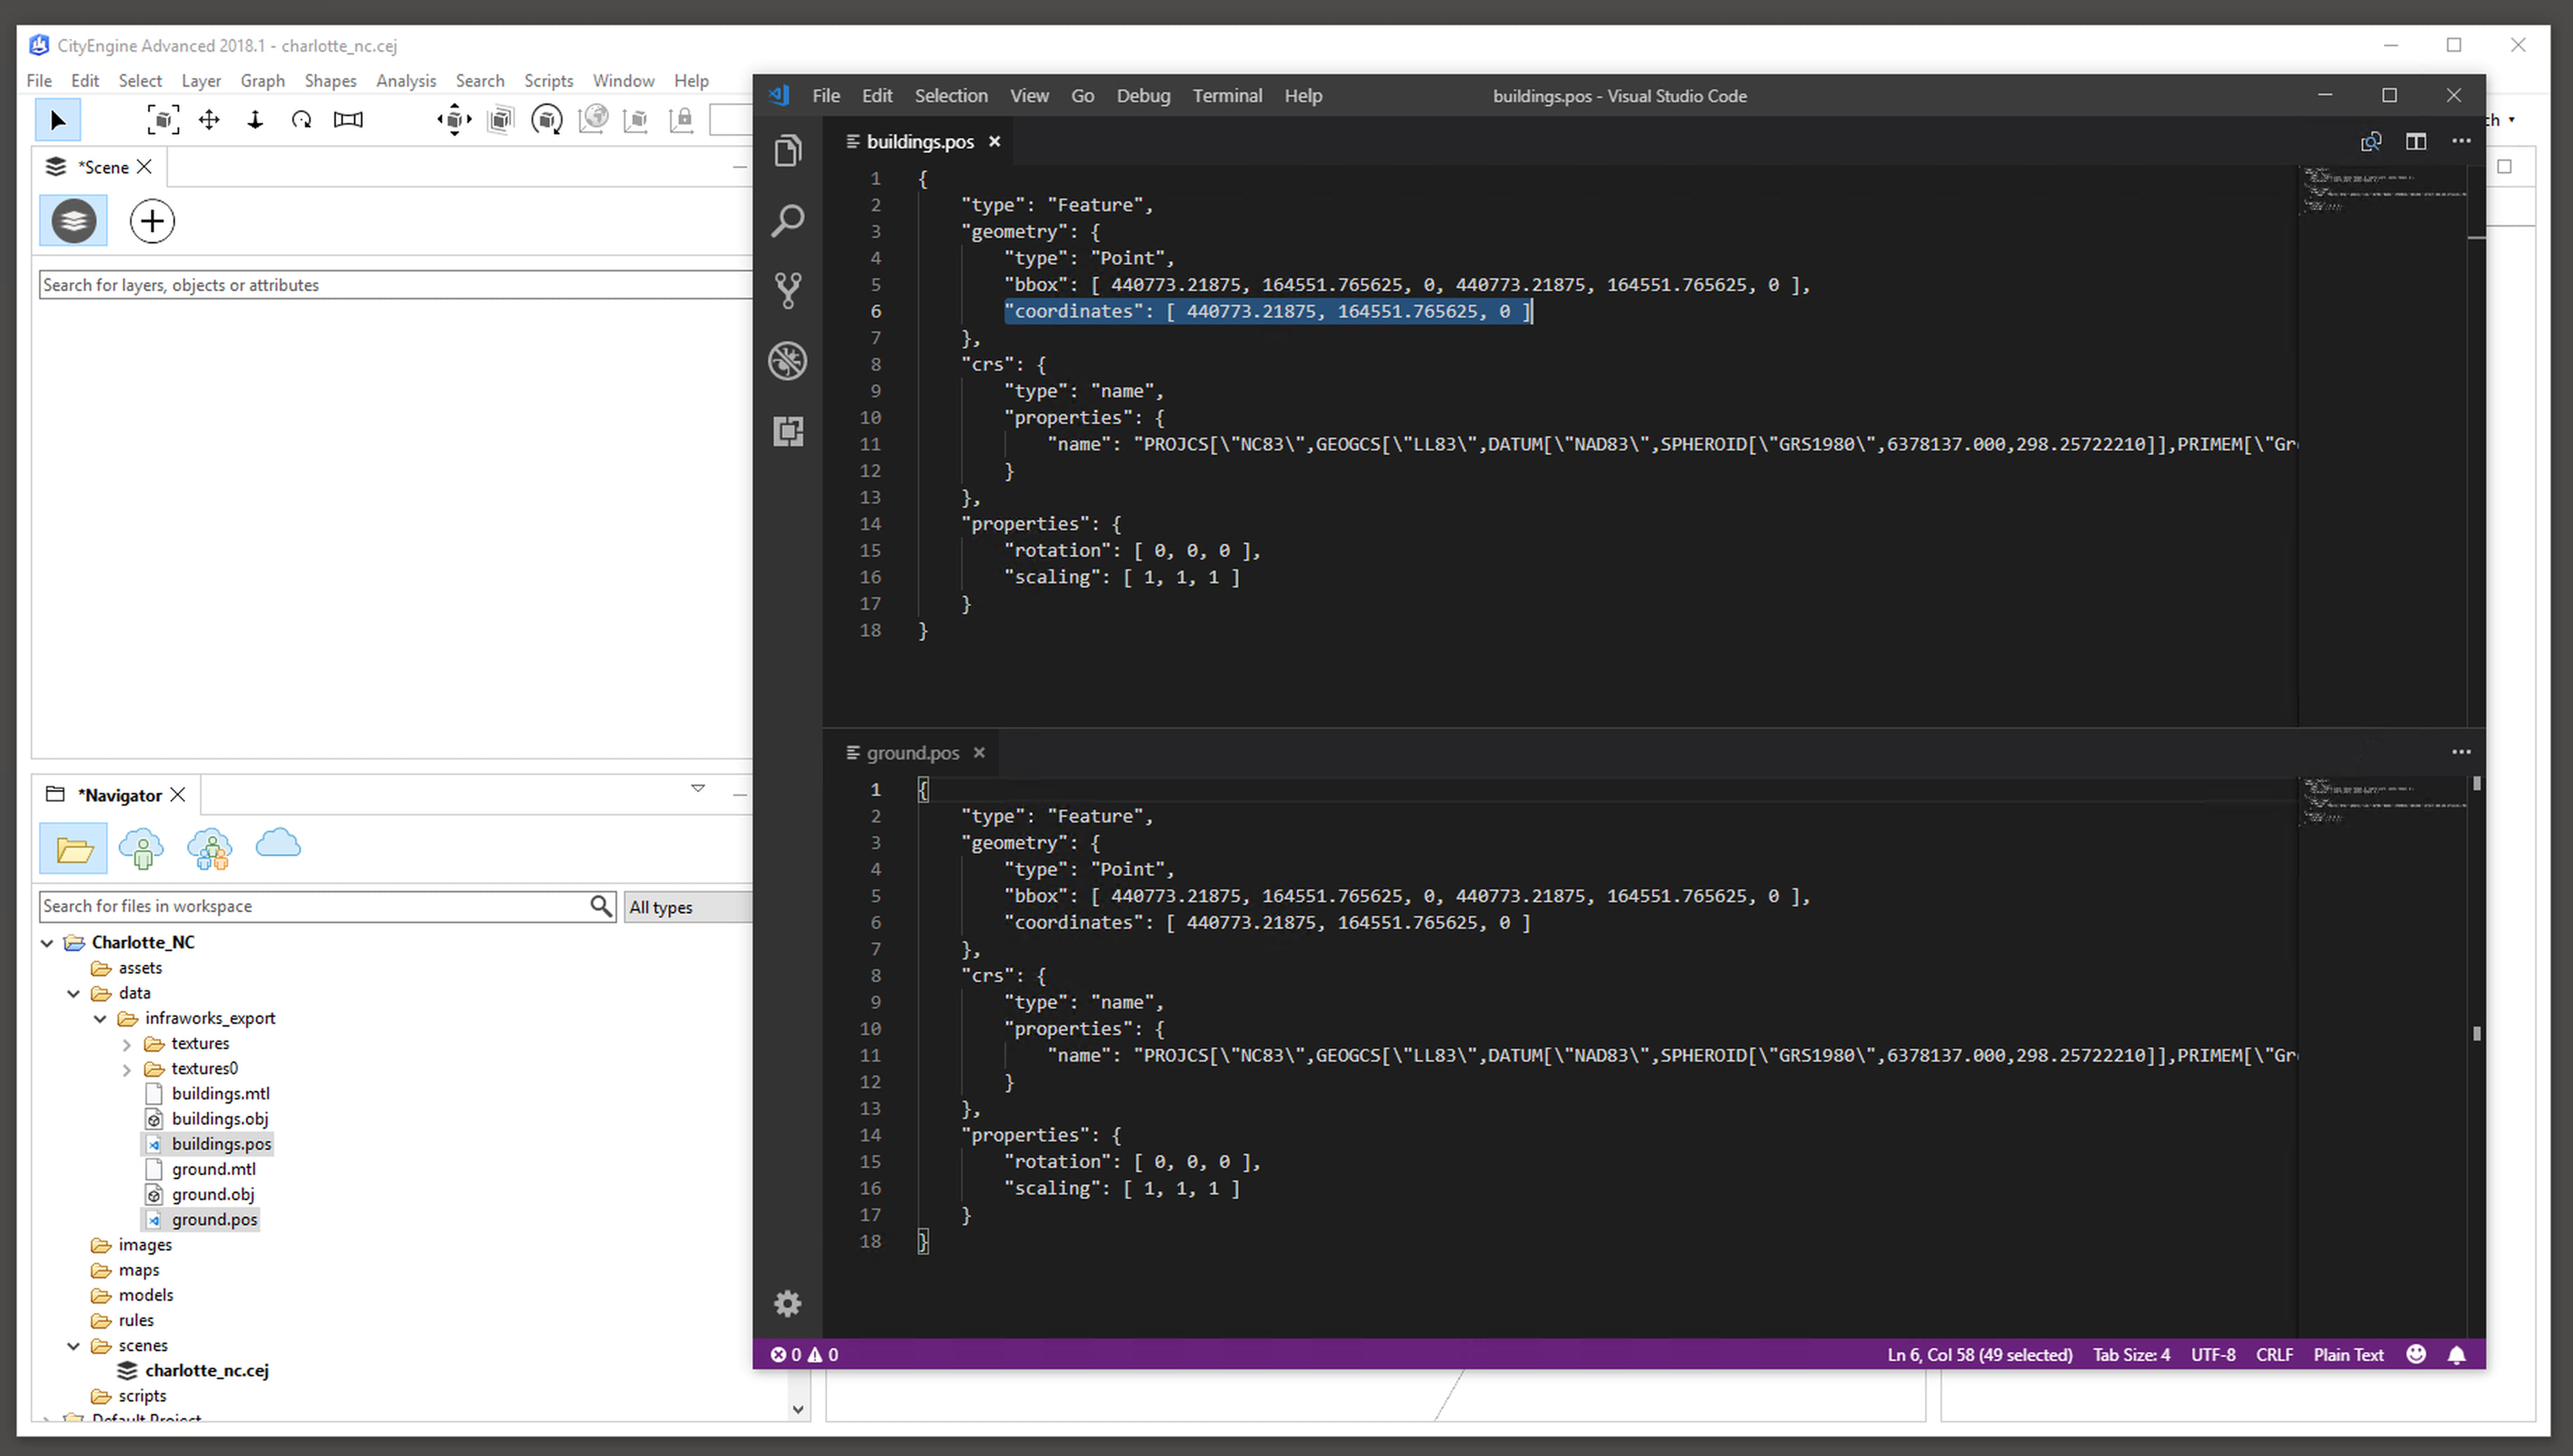
- In the next step, we need to obtain the coordinate offsets for importing the data. For each file, Infraworks exports a “.pos” file, which contains information about coordinate system and offset (figure 18). In order to correctly import the data into CityEngine with the correct offset, we need to write down (or copy) the offsets from the “.pos” files (highlighted in figure 18).
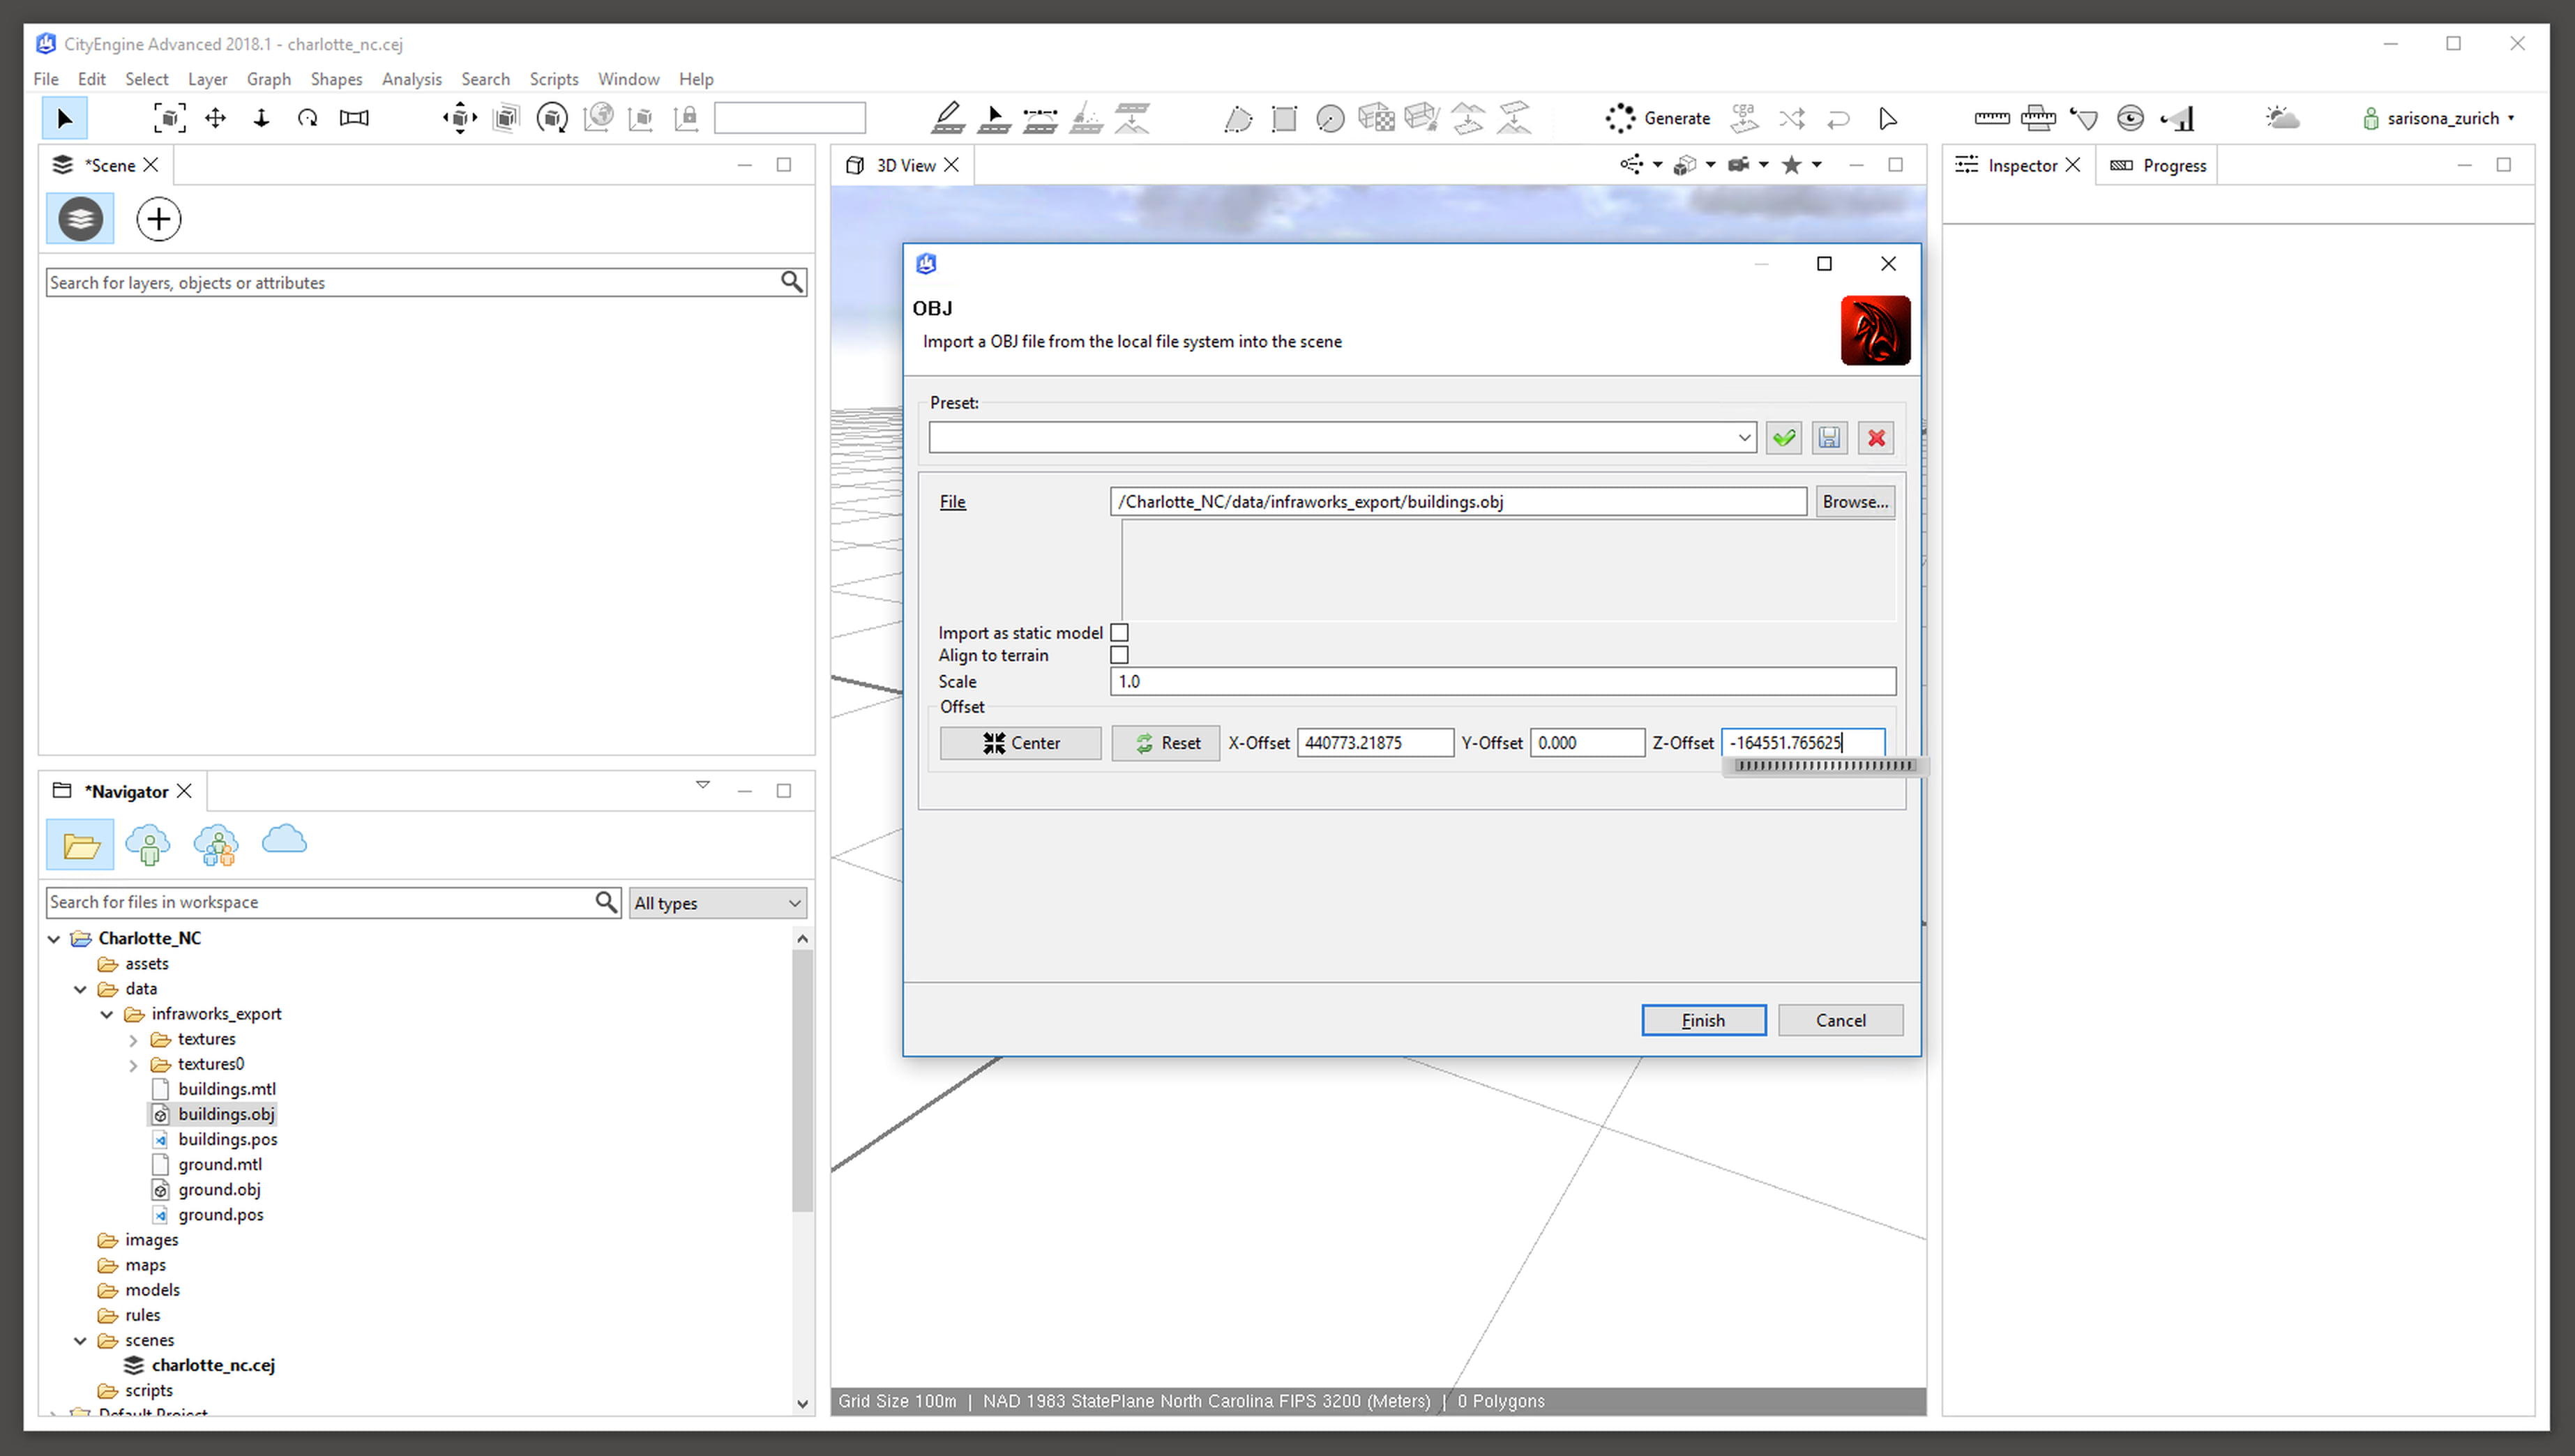
- Back in CityEngine, you can right-click on the “.obj” file and select import, which will bring up the OBJ import dialog. As shown in figure 19, you can now enter the offsets correspondingly. Important: Since CityEngine uses a y-up coordinate system, make sure to enter Infraworks’ y-offset as negative z-offset in CityEngine.
- You can choose to either import the data as a static model, or as dynamic shape for further processing. Refer to the CityEngine manual for more information on this.
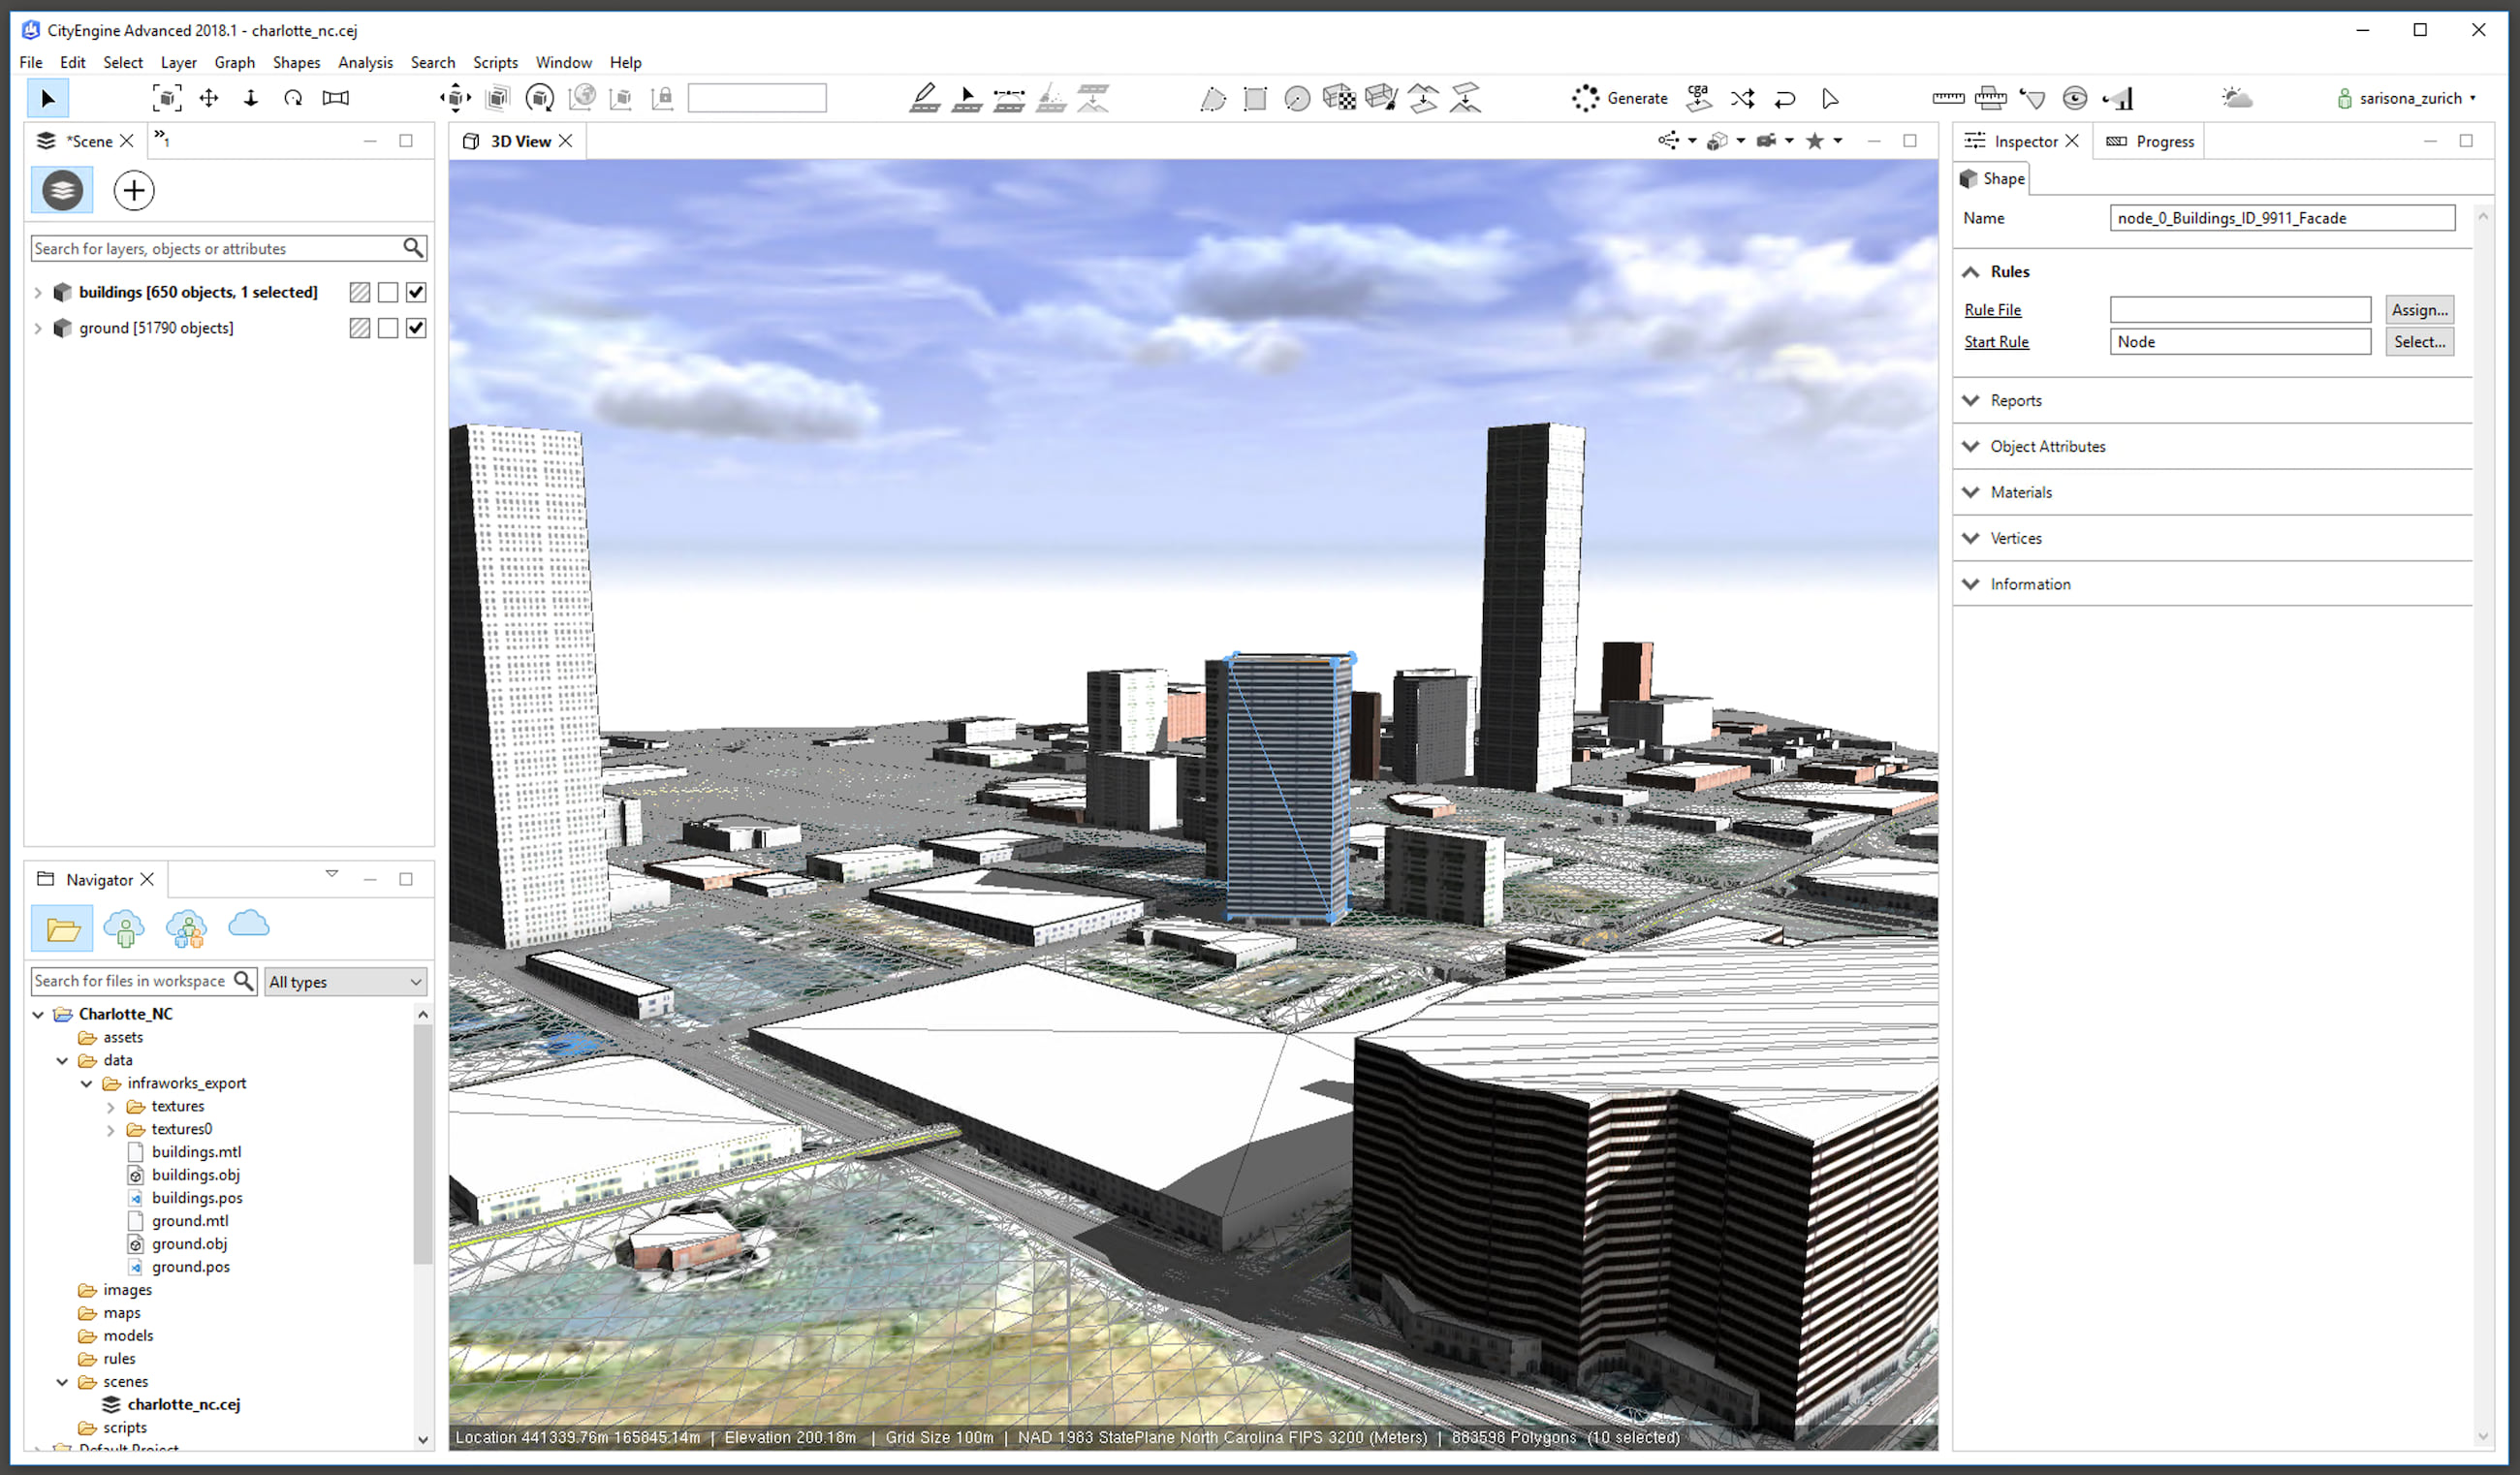
- Select “Finish” to import the model. Depending on the model size, the import process might take a while, after completing the models show up as shown in figure 20. Note that terrain / ground features in Infraworks are typically made of very large amounts of triangles as this example shows.


Commenting is not enabled for this article.