ArcGIS Pro 2.5 now includes ArcGIS Notebooks. The built-in integration with ArcGIS Notebooks allows you to create and edit Jupyter notebooks without leaving the Pro environment. This is a great way to keep your notebooks organized with the Pro projects they relate to without worrying about which Juypter environment your notebook was stored in.
Creating a new notebook
There are two ways to create a new, blank, notebook in ArcGIS Pro 2.5, you can use the Insert tab or the Catalog pane.
Let’s start with the Insert tab:

When you click the New Notebook option a dialog box appears giving you the option to select where you would like your notebook to be stored, at minimum you need to enter the name of your new notebook here.
Something to think about: If your organization wishes to have single notebook repository, or if wants to separate notebooks by their development stage (for example, separating them by dev, QA, and production), you achieve this by storing notebooks in different folders or repositories.
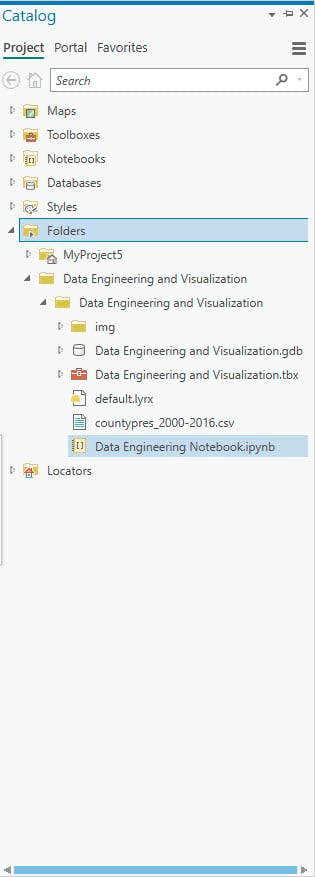
Once saved, your notebook item will appear in the Catalog pane of your Pro project (in the folder location you designated).
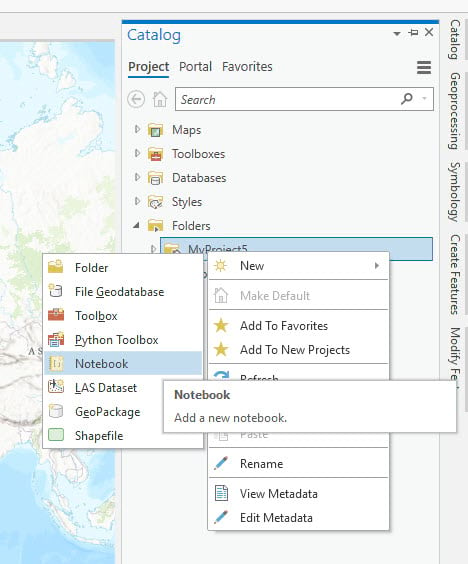
The second option is to use the Catalog pane. You can add a new notebook to any folder connection you’ve configured within your Pro project, including the default folder that was automatically created when you launched your project. To create the notebook, right-click the folder, and navigate to New > New Notebook..

You can rename your notebook by right clicking the item in the Catalog pane.
Importing an existing notebook
If you want to bring in a Python notebook that already exists, you can. Examples include bring in notebooks created within open source Jupyter or accessing an ArcGIS Notebook that has been downloaded from ArcGIS Enterprise or ArcGIS Online.
To bring in a notebook, open the Catalog pane and add the folder location where your notebook is saved. Once the folder location is added to Pro, you will be able to expand it, find the notebook(s), and open them as needed.
Remember, if you are bringing in a notebook from outside of Pro, you may need to adjust paths to data, connection credentials, and make sure that all the libraries and modules you need are available within your Pro Python environment.

Launching a notebook
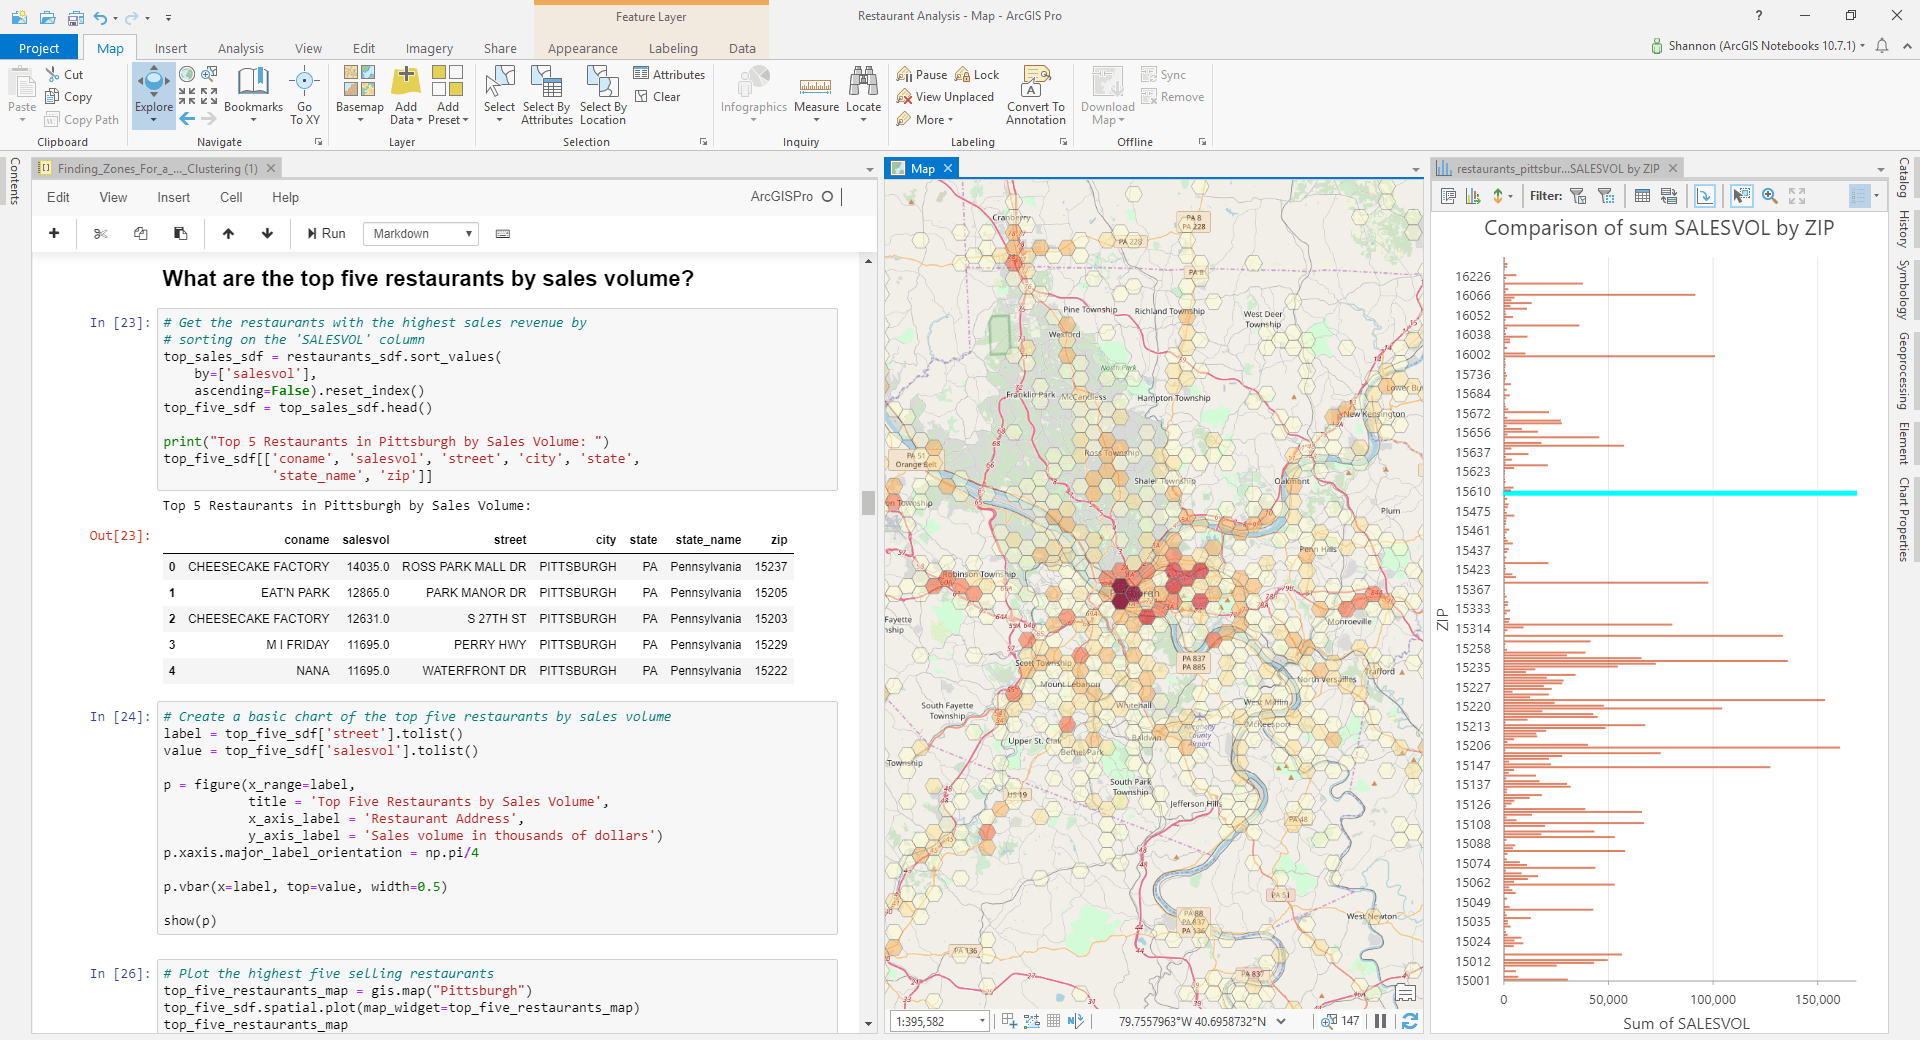
To launch a notebook, simply double-click the notebook item from the Catalog pane. This will open your notebook in a new Notebook view.
Tip: The Notebook view is dockable, allowing you to layout your project in whatever way is easiest for you to work. Notebooks can sit side-by-side with maps, charts, and graphs or can take the full screen real estate – it’s up to you.


Commenting is not enabled for this article.