You’ve put together a gallery of your authoritative maps in ArcGIS Online and now you want to share it.
You can feature the gallery on your ArcGIS Online home page, of course. But you can also embed it in your organization’s website, blog, or other web page. That gives you the flexibility to feature your content anywhere you like. Content that appears in a gallery comes from members of a group in ArcGIS Online.
Follow these seven steps to embed your map gallery:
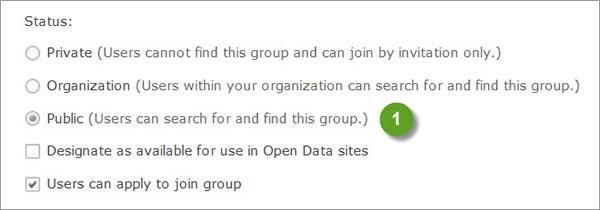
Step one: In your ArcGIS Online organization, go to the Groups tab and click on the group of interest. Click Edit and check the Status section to make sure your group is public. If it is not public, contact the group owner to make it public. If your group is public, hit Cancel at the bottom of the page.

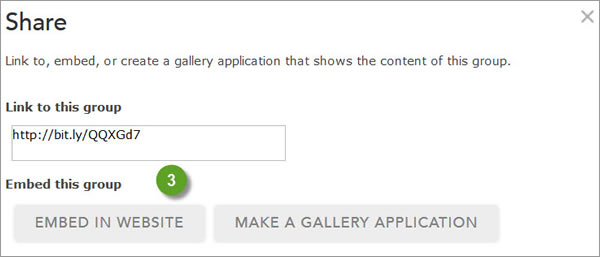
Step two: On the Group Details page, click SHARE.

Step three: Click EMBED IN WEBSITE. To do this, your ArcGIS Online site must be set to allow members to share items outside the organization. Your ArcGIS Online administrator can confirm the setting for your ArcGIS Online site.

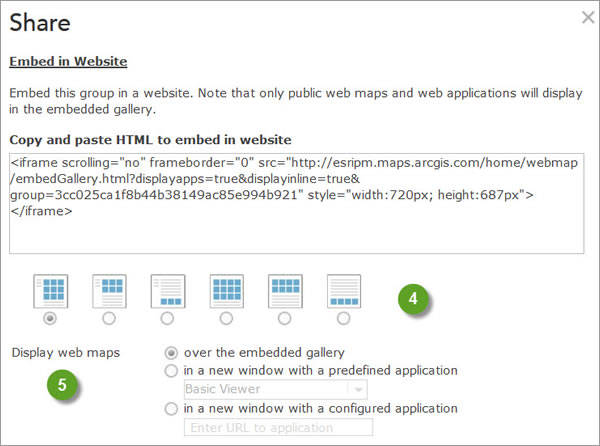
Step four: Select a layout for the group items. You have six choices including displaying the web maps at the top or bottom of the page.

Step five: Choose how to display the web maps. You have three options.
Step six: Select and copy the HTML code that’s provided.
Step seven: Paste the code into your web page where you want the group content to appear.
For a tip on how to center a map gallery in a web page, read Bern Szukalski’s blog in GeoNet, the Esri Community.
