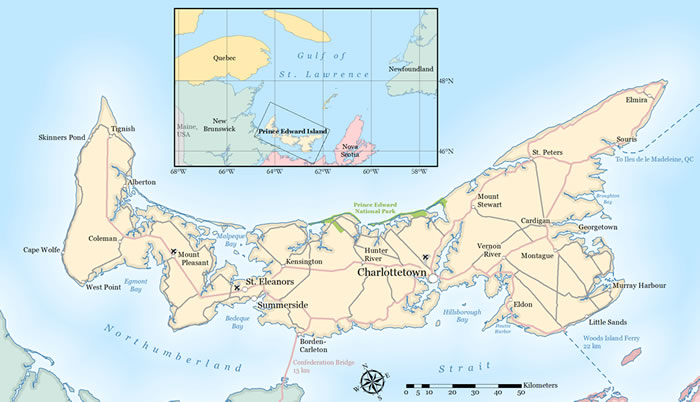
Adding a north arrow improves many maps, especially large-scale maps that show a smaller area in great detail and maps that are not oriented with north at the top (figure 1), which is often done to save space on the printed page.

A new ArcMap option in ArcGIS 10.1 lets you add a north arrow aligned to true north to your page layout. True north is the direction pointing toward the geographic north pole of the axis of the earth’s rotation, the location at 90 degrees north where all the meridians converge. (Meridians are the north–south lines on the earth that extend between the north and south poles.)
In previous versions of ArcGIS, a north arrow inserted onto a page layout in ArcMap always aligned to grid north of the data frame. (Read the blog Adding a declination diagram in ArcMap.) The north arrow would always point to the top of the page unless you rotated the data frame. In ArcGIS 10.1, you can now choose to have the north arrow align to the direction of true north at the center of the data frame.
To illustrate this, figure 2 below shows the orientation of the north arrow when it is placed on maps using the North America Albers equal area projection with standard parallels at 20N and 60N and the central meridian at 96W (shown in orange in figure 2B). When the true north alignment option is used, the north arrow aligns with the meridian at the center of the data frame that points to true north. Note that if you move the north arrow to another location on the page after you insert it, its orientation will stay the same. If you pan the data in the data frame, the north arrow will update automatically.

Note that the maps in figure 2 are for illustration purposes only. Cartographers advise against using a north arrow on smaller-scale maps that use conic projections such as these because north will vary across the map, as you can plainly see by the orientation of the meridians.
To set the true north alignment option, follow these three easy steps:
Step one: Click Insert on the main menu, then click North Arrow.
Step two: Use the North Arrow Selector to choose the north arrow you want to insert, then click Properties.
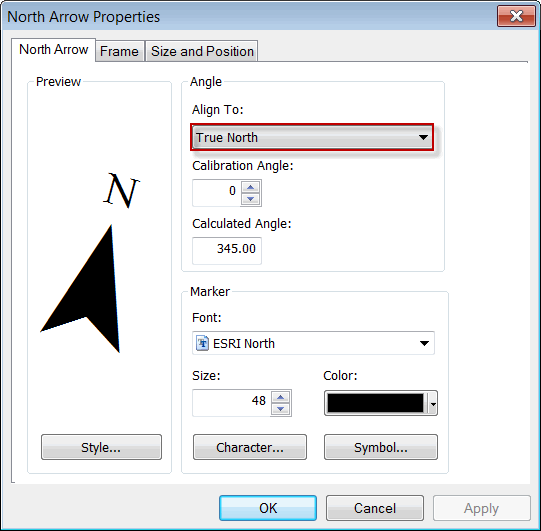
Step three: On the North Arrow tab, set the Align To option to True North (figure 3) and click OK.

Note in figure 3 that the calculated angle automatically updates to indicate the angle of the true north arrow. The calculated angle is always a read-only property, calculated by the software.
You can also set a calibration angle to define adjustments for either the data frame rotation or true north alignment options. For example, you can use this option along with alignment to true north if you are inserting a north arrow that aligns with magnetic north. Magnetic north is the direction of a compass needle when it is aligned with the earth’s magnetic field. To set this value, you will have to know the correct declination (the angular difference between true and magnetic north) for the time and area being mapped.
Other guidelines for using the true north alignment option include the following:
- You can use Style Manager to edit the alignment setting of a north arrow symbol so that the symbol defaults to the rotation option you set.
- The calibrated angle can be user-edited with either rotation option. The calculated angle is determined by the software, so it is not something you can edit.
To learn more about north arrows in ArcMap, read these ArcGIS blog posts:

