One of the ways to quickly reduce your workload and simplify maintenance of your GIS is to write scripts that automate common administrative tasks. If you think scripting is writing complicated batch files or shell scripts that are difficult to maintain, let me encourage you to use the ArcGIS Chef Cookbooks. It will make your life easier. This article introduces (or reintroduces) you to a relatively new scripting and automation technology—Chef.

What is Chef? Technically, Chef is both a company and an automation platform for working with your infrastructure in the cloud, on-premises, and in hybrid environments. Chef has lots of components, but this article will focus on cookbooks. The cookbook is the fundamental building block of Chef. It is used to define what you’re going to do to automate a task. A cookbook contains recipes that are the actual scripts. Recipes can accomplish very simple tasks, such as installing or uninstalling software, or they can be used to perform more complex tasks, such as assembling and configuring multiple software components across your network so they all work together.

The Esri Server team has been using Chef for several years to quickly configure virtual machines on-premises and in Amazon Web Services (AWS). As you can imagine, Esri runs ArcGIS software in many different environments to test it, improve its performance, and support customers. Using Chef has saved considerable time and effort and has reduced the stress of constantly installing, uninstalling, updating, and maintaining all Esri machines running ArcGIS. Chef has proved to be a dependable and repeatable solution for automating ArcGIS deployments.

Earlier this year, Esri created a collection of Chef cookbooks for ArcGIS and made them available to all ArcGIS users at the Esri repository on GitHub. Each cookbook has a set of useful Chef recipes that work with different aspects of the ArcGIS platform, including ArcGIS Server, Portal for ArcGIS, ArcGIS Data Store, ArcGIS Web Adaptor, ArcGIS GeoEvent Server, and ArcGIS Pro.
To get started using Chef and the ArcGIS Cookbooks, you will need to have the following items:

- The setup and valid authorization files for the ArcGIS software stored in a folder on the machine you’re working with.
- An SSL certificate issued by the certification authority for the domain. (Note: If you don’t define a CA-cert, this tool will generate and use a self-signed certificate for testing purposes.) Note that self-signed certificates are not supported by Portal for ArcGIS. Your organization probably already uses CA-signed certificates from an organization like Verisign, Thawte, or DigiCert, and a web server expert in your IT staff can help you acquire a signed certificate.
- The Chef Client to run recipes. You can download and install the Chef Client appropriate for the operating system you’re working with.
- The appropriate ArcGIS Cookbook. There are separate ArcGIS Cookbooks for ArcGIS Desktop, ArcGIS Pro, ArcGIS Server, and ArcGIS GeoEvent Server. Download and extract the appropriate ArcGIS Cookbook.
ArcGIS Cookbooks were designed so you don’t have to write scripts—just modify existing recipes and files to automate simple tasks.

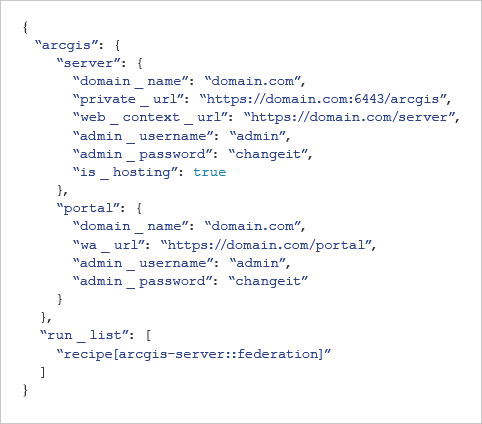
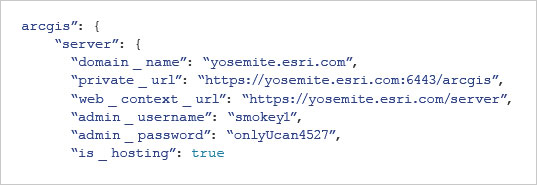
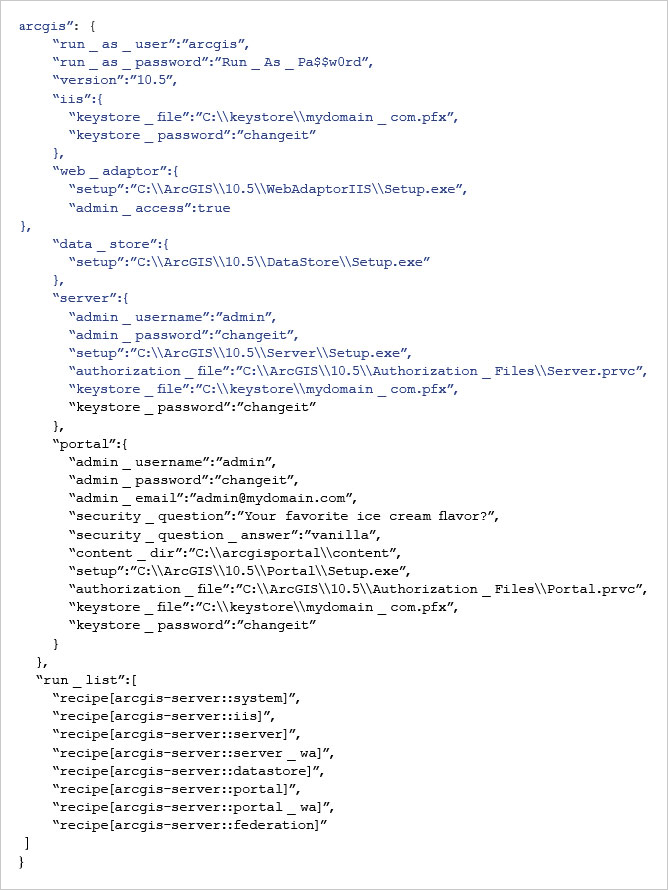
The listings that accompany this article demonstrate how easily you can modify and use recipes. Listings 1 to 4 show how to use an ArcGIS Cookbook recipe to federate an ArcGIS Server with Portal for ArcGIS, a task you can do manually but one that can be automated with Chef. You can use this recipe not only for your initial configuration but later when you have added another ArcGIS Server to your deployment. After making changes to the recipe and saving them, use the Chef Client you installed to run the script by typing “chef-solo -j C:\chef\roles\webgis-windows.json” at the prompt (C:\) in the command prompt window and pressing Return.
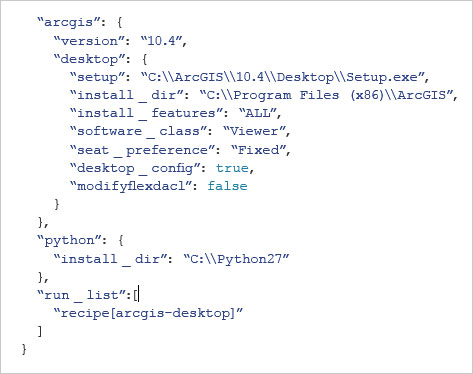
If you don’t have ArcGIS installed on a laptop or PC, you might want to try the simple recipe shown in Listing 5 for installing and authorizing ArcGIS Desktop.
To learn more about using the ArcGIS Cookbook, visit the arcgis-cookbook wiki on GitHub.

