The Shoreline Cleanup and Assessment Technique (SCAT) is a systematic method for surveying an affected shoreline after an oil spill. SCAT originated during the response to the 1989 Exxon Valdez oil spill, when responders needed a systematic way to document the spill’s impacts on many miles of affected shoreline. Read this article to learn how you can support field data collection activities using the SCAT template.
About SCAT
The SCAT methodology is described at length in this NOAA web page. Below is an extract from it:
When spilled oil contaminates a shoreline, responders must survey the affected areas to determine the best response. The SCAT approach uses standardized terminology to document shoreline oiling conditions. It is designed to support decision-making for shoreline cleanup. It is flexible in its scale of surveys and in the detail of datasets collected.
SCAT is a regular part of the oil spill response. SCAT surveys begin early in the response to assess initial shoreline conditions, and ideally continue to work in advance of operational cleanup.
The SCAT process includes eight basic steps:
- Conduct reconnaissance survey(s).
- Segment the shoreline.
- Assign teams and conduct SCAT surveys.
- Develop cleanup guidelines and endpoints.
- Submit survey reports and shoreline oiling sketches to the ICS Planning Section.
- Monitor effectiveness of cleanup.
- Conduct post-cleanup inspections.
- Conduct final evaluation of cleanup activities.
About the Survey123 SCAT template
The SCAT Survey123 template is modeled after NOAA’s Field Observer Form for Quick Shoreline Assessment. Use this form for quick reconnaissance and to report observations to the Field Observer Coordinator in the Situation Unit.
While you can use this template as-is, making modifications to it is straight-forward. You can change it to include field sketching capabilities, watermarked photos and more. Find more about this later in this article.
The Survey123 SCAT template is just a piece of a larger workflow. Do not stop at field data collection: Build an ArcGIS dashboard to display information submitted from Survey123. Use ArcGIS Pro to further analyze field assessments.
Getting started with the SCAT Survey123 template
To get started with the SCAT Survey123 template, download ArcGIS Survey123 Connect. Get it from the Microsoft Store or alternatively, use the Windows 64 bit installer.
Survey123 Connect will help you publish your SCAT forms into ArcGIS. You will need an ArcGIS account with publishing permissions.
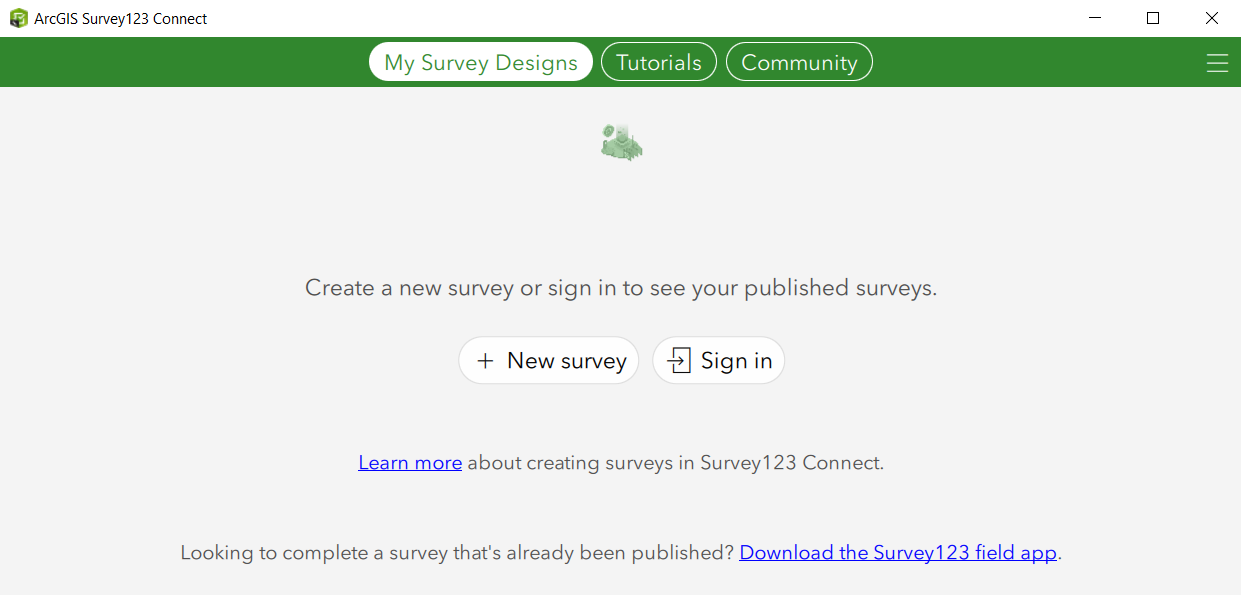
Click on New Survey to open the the New Survey dialog.
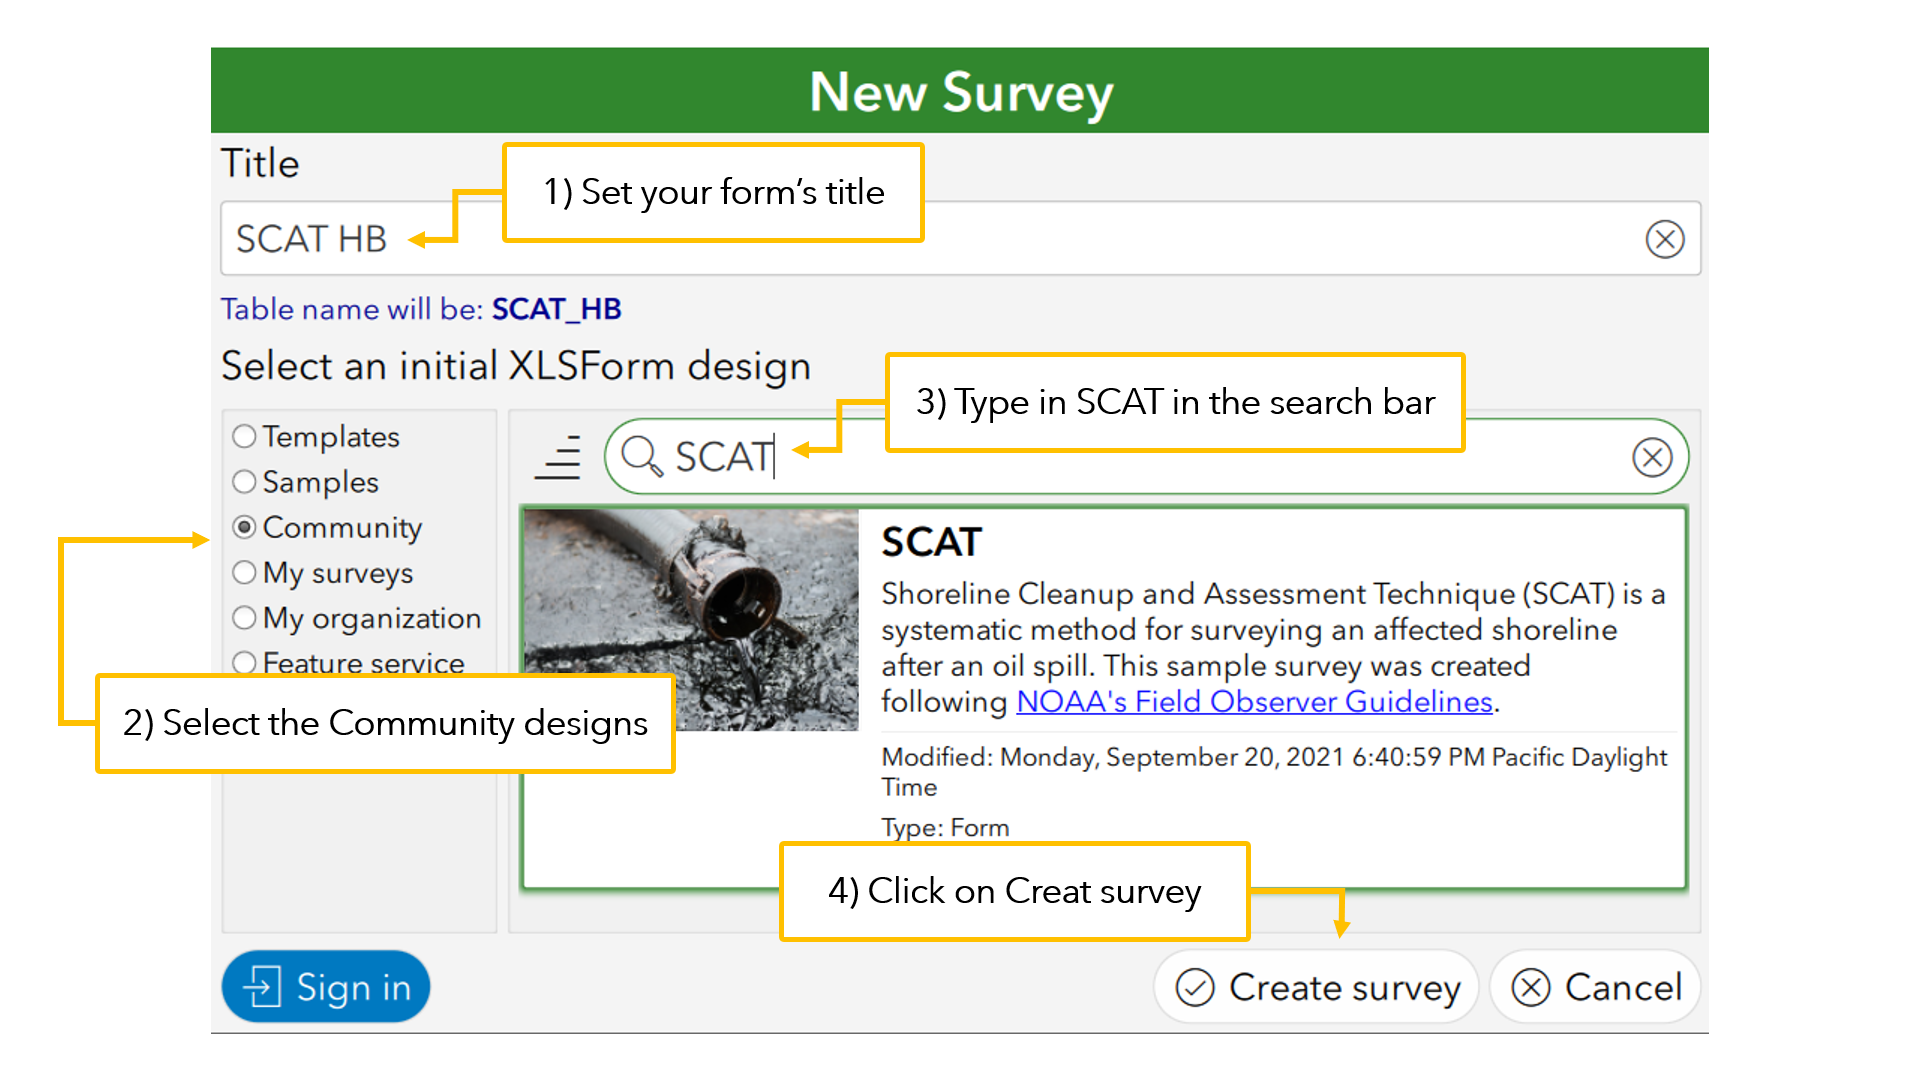
From the New Survey dialog, select the Community category in the left panel, type ‘SCAT’ in the search bar and create a new form from the SCAT template.
Survey123 Connect will now display a preview of your SCAT survey. Use the XLSForm button in the left bar to open the XLSForm spreadsheet.
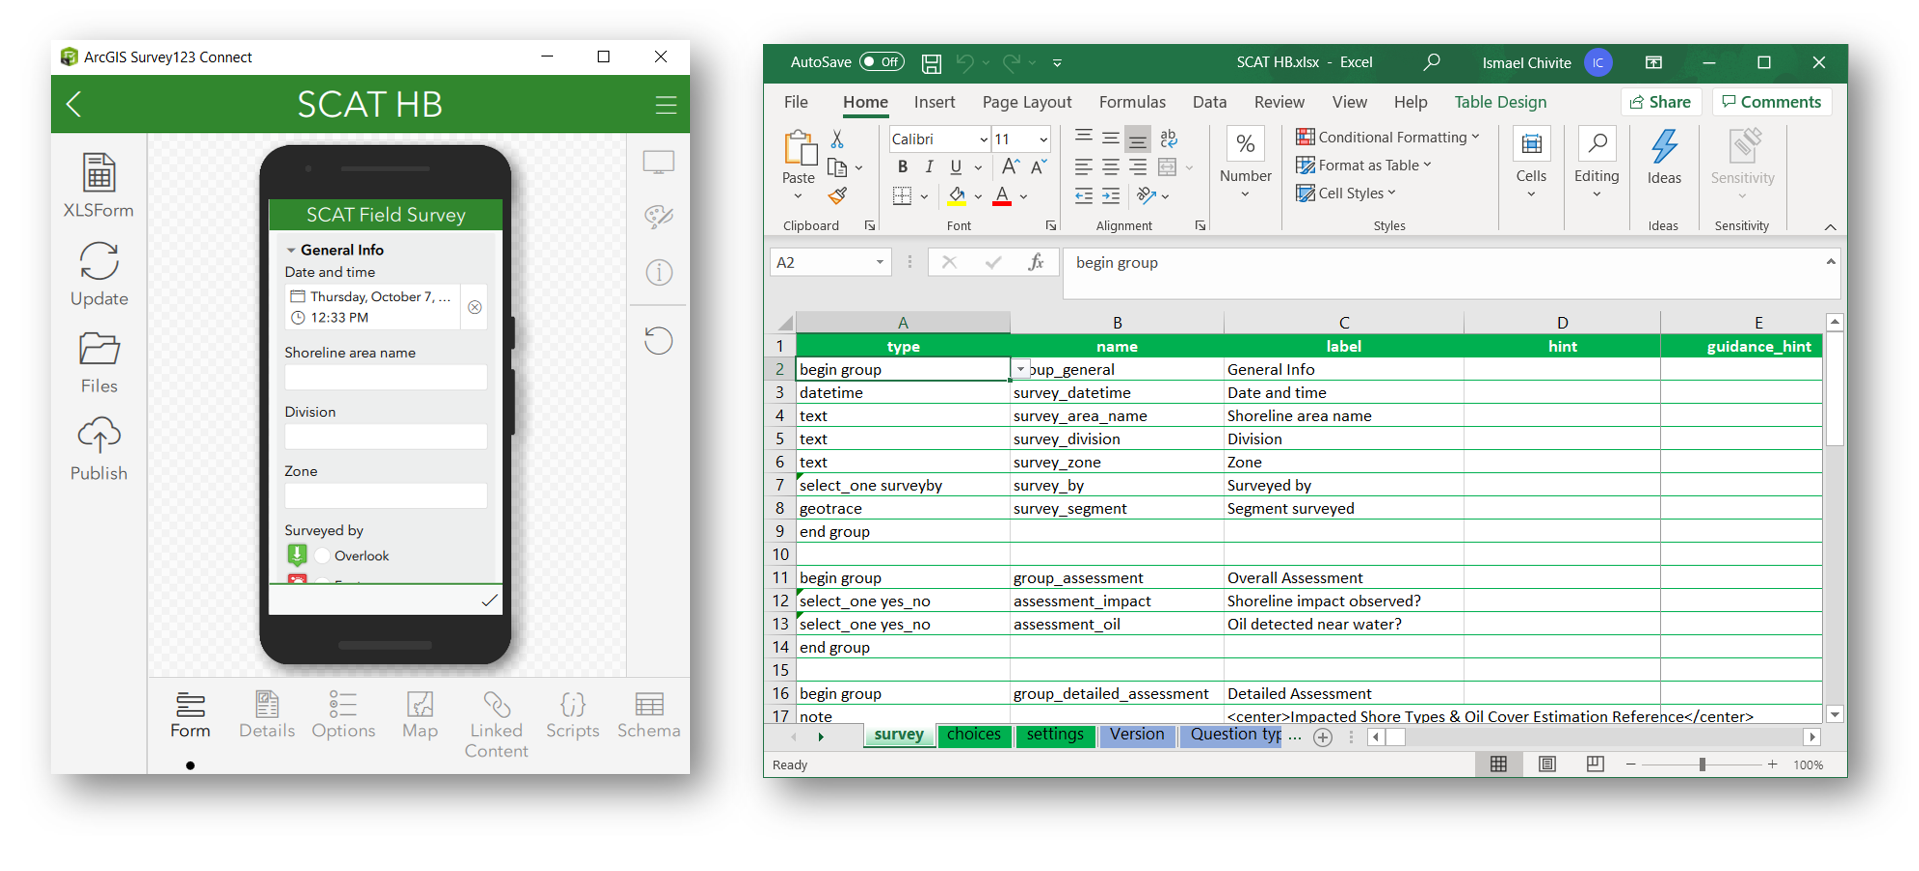
Use the design preview in Survey123 Connect to explore your SCAT survey.
How to modify the SCAT template
The Survey123 SCAT template follows guidelines as provided by NOAA’s Field Observer Form for Quick Shoreline Assessment. You can use Survey123 Connect to tailor this template to your own needs. Common changes you may want to make include:
- Change question labels
- Reorder questions
- Add questions: To take photos, create sketches or to collect additional information
- Brand the form with your organization’s logo and color scheme
- Customize the map
Use the XLSForm spreadsheet to make modifications to your form. Put Survey123 Connect side by side with your spreadsheet editor and you will soon figure out how they work together. Make modifications in your spreadsheet and then save it. You will see how your survey design updates in Survey123 Connect!
The Survey123 YouTube playlist contains many short video tutorials around XLSForm. Check out the XLSForm essentials help topic for more context.
Change the label of a question
Look for cell C3 in the XLSForm spreadsheet and change the content from ‘Date and Time’ to ‘Date and Time of the survey’. Now save changes in your spreadsheet. Survey123 Connect will automatically refresh the design preview. Simple, right?
Change the appearance of a question
There are many columns in the XLSForm spreadsheet. Learning all their secrets will take time, but the appearance column is pretty straight-forward. It controls the look and feel of your questions. Refer to the appearance Survey123 help topic for details.
Go to cell F7 and change its value to horizontal. Save the spreadsheet and check the changes in the design preview.
Collect photos
Insert a new row immediately after row 32. Set it’s type to image. In the name column insert the word photos and in the label add Photos. Save and preview your changes in Connect. You should now see a new question called Photos in your form.
By default, the image question will only let users take a single photo, but you can quickly fix that. Go into the appearance column for your new Photos question and set its value to multiline. Save and preview again. See how you can now take multiple photos?
You can do so much more if you like. For example, you can control if photos can be browsed from the device or if they should be taken with the camera. Specifying a maximum of photos for each segment assessed is also possible. Check the Suvey123 Tricks of the Trade: Photos article to learn more.
Photo watermaks
Would you like to burn into every photo the exact geographic location where it was taken? What about the time? Do you need to include the Shoreline area name and division too? All of that is possible. Read Survey123 Tricks of the Trade: Photo Watermaks for the details.
Style
The vertical bar on the right of Survey123 Connect includes a Style button; Click it to modify the look and feel of your form. Configure the color scheme of your survey as you like. Using the Details option in the bottom bar you can also change the thumbnail of your survey, its description, etc.
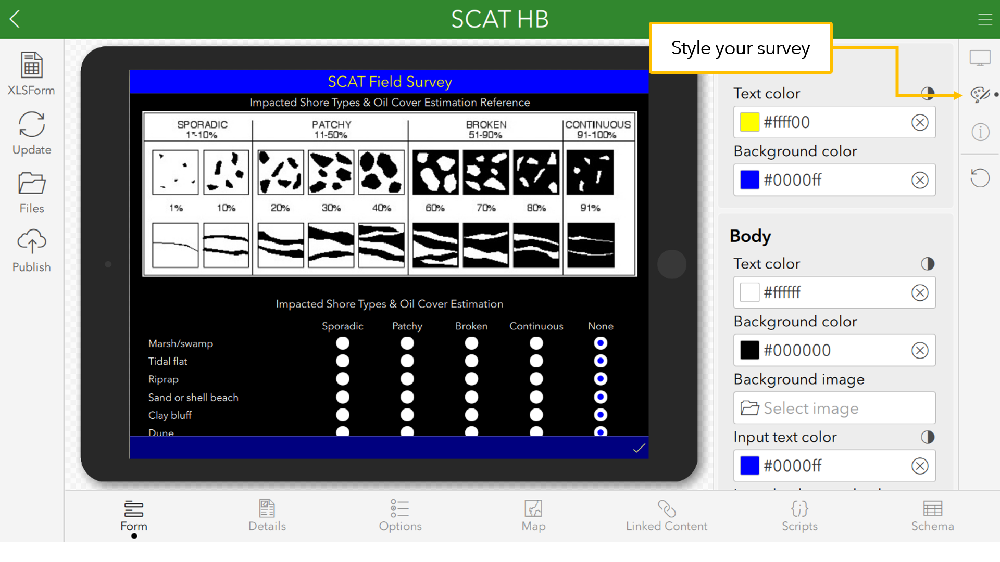
As you can see, Survey123 provides a great level of flexibility to help you create powerful survey instruments. You can start with a template to get things going quickly, and then grow and customize your surveys as you like.
Publishing and testing your SCAT survey
Once you are happy with your design, click the Publish button. Survey123 Connect will publish your survey into ArcGIS and create its corresponding feature layer to store all the data.
Download the ArcGIS Survey123 field app in your device. You will find it in the Microsoft, Apple and Google Play stores. Sign in and download your new survey.
If you do not like what you see, go back into Survey123 Connect, make further edits and publish again. Survey design is an iterative process.
Sharing your survey with other members of your organization
Survey123 forms can be shared with members of your organization. The recommended way to share your survey is through the Survey123 website. Try this:
- In a web browser sign in to survey123.arcgis.com
- Open your survey from the gallery and switch to the Collaborate tab
- Select who should have access to your survey and with what permissions
- Save your preferences
You will want to share your work with other people. Use links to help them easily download the SCAT survey. Right from the Collaborate tab you can create links and a QR code which you can include in an e-mail, SMS or internal website.
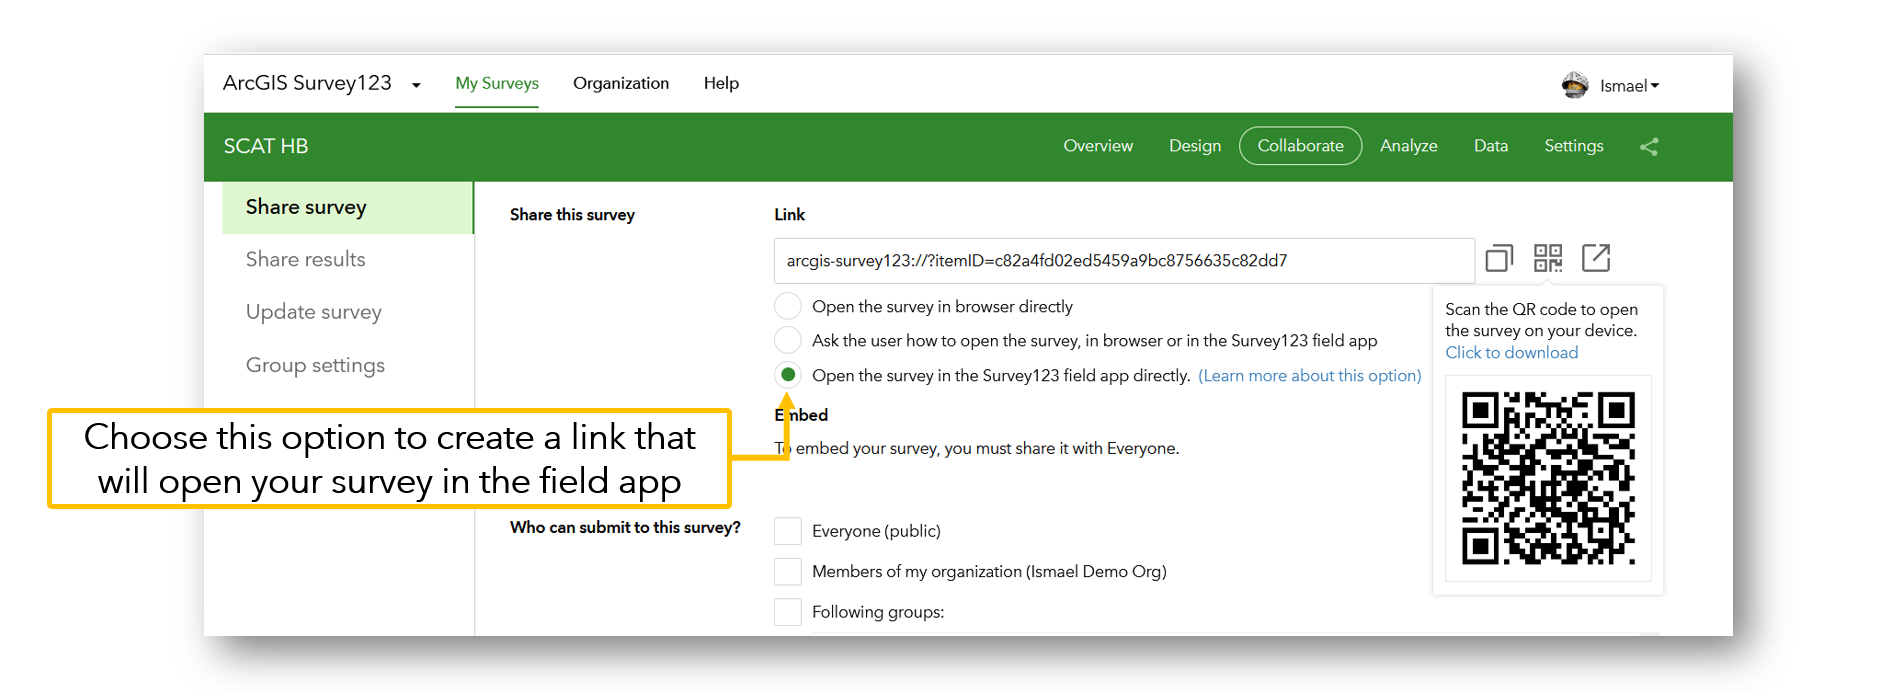
As shown in the image above, you can create links to open your survey in a web browser or the Survey123 field app. For the purpose of a SCAT workflow, you will likely want to create a link for the Survey123 field app only.
Supporting crowdsourced SCAT data collection initiatives
In some cases, you may want to share your SCAT survey with a group of volunteers or even the general public. If this is the case, you will want to feature your Survey123 SCAT survey via an ArcGIS Hub initiative. ArcGIS Hub initiatives provide an excellent framework to organize people towards a common goal. Read this ArcGIS Hub article for additional details.
If you share your SCAT survey publicly, do not forget to think about the security of your data. Making a survey public does not mean you need to make your survey data public too! Share your survey, keep your data private is always a good rule to follow. Check details about how to secure your public survey data through this article.
Summary
The Survey123 SCAT template is a great starting point to support SCAT field data collection activities. It can be deployed in minutes and tailored to your own needs. Around data collected with ArcGIS Survey123, you can easily build real time ArcGIS Dashboards as well as other information products to support decision making.

Article Discussion: