Using the ArcGIS Survey123 connector for Microsoft Power Automate you can automate tasks when a survey is submitted. Typical tasks include:
- Automatic notifications: Survey submitted, email sent! You can also send an SMS, add a message to a Teams channel or send a push notification.
- Instant data transfer: Load Survey123 data into a spreadsheet, a cloud folder, a database, and more.
- Data enrichment: Use data sent by the user to populate extra attributes in your GIS records. For example, take the location of an observation and automatically calculate the closest street address and postal code.
This step-by-step guide you will show you how to instantly load data from Survey123 into a Microsoft Office workbook.
In this particular scenario, we will pretend a severe weather event has hit our city. You will create a public online survey to help citizens document damage to their property. Using Microsoft Power Automate you will take data submitted via Survey123 and instantly load it into an existing Microsoft Office workbook.
Ready to start? Following this step-by-step guide should not take you more than 20 minutes.
Prerequisites
To follow this guide you will need an ArcGIS Online account with publishing permissions and a subscription to Microsoft Office 365.
It all starts with a survey, let’s create one
There is not much you can automate without a survey , so let’s get that going first:
- Sign in to survey123.arcgis.com
- Click on New survey and open the gallery of templates
- Use the Property Damage Report template to create a new survey
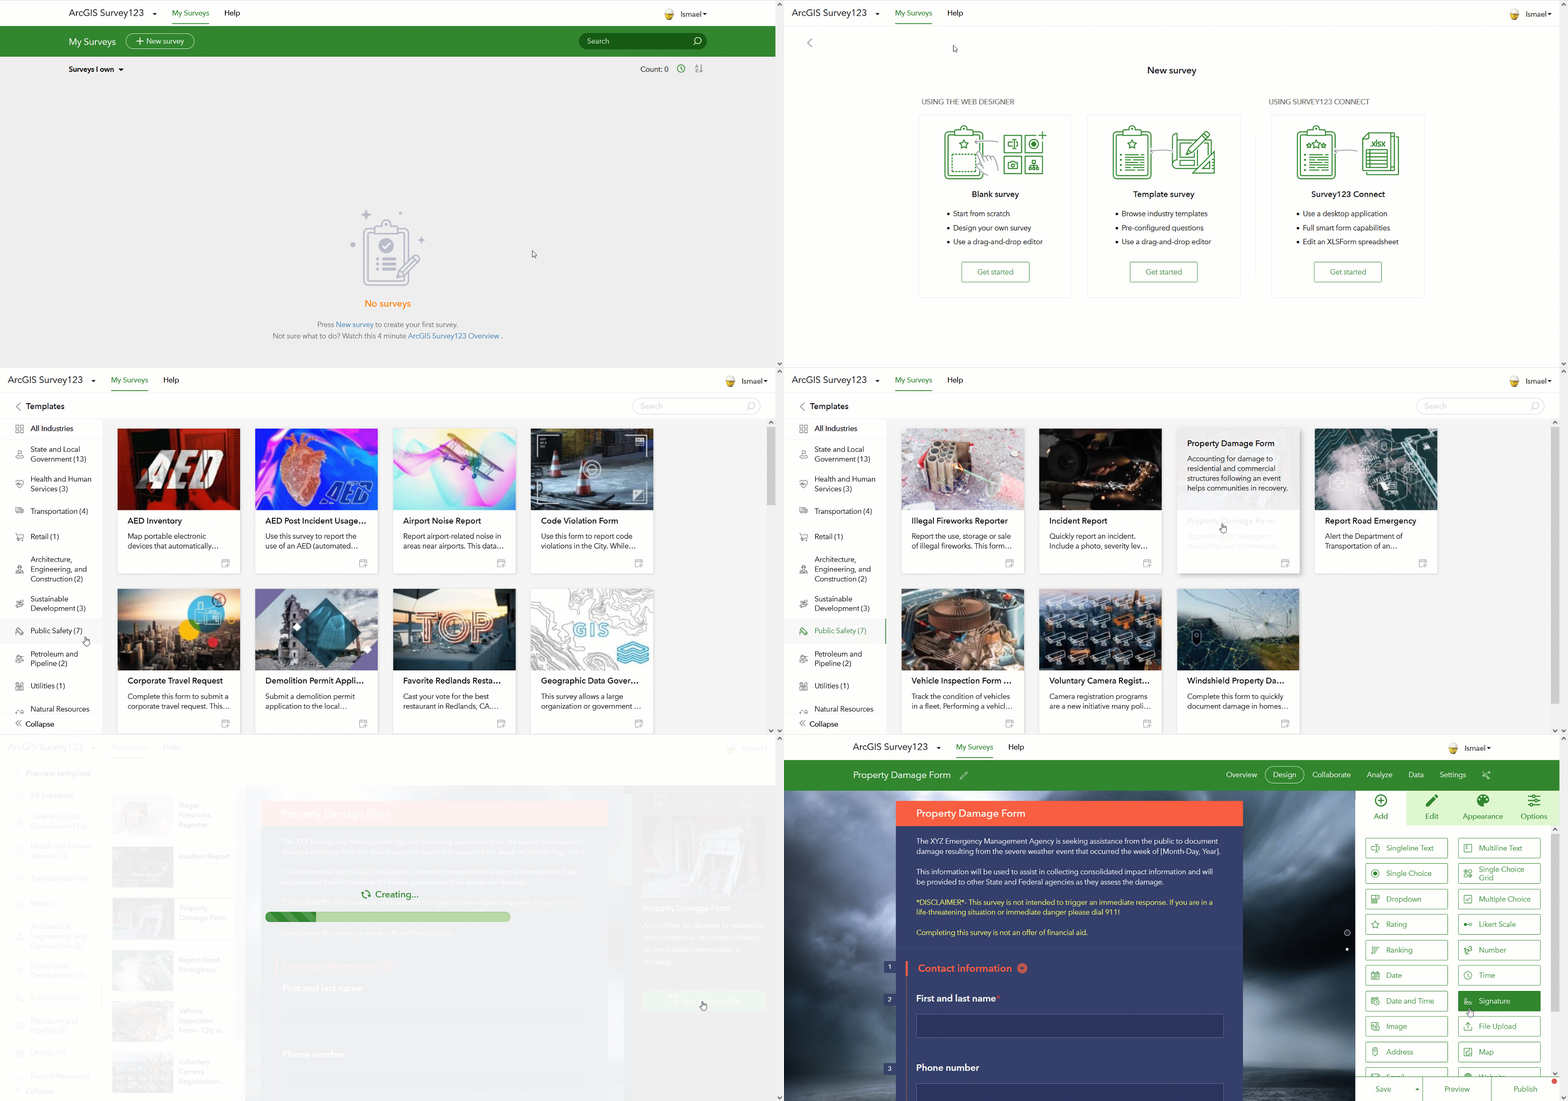
This survey allows residents of the city to report damage to their home. Contact information, details of the property and a description of the damage are part of the form. You may make adjustments to the survey such as adding new questions, rewording existing ones or changing its look and feel. For this exercise, we will proceed to publish and share it publicly.
- Publish the survey
- Switch to the Collaborate tab
- Share your survey with Everyone and click Save
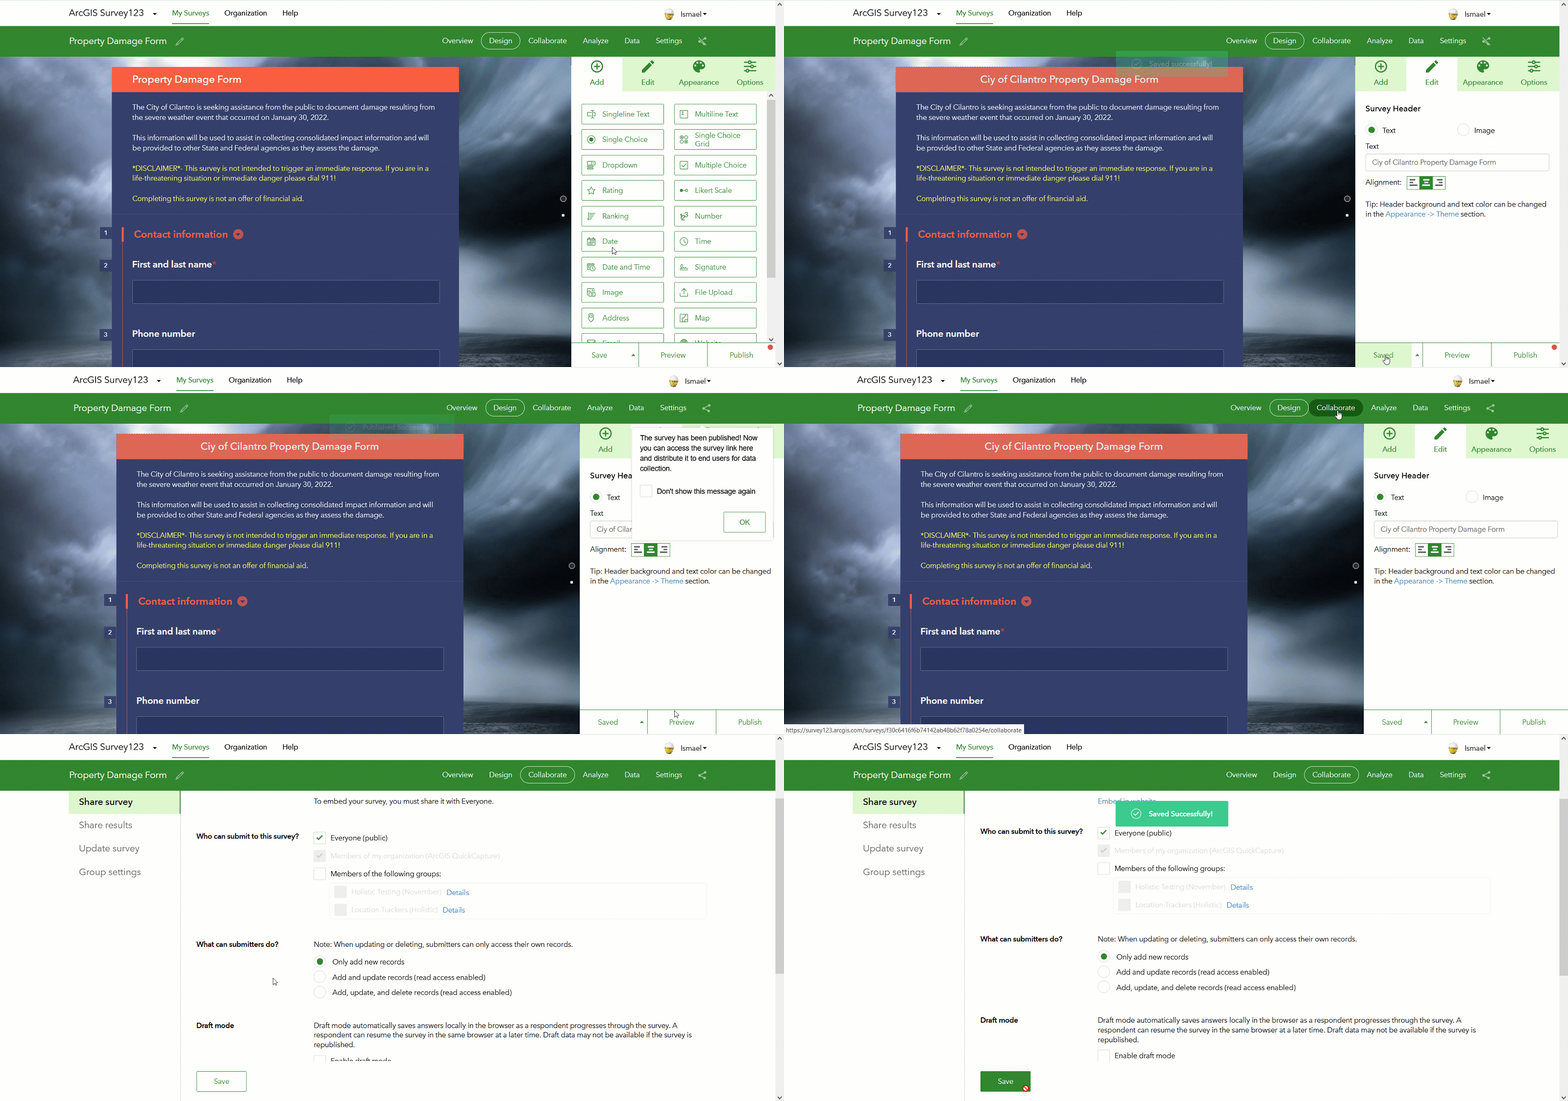
If you now share your survey link with others, they will be able to submit data. Do you want to do that now? I don’t think so!
We need a spreadsheet too
Next, we are going to create a new workbook in Microsoft Office 365 and add columns matching the information collected in the survey:
- Login into Microsoft Office 365 and create a new blank Microsoft Excel workbook
- Add the following columns: Report ID, First and last name, phone, email, street address, city, postal code, primary residence?, insured?, damage description
- Select all the header columns you added an click on Format as table from the Home ribbon
- Select a table style. Check the My table as headers option and click OK
- Rename the file to Damage Reports City of Cilantro

Ok. We are almost ready to have some fun with Microsoft Power Automate!
First steps with Microsoft Power Automate
Microsoft Power Automate includes a Survey123 module. We will use it to connect our survey with the workbook you just created.
- In Microsoft Office 365, open Power Automate
- From the left panel, click on Create
- Select the Automated cloud flow option
- Give your flow a name such as Property Damage Reports to Excel
- Choose Survey123 as your flow’s trigger and click Create

Configuring the workflow
In the next steps, you will configure the Survey123 module to trigger your workflow when a new response is submitted. You will also add a second module to add new records into your Microsoft Excel workbook.
- Sign in to create a new connection to Survey123
- Select the Property Damage Report survey that you authored previously
- Click on New Step and select the Excel Online (Business) module
- Select the Add row into a table action
- Navigate to the location of your workbook and select Table1
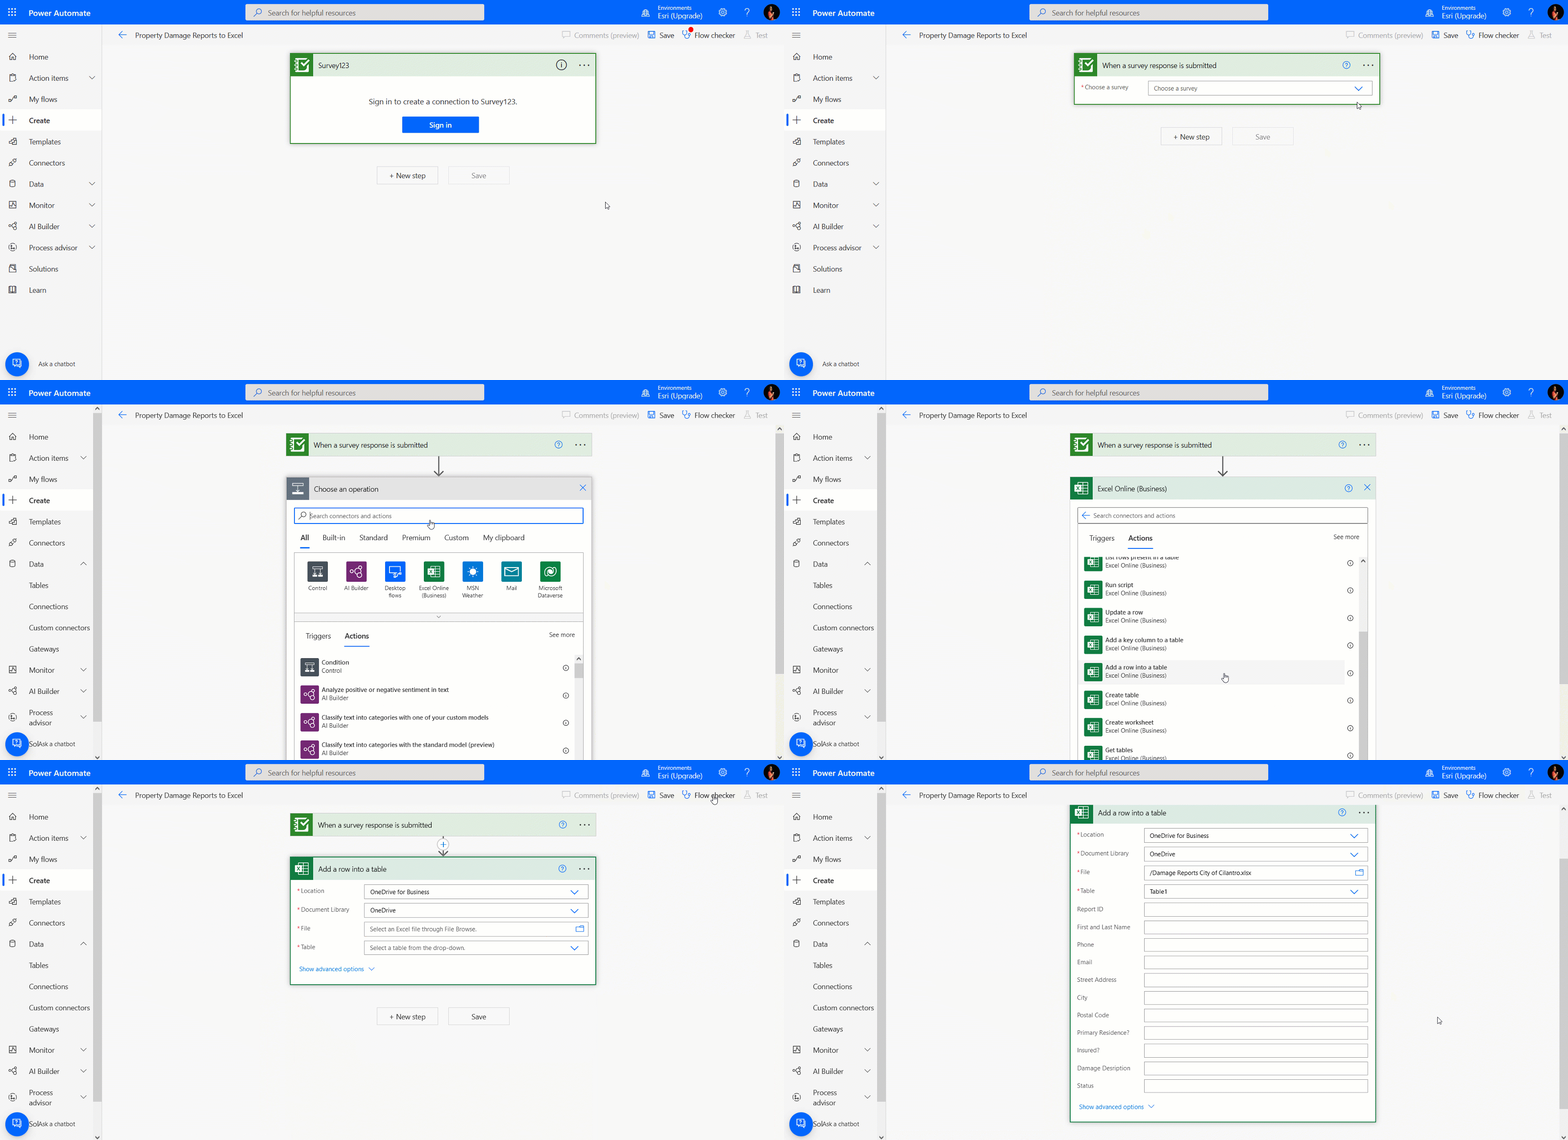
Once a table is selected, the Add row into a table module will display all the columns you added into the spreadsheet. One by one, we will instruct Microsoft Power Automate to populate the values using data from the Survey123 record that triggered the workflow.
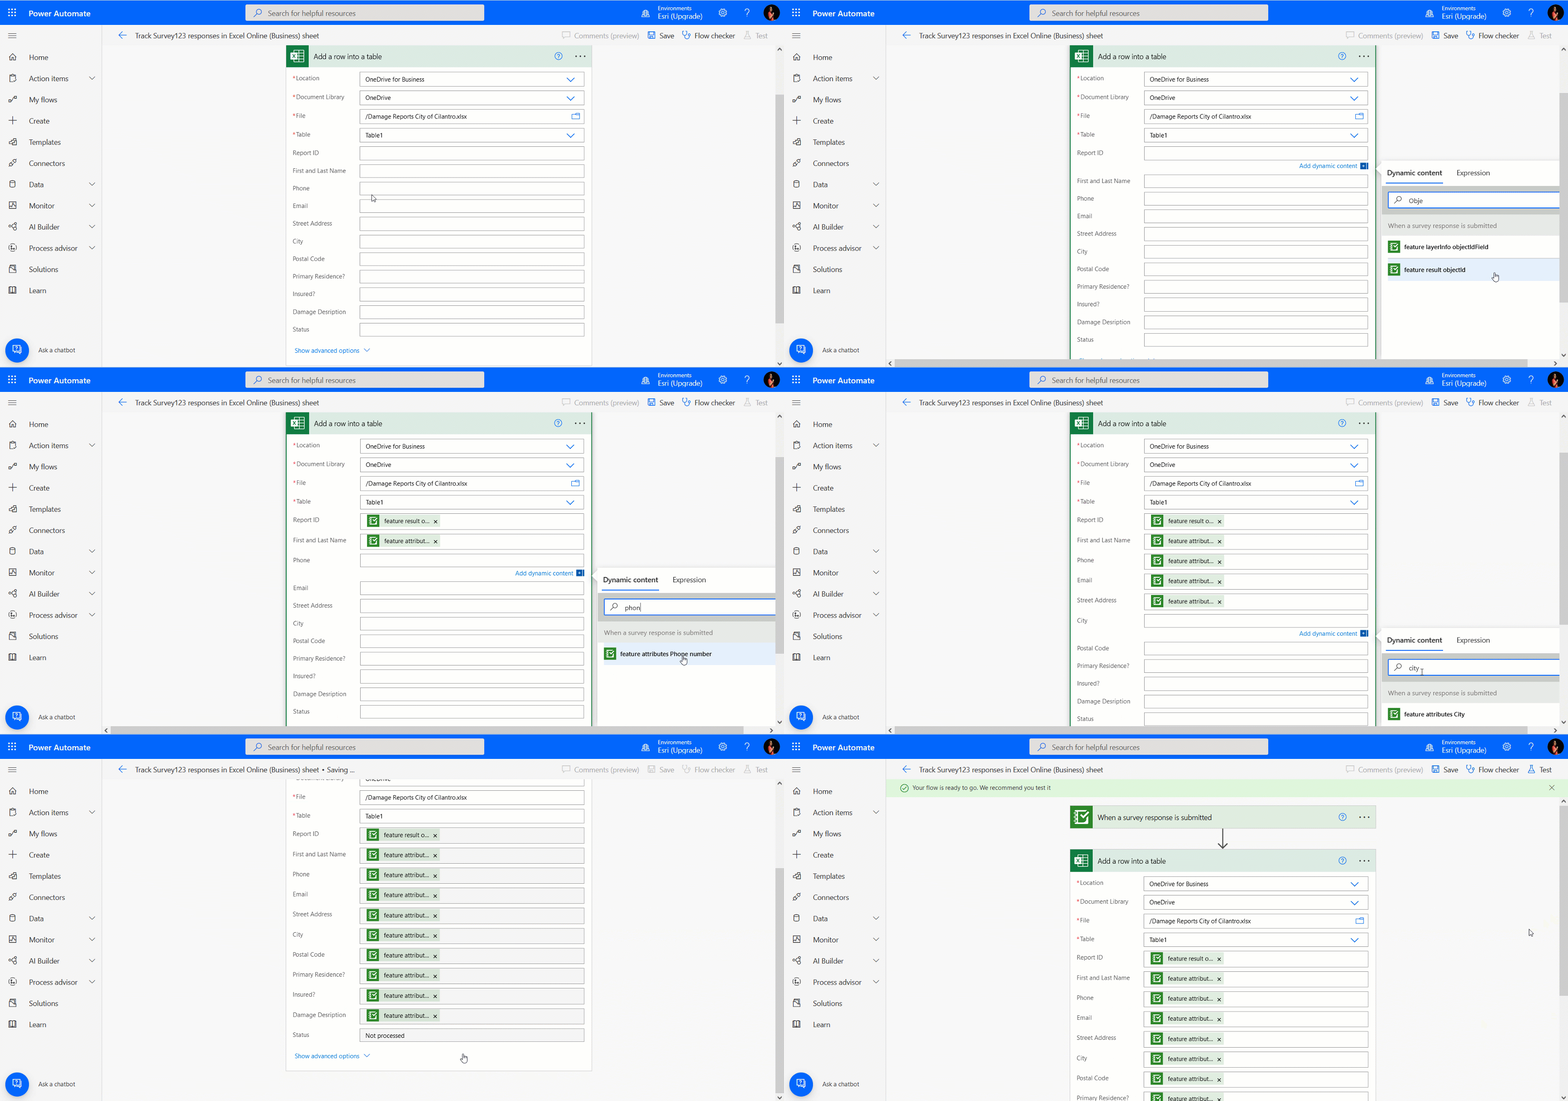
- Place your cursor over the Report ID input.
- From the Dynamic Content window, select the feature result objectid value
- Repeat the process with the remaining cells
- Click Save
Time to test!
Once the Power Automate workflow is saved, your Property Damage Report survey will be connected to your workflow. At that moment, every time you submit a record from your survey, the Microsoft Power Automate workflow will be triggered.
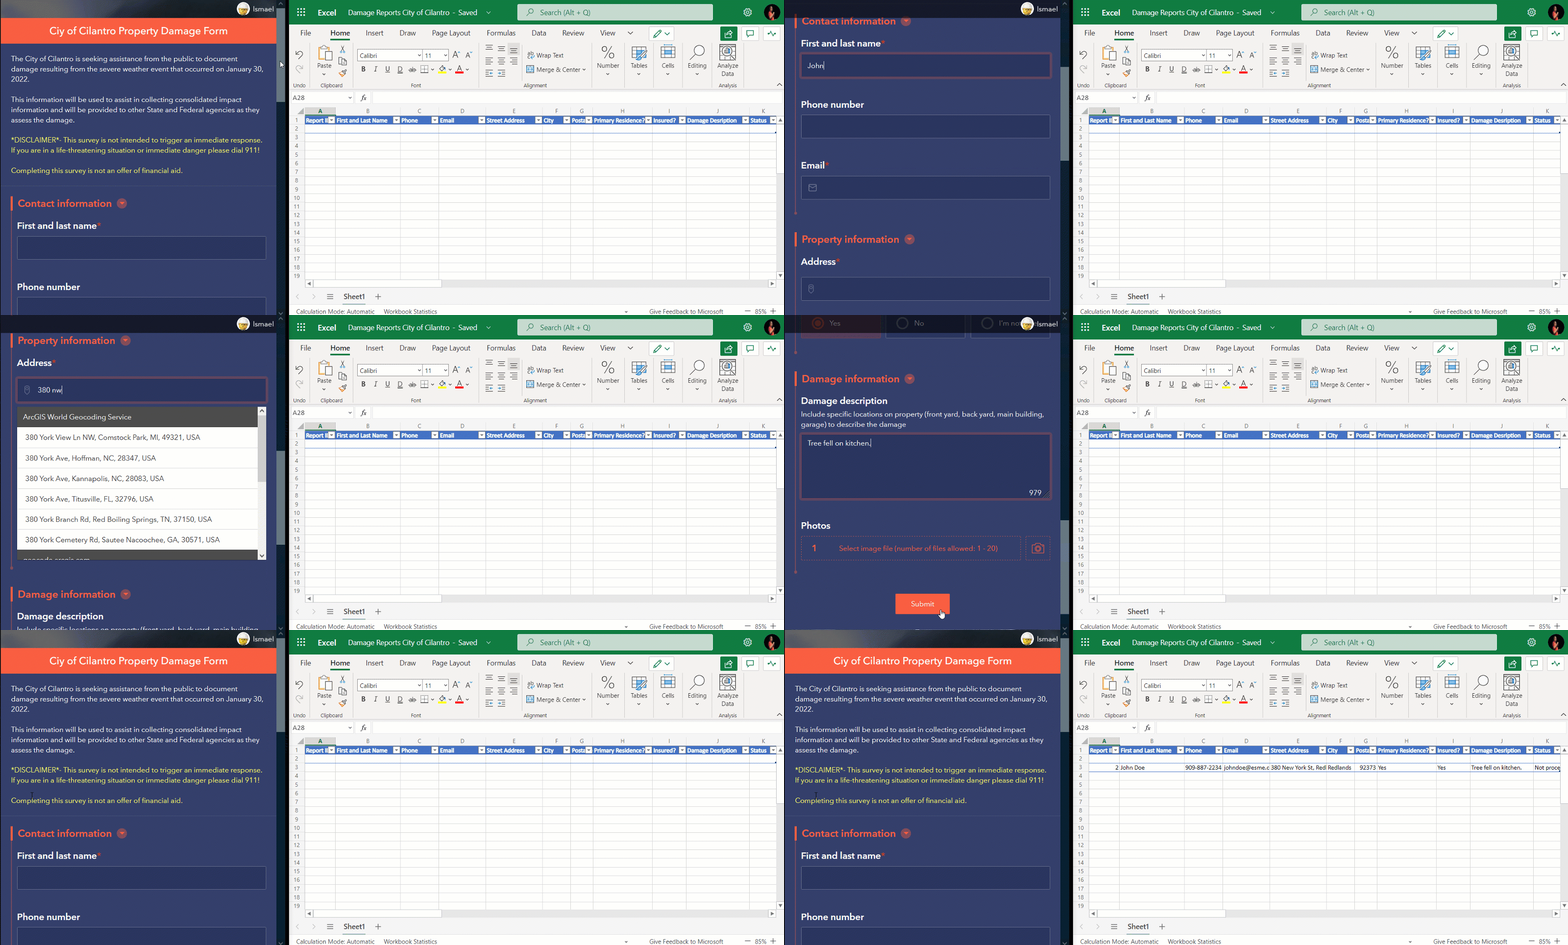
- Go back to the survey123.arcgis.com website
- Launch your survey in a web page (you could also download it into the Survey123 field app if you prefer)
- Complete your form and submit it
- Open your Excel workbook and you will see your Survey123 record be added right away!
What’s next?
Collecting data is just the beginning. It is only when you get data into the hands of people who need it that magical things happen. Every time someone submits data through your survey, a new record is created in an ArcGIS layer. You can build web maps, real time dashboards and web applications to help people work with your data. Thanks to your Microsoft Power Automate workflow, your data is also instantly loaded into an Excel spreadsheet. Excel is a favorite for many people, and for good reasons.
With Microsoft Power Automate and its Survey123 module, you can do much more. I encourage you to explore other Survey123 templates. An an Esri user you can also access this 55 minute training seminar. Do not hesitate posting your questions to the Survey123 Esri Community.



Hello, I have a multiple choice question… I used the attribute feature… But when I test, No data is gotten into that column… Any workaround?
I am unable to select a survey from the “Choose a Survey” drop-down. Any tips for when you get “Could not retrieve values. The dynamic response could not be parsed.”? Any guidance for what a custom value is in this case?
f the choose a survey list is empty, try refreshing the connection of your Survey123 connector in Power Automate. Make sure you sign in using the same account used to author the survey
Ismael,
I am having trouble navigating the dynamic content for the address information using the ArcGIS Geocoding Service. How do I derive information from the geocoding service to be integrated into the excel spreadsheet?
Thanks,
Jada