Note: This blog article covers the classic Esri Story Maps which are in mature support and scheduled to be retired in late 2025. Story authors are strongly encouraged to use the new ArcGIS StoryMaps to create stories.
For more information about transitioning to the new StoryMaps, see ArcGIS StoryMaps resources. For more information about the transition from classic Esri Story Maps to the new ArcGIS StoryMaps, see Esri Story Maps: Now in mature support.

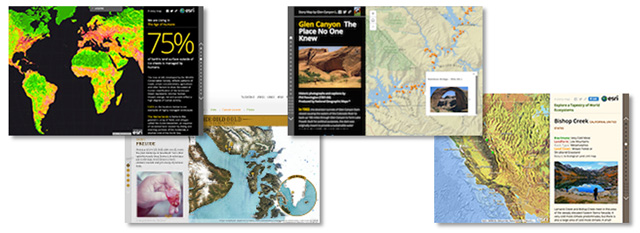
The Story Map Journal is a very popular Story Map, letting you create a compelling map-based narrative presented as a set of journal entries. It’s ideal for creating multimedia stories that combine text, maps, images, and video. And it’s especially useful when you have lots of text, or a rich array of content that you want to include in your story. You’ll find many examples by exploring the gallery.
One of the key elements of any story map is a map. Here’s a few tips and things to consider when using maps in your Story Map Journal.
The web map
You can use any web map that is shared to your organization, or is publicly shared, depending on how you want to share your Story Map Journal. Choose a map from My Content or others you find by searching your organization or ArcGIS Online.
To ensure maps used in your story map are not accidentally removed, it is recommended that you use maps you author (or maps from your organization) and set delete protection for the map item. See How to prevent accidental deletion for more information.
Maps should also adhere to best practices, and use appropriate symbols, layer transparency, scale dependencies, and include configured pop-ups. The map item should also be documented, and include an appropriate thumbnail and tags.
Adding a map to your Map Journal
To add a map, follow these steps:
1. In the Main Stage panel, select map.
2. Browse for the map.
3. By default the extent and visible layers from the saved web map are used. You can override these by choosing from these options. You can also save an open pop-up on your map.
Location: sets the location/extent for the map.
Content: sets the visible layers.
Popup: opens the selected pop-up when the map is viewed.
4. In Extras, choose whether to include a legend and an overview map.
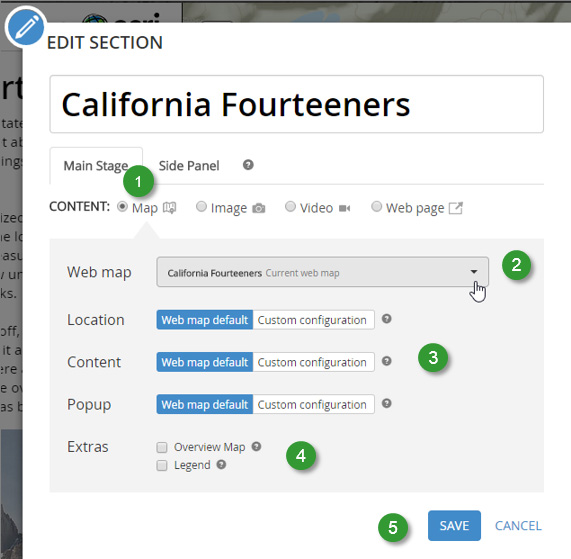
5. Click Save when finished.
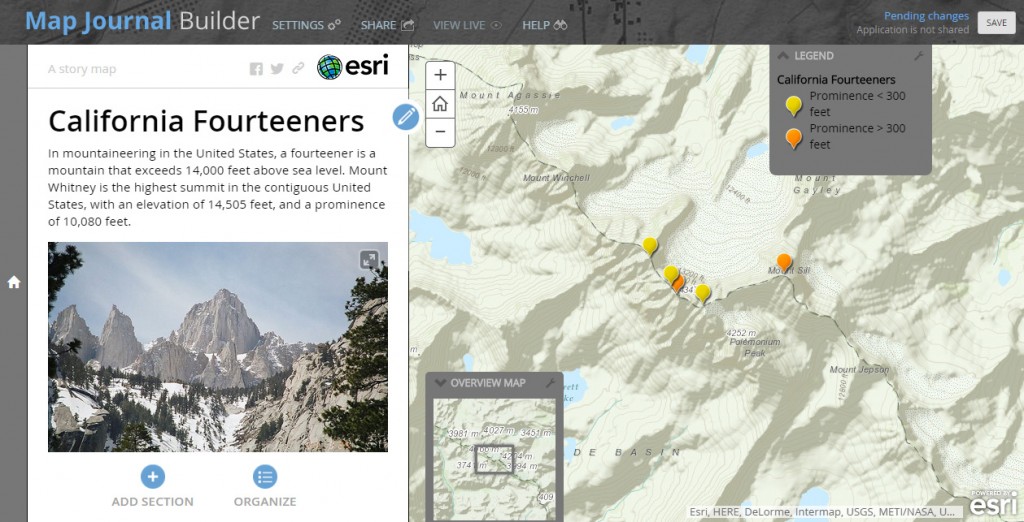
Below is an example showing a map configured with an Overview Map and Legend.
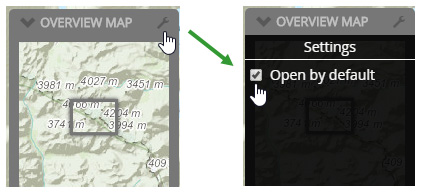
Tip: While in builder mode click the tool icon found in the upper right corner of the Overview Map or Legend to set whether these are open by default.
Layout options and web maps
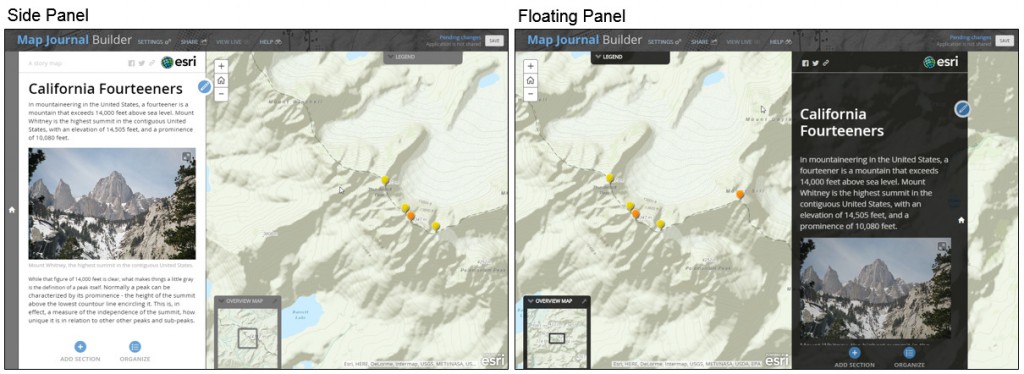
You can choose a Side Panel or Floating Panel layout in builder mode Settings.

Both options can be used with web maps, the choice is a matter of style and preference.
More information
For more information see the following:

Commenting is not enabled for this article.