Introduction
In version 200.4 of the ArcGIS Maps SDKs for Native Apps, we’ve introduced feature snapping support for the Geometry Editor. This functionality ensures data integrity when precise geometric coincidence is crucial during interactive editing sessions.
In this blog post, you’ll learn how to configure snapping within your Native Maps SDKs application, and discover how it can be used when creating and editing geometries with the Geometry Editor.
What is snapping?
Snapping improves the experience of editing geographic data making it easier to create and edit geometries that are coincident and connected to each other. This is important when editing connected features such as utility networks, transport networks and building footprints. The animated image below shows how this is achieved when the position of an interactive geometry edit is adjusted so that it connects with a nearby feature allowing for greater accuracy during an editing session. The next section of this blog post covers how snapping works and how to configure it in your application to leverage its advantages.

How it works
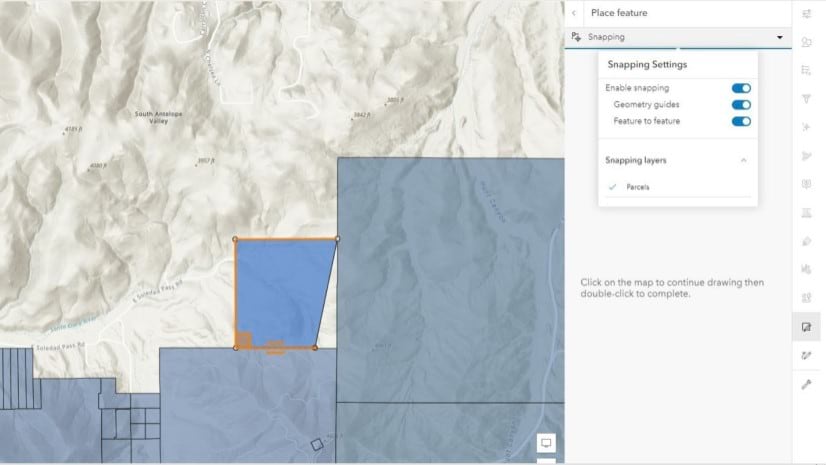
The Geometry Editor has a new snapSettings property to control the interactive snapping functionality. This property provides controls for enabling snapping both for the application and for individual SnapSourceSettings objects in the sourceSettings collection. These configurable objects are associated with a valid SnapSource from the connected ArcGISMap representing an underlying source of geometries to snap to, for example a feature layer. However, before these objects can be configured for snapping, the syncSourceSettings method needs to be called to synchronize the sourceSettings collection with the loaded operational layers of the ArcGISMap. Let’s have a closer look at how to configure snapping using the ArcGIS Maps SDK for Kotlin. This workflow is also supported in the other Native Maps SDKs.
// connect the map and geometry editor to the map view
mapView.map = ArcGISMap()
val geometryEditor = GeometryEditor()
mapView.geometryEditor = geometryEditor

// synchronize the collection and enable snapping
val snapSettings = geometryEditor.snapSettings
snapSettings.syncSourceSettings()
snapSettings.isEnabled = true

// enable snapping for each valid snap source
snapSettings.sourceSettings.forEach { snapSourceSettings ->
  snapSourceSettings.isEnabled = true
}
As seen in the code above, each valid snap source can be enabled or disabled individually allowing for an easier snapping experience. This is beneficial when features in different layers are close to and overlap with each other resulting in a challenging snapping experience. Furthermore, any change in the operational layers of the connected ArcGISMap will require the collection to be synchronized again to account for updates to any of the valid snap sources. Details on the validity of snap sources and how to setup your data for snapping is available in a later section of this blog.
Interactions and feedback
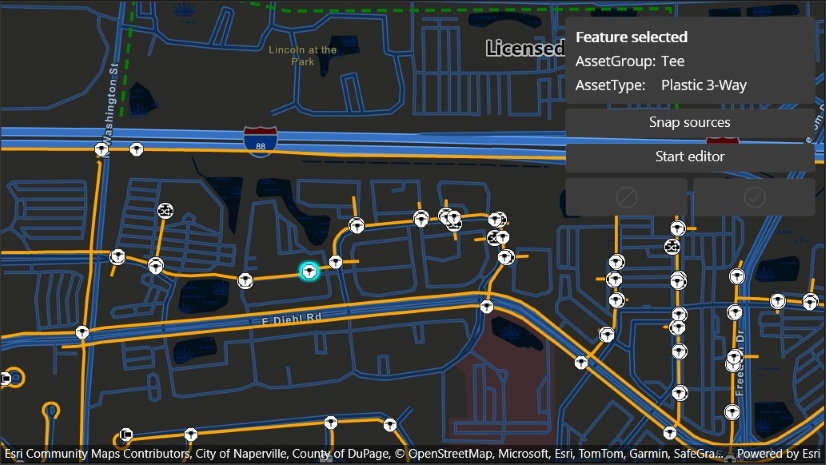
Snapping can be used during interactive edits that add or move existing vertices of a geometry with the VertexTool. The Native Maps SDKs for Java, Qt, .NET, and Swift support snapping for input devices with a hover event such as a mouse move. On touch screen devices, snapping visual cues and interactive edits are likely to be obstructed by the user’s hand. To solve this usability problem, the use of the magnifier is recommended by enabling it through the MapView or mapViewInteractionOptions supported in the ArcGIS Maps SDKs for Kotlin, Qt, .NET, and Swift. The magnifier is shown offset from the interaction position by long pressing on the MapView making it possible to see the snapping visual cues when using a touch screen. Therefore, by long pressing and holding on a vertex, the magnifier is displayed, follows the interactive position, and remains visible until the vertex is released as seen in the animated image below.

The visual cues or symbols that show when snapping has occurred represent which aspect of the feature geometry was used as the best candidate for that adjustment. These can be vertices, polylines, or also segments between two vertices when using polylines or polygons. The symbols that represent snapping feedback can be customized via accessing the GeometryEditorStyle properties that define the visual appearance of geometries displayed by the Geometry Editor. By configuring and enabling snapping in your application, you can leverage these advantages and enhance the editing experience with the Geometry Editor.
Data requirements
To use snapping, a SnapSource needs to be created from a source of geometries like a feature layer. It is important that each source provides full resolution geometries to ensure data integrity between different sources during an editing session. This is because the snapping adjustment can be inexact when geometries are not in full resolution. Local data sources, such as geodatabases, always provide full resolution geometries. However, some of the default optimizations used to improve the efficiency of data transfer and display of polyline and polygon layers based on feature services are not appropriate to use with snapping. The recommended approach when using hosted feature layers is to ensure the following properties are configured before the layers are loaded:
// Kotlin Maps SDK code demonstrating feature layer configuration
featureLayer.tilingMode = FeatureTilingMode.EnabledWithFullResolutionWhenSupported
serviceFeatureTable.featureRequestMode = FeatureRequestMode.OnInteractionCache
These properties can be configured on a per-layer basis or for a whole ArcGISMap using LoadSettings.featureRequestMode and LoadSettings.featureTilingMode.
An alternative approach which is useful when your data includes curved features is to disable feature tiling using FeatureTilingMode.disabled and set the request mode to FeatureRequestMode.onInteractionCache. Furthermore, using the request mode FeatureRequestMode.manualCache with any feature tiling mode also provides full resolution geometries. These alternatives can be used to ensure that true curves are preserved in a snap source based on a feature service as seen in the GIF below. This is because if an application sets the ArcGISRuntimeEnvironment.serviceCurveGeometryMode to ServiceCurveGeometryMode.trueCurveClient so that true curves are fetched, densified curves are returned from the service when feature tiling is used. The requirement to only allow snapping to snap sources that provide full resolution geometries is designed to help protect you from imprecise snapping wherever possible.

Summary
In this blog you’ve learned about snapping and how to configure it for your application to leverage its advantages during an interactive editing session. The snapping roadmap includes allowing snapping to other sources of geometries in addition to feature layers like graphics overlays. We also plan to enhance the touch screen experience for snapping along with releasing sample applications to showcase snapping functionality in the Native Maps SDKs.
If you’d like to get started with snapping easily and quickly, you can check out the Snap Geometry Edits (.NET Maps SDK) sample for a fully configured code example you can copy into your own project. We’d also love to hear your feedback on feature snapping! Let us know how you’re getting on and what you’re building on the Esri Community Forums.
If you’re new to the ArcGIS Maps SDKs for Native Apps and want to have some fun testing out snapping, head to the ArcGIS Developers documentation website! There you can learn how to sign up for a free developer account and gain access to everything you need to get started building your apps.


Commenting is not enabled for this article.