
Did you ever think that the color ramps available in ArcMap were limited? Well, you can create your own color ramp! This blog gives instruction on how to create one using ArcGIS 10. (Each version of the software is similar but have slightly different menu names and navigation locations.)
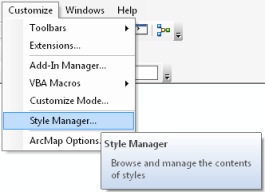
1. In ArcMap, click on the Customize menu, and then click Style Manager.
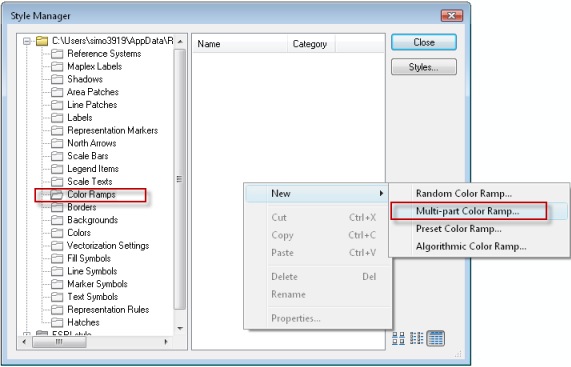
2. Expand your local profile.
3. Click on the Color Ramps folder.
4. In the right panel, right-click, select New, and click Multi-part Color Ramp.
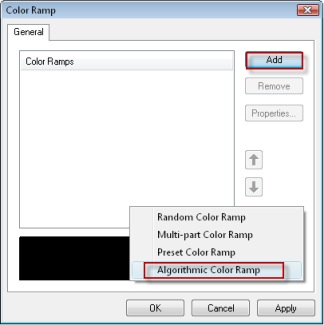
5. Using the Add > Algorithmic Color Ramp option, add in as many parts/colors as you need.
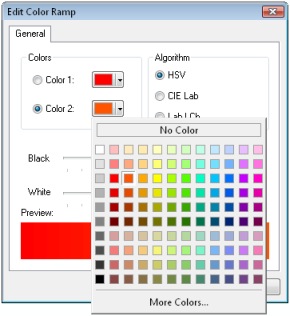
6. Now double-click on each algorithmic color ramp, and choose the exact color that is needed.
a. Under Color 1, click the dropdown to choose the color.
b. Once you have chosen the color, click OK on the Edit Color Ramp window.
c. Continue to edit each color until you have the desired color ramp.
7. Once you are satisfied with your color ramp, click OK on the Color Ramp window.
8. In the Style Manager, rename your color ramp to a custom name.
9. Click Close on the Style Manager, and now you are ready to use your color ramp with any data.
Custom color ramps are useful when:
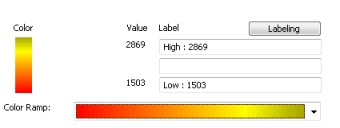
- Using the advanced labeling option within the stretch renderer.
- Using the classified renderer, in which you make the exact number of colors as there are classes within your classifications.
- Or anywhere else you need a customized color scheme.
Written by: Simon Woo

Article Discussion: