A geofence is a defined area on a map that, when entered or exited, can send alerts or enable location sharing in the ArcGIS Field Maps mobile app. Geofences work online or offline and in the foreground or background of the mobile device.
Send location alerts
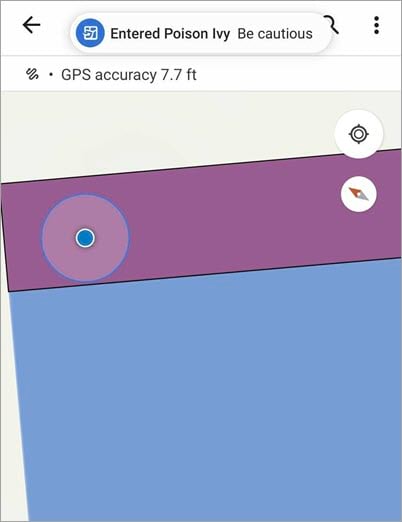
Setting up geofences allows you to automatically deliver important information to mobile workers based on their location. For example, you may want to let mobile workers know when they’re entering hazardous terrain or restricted areas, as shown below:
Control location sharing
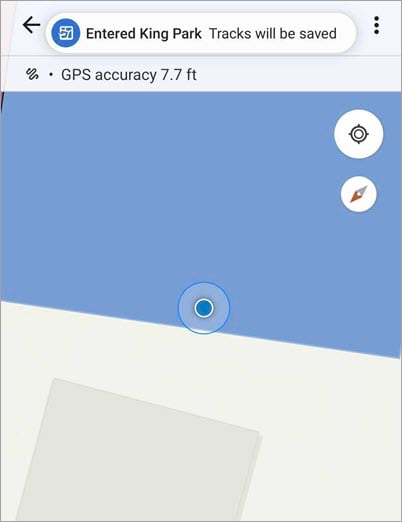
You may also want to control when location sharing is enabled based on where mobile workers are located. For example, you may only want to view the location of mobile workers when they enter a specific work zone or company property, as shown below:
You can set up geofences using ArcGIS Online and the Field Maps web app. Geofences are not currently supported on ArcGIS Enterprise. Follow along with this blog post to learn how you can set up geofences in your maps today.
1 – Open the map
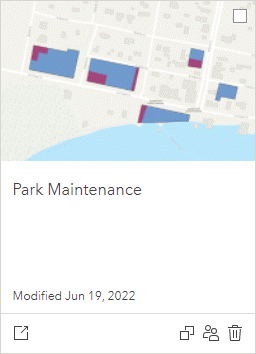
From the app launcher in ArcGIS Online, click Field Maps to open the Field Maps web app and select the map you want to add geofences to. In this example, I’ll be defining geofences for a park maintenance project.
2 – Add polygon layers
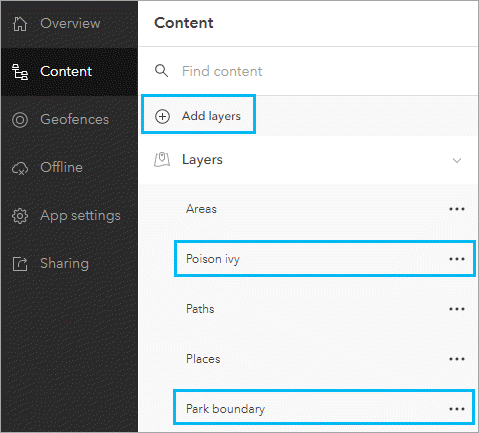
After you click the map card, the Content page appears, displaying the contents of the map. Currently, you can only define geofences using existing polygon layers. If your map doesn’t contain any polygon layers, you can add them from the Content pane by clicking + Add layer. In this example, I’ll add the Poison Ivy and Park Boundary layers from my organization.
3 – Open the Geofences page
Click Geofences  to open the Geofences page. When the page opens, the map is displayed along with any geofences you’ve already configured.
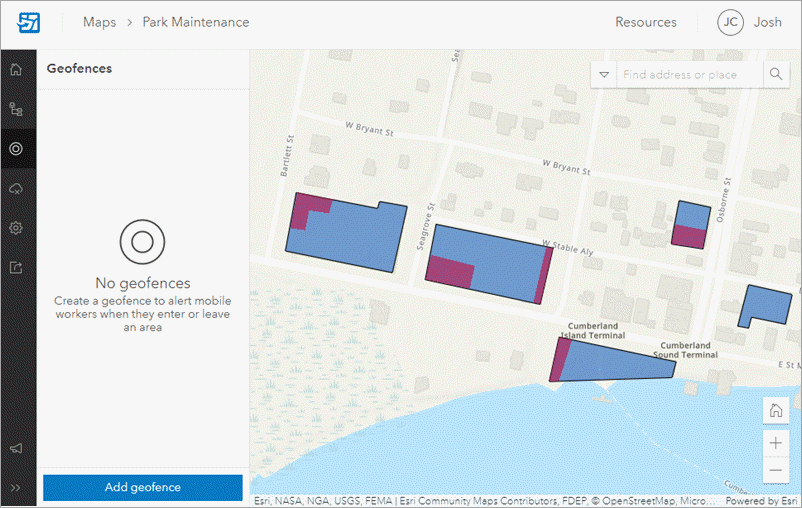
On the Park Maintenance map shown above, the blue polygon features represent public park boundaries and the purple features represent areas containing poison ivy.
4 – Add a geofence to send location alerts
First, I’ll add a geofence to alert mobile workers when they enter an area containing poison ivy. Click Add geofence to begin defining a new geofence for the map.

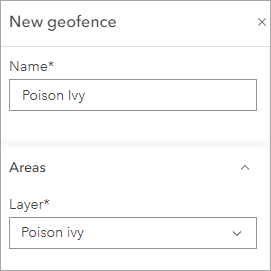
The New geofence pane appears where you’ll configure the properties and actions of the geofence. I’ll name the geofence Poison Ivy and select the Poison Ivy layer to use as the boundary.
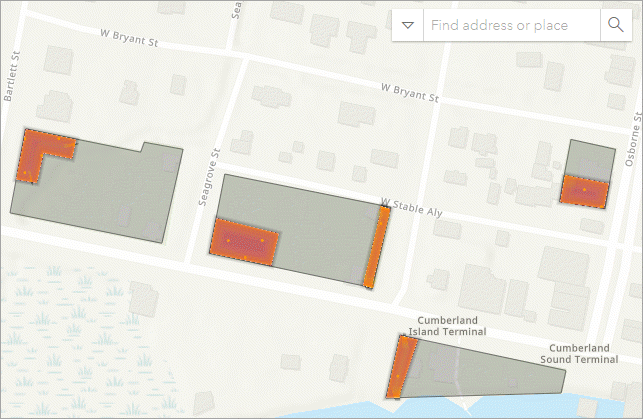
After selecting the layer, the map pans and zooms to it and symbology is added to represent the new geofence.
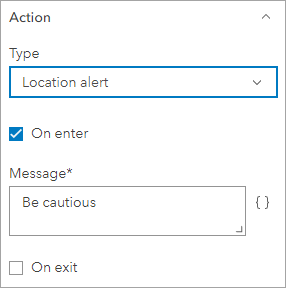
Next, I’ll configure the action triggered by entering and exiting the geofence. In the Type drop-down menu, I’ll select Location alert and check the On enter check box. In this example, I only want to notify mobile workers when they enter an area containing poison ivy, but I could also send a notification when they exit the area by checking On exit.
The Message text box is where you can enter the notification text that appears in the mobile app. For the On enter text, I’ll type: Be cautious
Additionally, you can use the Add field  button to use field values in the message. Once the geofence is configured, click Save to save the geofence and add it to the map.
5 – Add a geofence to control location sharing
I’ll now add a geofence that enables location sharing when mobile workers enter the park boundary. When mobile workers leave the park, location sharing will automatically be disabled.
To use location sharing, the Location sharing capability must be enabled for your organization and mobile workers must have the ArcGIS Location Sharing user type extension. For more information, see Share location requirements.
I’ll repeat the same steps for adding a new geofence, except this time I’ll name it Park Boundary and use the Park boundary layer. Once I select the layer, the map pans and zooms to it, adding symbology to represent the new geofence.
I’ll select Location sharing as the action type and select the Start on enter, stop on exit option so location sharing is enabled when mobile workers enter the park and is disabled when they leave.
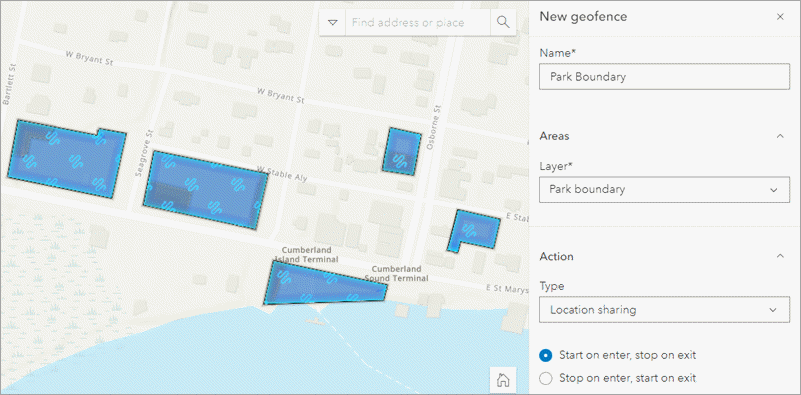
I’ll then click Save to save the geofence and add it to the map. Both new geofences appear on the Geofences pane and can be edited at any time.
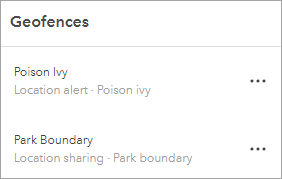
After I share the map with mobile workers, the geofences are ready to go!
6 – Use geofences in the Field Maps mobile app
When mobile workers open a map that contains geofences, they are prompted to enable location sharing or location alerts (depending on what you configured). If they don’t enable these settings, they cannot use the map.

Now, when mobile workers enter the park, location sharing is enabled. When they enter an area with poison ivy, they receive a location alert with the custom message.
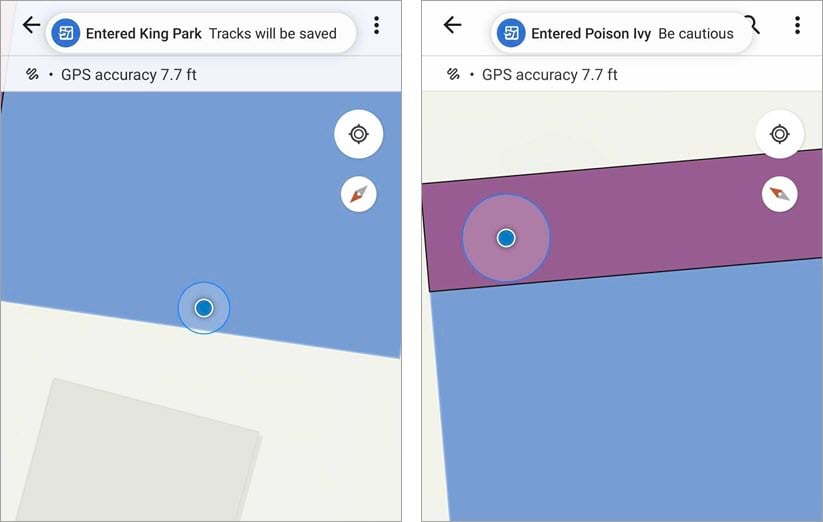
What’s next
This is just the beginning of creating and using geofences in Field Maps. The following additional features are currently being developed:
- Use point and line feature layers to define geofences
- Filter which features are used as geofences
Don’t want to wait until the next release? No problem! You can try out the latest Field Maps capabilities by joining the Early Adopter Program.
Additional information
For more information about configuring geofences in Field Maps, see the following resources:
- Add geofences using the Field Maps web app (help topic)
- Enable location alerts in the mobile app (help topic)
- Location sharing requirements (help topic)
Blog card and banner image by Aubrey Odom-Mabey on Unsplash



How do i show all text in the Location alert?
My phone only allows some of the text to be shown.
“Geofenses are not currently supported on ArcGIS Enterprise.” This could be updated as it is available in ArcGIS Enterprise 11.1.
I am working on a project for work. I am not the best at script writing, but I want to add in a GeoFencing for a Detention Pond layer and basically what I want to happen is a form/survey which ive made on Arc Survey 123 or use one on field maps to populate once you step into the Detention Pond area based on your phones location.