SharePoint can be an essential tool for an organization’s collaboration and content management. With a new feature available in ArcGIS for SharePoint, SharePoint page authors can now allow document links to be available in a map layer’s feature table. This allows you to access SharePoint documents from a feature’s pop-up in ArcGIS Online, ArcGIS Enterprise, or ArcGIS Pro. This enhancement streamlines organizational document management and accessibility to documents for members of your organization. Let’s take a look at how to integrate your SharePoint documents with ArcGIS.
Setup
There are a few prerequisites to keep in mind before you enable this functionality. First, editing must be enabled on the layer that will have documents geotagged to it. To learn more about this, see Manage hosted feature layer editing in the ArcGIS Online documentation.
Next, as a best practice, your Microsoft administrator must set up a term group in the SharePoint term store. The term group must be named Esri and the term set must be named ArcGIS. Both of these names are case sensitive. This step prevents the geotags/terms that you create using ArcGIS for SharePoint from being added to the default System term group and mixed up with other keywords from other SharePoint apps. Once this is complete, your administrator must add the ArcGIS for SharePoint user as a contributor to your Esri term group. For more information on managing data in the term store, see the Microsoft documentation.
Lastly, the ArcGIS user who has signed in to ArcGIS for SharePoint must have a Creator or higher user type. To turn on the Add document URLs toggle button, the user must be the owner of the feature layer or an organization administrator.
Add geotagged links to ArcGIS
With all the prerequisites in mind, explore this new feature:
Step 1 – With the SharePoint page in Edit mode, add the ArcGIS web part.
Step 2 – Sign in to your ArcGIS organization.
Step 3 – Add the feature layer that you want to geotag.

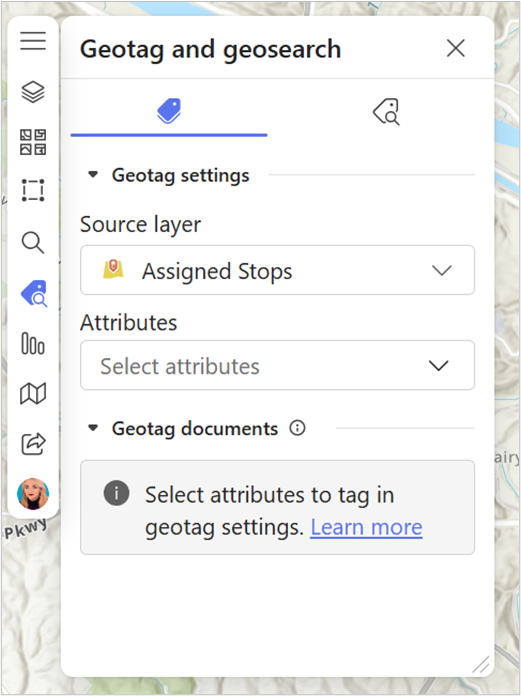
Step 4 – Open the Geotag and geosearch tool.

Step 5 – From the Source layer drop-down menu, select the layer for geotagging.
Step 6 – Configure an Attribute for geotagging.
Feature attributes become tags that attach themselves to SharePoint documents, so you can perform geosearching in ArcGIS for SharePoint.
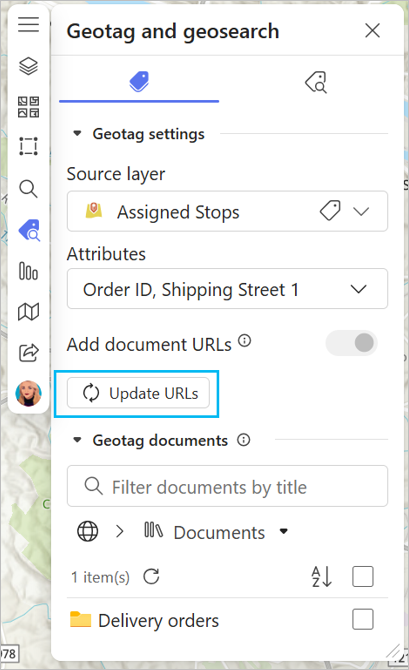
Step 7 – Turn on the Add document URLs toggle button.
This creates a column in the feature table of the layer. Make sure to do this before you start geotagging.
Step 8 – Select the document library that contains the documents to geotag.

Step 9 – Tag the documents to the desired features by dragging and dropping the documents directly onto the features.
If the tagging is successful, a toast message appears in the corner of the map.

Update URLs
Click the Update URLs button to synchronize the links in ArcGIS with the documents in SharePoint. This button automatically removes links from the ArcGIS feature table for documents that have been deleted in SharePoint.

Turning off the Add document URLs toggle button does not erase existing links in the feature table, but newly geotagged documents will not be stored in the feature table.
Your integrated links
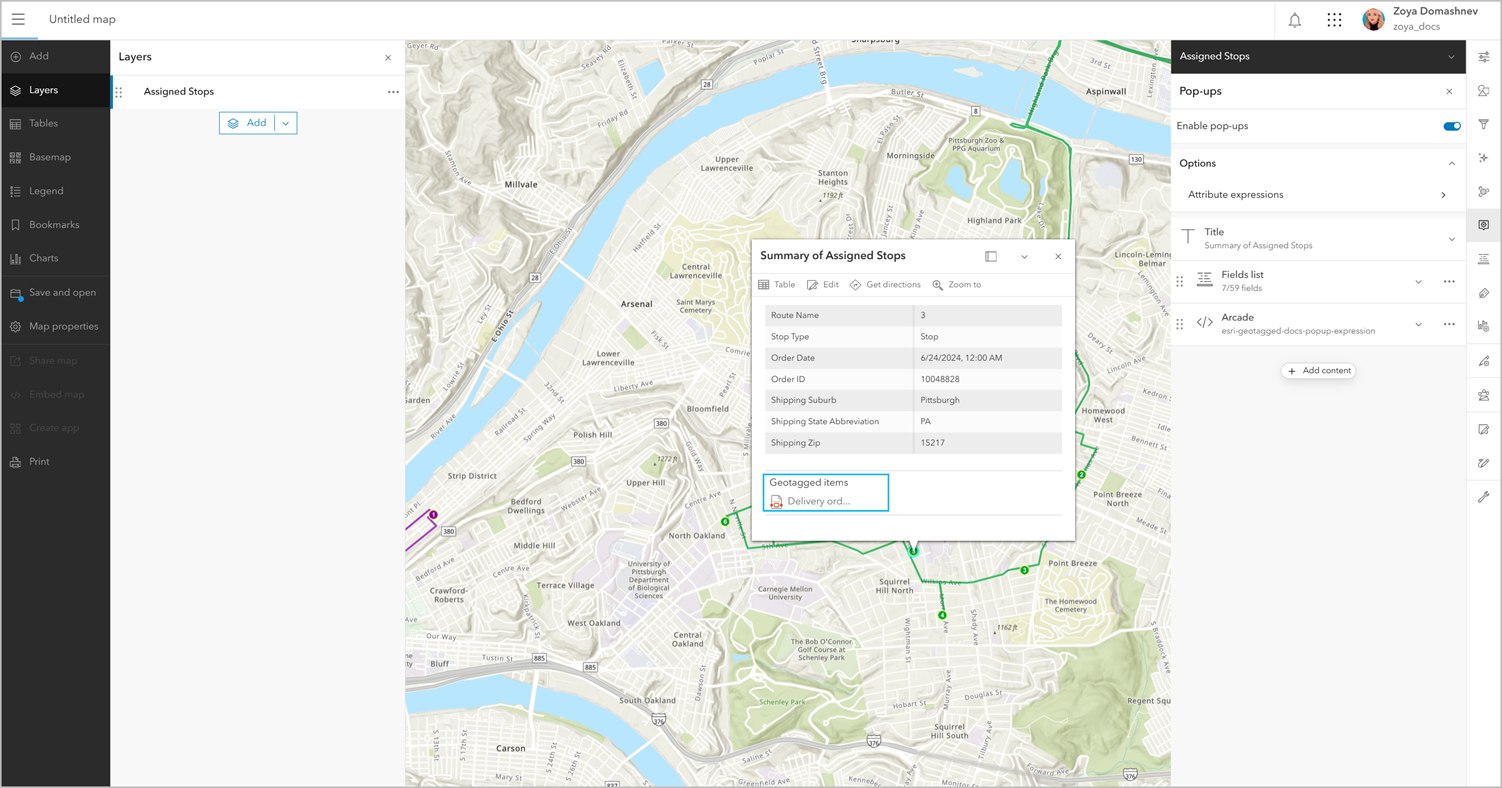
Now you can take advantage of this new enhancement by exploring your SharePoint documents from pop-ups in places like Map Viewer. Open the same layer you geotagged in Map Viewer, zoom to a geotagged feature, and click the pop-up. The document link is available at the bottom of the pop-up. This functionality continues to help integrate and streamline workflows across ArcGIS.

Learn more
To explore more about what you can do in ArcGIS for SharePoint, check out the ArcGIS for Microsoft resources page, the ArcGIS for SharePoint documentation, or the ArcGIS for SharePoint Esri Community site.

Article Discussion: