Viticulture, or the cultivation and harvest of grapes, is perhaps the most geographically expressive agriculture industry. Using our viticulture templates, a burgeoning vineyard manager can quickly undertake the collection and management of data related to their vineyard practice.
Let’s go through a step-by-step workflow for creating a feature layer from the vineyard management template. In this example, we’ll create a feature layer for capturing vineyards, blocks, and sub block locations along with the associated vineyard harvest and maturity data in related tables.
Create a feature layer using a template
Step 1: Sign in to ArcGIS Online with your ArcGIS account and go to the Content page.
You’ll need privileges to publish hosted feature layers. If you don’t have these privileges, contact your administrator or join the Learn ArcGIS organization for a free 60-day membership.
Step 2: From the My Content tab, click Create, and select Feature Layer from the drop-down list.
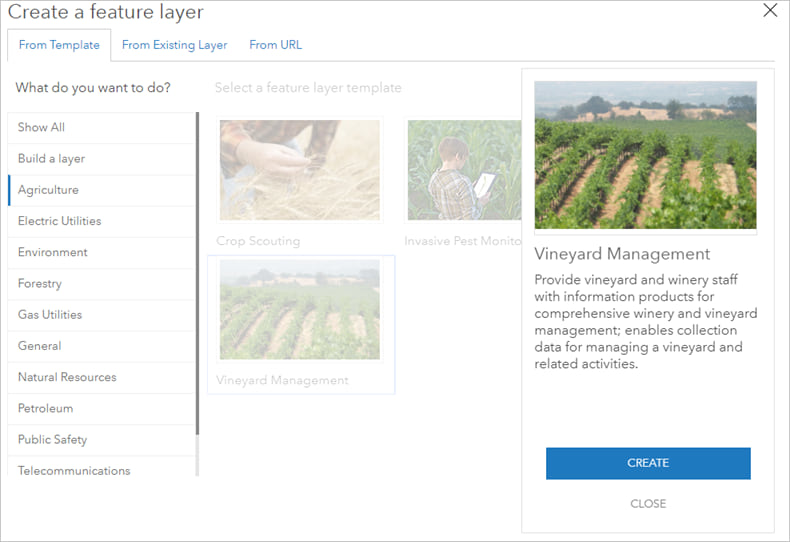
Step 3: Click Agriculture, choose the Vineyard Management template, and click Create.
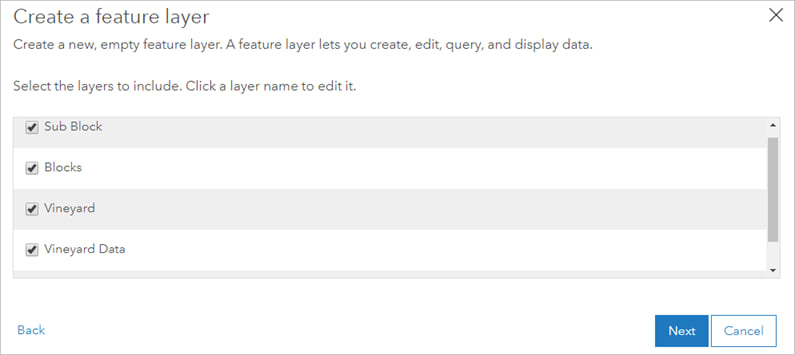
Step 4: Include the four default layers and click Next.
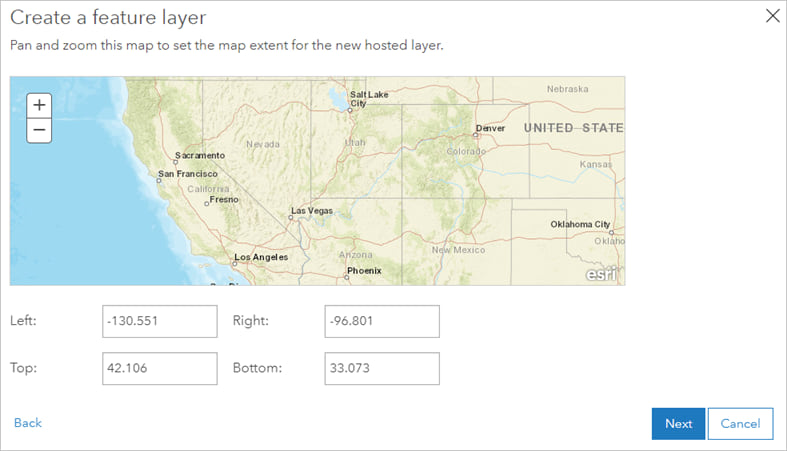
Step 5: Set the map extent to your area of interest by panning and zooming or typing in the exact coordinates.
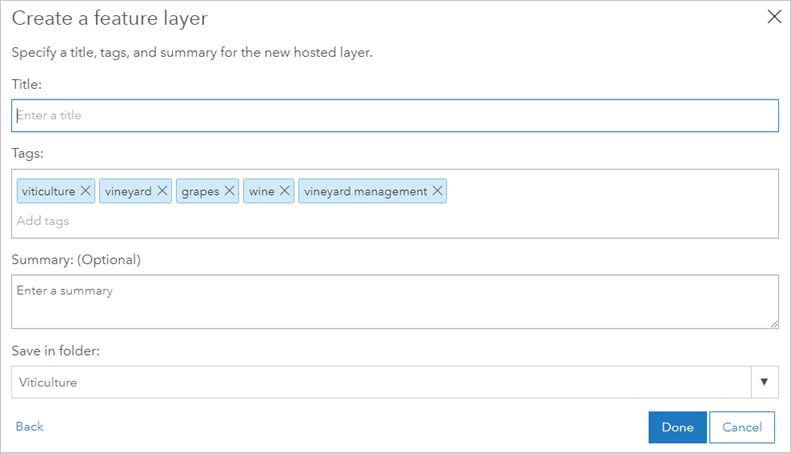
Step 6: Set the item properties of the feature layer including a title and tags. By choosing meaningful tags, your feature layer will be more discoverable to those who have access to the layer, thus enabling easy search and discovery. A summary, though optional, can provide additional context. Click Done to publish your layer.
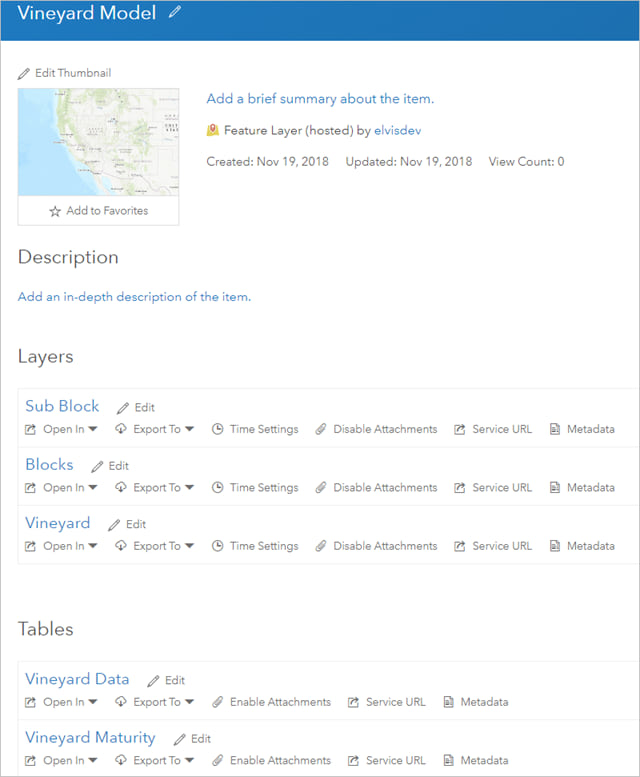
Your new feature layer is published with the appropriate related tables.
You want to use the layer to collect data with Collector for ArcGIS so you’ll set a few editing properties on the layer and add it to a map.
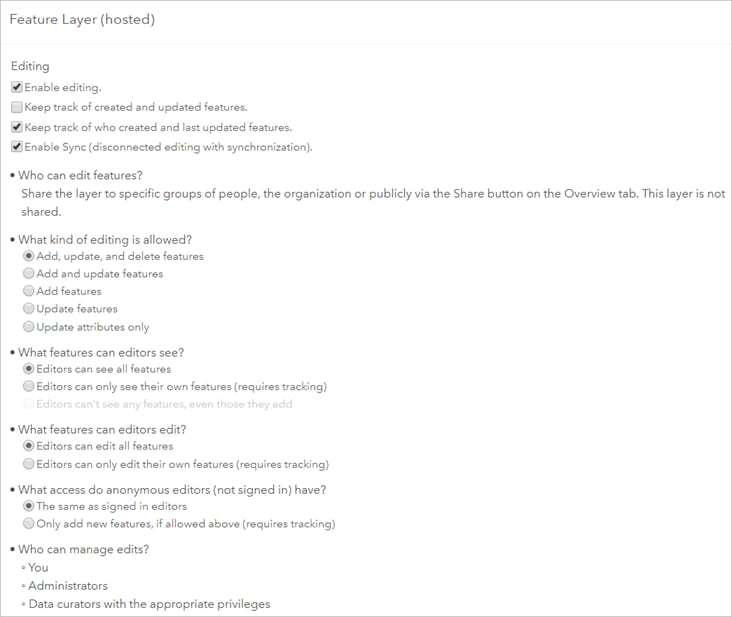
Step 7: In the item details under Settings,ensure your new feature layer is editable by selecting the appropriate options for field data collection. You can choose to monitor or keep track of created and updated features as well as who can see or edit features.
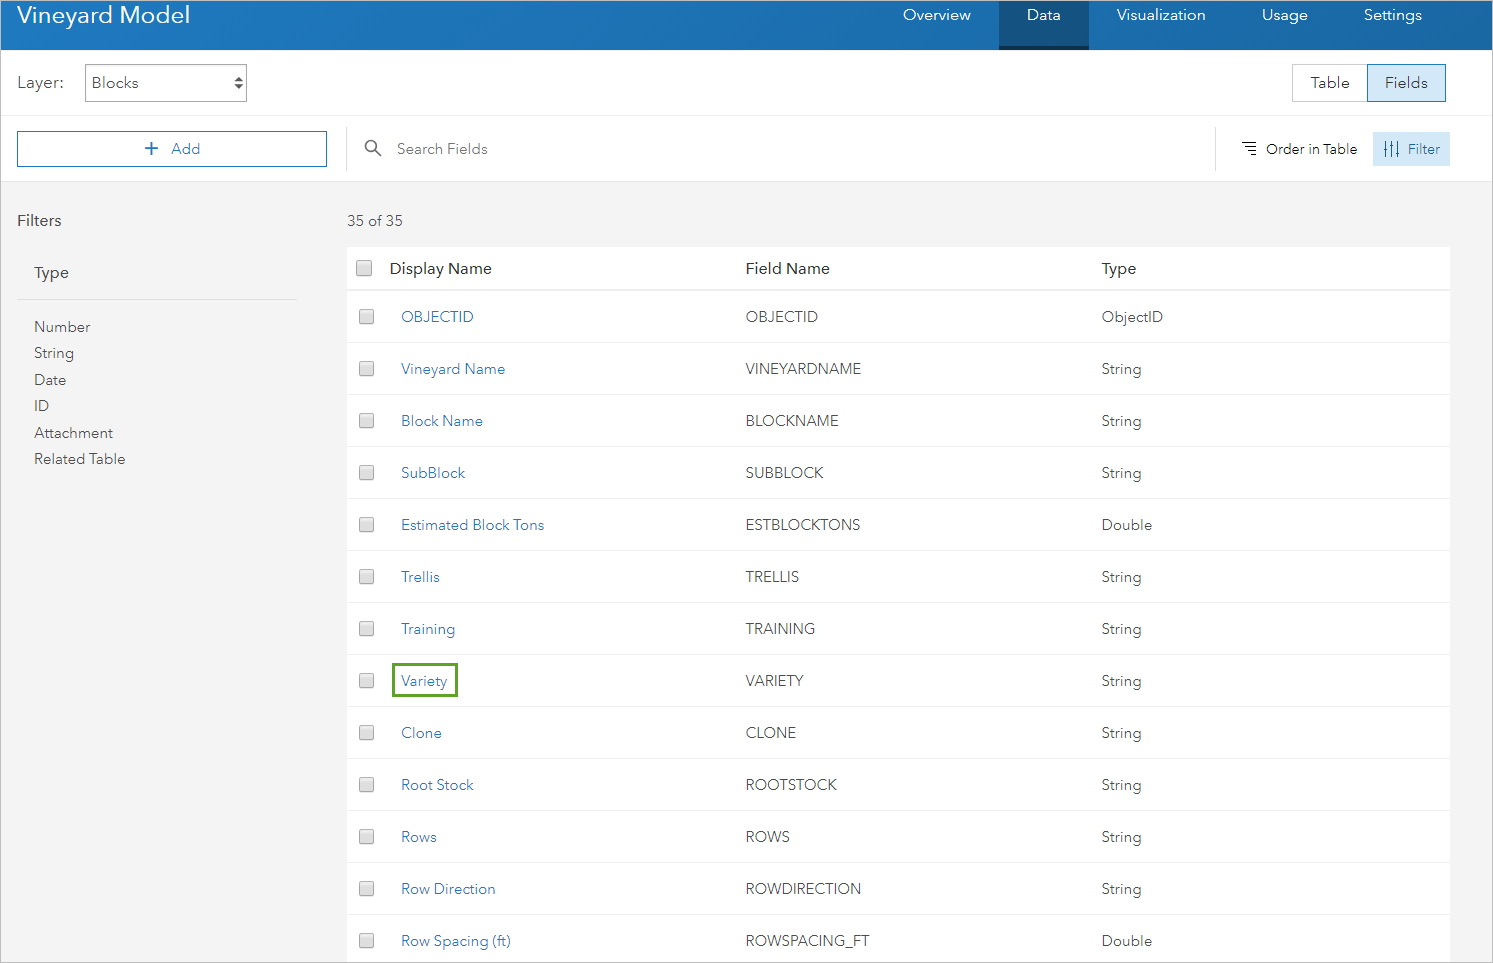
Step 8: To add a new field to your layer, click Data, Fields, and click + Add.
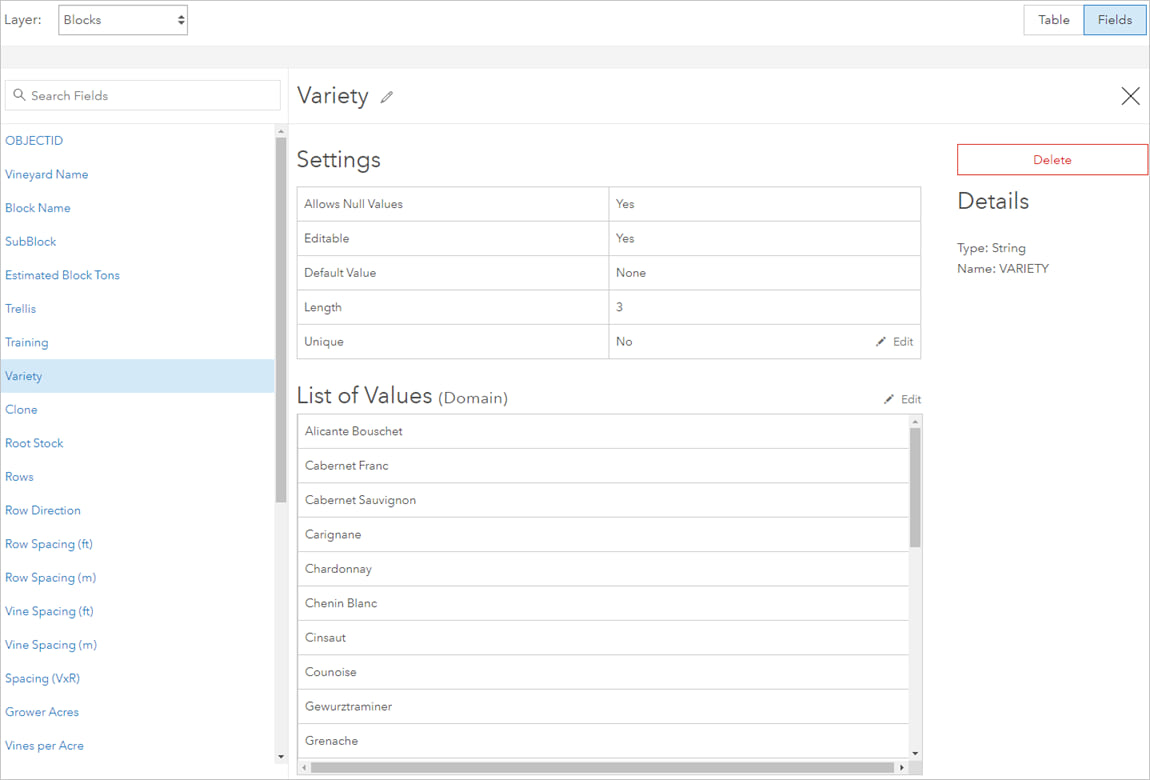
Step 9: Click a field to open the details and edit the domain list. In the example below, we have chosen to examine the Blocks layer and edit the ‘Variety’ field. Click Save to finish.
Our vineyard management template is ready for use. A vineyard manager can use the layer with Collector for ArcGIS to map a new vineyard boundary, blocks, or sub blocks. The associated related tables can be used to collect vineyard maturity data for a block or sub block.
Create a map
To use Collector for ArcGIS, our new vineyard management layer must be added to a map. Here’s how:
Step 1: From My Content , click View item details for your new feature layer.
Step 2: From the overview tab, click Open in Map Viewer and choose Add to New Map.
Step 3: Save your new map and share it with your vineyard manager. For example, you can share it to a group and invite the manager to join the group.
Step 4: Have your manager sign in to Collector, find your map, and begin collecting data.
Examples
Once you’ve created your map, you’re ready to start collecting data. Below are a few examples of how you can use your vineyard management collector map.
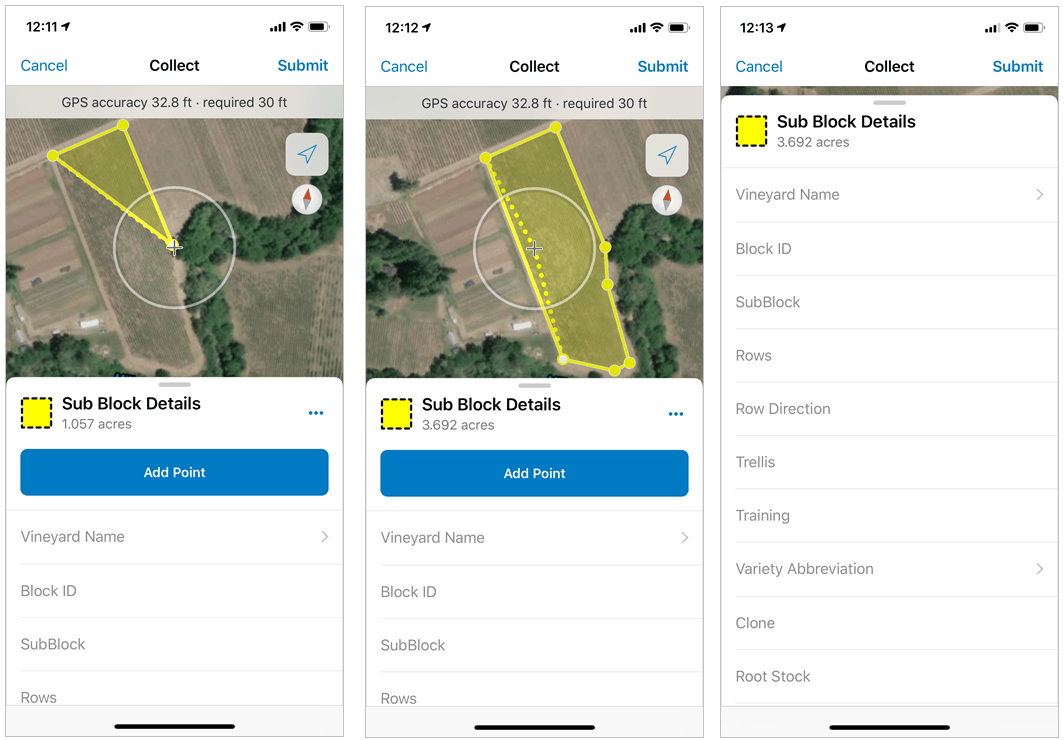
Map a new vineyard block and edit its attributes accordingly.
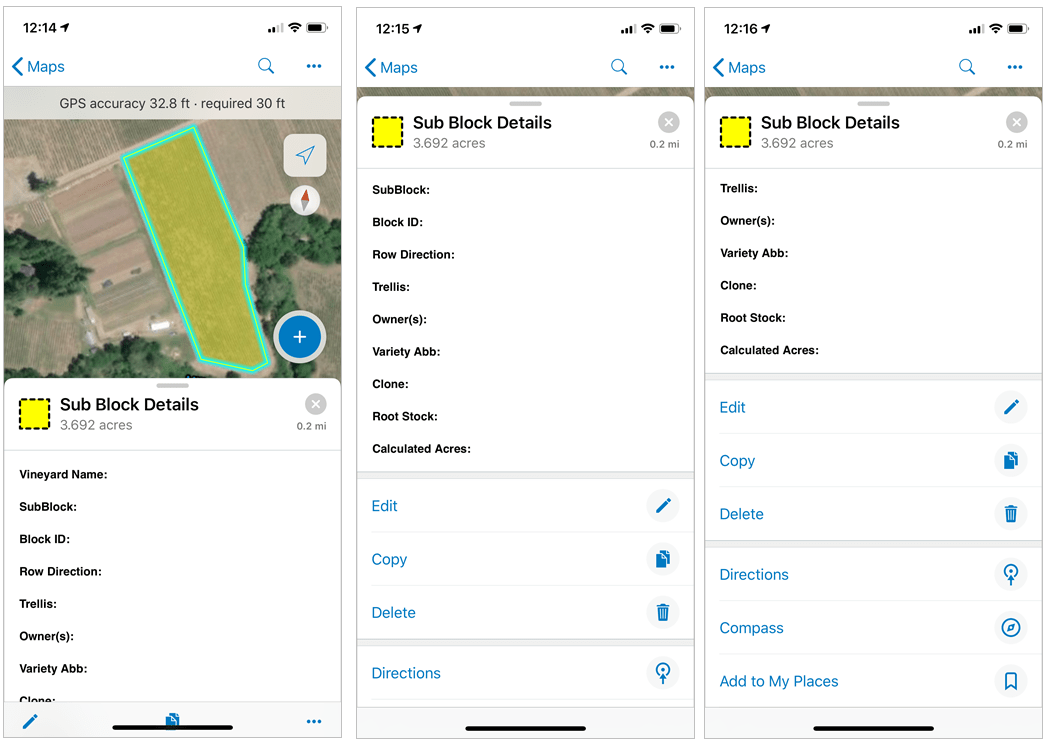
Assess your results by editing, copying, or deleting as necessary.
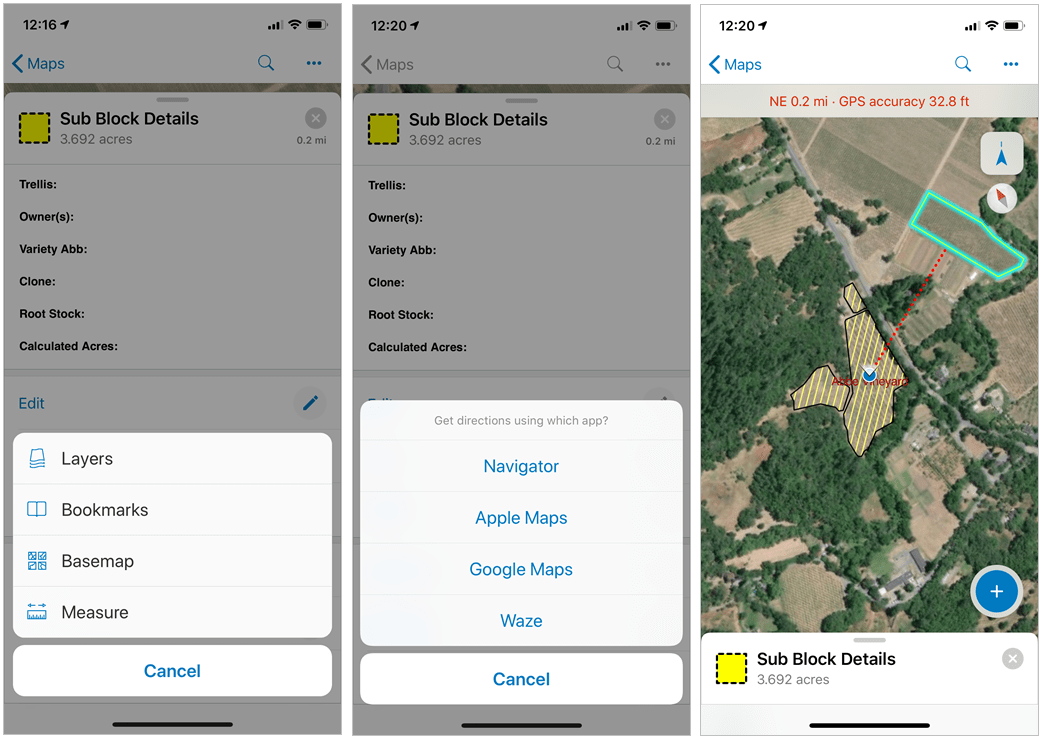
View bookmarks, get directions, or use the compass feature for direction and orientation.
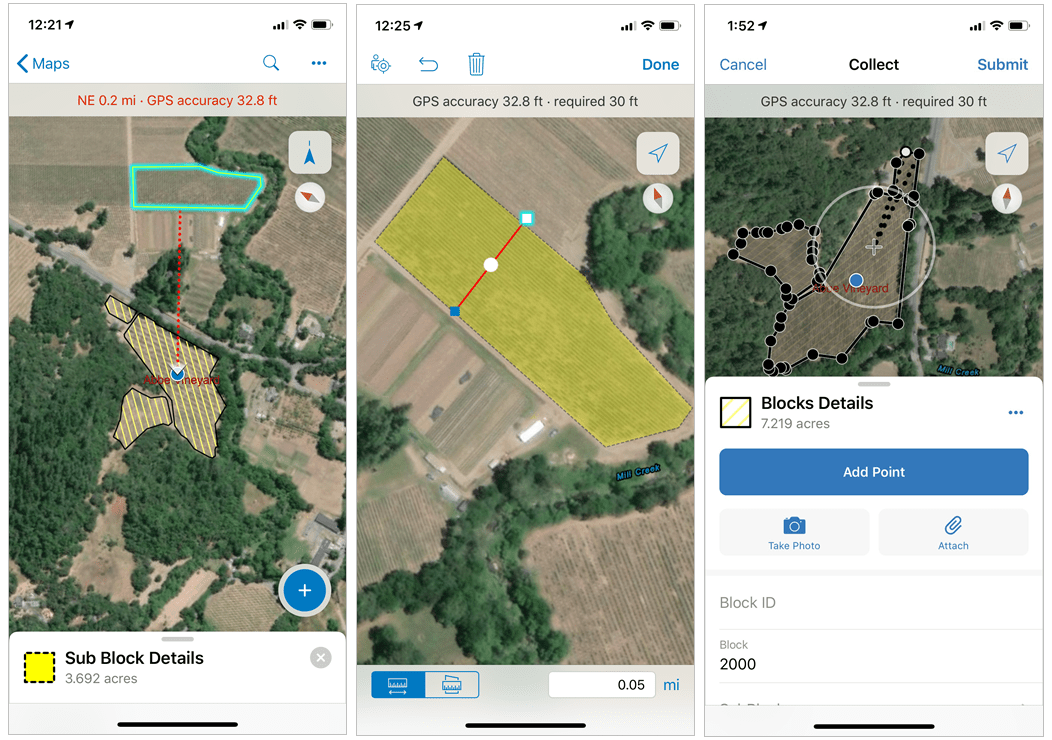
Measure vineyards blocks or even take photos.
Feature layer templates provide new and traditional GIS users with the tools and means to collect new data or edit existing data while maintaining data integrity. A vineyard owner or manager can map new and existing vineyards or blocks, monitor harvest activities, or use the template as a foundation toward a vineyard management system.
Using configurable web apps like Operations Dashboard, the same template can be used to hydrate other ArcGIS applications.

More information
Publish hosted feature layers from a template
Create and share a map for data collection

Commenting is not enabled for this article.