Esri CityEngine is a great tool to bring city models and other 3D GIS contents to Virtual Reality (VR). It allows you to create VR experiences for both mobile phones (see ArcGIS 360 VR) and desktops PCs.
In this blog post, we describe step-by-step how to quickly bring your 3D data into desktop VR headsets such as the HTC Vive. To interact and navigate within the 3D environments in VR, we will also show how to simply setup hand controllers and teleport functionality.
As an example 3D data set, we used an imaginary city created by the CityEngine City Wizard which can be easily accessed either via the Welcome Screen or via File menu – New – City Wizard.
Exporting your urban environment
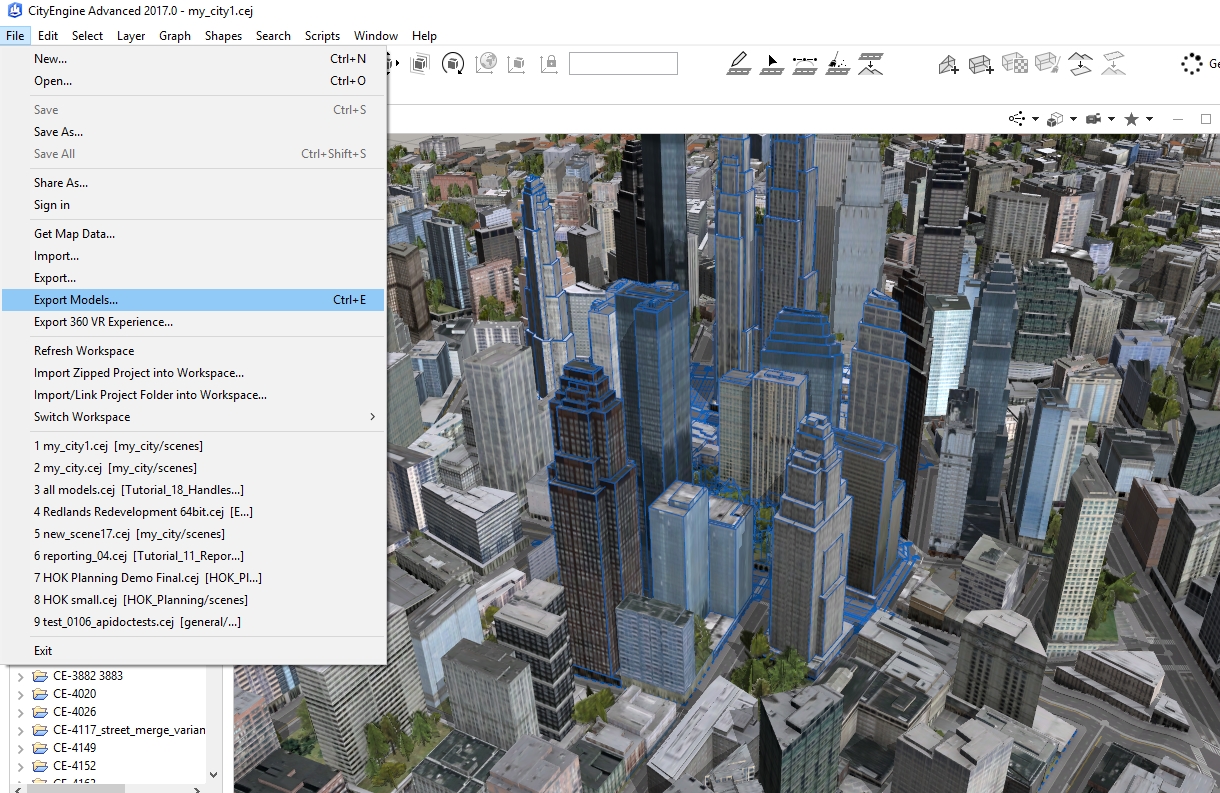
As a first step, select a central part of your city, then go to File – Export Models.
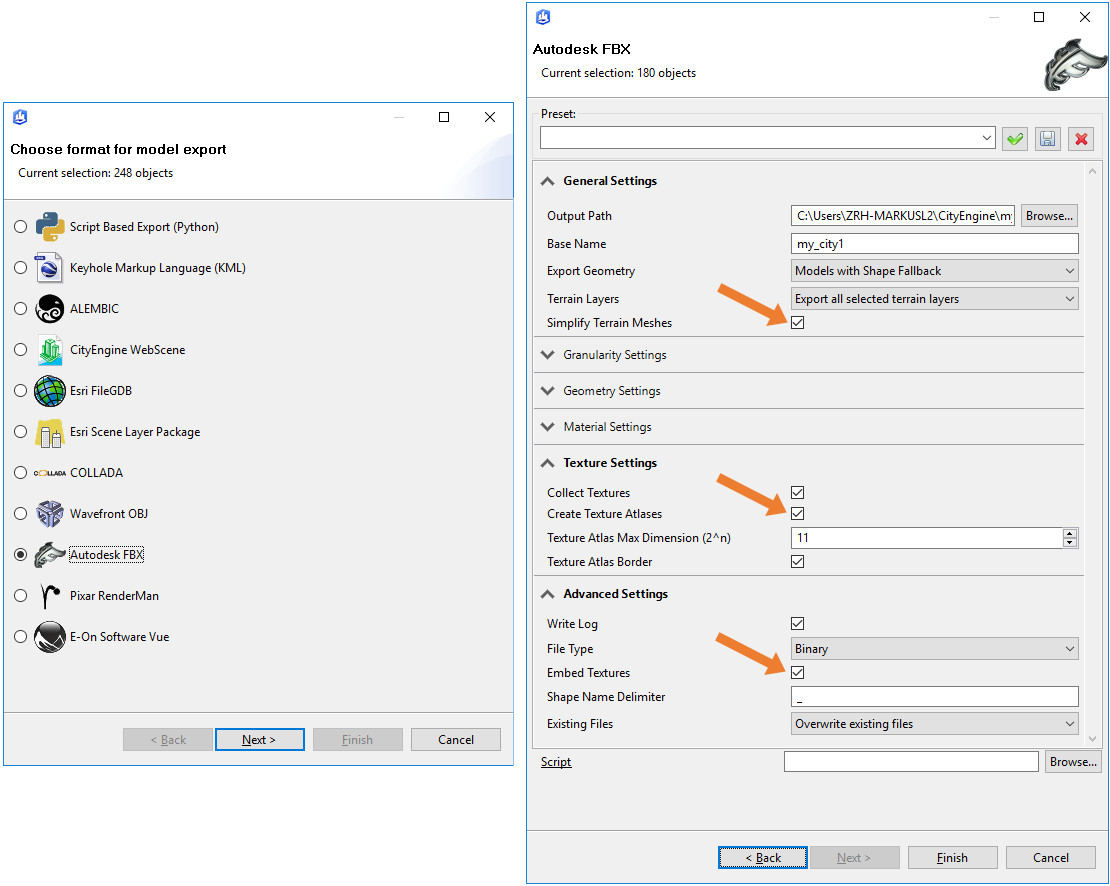
Autodesk FBX works great both in CityEngine and Untiy. In the next dialog, you can tweak some parameters. Simpify Terrain Meshes reduces the amount of triangles in flat areas, and is important for good performance. Also select Create Texture Atlases, this will decrease the amount of drawcalls. You can further choose to Embed Textures for easier transfer to Unity. You might need to scroll down to find those options.
Import into Unity
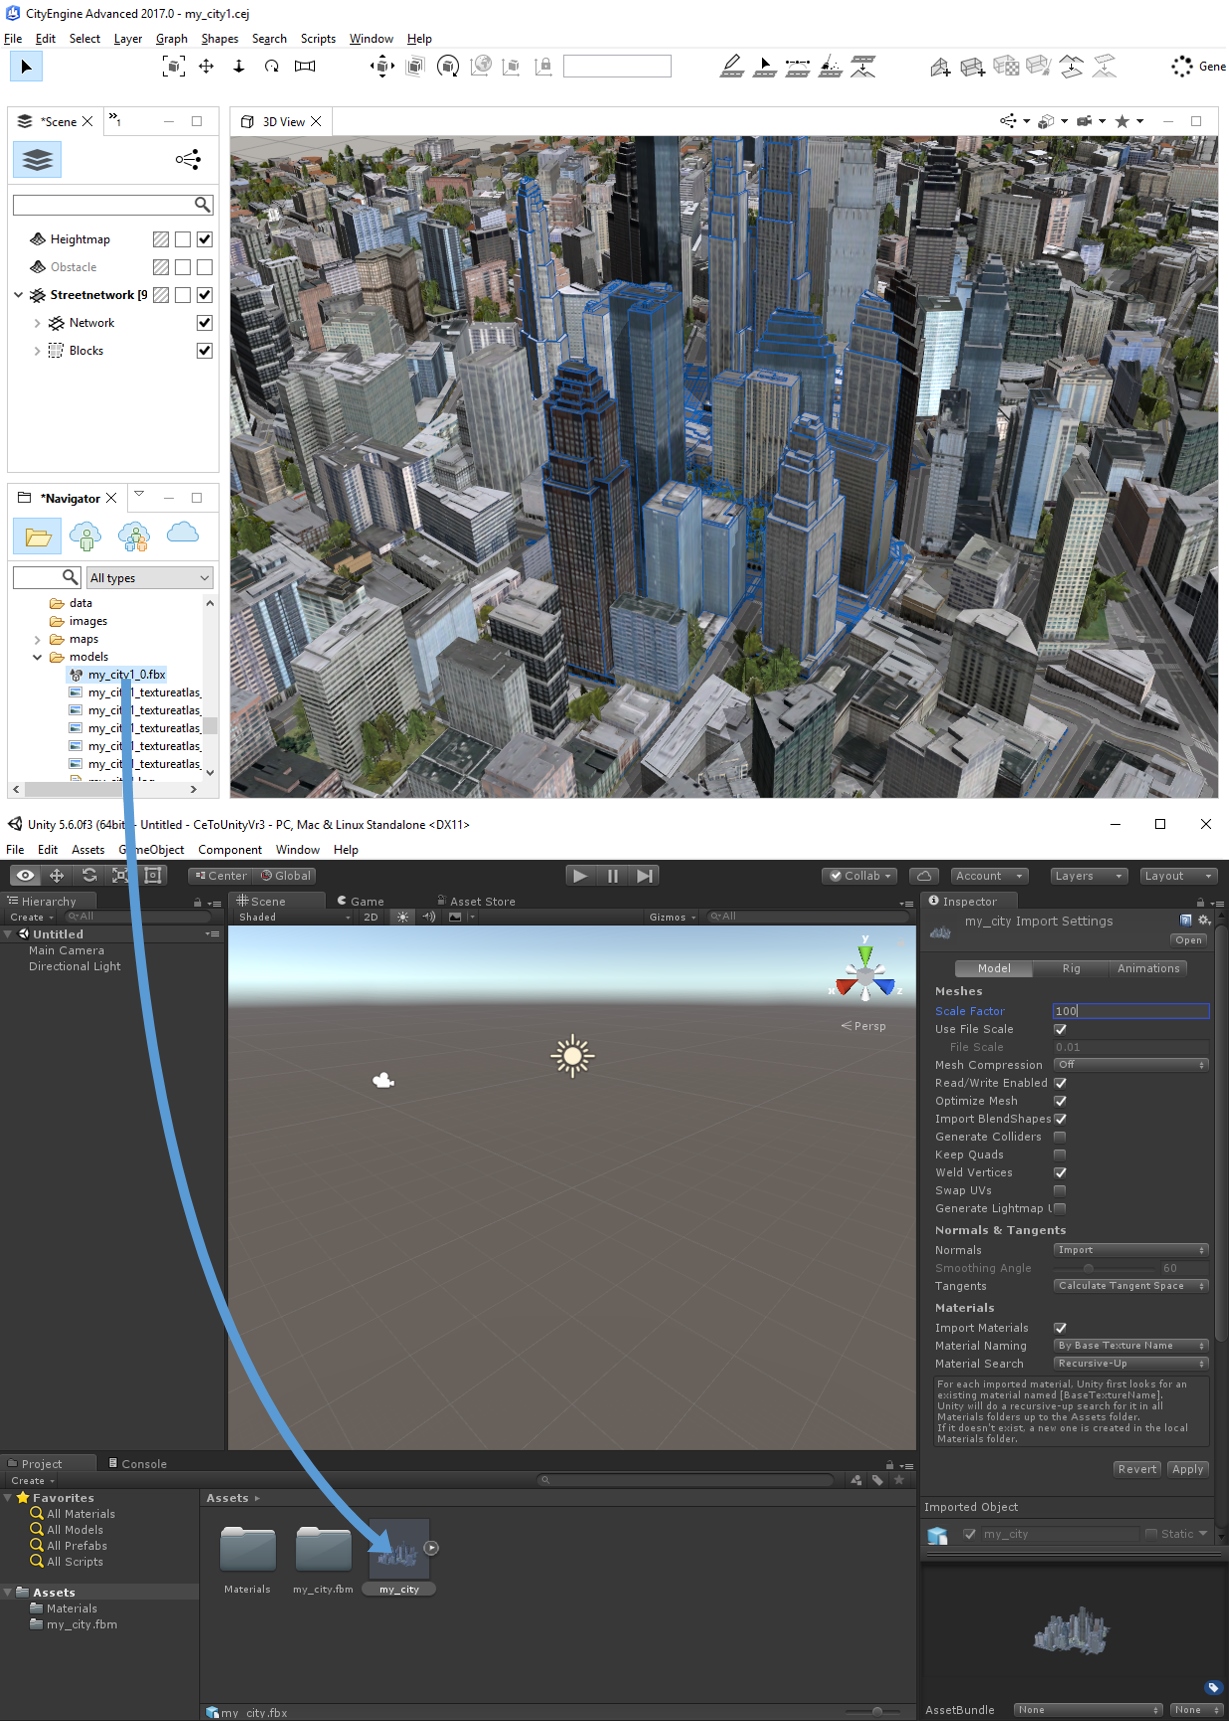
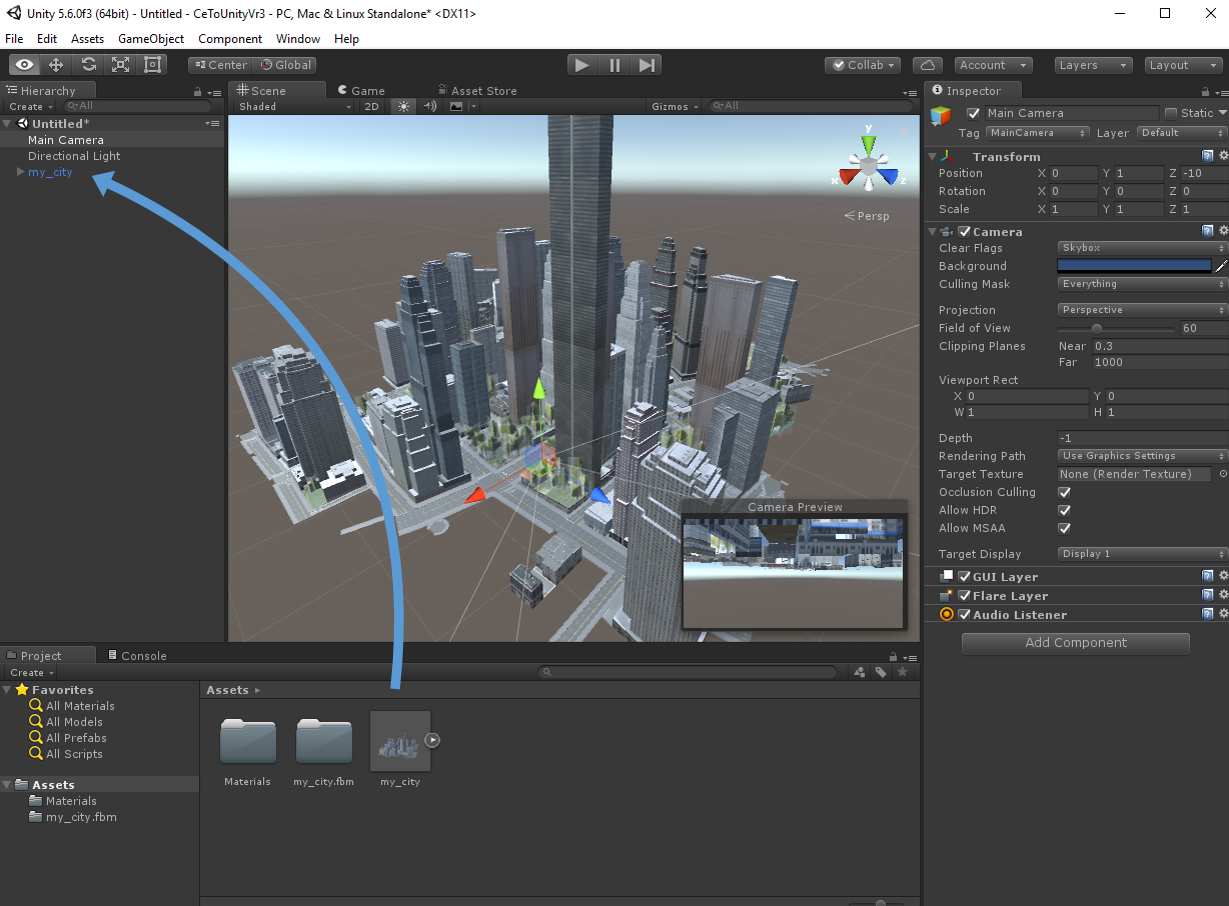
The resulting FBX file can be found in the CityEngine Navigator in the folder models. Drag and drop this file into the Assets folder of an empty Unity scene.
Then drag the city into the Hierarchy view. It will also appear in the 3D Scene view. Double click on the city in the Hierarchy view to recenter, and zoom in a bit. Now, let us tweak the camera position. Select the Main Camera and use the move tools to place it over a street. The small Camera Preview helps.
Setup VR
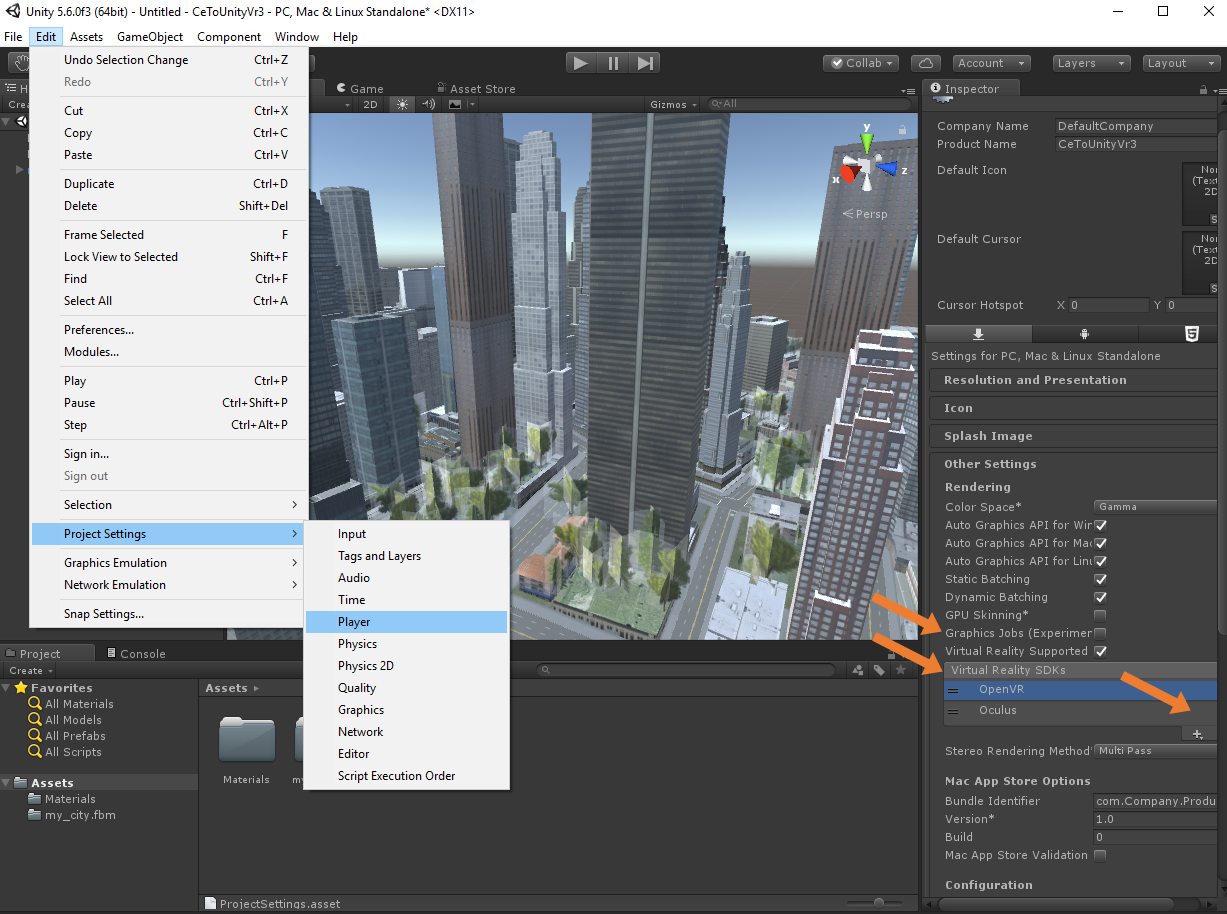
To enable VR, go to Edit – Project Settings – Player, and check Virtual Reality Supported in the Inspector.
By default only the Oculus SDK is added, which will not work with HTC Vive. To add Vive support, click the small + and then OpenVR. OpenVR works with both Oculus and HTC Vive. Drag OpenVR in front of Oculus, or simply delete Oculus.
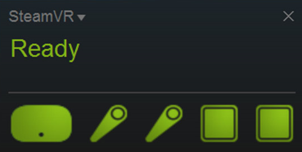
Press the Play button above the 3D view. If SteamVR and the VR glasses are installed correctly, a small SteamVR popup will display, and the city will be shown in VR. If warnings appear in SteamVR popup, refer to the HTC Vive or Oculus Rift setup instructions for help.
Add Locomotion
We now have a scene with an initial camera positon. If you have a big enough room you can physically walk around to explore the street a bit. However, how do you navigate through larger areas?
Traditionally, 3D games implement continuous motions using controller input. However, in VR this causes discomfort for many users, because the visual stimuli of moving do not match the feeling of standing still.
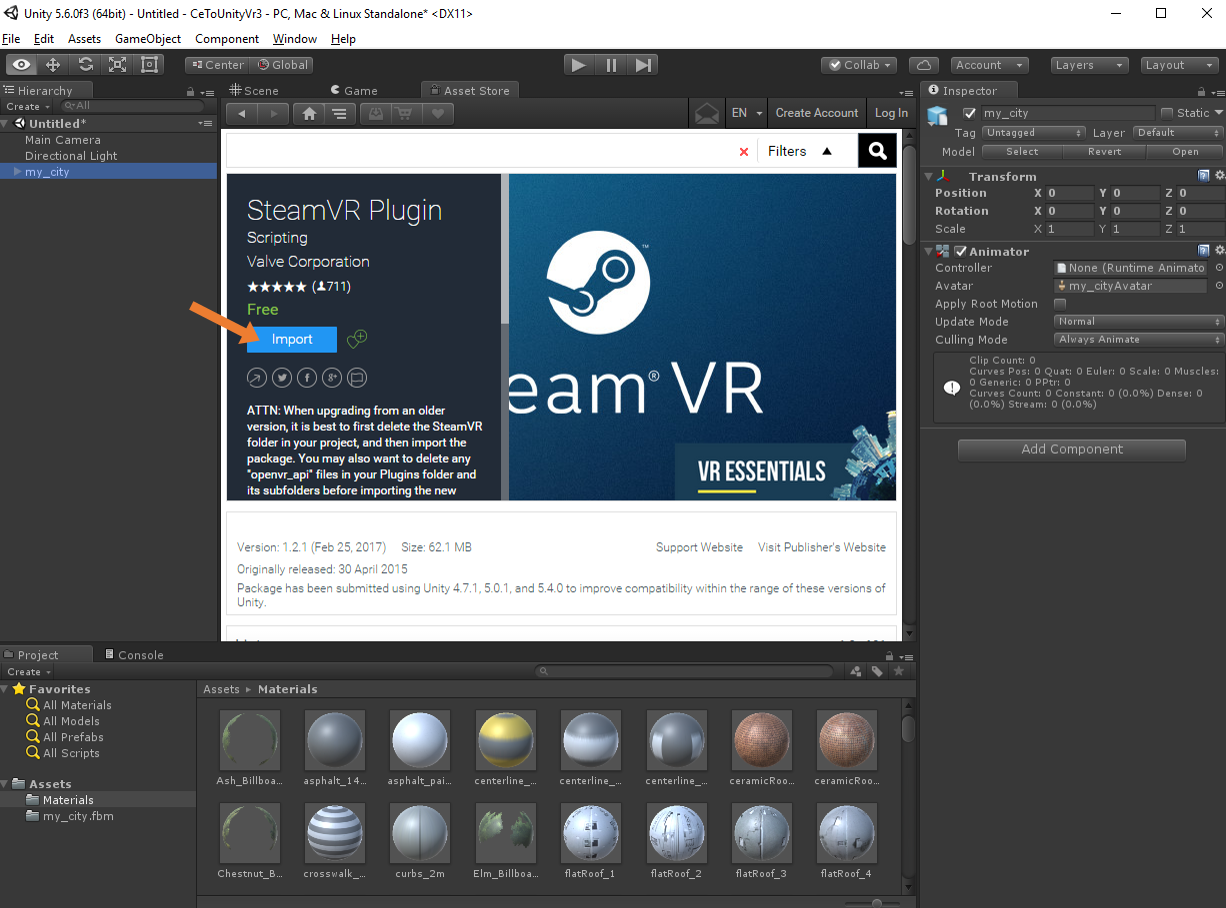
One solution is to use teleport locomotion. Instead of continuous travel, the user directly switches between locations. Fortunately this is easy to implement in Unity. First, click Window – Asset Store. You might be asked to log in. Then search for SteamVR plugin, and click Import. In the dialog SteamVR Settings click Accept All.
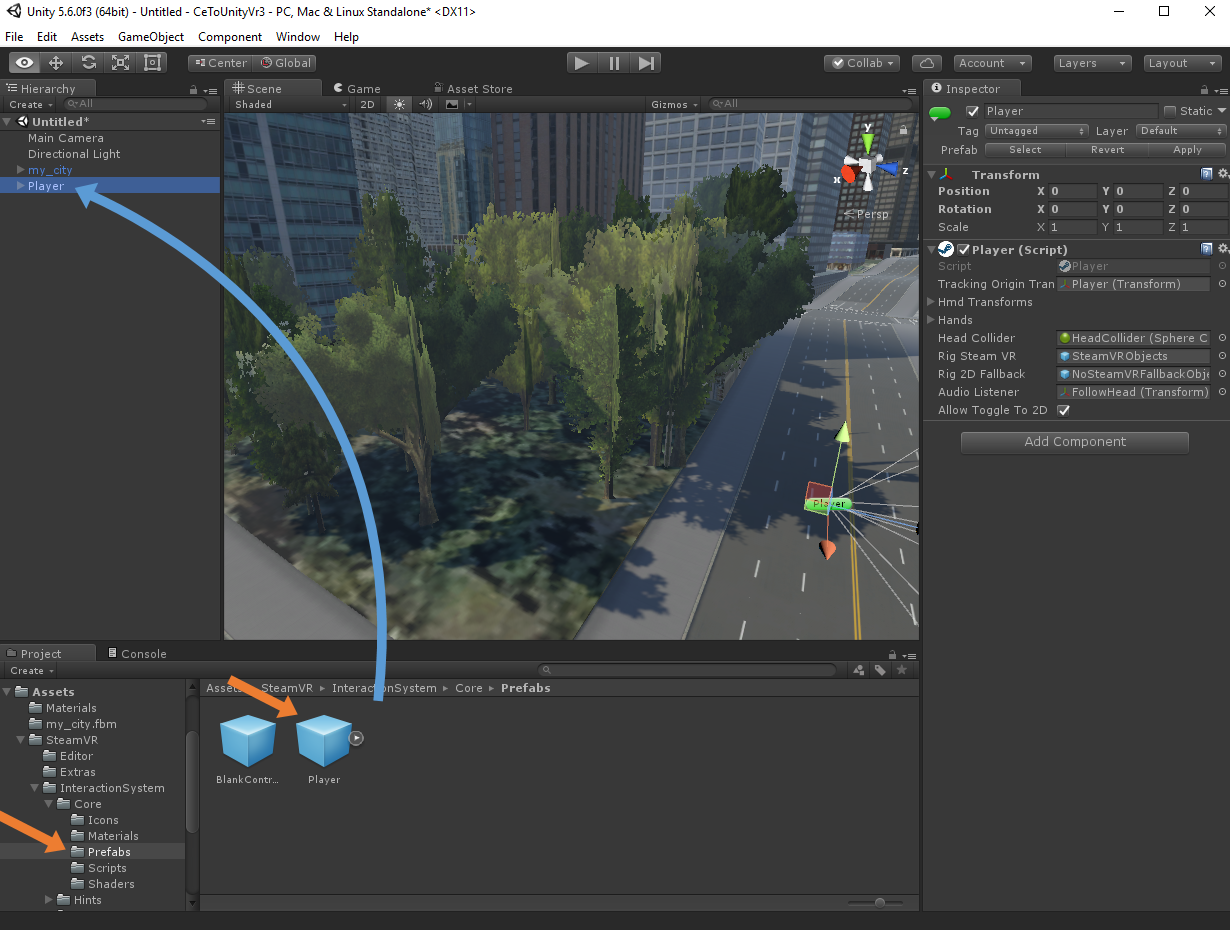
Drag&Drop the Player prefab from the asset folder SteamVR/InteractonSystem/Core/Prefabs into the Hierarchy. Just as we did before with Main Camera, move it to a nice position in the 3D Scene. Then delete the Main Camera, as the Player prefab already includes a camera.
Now, drag some TeleportPoint prefabs from SteamVR/InteractonSystem/Teleport/Prefabs into the 3D View, and the Teleporting prefab into the hierarchy. For easier teleporting in bigger scenes, you can increase the Arc Distance in the Teleporting parameters.
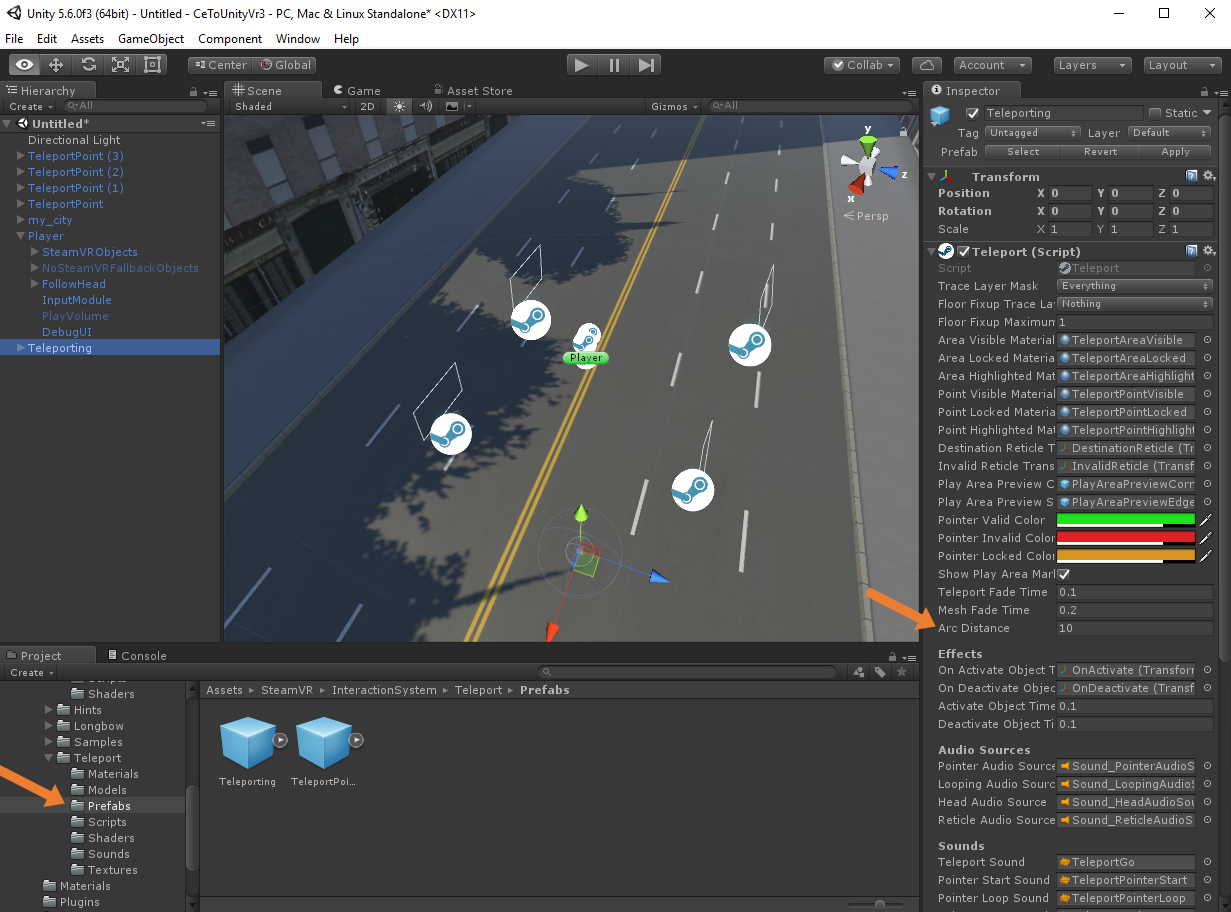
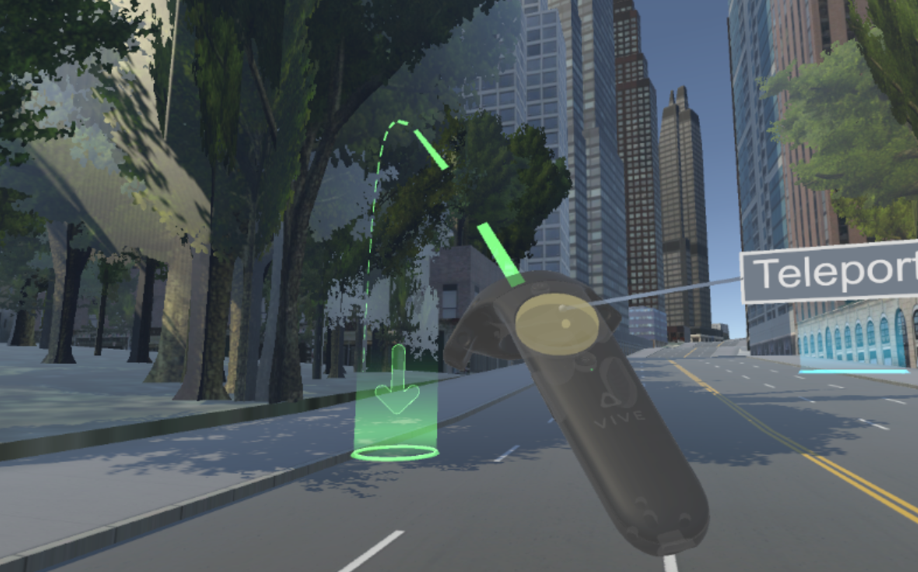
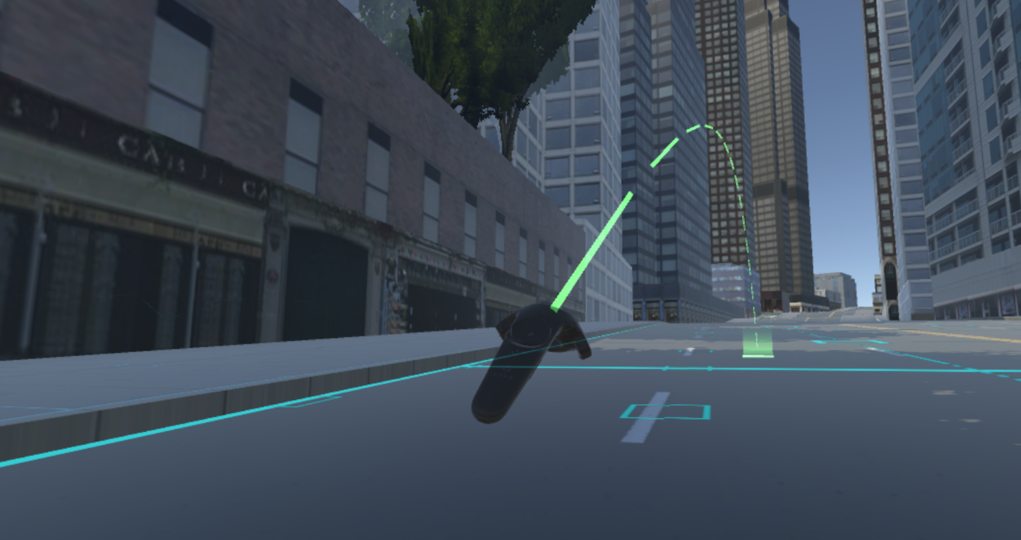
When starting the scene, you now have the ability to teleport to those locations, by clicking the Vive controller and aiming the green path on the teleport point.
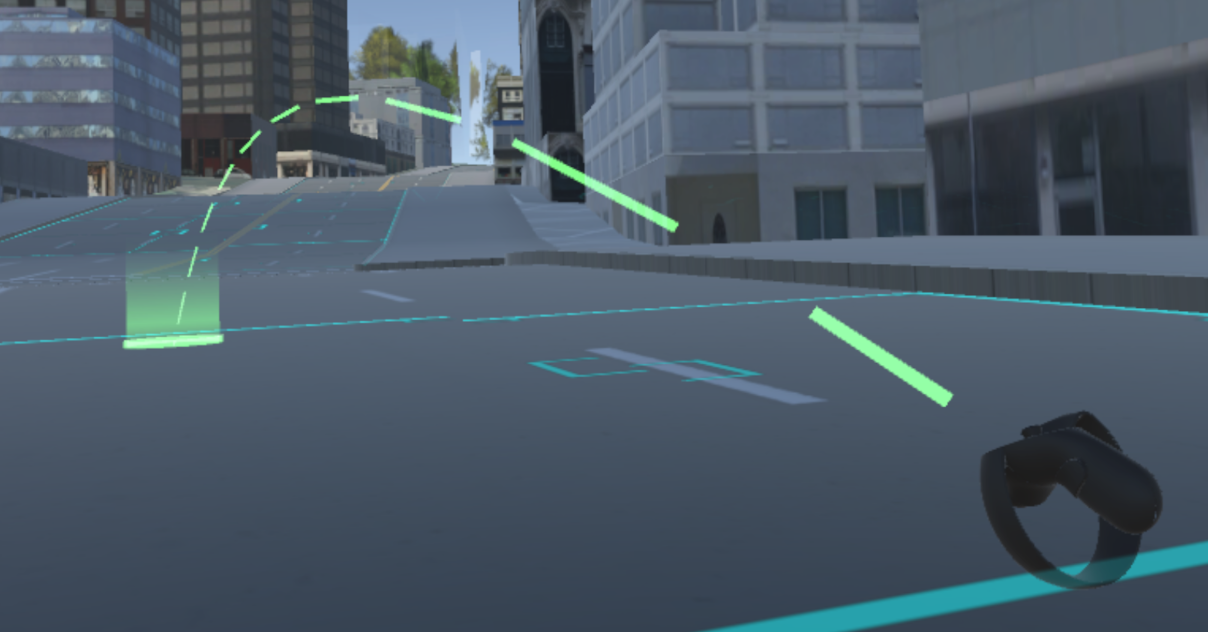
It works just as well with Oculus Touch.
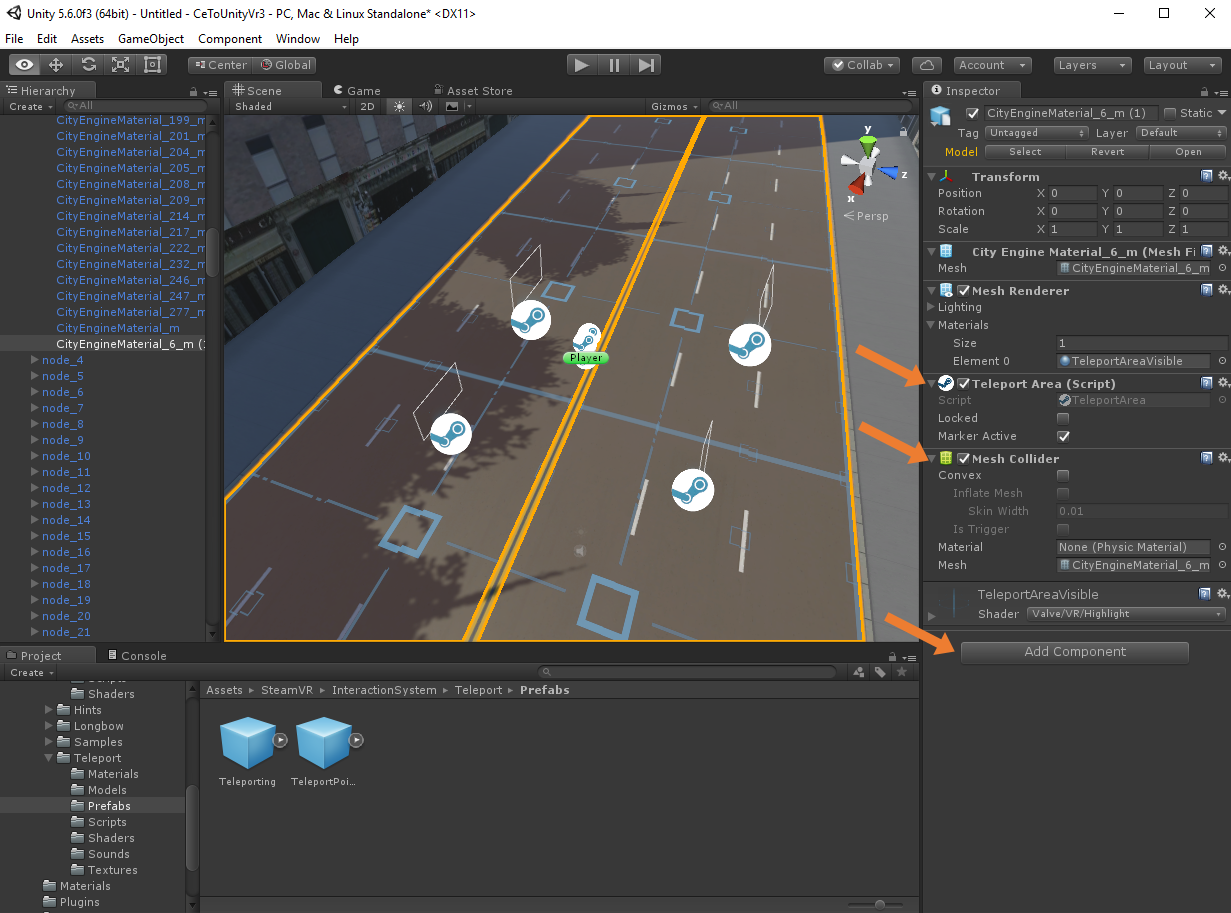
You can also add teleport areas: Double-click on a street in the 3D view, then create a copy. Click on Add Component in the inspector, and add a Teleport Area as well as a Mesh Collider.
Now you can teleport anywhere on this street in VR.
Tweak Scene
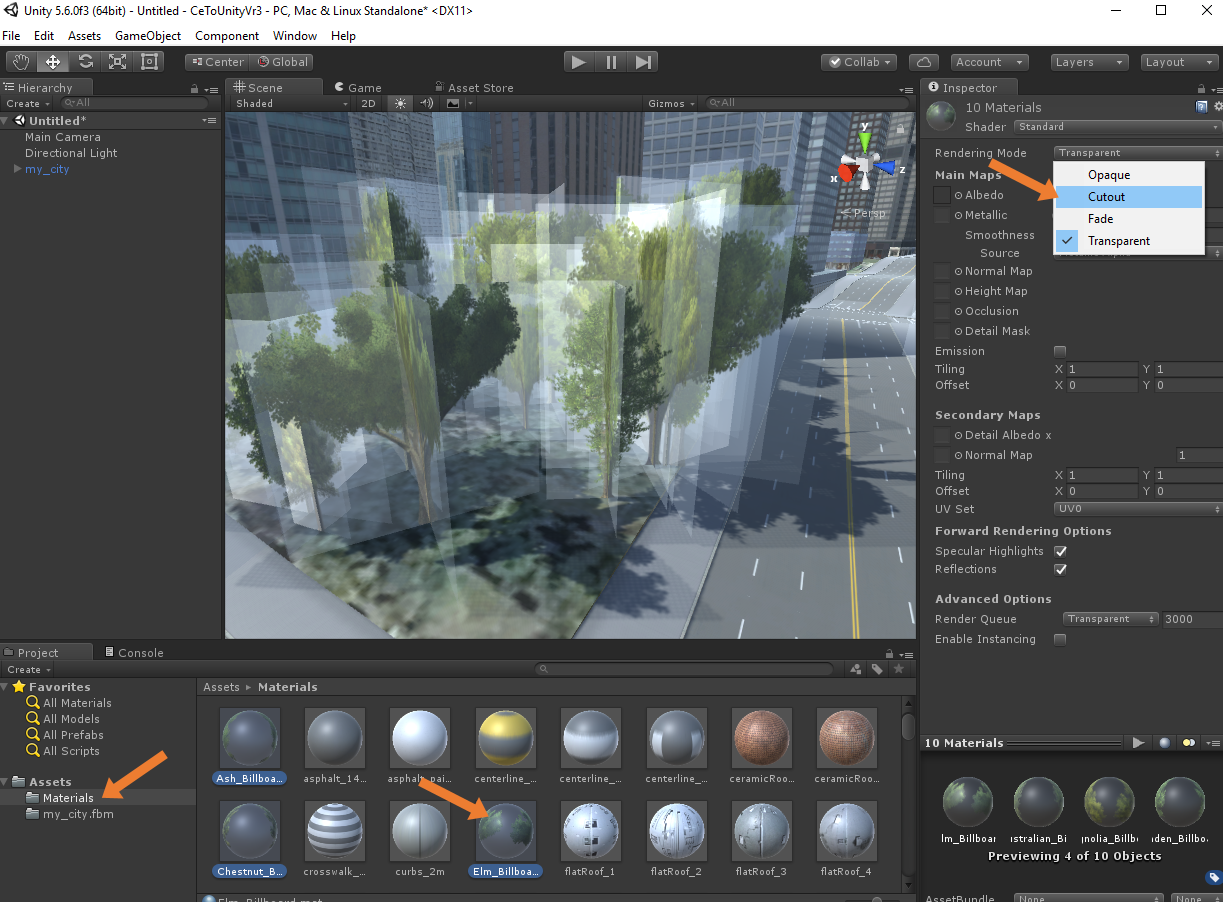
You might notice that the trees look a bit weird. To fix this, click Assets/Materials , and select all green tree materials. Then select Cutout as rendering mode in the Inspector. This removes the highlights from the transparent parts.
Conclusion
Using a few simple steps and out-of-the-box functions in CityEngine and Unity, you can create compelling VR experiences. By adding additional plugins, such as the SteamVR locomotion system, the experience can be refined.
You can add further easy tweaks to improve the visual quality: Adding the Screen Space Ambient Occlusion (SSAO) shader in Unity will improve the depth perception of small details. Unity also provides a global illumination solution for realistic shadows.
When showing larger Cities in VR, it is important to keep an eye on the performance. Ideally, it should run with 90fps for a comfortable VR experience. To improve performance, Single-Pass Stereo rendering can be enabled in Unity. Also, the rule-based nature of CityEngine enables creation of different Levels of Detail for geometries, for example adding less details to buildings far away.
Due to the multi-platform nature of Unity, it is easy to deploy VR experiences on multiple platforms. For example, it works both with HTC Vive and Oculus Rift, and can also be built for Windows Holographic to add Microsoft Hololens support.
We will further improve on this workflow to make GIS2VR even easier in the future. Are you interested in seeing a similar guide also for Unreal Engine (which is more complex to operate but very well suited for interactive high-quality architectural visualizations)? We would love to hear your feedback.
Commenting is not enabled for this article.