Have you ever wished that your 3D geometry file was in another format? Maybe you have an OBJ file and you’d prefer a glTF model, or your Collada file would be really great if it had an FBX file extension instead. You might even want to work with many different 3D formats using only one tool.
This is where PyPRT comes in. In my previous post, I introduced our new Python package, called PyPRT. If you haven’t read it and really want to get to know PyPRT, check it out.
Below, you’ll find a brief recap of PyPRT 3D capabilities. Moreover, we’re going to discuss the 3D geometry format converter topic. Mixing all that together, PyPRT allows you to edit a 3D geometry while converting it from one format to another.
PyPRT, in short
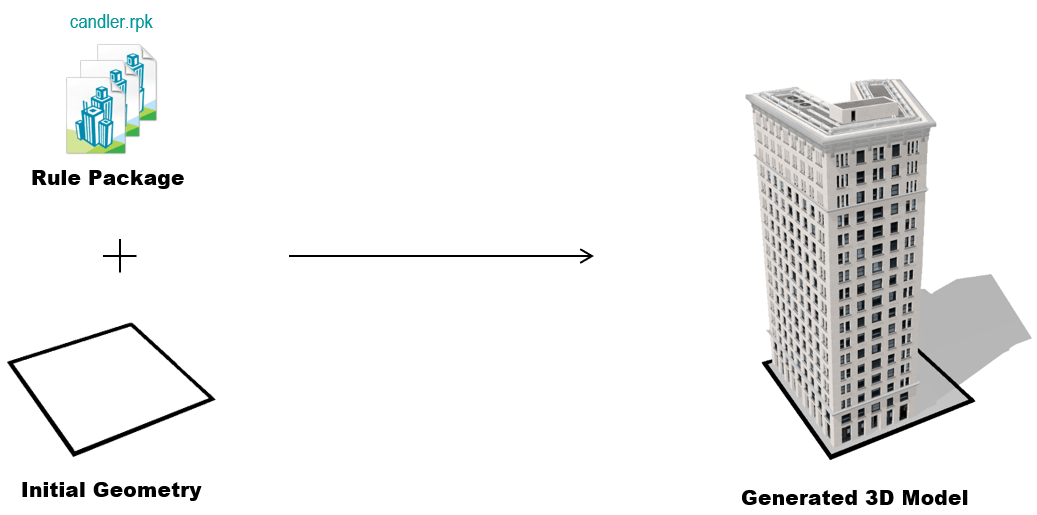
PyPRT is a Python package that allows you to easily and efficiently generate 3D content in Python. With PyPRT, you can transform any 2D or 3D data into detailed 3D geometries. This transformation is based on a set of geometric rules encapsulated in what we call a “Rule Package” (RPK).
After you provide PyPRT with an initial geometry (a building parcel for instance) and a Rule Package, PyPRT procedurally generates the 3D model driven by this input.

PyPRT is useful to:
- Generate simple 3D content out of building footprints (LOD2 buildings)
- Optimize a 3D geometry design (presented in the first post)
- Convert a 3D geometry into another format (keep reading to find out more)
3D geometry formats converter
Nowadays, there are a lot of different formats for 3D geometries. Each of these formats has its own specifications, way of encoding the 3D model and applications where it is used. To read a format, you will use a geometry decoder and, inversely, you will write the geometry using an encoder.
Regarding the model encoders, the formats differ from one another in many ways. For example:
- How they store the geometry (vertices, faces, etc…)
- If the models color and appearance are considered
- If individual objects (e.g. buildings) are stored separately or merged into one big geometry
Usually, the 3D data format you will be using is determined by the field you are working in and the software used. For example, the entertainment industry uses a different data format compared to 3D printing applications.
For the most popular 3D formats, format converters do exist which help to go from one specific format to another. These tools are sometimes available online. However, if you want to work with multiple formats, you will need many converter tools.
This is what makes PyPRT so interesting. With PyPRT, you have a set of geometry formats at your disposal and they can be integrated into your Python workflow.
You simply need to give PyPRT your 3D geometry and the name of the desired exporter as input and PyPRT will do the rest.
Demo App: 3D Geometry Visualization on a Web Map
When working with 3D building models, it is interesting to not only visualize their 3D geometry but also to see them in a geographical context. In other words, we want to visualize them on a map.
The video above shows a browser window with a world map. The first thing we do is choose where to place our 3D model.
At the top right of the window, the upload box allows us to upload a 3D geometry file. Drag and drop your file! The model then appears on the map in the right location.
Finally, we can have a look at our 3D model by moving around the map.
This demo app makes use of three main components.
- Firstly, it uses the ArcGIS API for JavaScript for everything related to the mapping and map interactions.
- Then, PyPRT takes the uploaded file, deals with the geographical placement of the model and converts it into a Scene Layer Package.
- Finally, the ArcGIS API for Python takes care of the workflow with ArcGIS Online (meaning it takes care of the uploading and publishing of the Scene Layer Package). At the end of this process, you can find the Scene Layer in your ArcGIS Online account.
In summary, this app allows you to upload a 3D geometry file (OBJ, Collada, FBX, glTF) and visualize the geometry on a map at a desired location.
Behind the scenes, we are using PyPRT to convert the uploaded 3D geometry file into a Scene Layer Package.
You can easily extend this example app by adding context layers to the map or to make it work with existing building models that inherently contain the georeferenced information for instance.
How to get PyPRT
The demo app presented above is available in the pyprt-examples Github repository. Please visit the PyPRT page for more information about the package installation, documentation and examples with ready-to-use rule packages and initial shapes. If you have any questions or feedback about PyPRT, contact me.


Hi, I’m Rukun.
I’ve recently been focusing on how to convert directly from third-party formats to SLPK, and I feel that PyPRT is an easy way to do this, and I’d like to see if there is sample code for this.
my email xurk@geoscene.cn