Challenge 1: Coloring In
Challenge 2: A Forest of Color
Challenge 3: This one!
Challenge 4: Adventure Awaits
Challenge 5: Map Kids, Assemble!
Challenge 6: Living Atlas Cross-Stitch
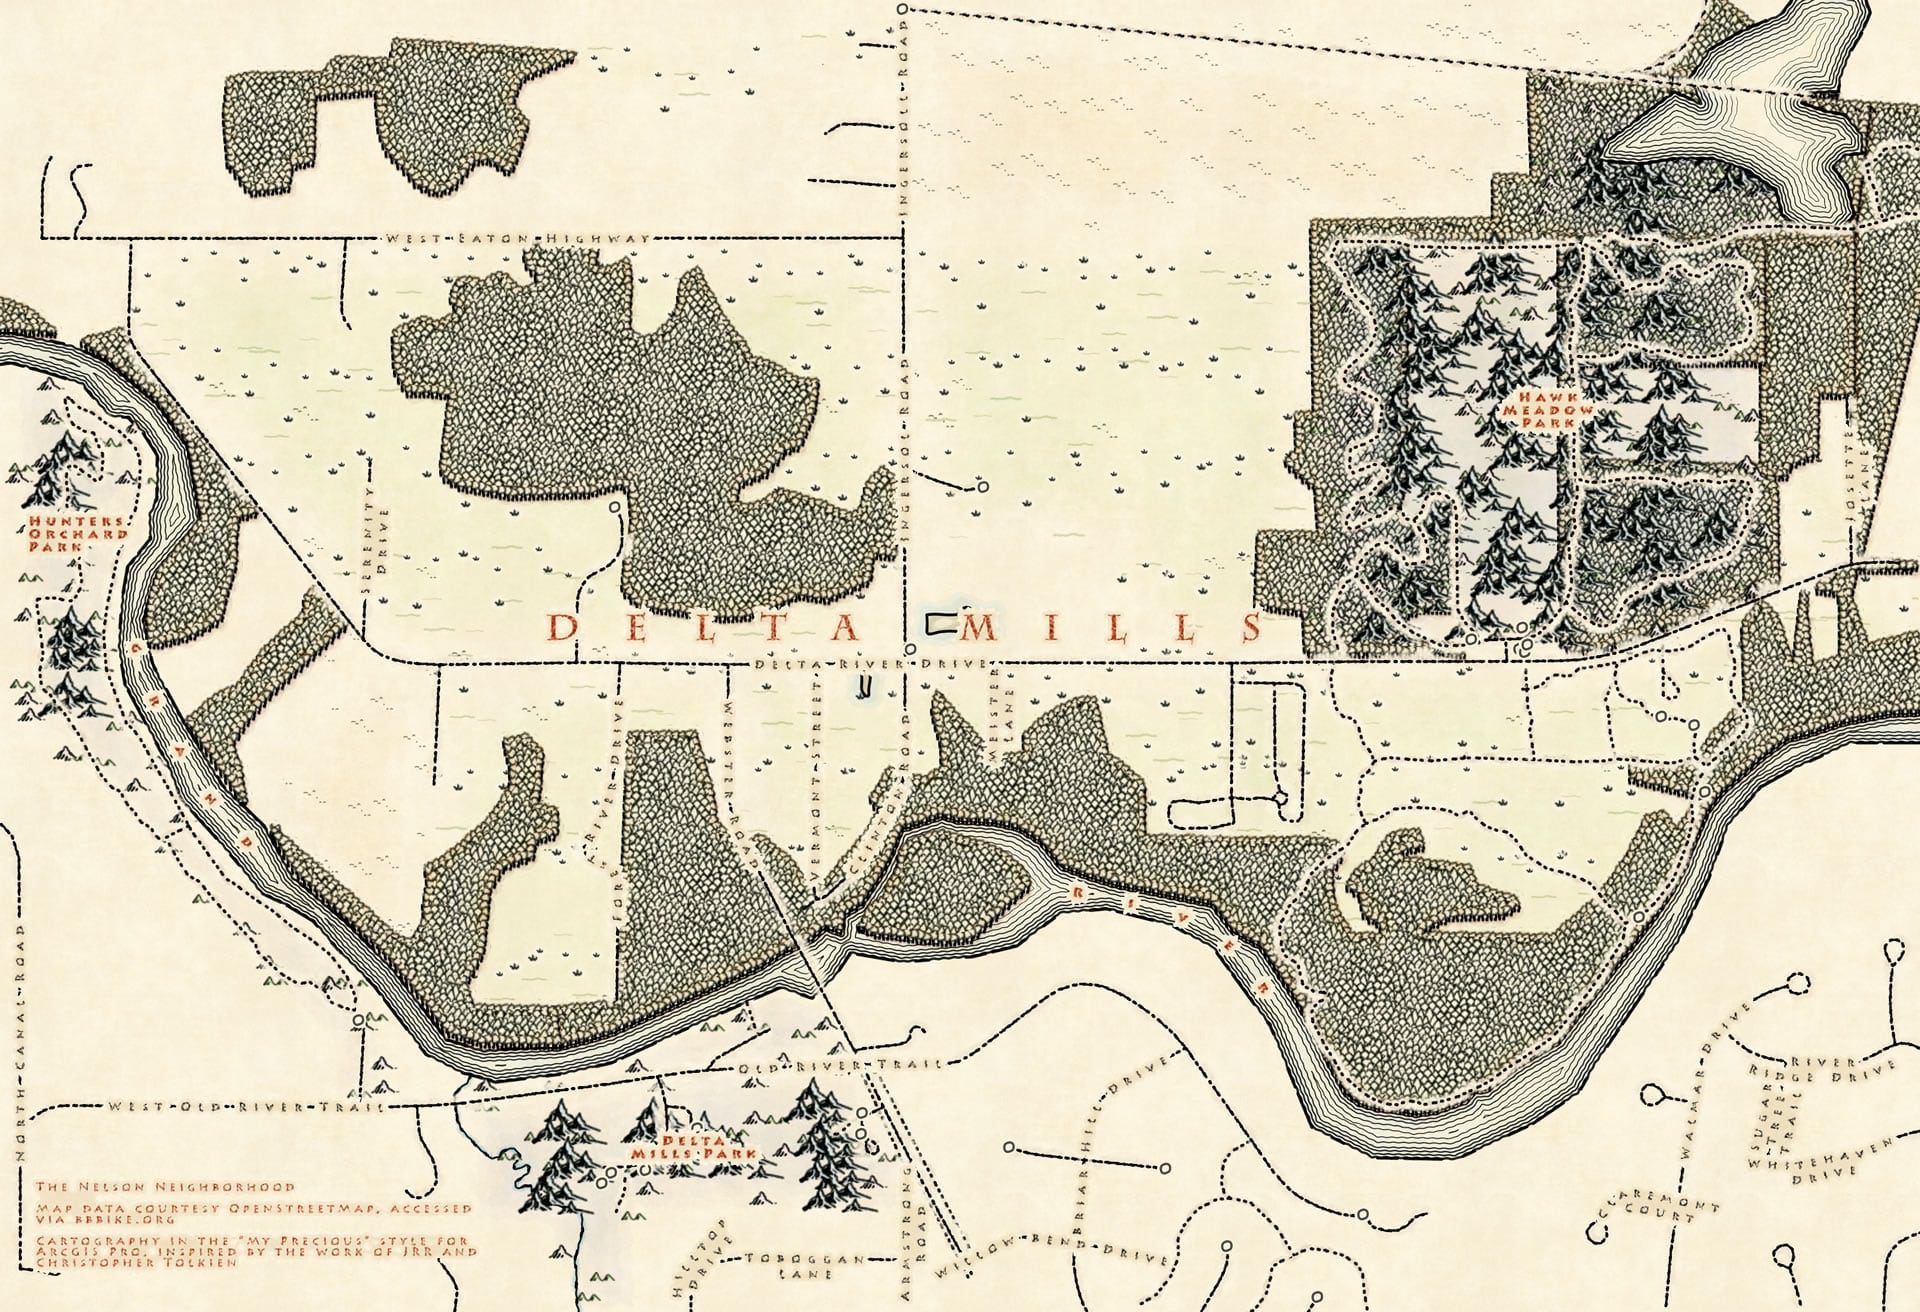
Whenever we fire up a map our eyes naturally dart to our little place on the surface of this earth. Our home. So why not throw a little Middle-Earth magic into that experience and make our own maps of our own neighborhood in the style of that glorious Lord of the Rings map insert we all pore over at some time (or times) in our lives? Here is a map of my neighborhood of Delta Mills, Michigan. A lovely little place to be.
Ready to team up with your socially co-isolated youngsters and start slinging ink? Ok, go have breakfast, second breakfast, elevensies, and lunch then meet me back here for some map making adventure!
Step 1. Neighborhood Data
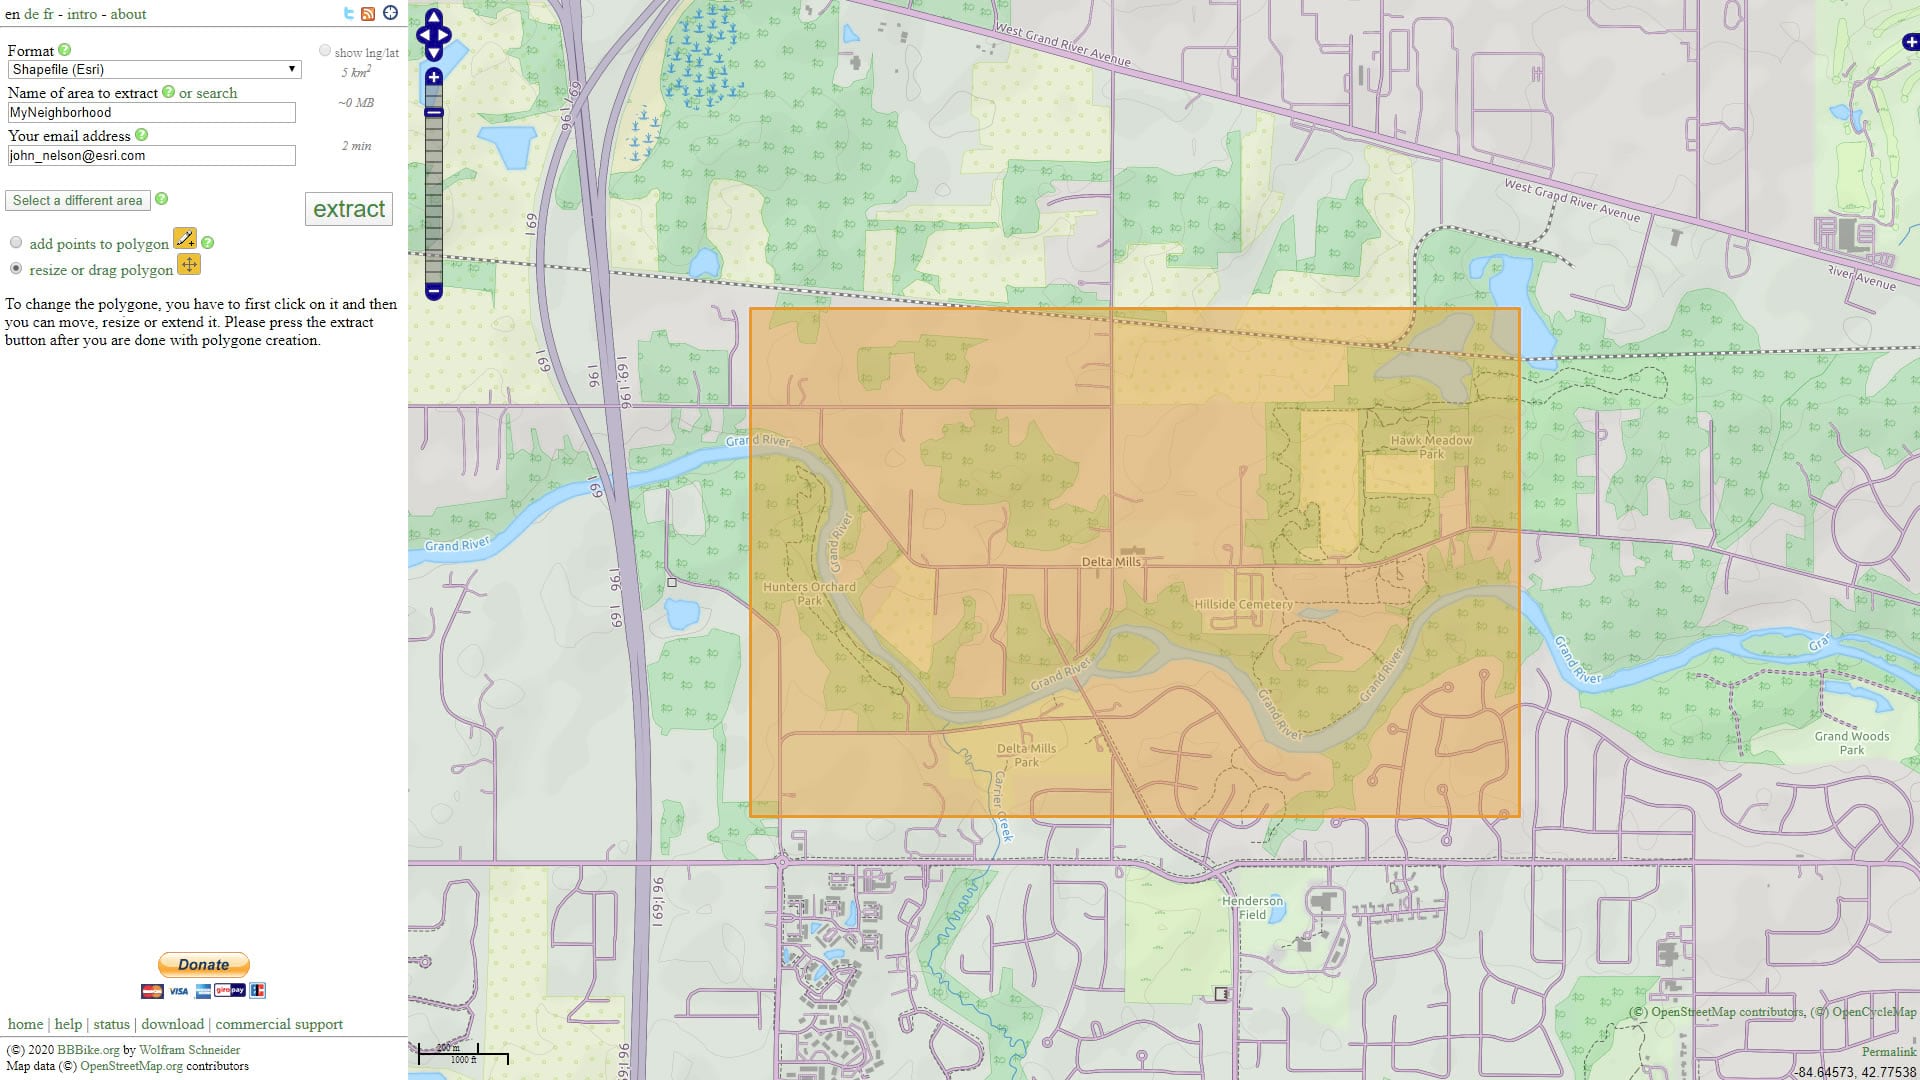
First we need to extract a tiny little portion of the vast and amazing world of OpenStreetMap using the simple and wonderful extract.bbbike.org. I zoomed in to my neighborhood and exported it as a shapefile. You should zoom in to yours too, or a place that’s special to you (making maps of places we love is always way more fun). I do recommend you keep the export pretty small, so you are aren’t doing crazy heavy-data-lifting. I mean, come on, it’s a neighborhood map designed to look like the Shire. But you’ll do what you feel is right; it’s your world.
Step 2. GIS Time!
I added all the layers to a new ArcGIS Pro project, and chose a projection that works best for my neighborhood. It’s pretty exciting seeing all that content appear. I also added a sneaky layer I call “Global Background” (which you can download here) so we can apply a nice paper texture as a background, later.
Take a look at the attribute tables of these layers. They will be flattened into categories like “landcover” but you’ll see that there are lots of different feature types within each layer.
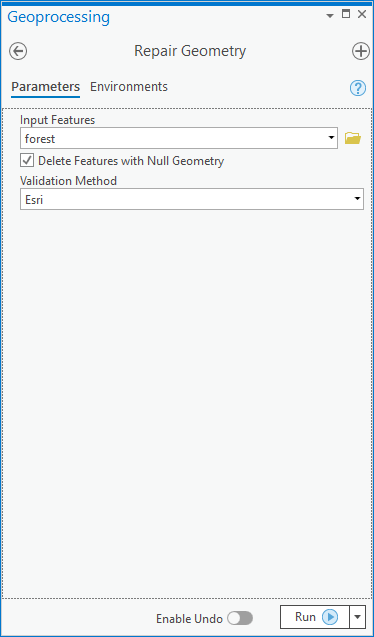
Before we go any further, open up the “repair geometry” tool and repair every one of the layers. Trust me; they’ll need it—ripping content out of OpenStreetMap can be a pretty bumpy ride for some features and this will ensure that they get stitched back into shape and render correctly down the road. Plus, kids, it’s a valuable lesson in the cruel realities of data management.
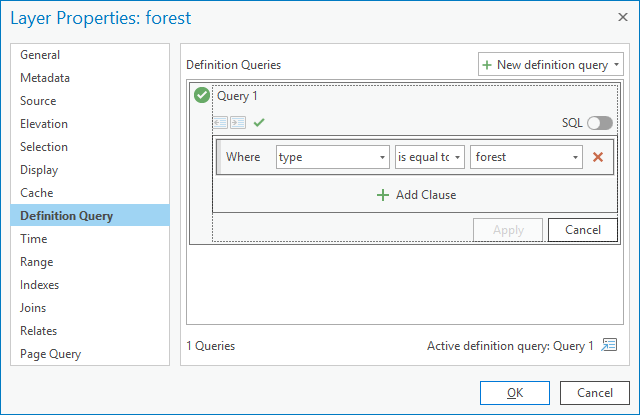
Next, run “definition queries” to show only one feature type per layer. Copy that layer, and show another feature type. For example, there’s lots of different stuff inside the “landuse” layer, like parks and farmland and cemeteries, that you’ll want to style separately.
The result will be a really cleaned up map with more layers whose ordering you can control, so you are in charge of what draw on top of what. Looks a lot better already.
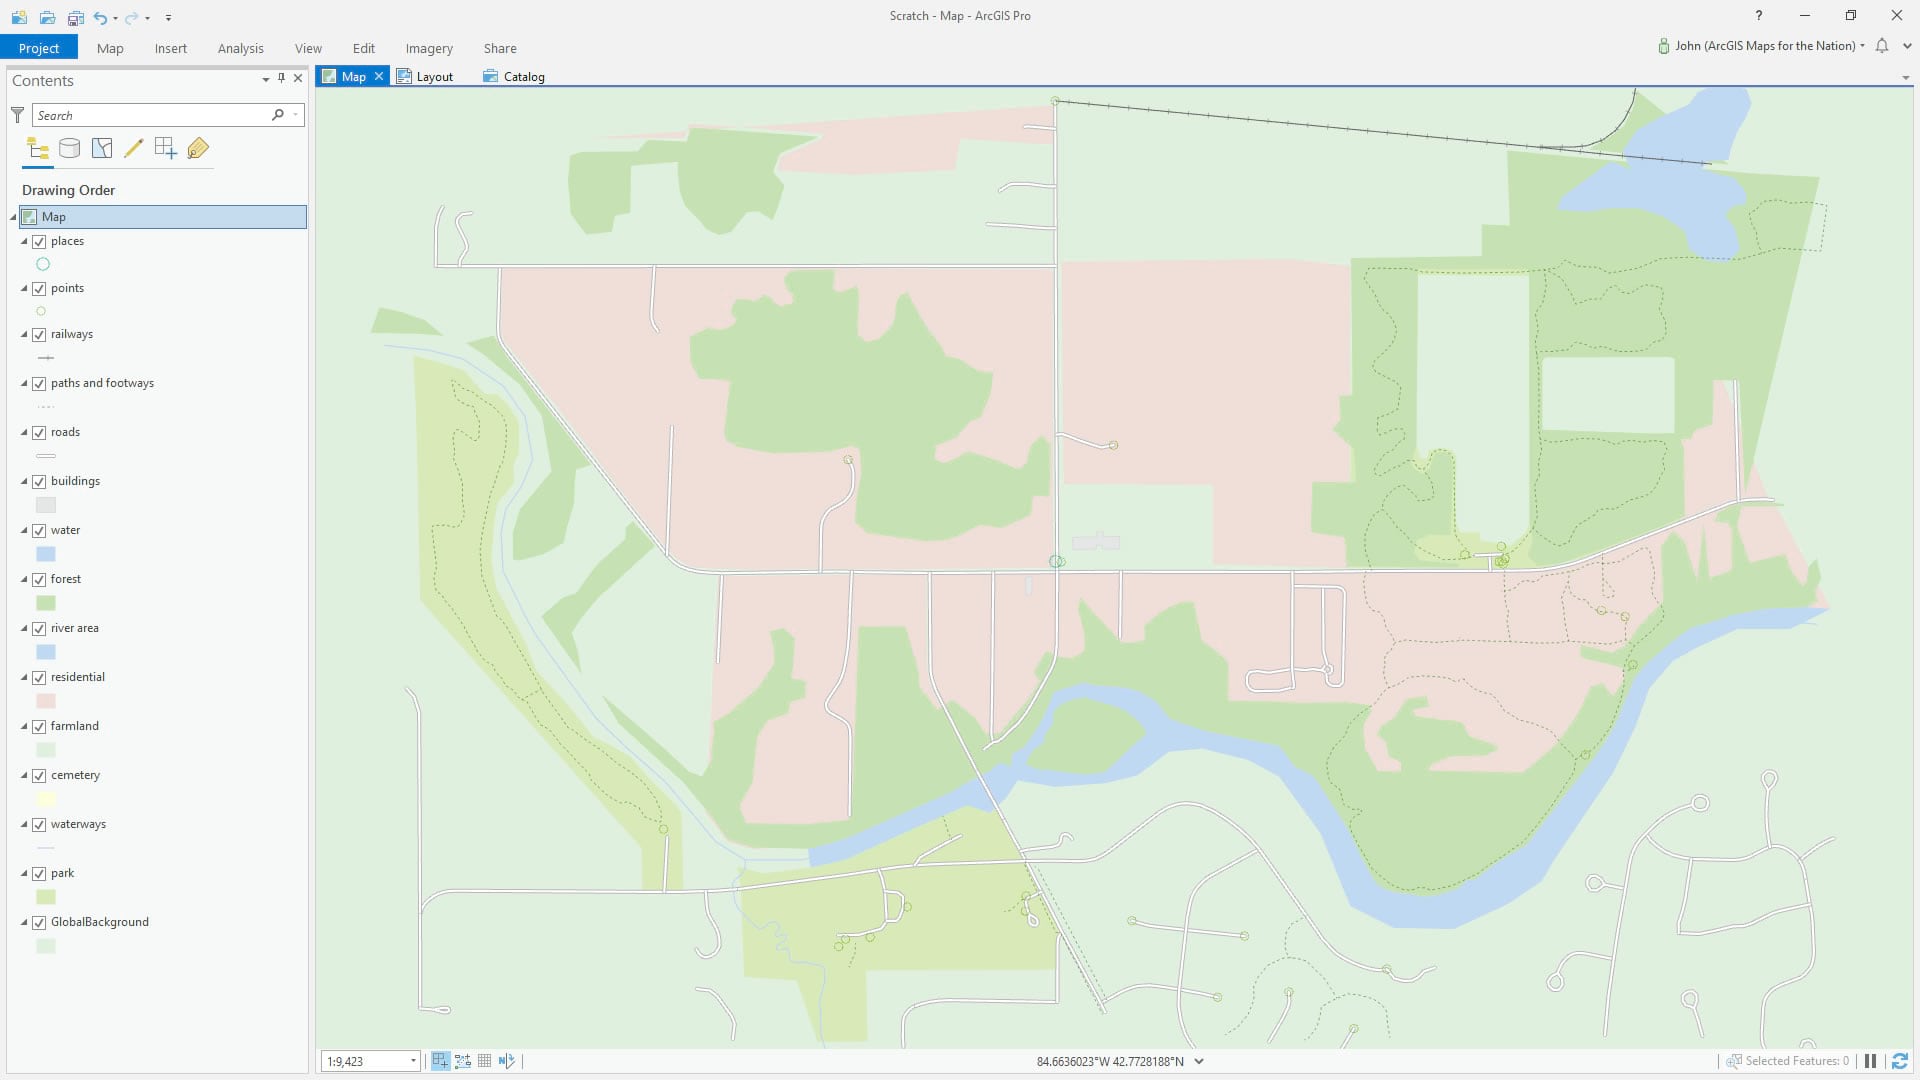
Step 3. Style!
Ok, now for the extra-fun part. Download the “My Precious” style for ArcGIS Pro, and add it to your project (in the “View” tab you can open trusty old “Catalog” the dig into the “styles” section and right-click and choose to add a new style). Then it’s just a matter of picking from the gallery whatever works best for your map features. Total blast.
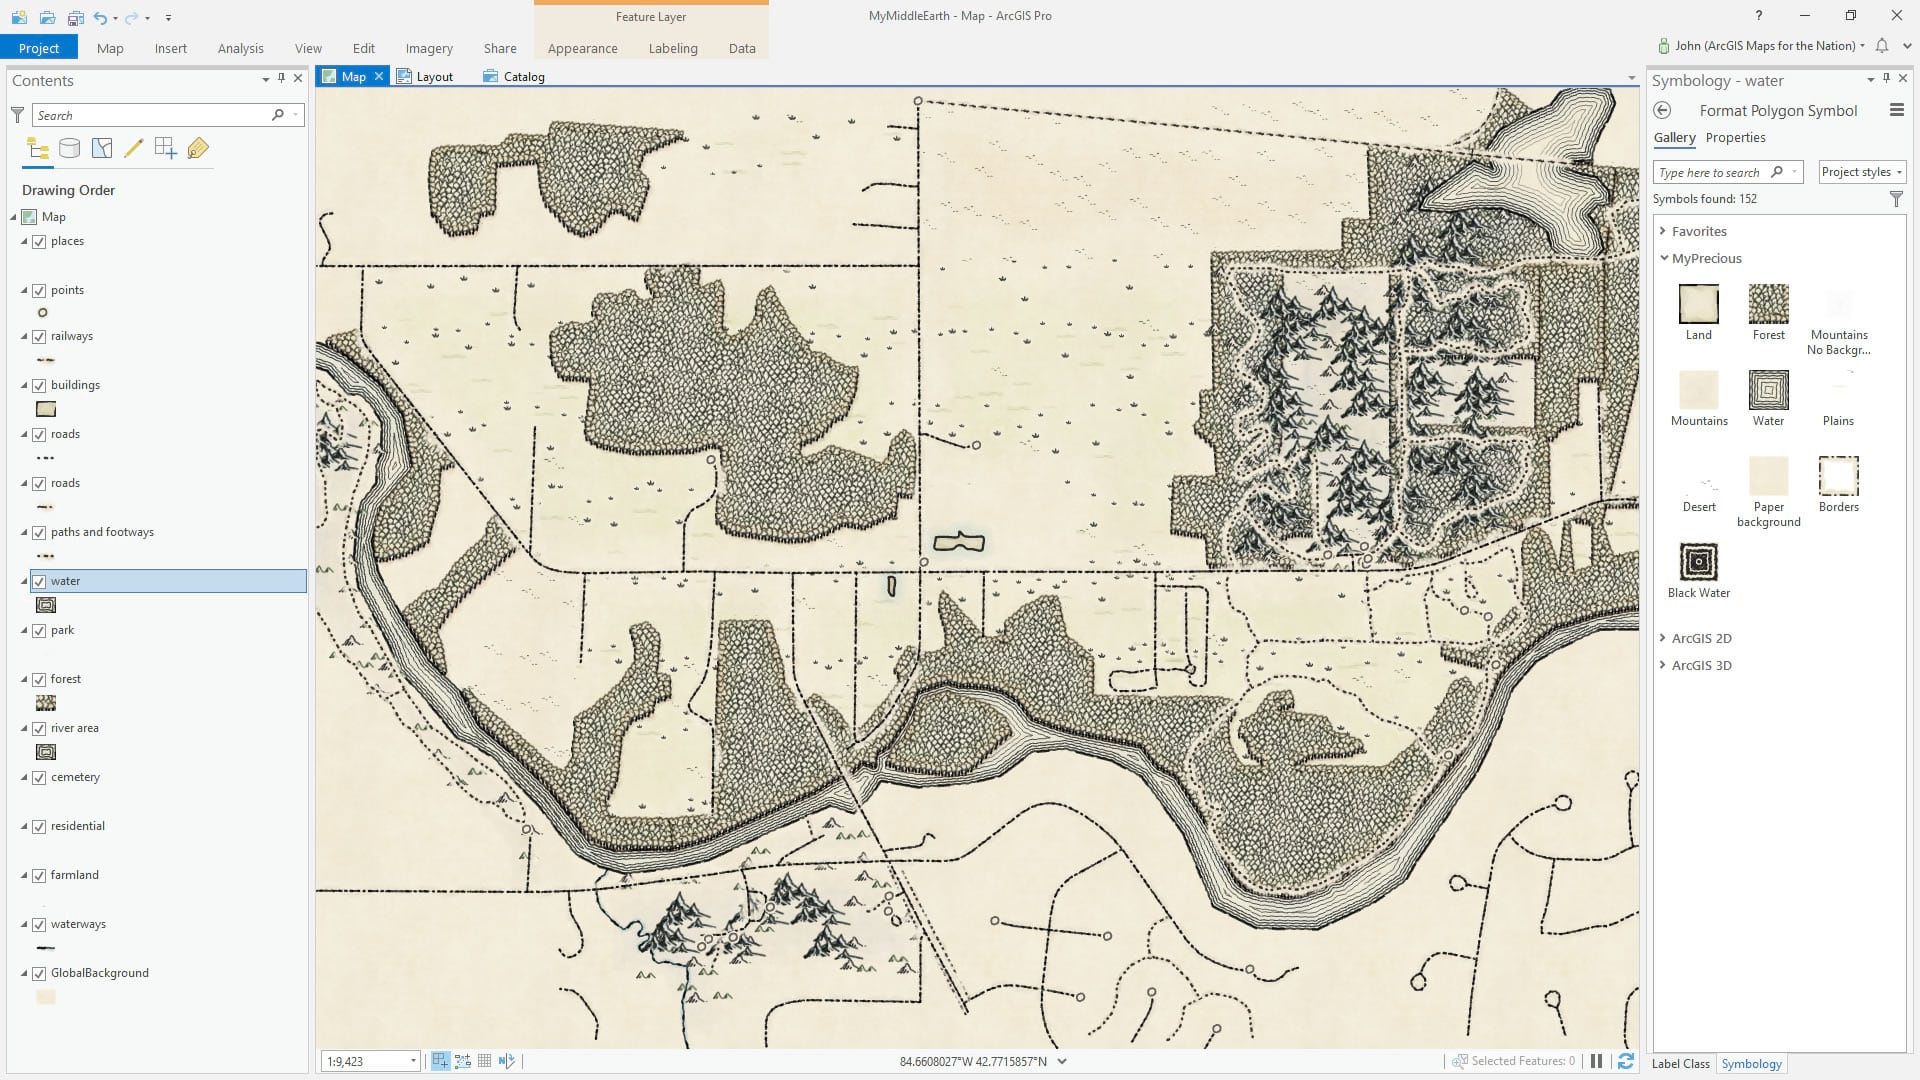
Play with labeling the map features using the text formats that come with the My Precious style. You can find them up in the “Labeling” tab.
Then I added the map to a layout and exported it.
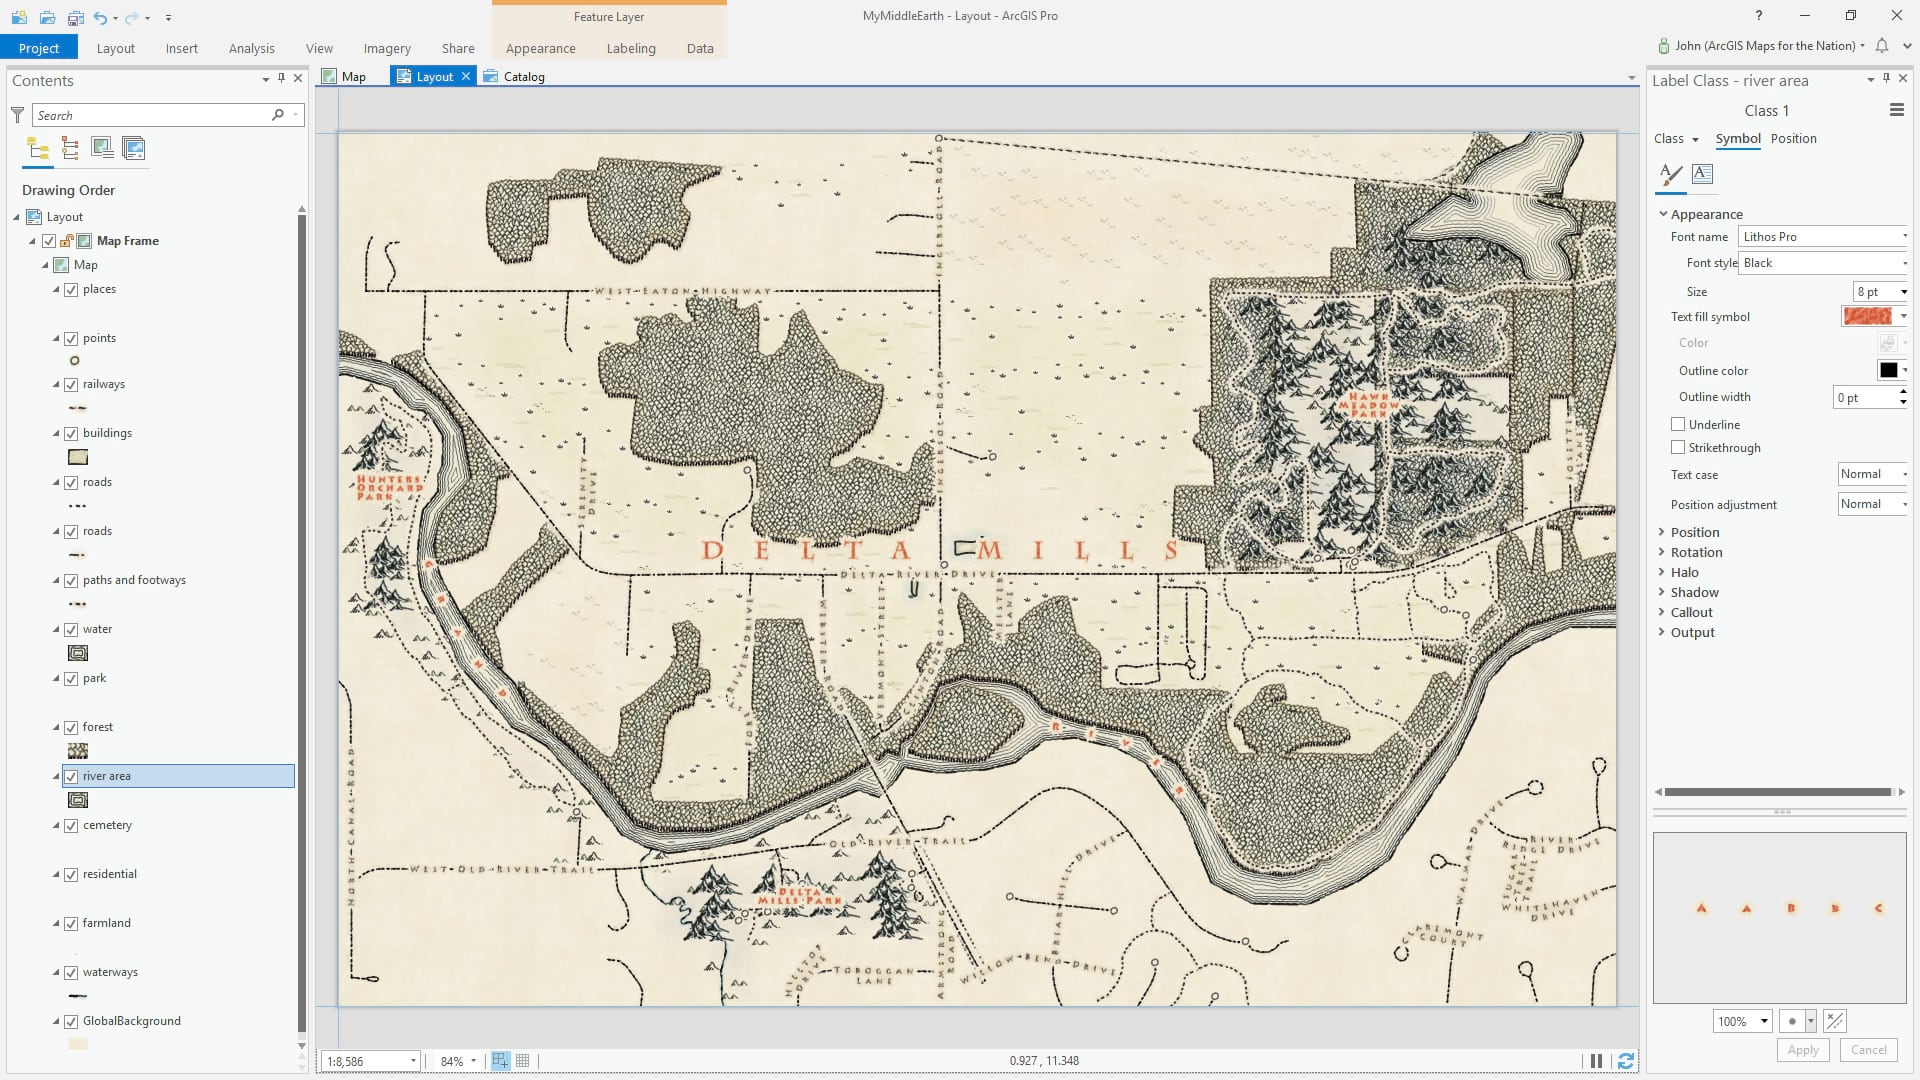
And that’s that! A custom Middle-Earth map of my neighborhood. I hope you give this a try and share your Middle-Earth neighborhood with the rest of us by commenting below and show them off in your social media channels with the #TakeYourWorkToKidsDay tag!

Love, John

Article Discussion: