Creating styles in ArcGIS Pro is a great way to build cartographic standards within a group or organization. It allows you to save a variety of style classes (such as symbols, colors, and text elements) in one place and then share this file with others. I am going to walk you through a color style I created to show how you can build something like this yourself.
The Colors:
I built an ArcGIS Pro style (.stylx file) that captured the colors from the 1821 2nd Edition of Werner’s Nomenclature of Colours. This version was adapted by Patrick Syme for use in Zoology, Botany, Chemistry, Mineralogy, Anatomy, and the Arts. This has been widely used by naturalists over the years, including Charles Darwin. I was able to locate the original text online:
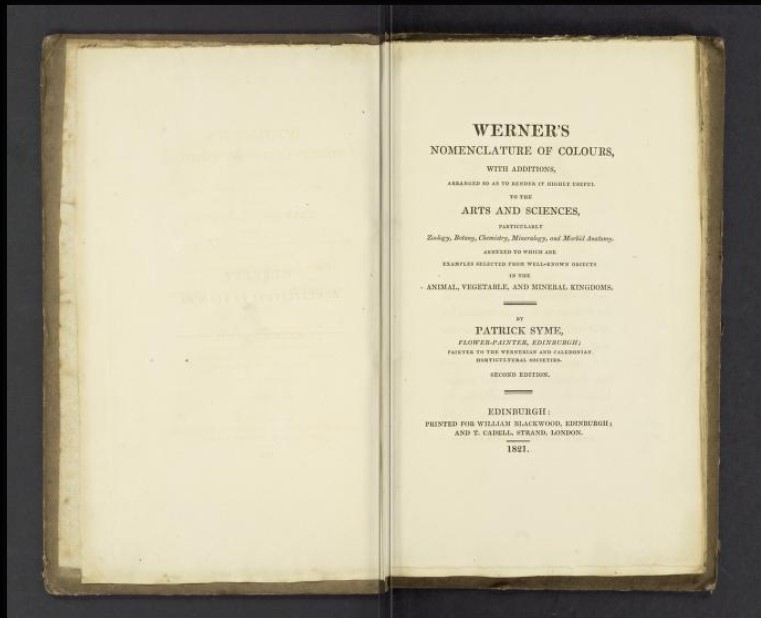
(Werner’s Nomenclature of Colour – Adapted by P. Syme)
I downloaded the pages of referenced colors and saved them as .jpg files. Then I added them to ArcGIS Pro as raster images.
The Process:
After adding the pages of colors into ArcGIS Pro, I let the application build pyramids and draw without georeferencing them. (I just needed the colors.)
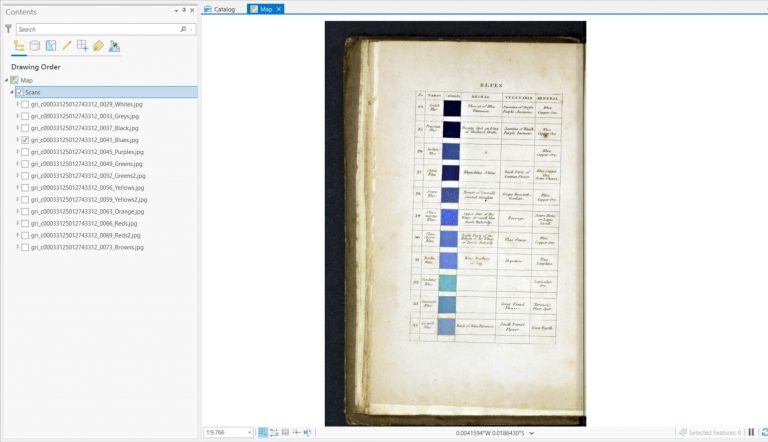
After creating a new style, I had a blank canvas to start adding my colors.
By clicking the ‘New Item’ drop down in the Styles Ribbon and selecting ‘Color’, I was able to add new blank color items to my style.
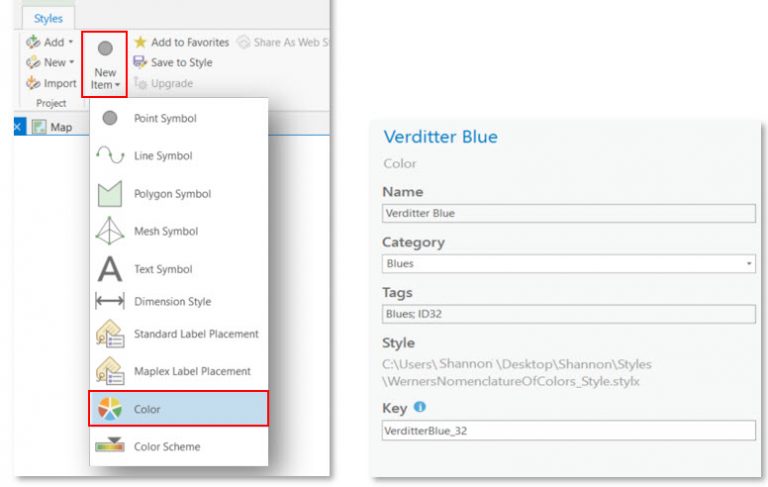
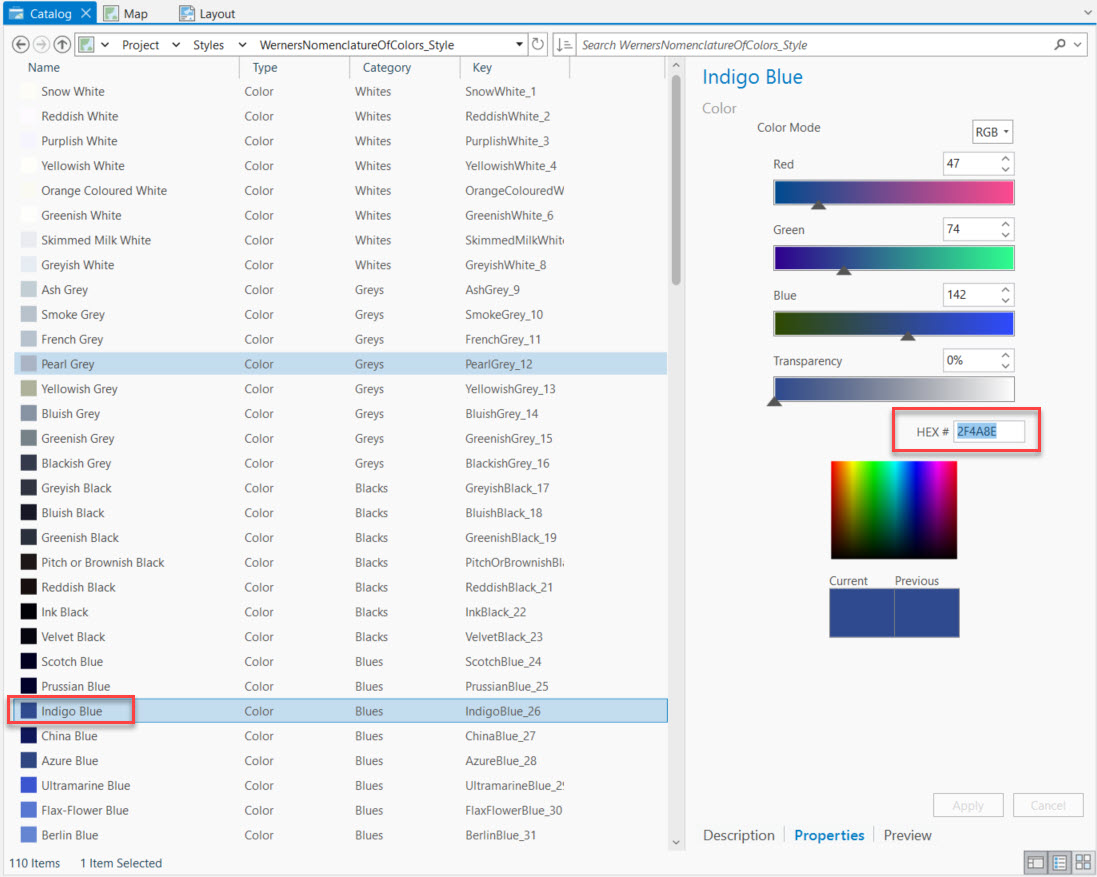
In the catalog view, I set the details for each color item. I named each color after it’s listed name in the book and gave it tags based on Werner/Syme’s assigned numerical ID. The book categorizes the colors into groups, such as ‘blues’, ‘greens’, ‘purples’, so I used these as the category for each color item.
The Eyedropper Tool:
After applying these changes, I then clicked on the ‘properties’ tab at the bottom of the pane to bring up the color properties for the item. To find the Hex # for each color, I needed to use the ArcGIS Pro Eyedropper tool.
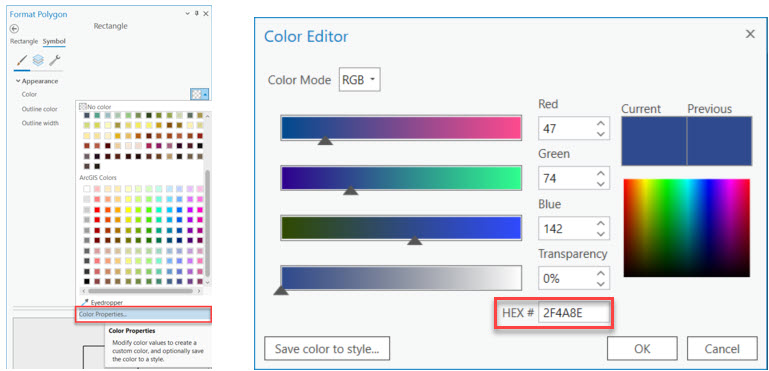
Switching back into my map view, I created a polygon map graphic that I could use to assign the colors. By right-clicking on the polygon graphic and choosing ‘properties’ I opened the ‘format polygon pane’ and then clicked on ‘symbol’, to see all of my color and appearance settings.
I clicked on the drop down next to the ‘color’ block and selected the eyedropper tool from the bottom.
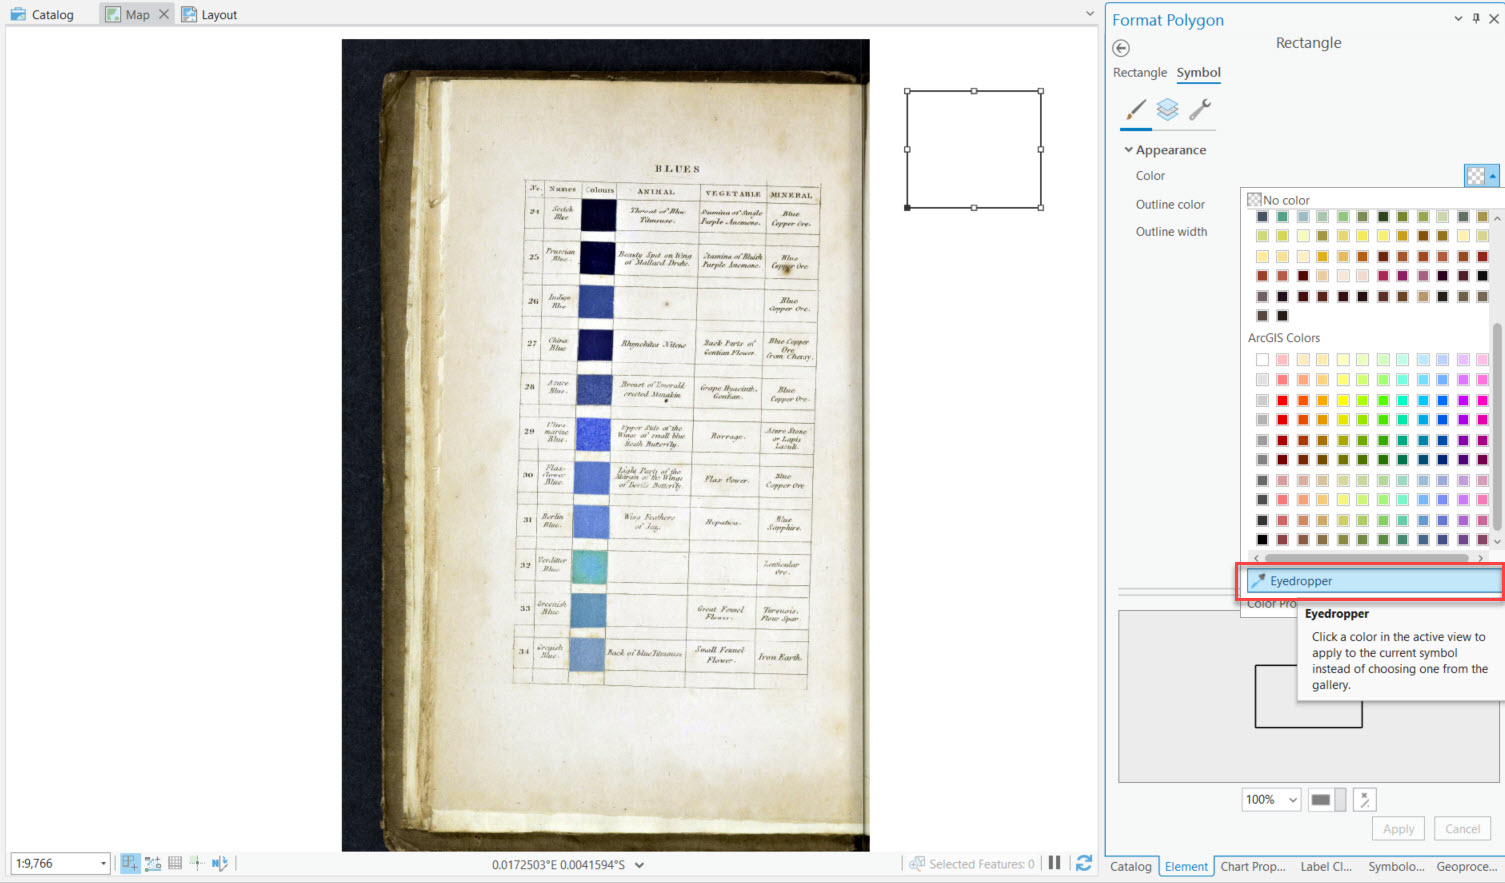
When the eyedropper tool is engaged, it has a preview magnifier on the mouse icon. This allowed me to see the color I was selecting. I hovered my mouse over the raster images from the book, and then clicked the color I wanted to capture its values.
The hex # value is populated in the color editor window, which I could open by selecting the color swatch in the format polygon pane and choosing ‘color properties’ from the drop-down menu.
Applying Hex #:
From here, there were two options:
1) Copy/Paste the hex # into the properties of the style item in catalog view
2) Click ‘Save color to style’ to open the ‘save color as’ window. (Here you can specify all the descriptive information you need and choose the style you wish to save the color to) This creates a new color class item in the style.
For this workflow, since I had decided to preliminarily build my styles in catalog view for easier iterating of categories/ tags, I decided to use the first option.
I copied the hex # before returning to the catalog view.
Once here, I clicked on the appropriate color style item (ex: Indigo Blue) and, in the properties tab, I pasted the hex value to apply it.
I continued through these steps until I had applied the hex # values for each of the book’s colors.
The Style:
The finished style includes all 110 colors from the book, along with the categories, tags, and descriptions.
I have uploaded the style to Esri’s online ArcGIS Pro Styles Gallery.
You can also find the style dirctly here: Wener’s Nomenclature of Color Style

Please feel free to download it and use it for any of your naturalist (or other) mapping needs!
Happy Styling!

Article Discussion: