Occasionally I see a request to automatically add and maintain a point’s coordinates as attribute values either when creating features or moving existing features. I wanted to share how this can be done using ArcGIS Pro and attribute rules.
Requirements:
- ArcGIS Pro* Standard or Advanced
*Support for updating z-values (using the Move tool) was added in ArcGIS Pro 2.8. If you haven’t updated yet, the steps described below should work to populate x,y,z attribute values when creating features and populate x,y attribute values when moving features.
Here I have a point feature class that is about as simple as can be, other than the fact that it is z-enabled so that we can show that the process works in 3D too! The Fields view shows that each coordinate field has a data type of double.

In order to populate and maintain the PointX, PointY, and PointZ fields, we’ll set up attribute rules.
Before you go any further, make sure to read and understand this note thoroughly:

If you’re interested, here are the links from that image:
Client and geodatabase compatibility
Compatibility of Arcade in script expressions
That’s an important note. Don’t play with this functionality on production data that you might be using in ArcMap.
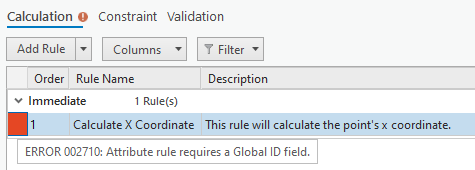
OK, now that we have that important disclaimer out of the way, let’s add Global IDs to our data because we know that attribute rules require them. (If you skip this part and try setting up your rules without Global IDs on your data, that’s OK, you’ll get a helpful error).
Right-click your point feature class where you want to maintain coordinate fields > Manage > Add Global IDs.
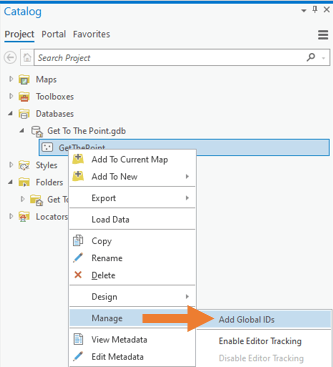
Easy!
Now right-click your point feature class > Design > Attribute Rules.
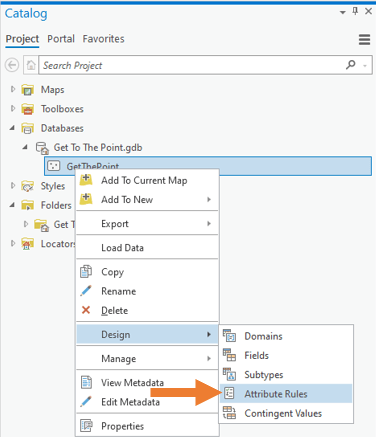
This opens the Attribute Rules view where we will add our rules.
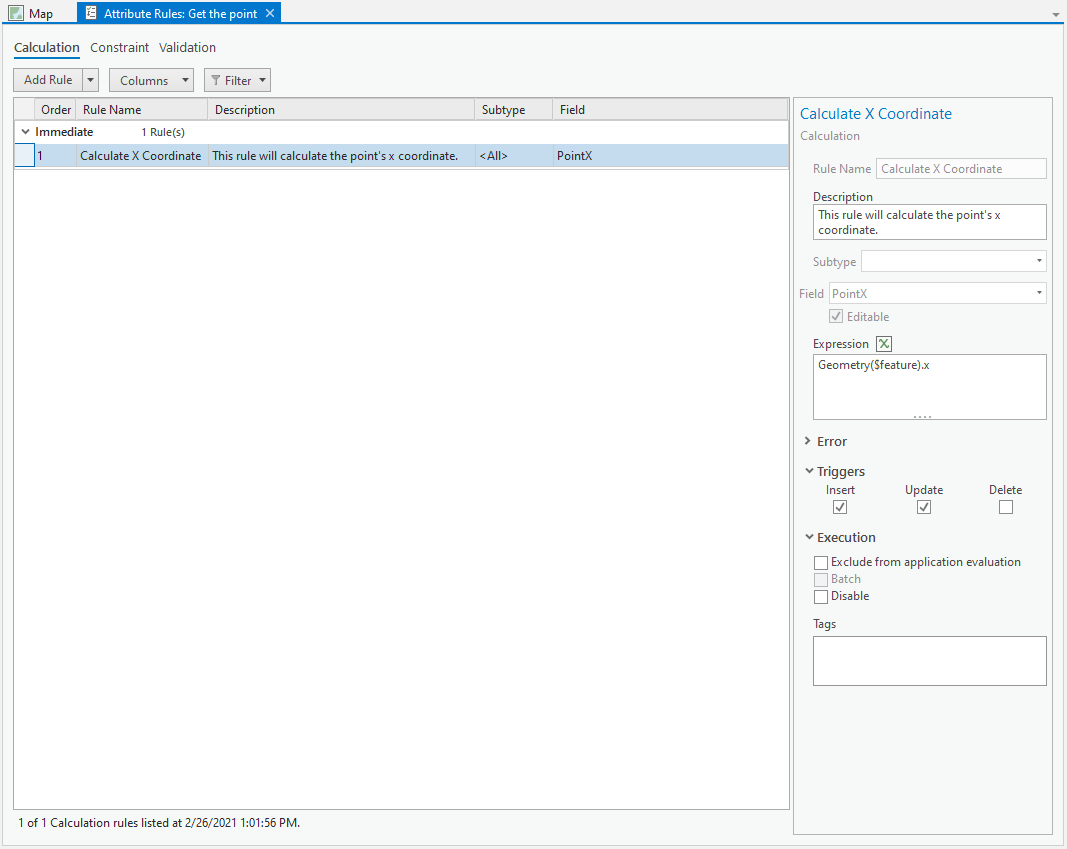
The view defaults to the Calculation tab and since we will be adding calculation rules, click Add Rule.
Use the following to populate the parameters in the details pane:
Rule Name: Calculate X Coordinate
Description: This rule will calculate the point’s x coordinate.
Field: PointX
Expression: Geometry($feature).x
Triggers: Insert and Update
Save the rule using the Save button on the ribbon. Here is what mine looks like:
Let’s see how we’re doing. Add a point to your map.
Boom! It’s like magic. My PointX field is calculated for me.
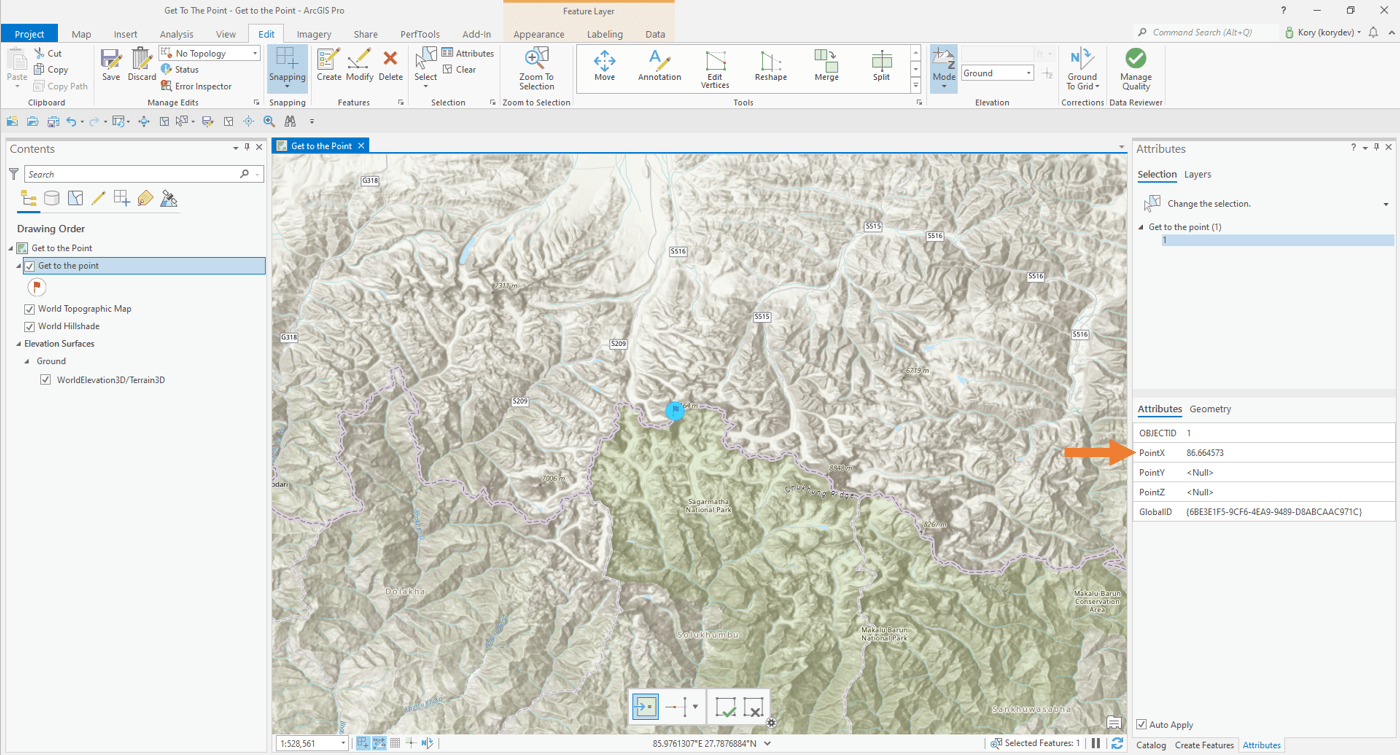
Switch back over to the Attribute Rules view and create two more rules – one to calculate the y coordinate and the other to calculate the z coordinate if your data has z-values. Use the rule that we created above as your template and be sure to update the Expression for each rule as follows:
Calculate Y Coordinate Expression: Geometry($feature).y
Calculate Z Coordinate Expression: Geometry($feature).z
Note that for this to work for z-values, you’ll need an elevation surface added to the map and elevation Mode turned on.

Read about how to add an elevation source to the ground surface and how to specify an elevation for 3D features.
Let’s save our rules and take them for a spin.
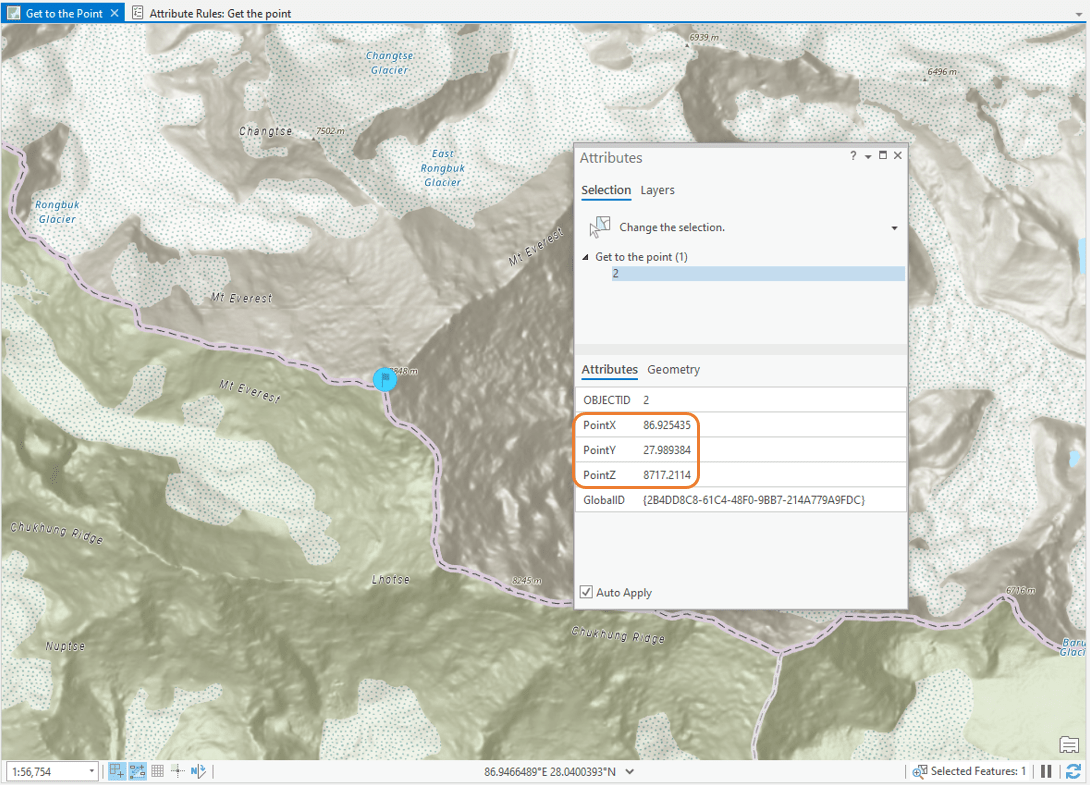
I add a point on Mt. Everest and see the following:
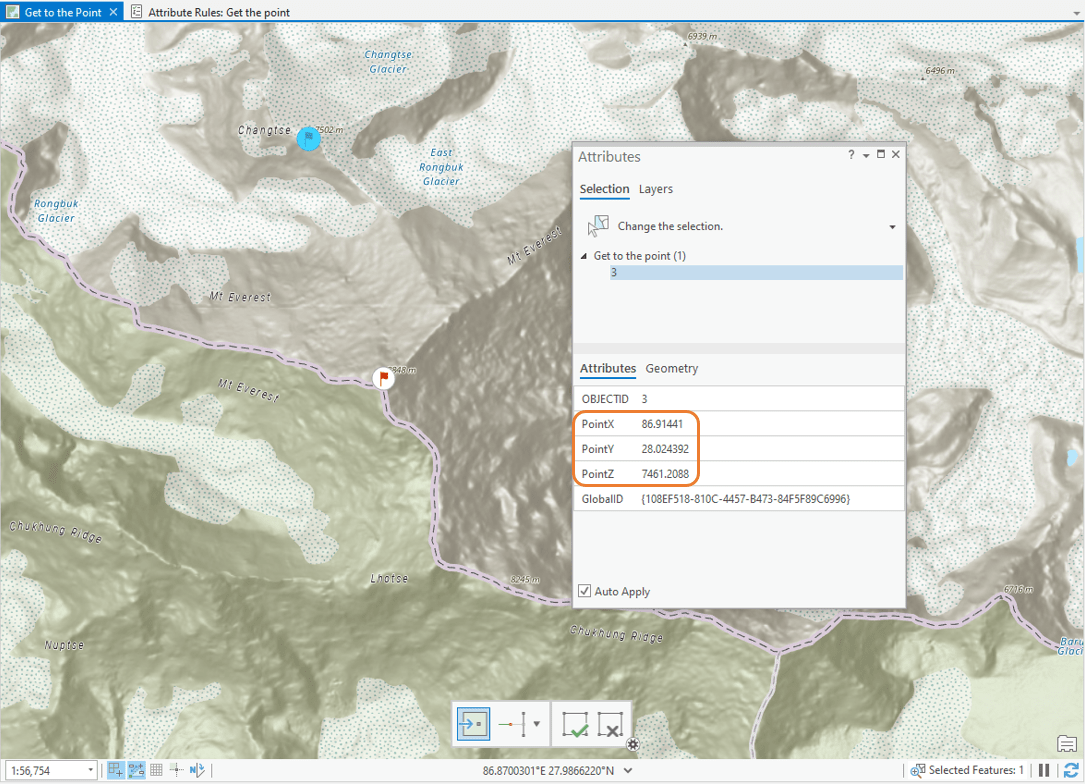
And then Changtse:
And then I keep clicking on every other peak I can see because it’s so cool to see the coordinates just show up like magic!
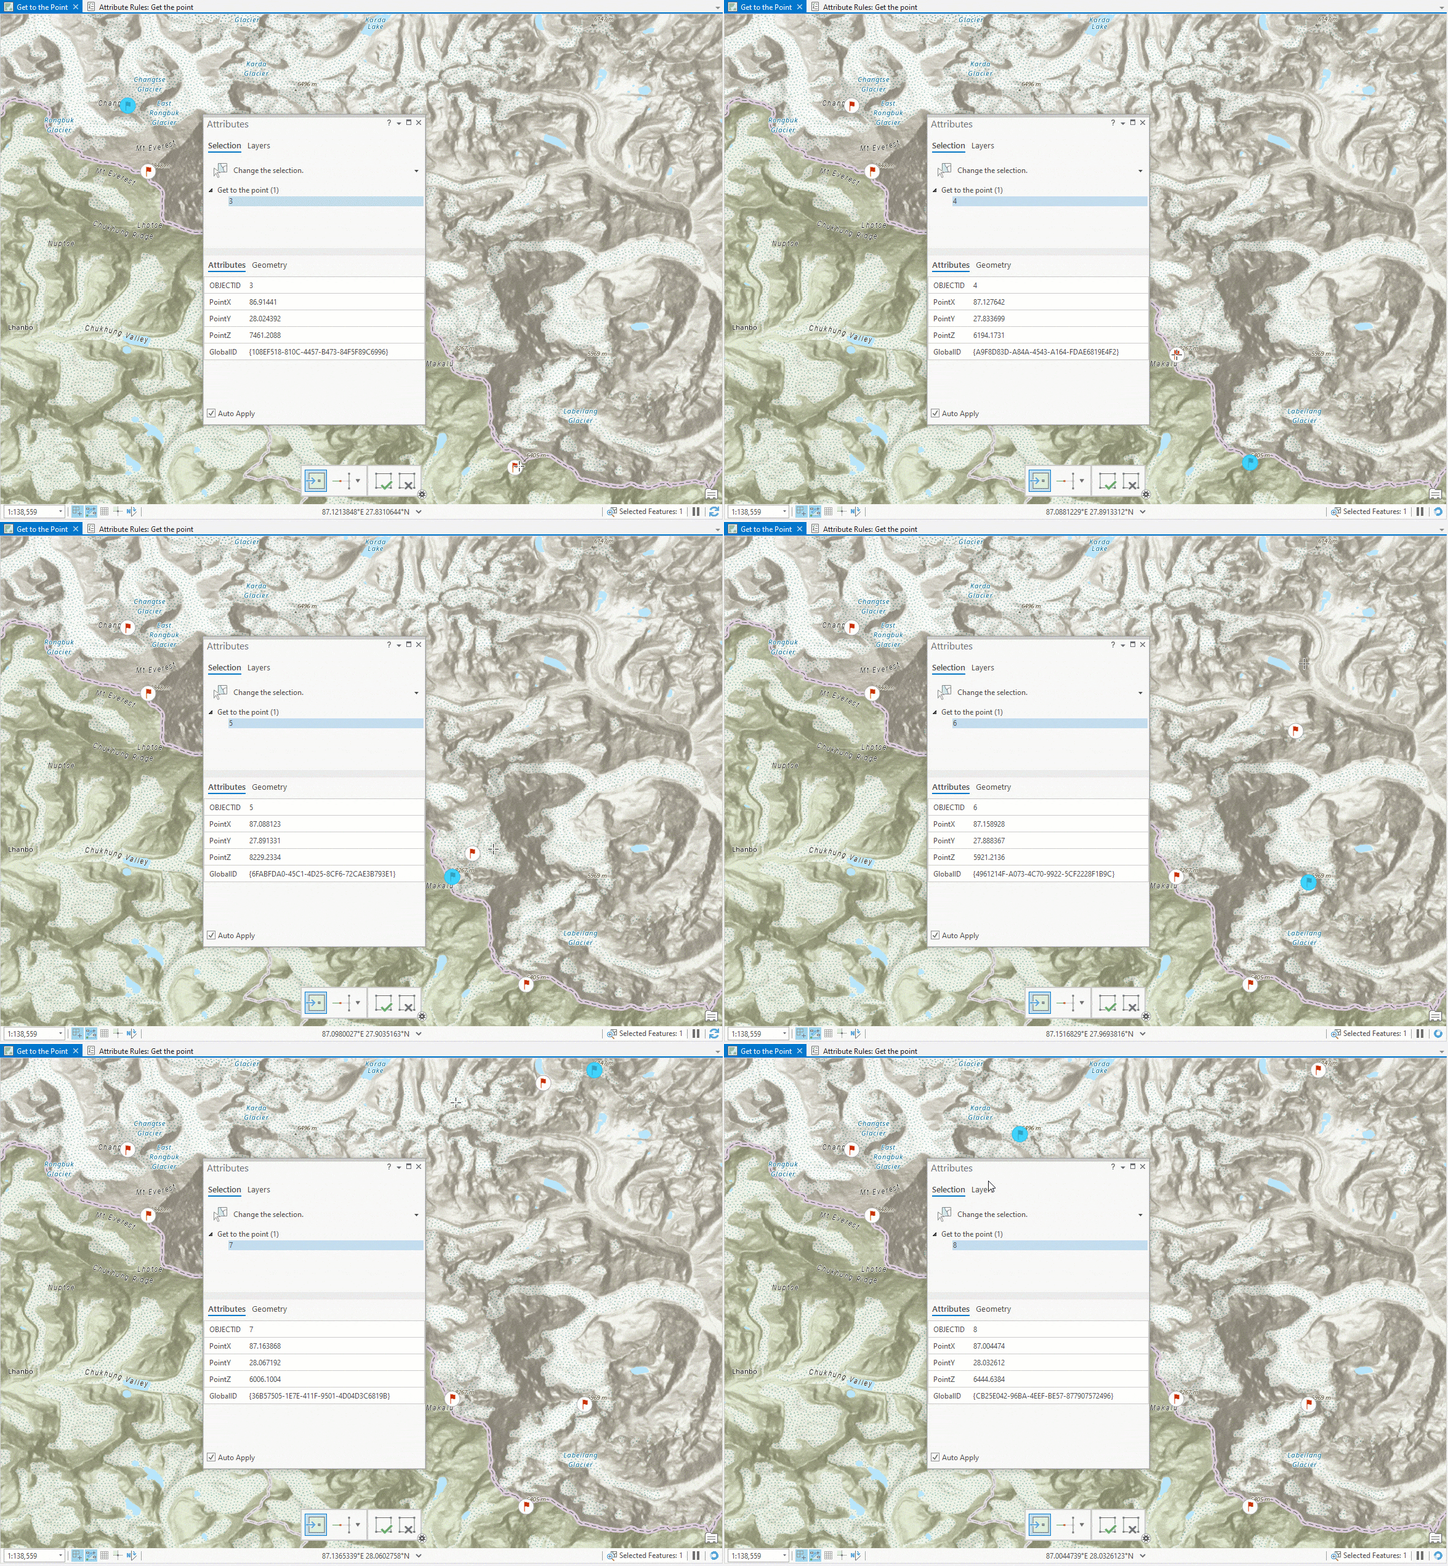
So that is the point creation workflow. But we also said that we wanted our coordinates to stay up to date when we are moving points. Got it – remember when we set the triggers for our rules to be Insert and Update? Triggering on update will keep our coordinate fields updated when we move points. Let’s take the last feature that I giddily added (OBJECTID 8) and slide it right down out of the mountains onto the plains.
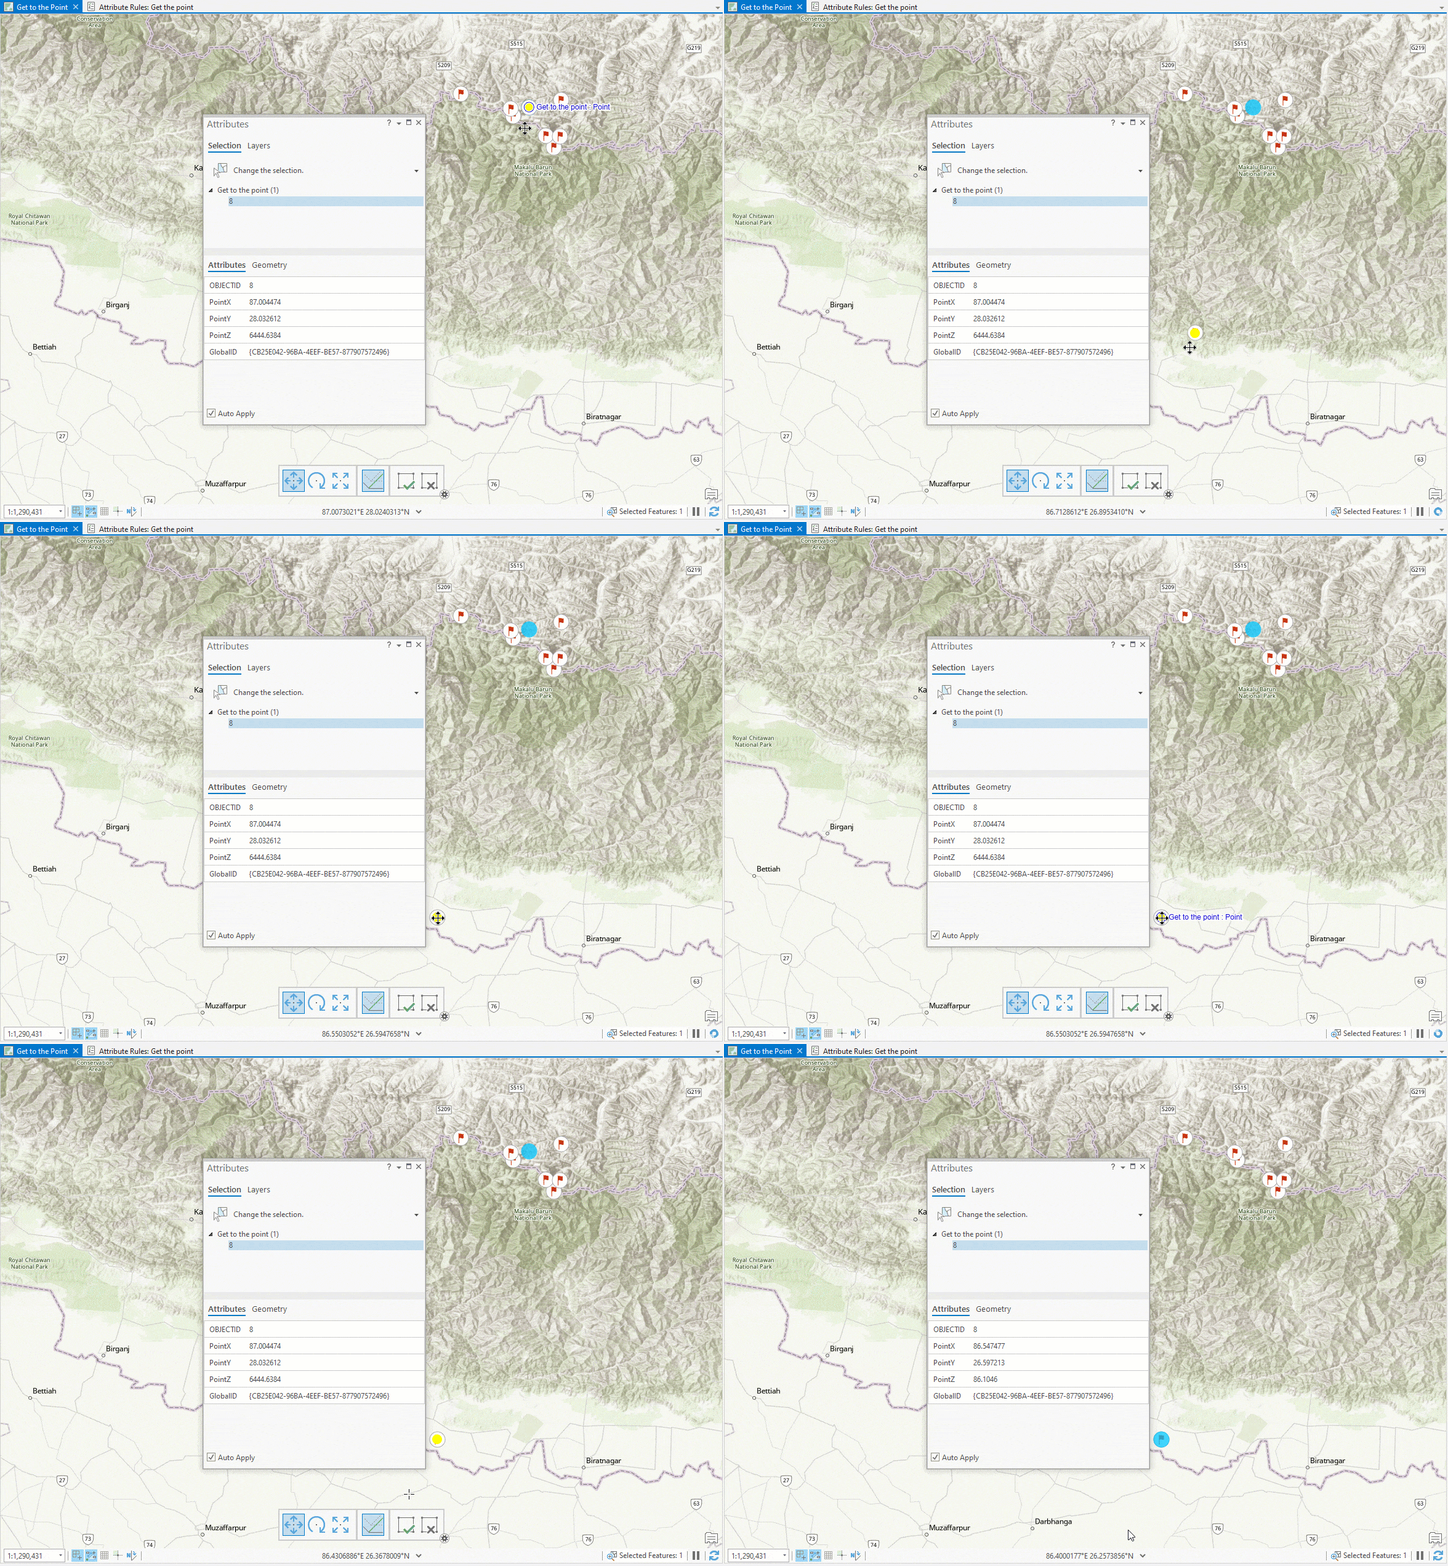
Super cool!
One final note that I want to add about efficiency. As we created three separate rules for x, y, and z that do exactly the same thing, you may have been asking yourself, “Isn’t there a way to just do this with a single rule?” Great question, and if you are using ArcGIS Pro 2.7 or later, the answer is yes! Check out this wonderful little tutorial by Hussein Nasser about updating multiple fields with a single attribute rule. Based on that guidance, I put together a single rule that looks like this:
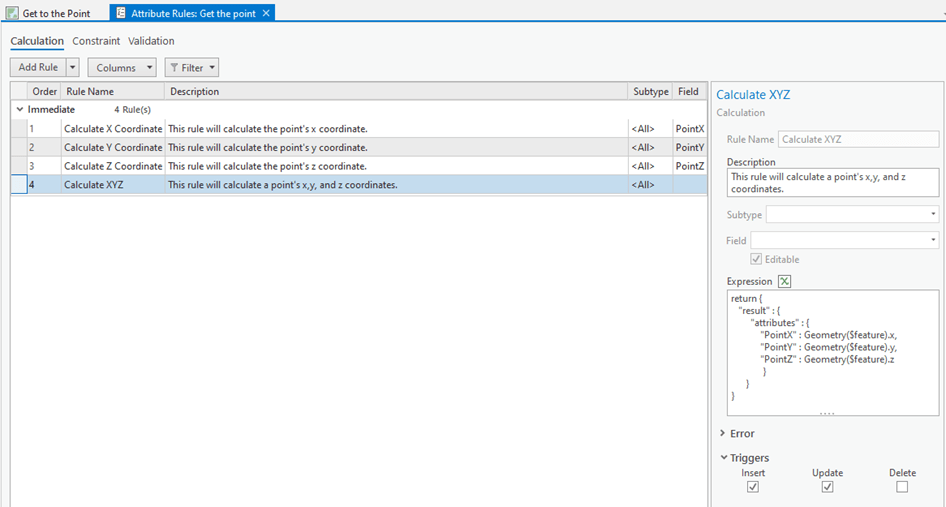
Here is the expression that you can adjust for your fields:
return {
“result” : {
“attributes” : {
“PointX” : Geometry($feature).x,
“PointY” : Geometry($feature).y,
“PointZ” : Geometry($feature).z
}
}
}
That’s it. I hope that sharing this helps you keep your data on point (OK, bad joke) or perhaps sparks your interest in exploring the much larger scope of everything that can be done with attribute rules!
Banner photo by Kalle Kortelainen on Unsplash


Article Discussion: