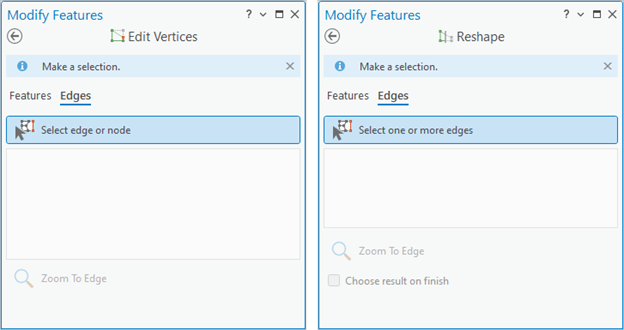
This blog highlights key topological editing improvements in ArcGIS Pro 3.4. These new features apply to both map and geodatabase topologies and allow you to choose how you visualize and interact with topology edges and nodes while editing in the map. As of ArcGIS Pro 3.4, tools that support topological editing include Align Edge, Edit Vertices, Move, and Reshape. When either map or geodatabase topology is turned on, the Edges tab appears on these tools, allowing you to make feature and topological edits.
You can visit Topology in ArcGIS and Create a topology for in-depth general information about topology and how to set it up in the geodatabase.
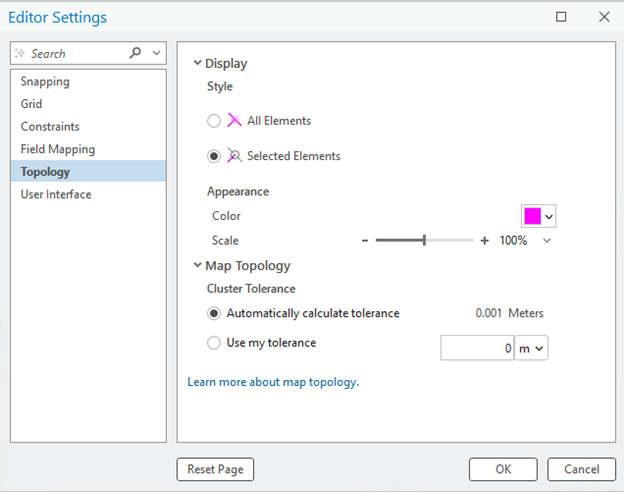
Topology options on the Editor Settings dialog box
A new Topology tab that hosts existing and new topology settings was added on the Editor Settings dialog box. This dialog box can be accessed from the Settings button on the Edit ribbon tab or from the Topology combo box drop-down menu. The Display settings persist across projects once they’re set but defaults can be restored using the Reset Page button. Map Topology settings have their own dialog box in earlier ArcGIS Pro releases, but at 3.4, they are hosted here.
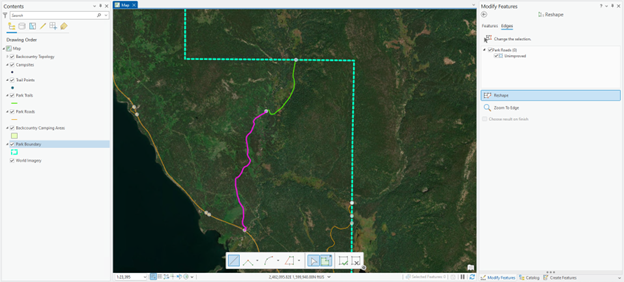
Only highlight topology nodes and edges when hovered over or selected
To get this behavior, set the Display Style option to Selected Elements. When you open a topological editing tool such as Reshape Edge, the topology graph builds but its highlighting color only displays when you hover over or select an edge or node; otherwise, all other features maintain their layer symbology. In the image below, a Park Roads edge is selected, but you can still distinguish Park Trails and Park Boundary features in the map by their symbology.
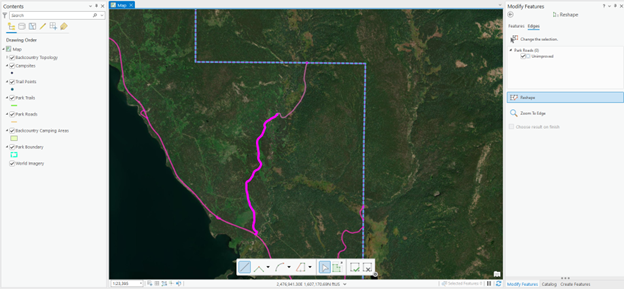
In contrast, the following image shows the same area in the map In ArcGIS Pro 3.3 when a topological editing tool such as Reshape Edge is active; all topological nodes and edges are highlighted with a magenta color. The selected edge is shown with a thicker symbol. Note that you can still maintain this current offering if the Display Style is set to All Elements.
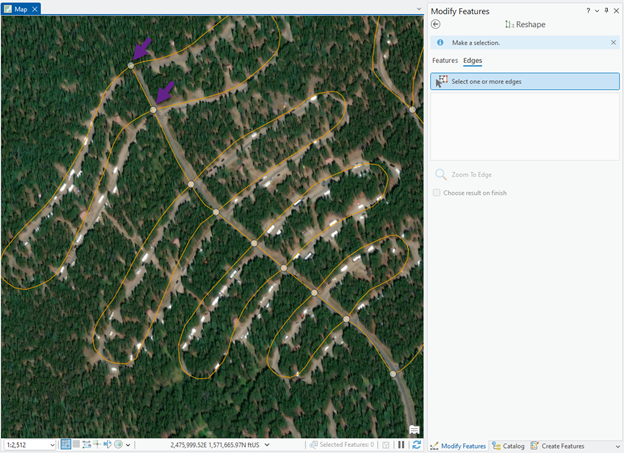
Nodes are now displayed prominently
When a topological editing tool is active, nodes can now be more easily identified on the map. This feature is available when the Selected Elements option is selected. A node indicates where two or more edges intersect, and this information can be useful when performing data quality and maintenance tasks.
Change the color and thickness of the overlay topology graph
You are no longer restricted to using the built-in magenta color option of the topology graph. You can now select a different color using the ArcGIS Colors palette, which also expands this capability to advanced hue options and transparency setting.
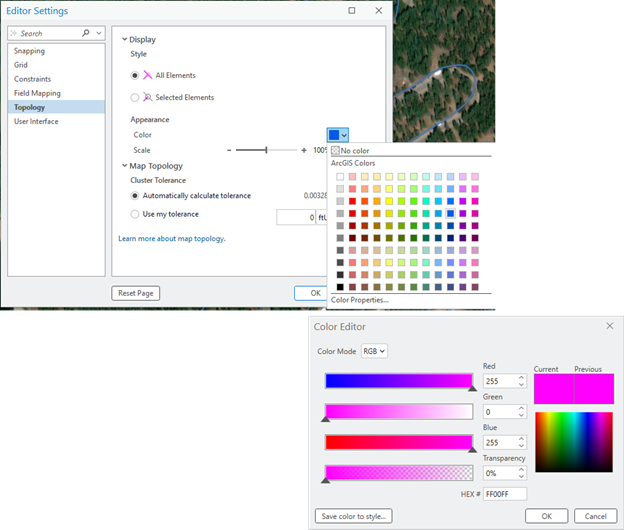
Additionally, you can change the thickness of the topology graph highlighting by changing the Scale from a range of 50% – 200%. Note that Color and Scale settings apply to both All Elements and Selected Elements display styles.
Bonus enhancement: Control editability at layer node level in the Selection tree view
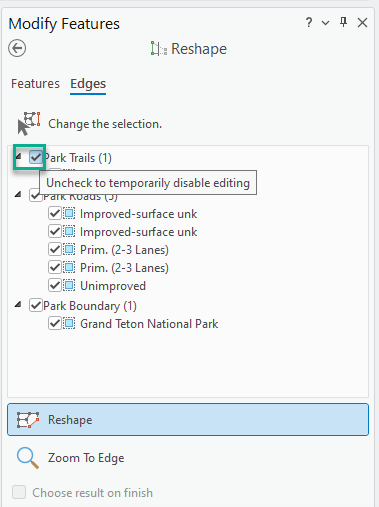
In versions earlier than ArcGIS Pro 3.4, you could uncheck the box next to an individual selected feature in the Selection tree view to temporarily disable editing on that feature. This meant that you needed to uncheck every feature and/or control layer editability on the List by Editing tab in the Contents pane to prevent certain layers from being edited using any of the topological editing tools. This is the recommended method to prevent layers from participating in map topology.
You can now disable a layer to make all its selected features not editable by unchecking a box next to the layer node in the Selection tree view.
Conclusion
The ArcGIS Pro Editing team will continue to collect your feedback about topological editing to make the experience better. You are encouraged to use the comments section to add any other improvements you want to see. In conclusion, the new topology settings allow you to change display styles, color, and scale of the topology graph. The benefits of these enhancements include, but are not limited to, the following:
- Display the entire topology graph or selected edges and nodes.
- Nodes are enlarged when displayed on the map.
- Options to adjust Color and Scale of the topology graph.
- Remove layers from an edit operation in the topological editing tool’s Selection tree view.

The scale range only goes from 50%-200%. Isn’t it supposed to start at 0%?
@Amanda Petrucci Thanks for your feedback. The lowest value for Scale is 50% by design. Note that the Scale value determines the thickness of the topology graph symbology so choosing small values (<50%) could provide poor display of the graph.
Do you have any specific use case for Scale value <50%?