ArcGIS supports a large variety of 3D workflows enabling users to build a comprehensive GIS system of record. By incorporating both 2D and 3D data, you can bring together geospatial information to create, visualize, and analyze complex scenes, as well as establish a foundation for digital twins.
Organizations in the public and private sector all choose 3D workflows to support different efforts. These efforts can include asset monitoring, building and city planning, and mission planning to perform risk analysis. 3D visualization often emerges as the best solution to support users who need to understand and interpret large volumes of complex location data with greater speed and accuracy.
The demand for city or country wide scale reality meshes capturing the “skin of the earth type” as 3D data is increasing. 3D reality meshes hereby offer an intuitive representation of the real world that is easily understandable by non-geodata specialists, for example top-level decision makers. You can create reality mesh data using applications like ArcGIS Reality Studio, ArcGIS Reality for ArcGIS Pro extension, ArcGIS Drone2Map, Site Scan for ArcGIS or other software. To view massive 3D meshes in a desktop, mobile or web applications, open 3D data standards such as 3D Scene Layers (i3s) and 3D Tiles were developed. Many users are working with a variety of open 3D data standards, to build their 3D System of Records, it is critical to ensure interoperability of both market-leading data formats within ArcGIS.
With the latest update in ArcGIS Pro 3.2, you can incorporate 3D tiles layers from 3D tiles datasets version 1.x. Your data can be both local sources and public web services. This expands the type of data sources you can bring to ArcGIS Pro and enables the use of 3D tiles in common 3D workflows. Here are three examples of what you can now do with 3D tiles layers using ArcGIS Pro 3.2:
Visualize 3D tiles layer together with other 2D or 3D layers
A typical 3D workflow is the creation of digital twins. To modify your digital twin to the task you want to accomplish it is essential to combine different layers in one scene.
View layers with different spatial reference together
Let us say you want to combine your 3D tiles layer representing a mesh with your utility data like the water pipes of a city. When you add multiple layers to a scene you will need to make sure that data will align properly. ArcGIS Pro allows you to draw data with different spatial references in the same scene.
The 3D Tiles specification defines data in geographic coordinate system (WGS 1984) and the vertical coordinate system as ellipsoidal coordinate system (EPSG 4978) WGS 1984. Most authoritative data in GIS are using the official projected coordinate system of the country and gravity related heights if the vertical coordinate system is not defined. So, what does this mean for you and your data?
To properly draw your layers, you need to set the vertical coordinate system in the scene’s properties. For example, in a global scene you could choose EGM96 or EGM2008. Both are gravity related vertical coordinate systems and will align with layers that have no vertical coordinate system defined. You can install supplementary coordinate system files if you are missing transformations to the spatial reference of the layer in the scene.
By setting the vertical coordinate system in the scene the 3D tiles layer is projected into a gravity related vertical coordinate system and you can draw 3D tiles together with any other 3D layers, which in turn would allow you to measure the correct x, y, z position with the anticipated height above sea level in the scene.
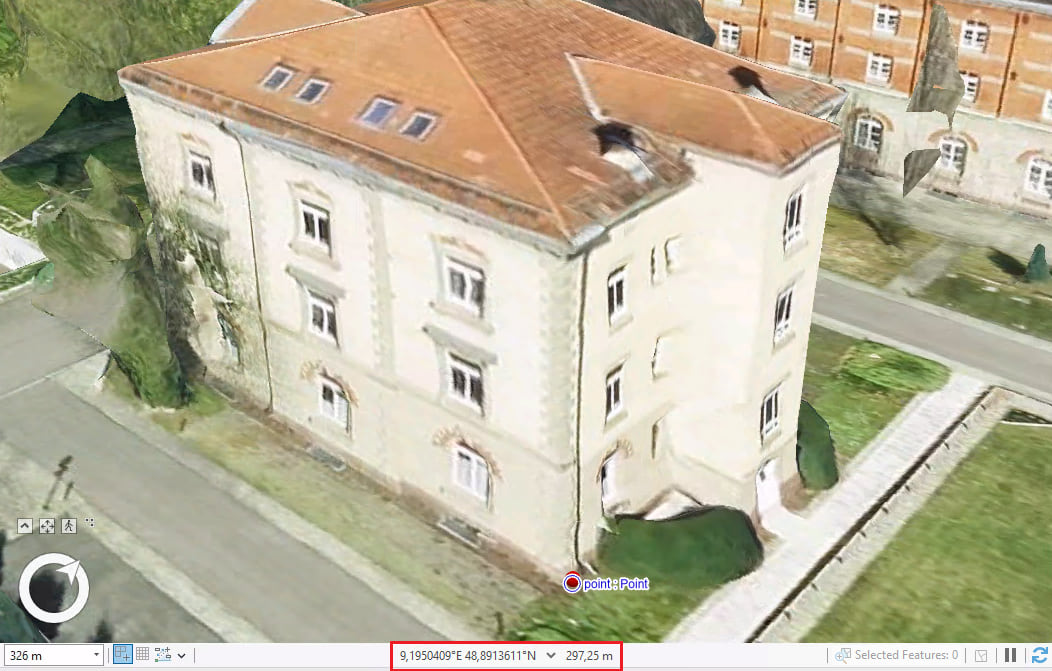
For example, the image below shows a scene with EGM2008 as vertical coordinate system. The 3D point feature in red is drawing at a height of 297.5 m (about 976.05 ft).
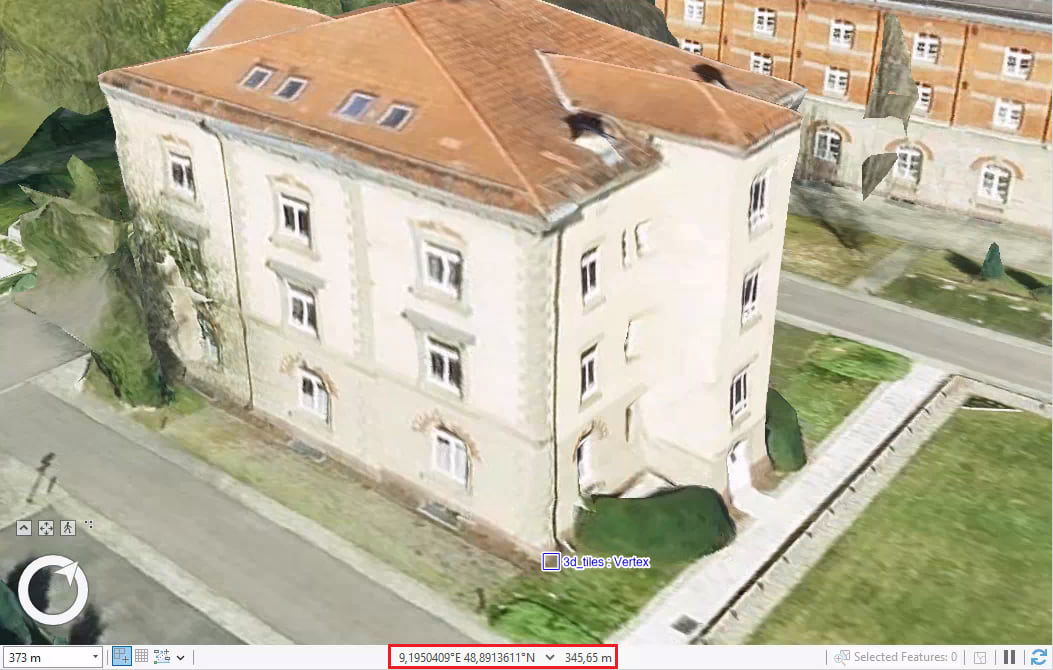
The same scene with an ellipsoidal vertical coordinate system WGS 1984 is no longer showing the point feature together with the mesh because the absolute position of the point remains 297.25 m (about 975.23 ft), but the scene is now draws at the ellipsoidal height of 345.65 m (about 1134.02 ft).
Spatial references are a fundamental concept in GIS and ArcGIS Pro enables you to bring data of different spatial references together. You can learn more about coordinate systems, map projections, and transformations in the ArcGIS Pro or learn how to choose the right projection.
Drape 2D layers on top of 3D mesh layers
Many data types in GIS are captured and maintained in 2D and used as layers in maps as well as in scenes. For example, a streets layer of a city can be used in many different maps and maintained as line feature layer without z coordinates. You can drape this layer by defining the elevation mode as ground so that the streets are drawn on top of the ground surface.
If an integrated mesh scene layer or a 3D tiles layer is present it replaces the ground and the 2D layers will be draped on the mesh.
Sometimes it can also be helpful to drape layers that usually are underneath the ground, like the underground railway, to see what infrastructure is crossed by the railroad system.
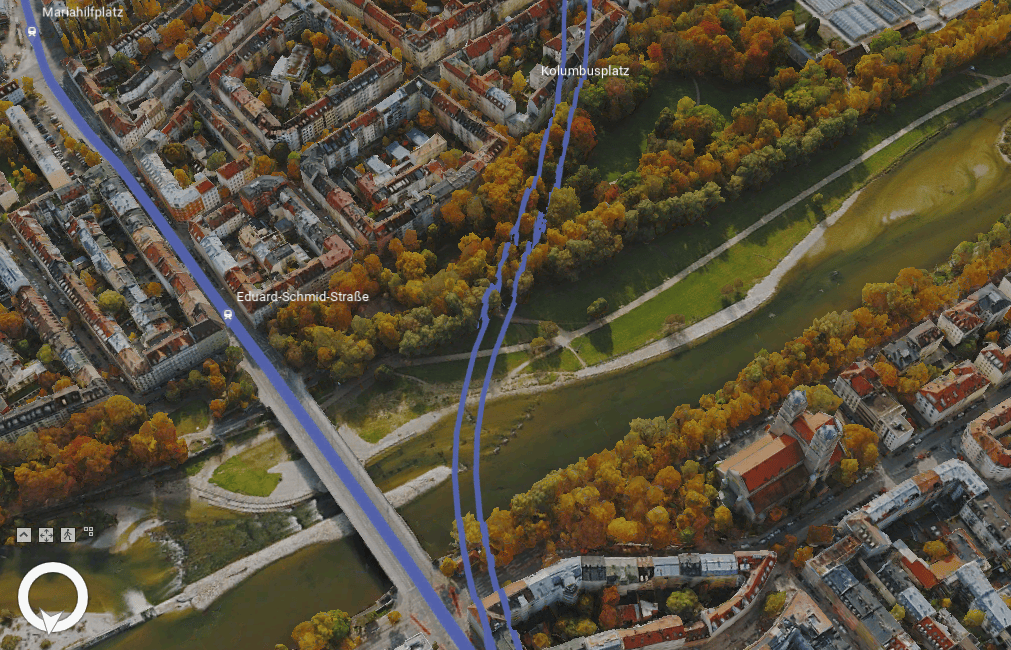
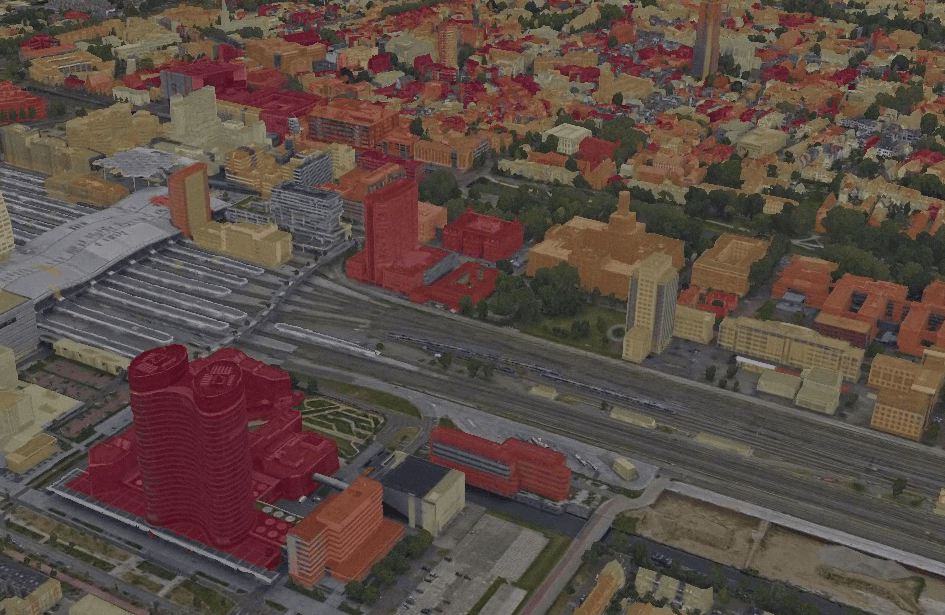
Draping of 2D layers not only enables you to define the 3D position of 2D layers, but it also enables you to enrich the mesh with information you already have. For example, if you have information about flooding events in a city you can drape this onto the mesh layer and see which building would be impacted and how severe it would be.
Edit features based on 3D tiles layers
The reality mesh captured in a 3D tiles layer, or an integrated mesh scene layer can be used as basis for editing other layers. For example, if you need to create a layer with all viewpoints in a city because you want to capture important locations for security and public safety you can create a point feature layer and edit the points by snapping to the mesh to have an accurate 3D position. Keep in mind when working with 3D tiles that the vertical coordinate system is in ellipsoidal heights, and you may need to apply a transformation to your scene so you can work in your official coordinate system of your country or assure you are using gravity related heights.
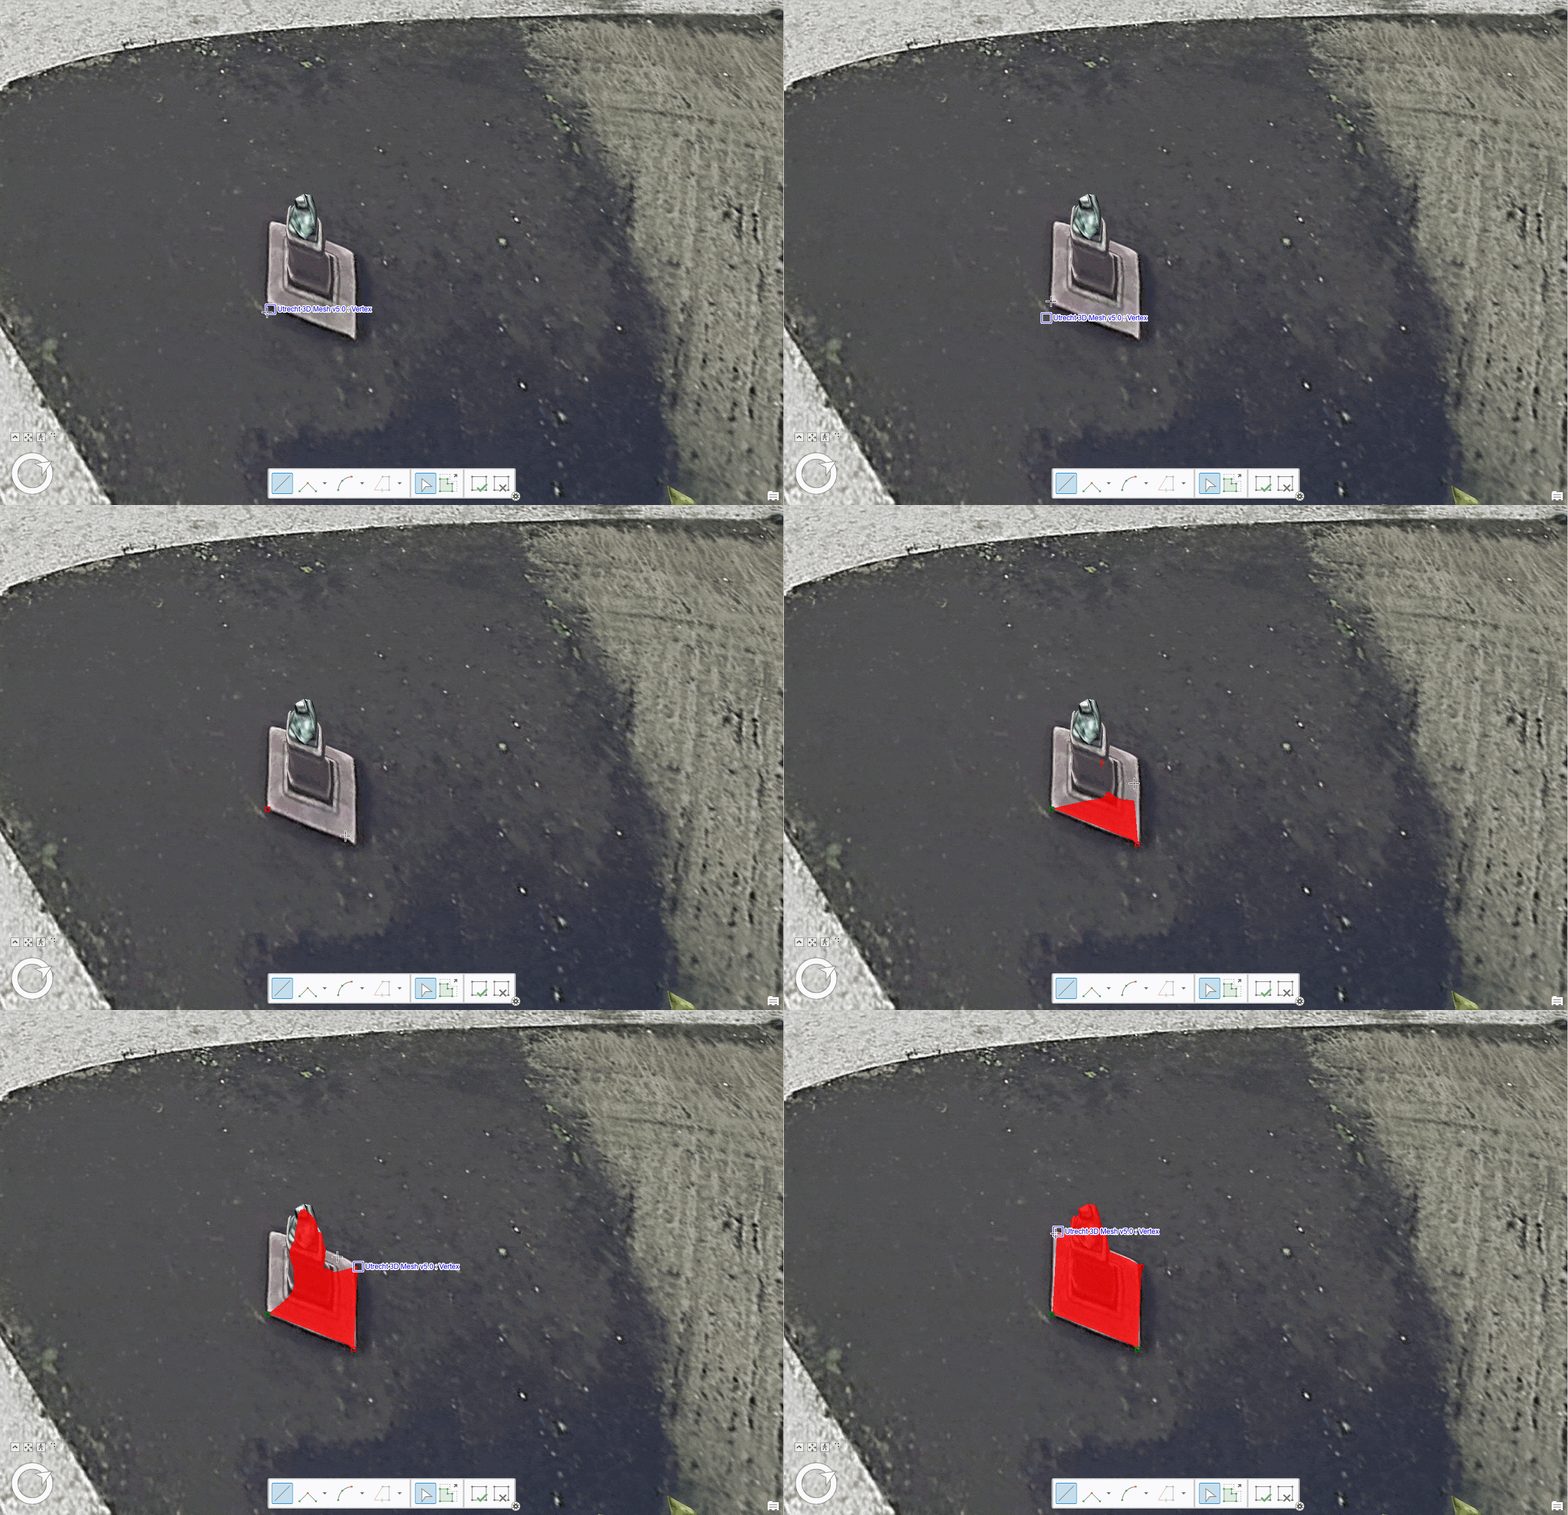
Interactively analyze scenes with 3D tiles layers
Besides bringing many different geospatial information together by combining different 3D layers in a scene you can also accomplish different 3D analyze workflows.
Measure
You can use the measurement tool to measure the height of a building, the distance between two objects within the mesh and much more. Also, because you can define the coordinate system of the scene, the correct spatial references allow you to measure and interpret values accurately in your frame of reference.
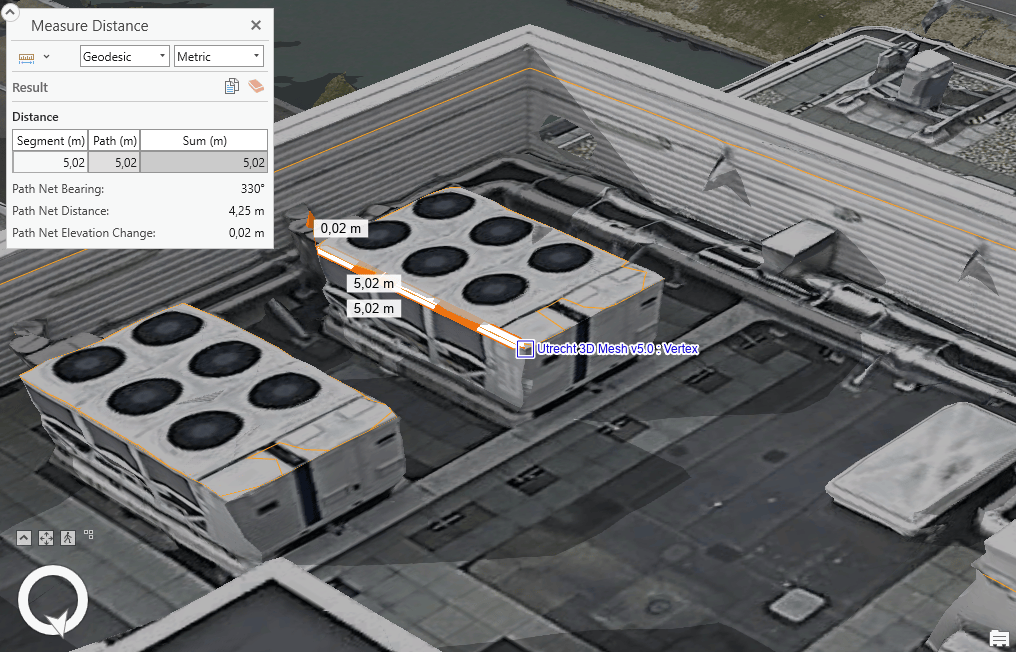
Exploratory analysis tools
Exploratory analysis workflows in ArcGIS Pro allow you to investigate your data interactively. Tools such as viewshed and view dome give you the ability to perform visibility analysis and change the parameters in real time.
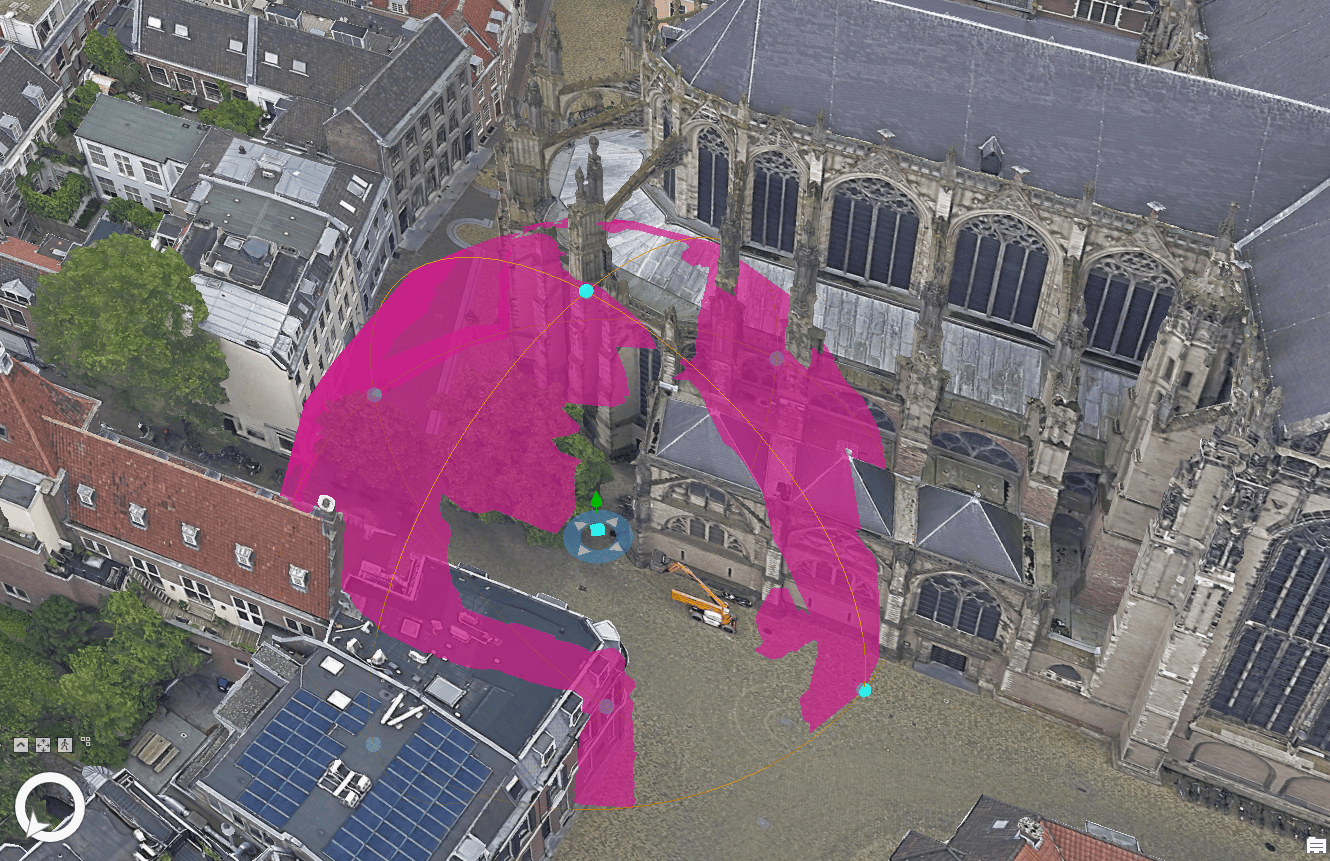
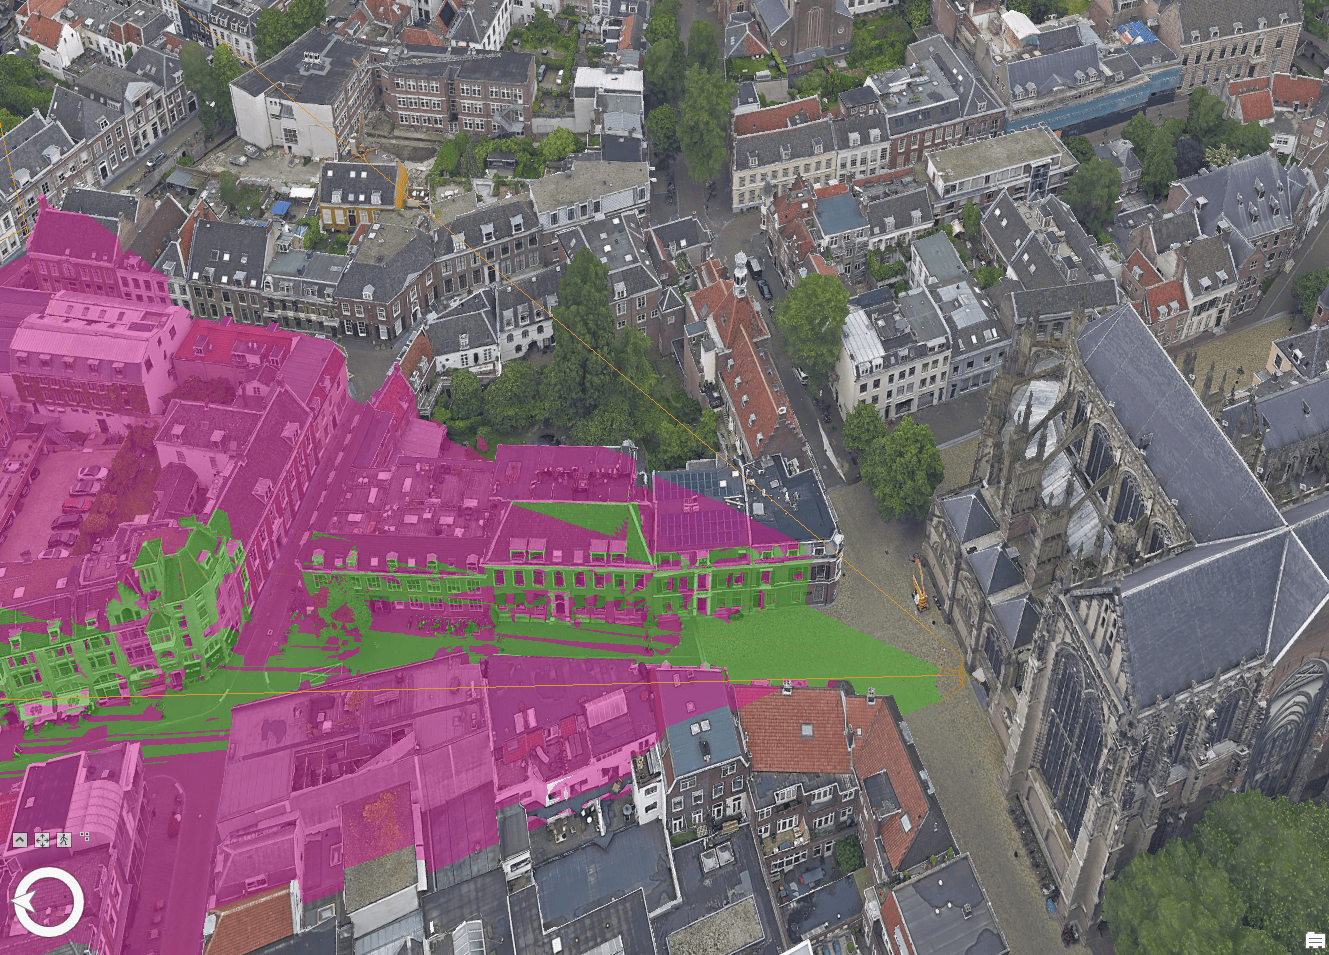
Exploratory analysis workflows are not limited to visibility analysis, you can also dynamically peek inside or slice through the reality mesh and 3D objects. For example, you can explore the spatial relationships between earth surface and subsurface infrastructure dynamically.
Conclusion
With the addition of 3D tiles to the large portfolio of 3D layers supported in ArcGIS Pro you have more options to complete 3D workflows. ArcGIS Pro is the first ArcGIS client to visualize 3D tiles datasets. We will continue expanding the support of 3D tiles in ArcGIS including sharing as web layer and hosting 3D tiles layer in ArcGIS Online and ArcGIS Enterprise as well as consuming in other ArcGIS clients like Scene Viewer and ArcGIS Earth.

Article Discussion: