Create a web and mobile app in ArcGIS Online
Sometimes it’s necessary to have apps targeted for different purposes and audiences. You might need a focused web app so your audience can interact with your maps and data on their computers by simply opening a browser. And at the same time, you might need a mobile app with the same functionality for those who need the same access outside the office. With a native mobile app, you can enable mobile workers to view your data without internet connectivity, and use device capabilities (Bluetooth, camera, etc.) These apps can be published to app stores or your organizations’ mobile device management (MDM) software, and once installed they provide a single tap experience to a preferred mobile experience.
However, for some GIS professionals, creating apps to share data is not always as fun as actually working with the data and analyzing it. Especially if coding or duplication of work is involved.
Esri’s new workflow in ArcGIS Online for easy app building has just solved all these problems. As a part of the App Builders suite, ArcGIS Instant Apps and ArcGIS AppStudio are no-code solutions that allow you to create a web app and a native app with one configuration. This blog will show you step-by-step how to knock out two birds (apps) with one stone (template).
Bird #1: Start with a purpose-driven web app template
Within five minutes, you can turn your map into a web app that addresses your audience’s needs. The Instant Apps home page can be accessed anywhere that Instant Apps can be found via the Create App menu, including the Content page, Map Viewer, Scene Viewer, the app launcher, and the details pages of compatible items.
We’ll start from Map Viewer. Click “create app” in the left panel, and then “Instant Apps”

Give your web app a title and choose where to save it.

Choose a template to provide a focused experience for people using your map.

The Attachment Viewer, Nearby, Zone Lookup, and Sidebar templates in ArcGIS Instant Apps are all supported in ArcGIS AppStudio.
Choose the Sidebar template to have full control of which tools to include, thus providing a custom and focused mapping app experience for your users. With the Sidebar template you can choose editing tools to enable viewers to update and add features, add filters to provide more information about the data, and include bookmarks and navigation tools to allow viewers to explore the map
Examples:
-
-
- Map population data with supplementary text for further explanation
- Allow data reviewers and inspectors to investigate and update records as needed with editing tools
- Create an app that presents public services with the ability for viewers to filter for the types of services they need
-
Choose the Attachment Viewer template for users to page through a layer’s features and review image, video, and PDF attachments with the option to edit attribute data.
Examples:
-
-
- Review photos collected during emergency response damage inspections
- Display the results of field data collection and images
- Present a map of land parcel along with associated documents
-
Choose the Zone Lookup template to allow viewers to search for locations within a zone or region. Organize results returned in the search by layer option.
Examples:
-
-
- Facilitate finding hurricane evacuation zones by address in an emergency
- Identify school districts based on address or location
- Provide city planning information by zone or area
-
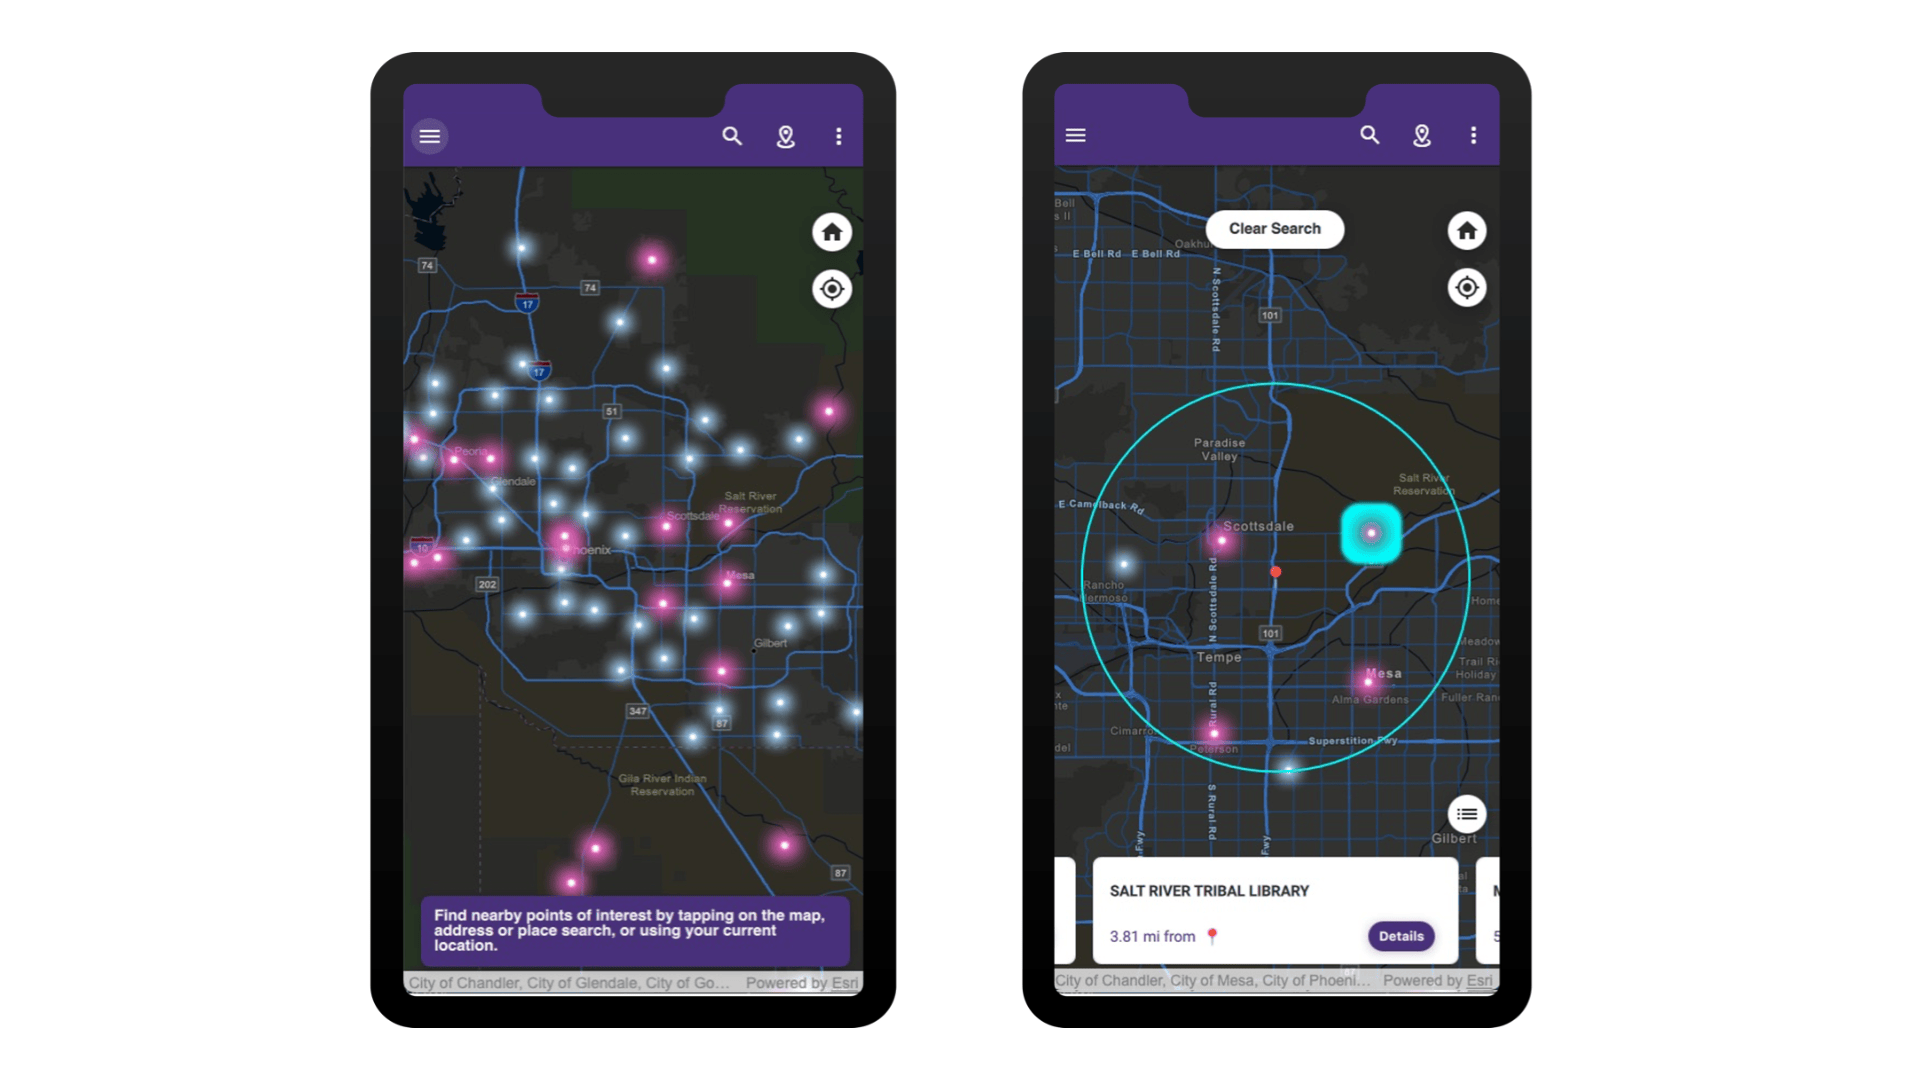
Choose the Nearby template to guide viewers to points of interest based on a location search and provide directions. Set a range for the distance slider that will be used to define the search buffer.
Examples:
-
-
- Create a store locator app for customers to find and navigate to the closest stores
- Quickly look up facilities or assets within a specified distance of a searched address
- Provide viewers with directions and information for election polling locations
-
We selected the Nearby template for this workflow:

Bird #2: Easily create a native app

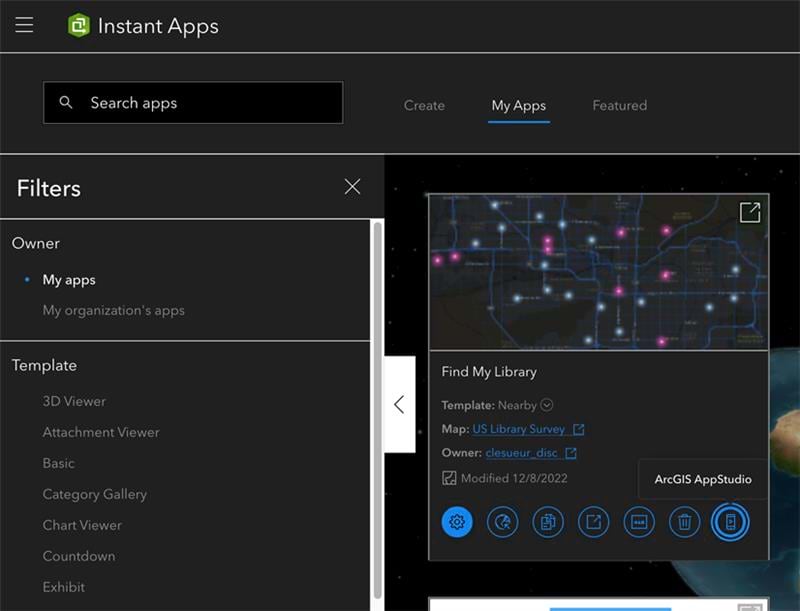
After you create your web app in ArcGIS Instant Apps, locate it on the ‘My Apps’ tab and select ‘ArcGIS AppStudio.

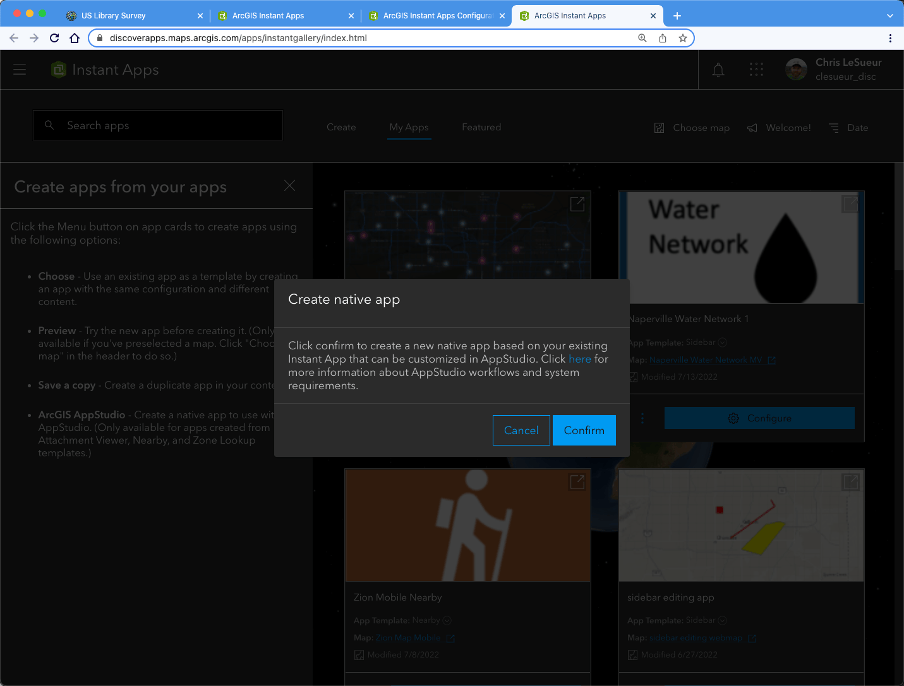
Click confirm to create the mobile app.

You can then launch the app and it will take you to arcgis.com where you can edit the app name, description, summary, etc.
Once the AppStudio native app is created, you can download and run the app on AppStudio desktop or the AppStudio Player. If you already have AppStudio desktop or Player installed, once you refresh, the new app you created will appear.

Now there are two scenarios to be mindful of
1) Instant app is public – In this case the created native app will run without any changes in the AppStudio app while consuming the instant app and its configuration
2) Instant app is private or shared within the organization – In this scenario, you must enable the Sign-in process to access secured instant app. This can be done by first downloading the app in the AppStudio desktop and then enabling the “Support secured web apps” property. In case of ArcGIS OAuth authentication, please be sure to also add the Client ID available under Settings > Licensing. To learn more about it refer to this online document. After making these changes, please upload the app item back to ArcGIS Online. This way the app can now allow users to sign-in to access the secured app when running within the player.

Additional Resources
Watch this video on configuring web and native mobile apps with ArcGIS and see the Q&A blog for frequently asked questions.
For a step-by-step guide in performing this workflow, learn how to “Configure apps for hikers.”
- Learn more about ArcGIS Instant Apps
- Learn more about ArcGIS AppStudio and Download AppStudio Desktop
We can’t wait to see you use Instant Apps and AppStudio to build apps. Please provide any feedback and suggestions in the Instant Apps Community forum or email appstudiofeedback@esri.com.

Article Discussion: