Note: Starting with the June, 2019, ArcGIS Online release, vector tile basemaps (excluding imagery) became the default with new organizations. Prior to that release, raster tile basemaps were the default. If your organization was created prior to June, 2019, you can bring it up to date by choosing vector tile basemaps as your default, or adding individual vector tile basemaps to your gallery. This blog article details how.

A basemap provides a background of geographic context for the content in your maps. ArcGIS includes a basemap gallery with a variety of choices, including topography, imagery, streets, and more. When you create a new map, you can choose which basemap you want to use. You can also change the basemap of the current map at any time using the basemap gallery.
When signed in, the basemap gallery is set by your organization and will appear in any apps that offer a gallery. Shown below are a a collection of applications, all using the same basemap gallery set by the organization.
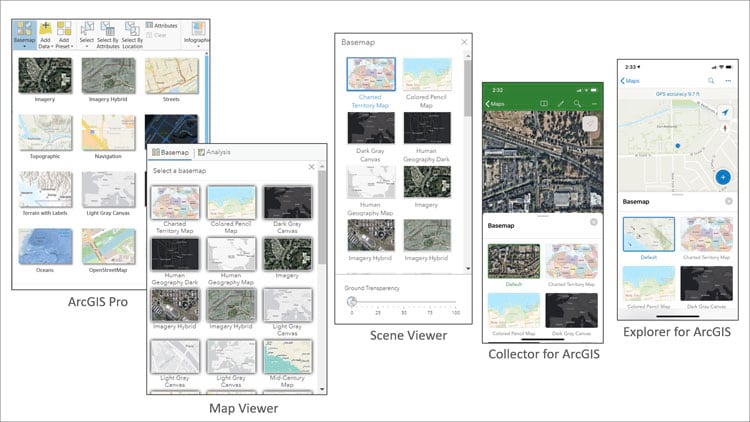
Basemaps and your organization
There are two types of basemaps; raster tile basemaps and vector tile basemaps. Raster tile basemaps are pre-rendered and stored on the server, and are displayed as is by the client. The World Imagery basemap is a good example of a raster tile basemap, and an example of one that can’t be displayed as a vector tile basemap.
Vector tile basemaps reference a set of web-accessible vector tile data (points, lines, and polygons) and the corresponding style for how those tiles should be drawn. Vector tile basemaps are used for content other than imagery. Vector tile layers can adapt to the resolution of their display device and can be restyled for multiple uses.
By default, your organization uses a basemap gallery set by Esri. You can configure your basemap gallery if you have administrator privileges in your organization. For example, you can combine raster and vector basemaps, can create a completely custom basemap gallery, or can combine custom basemaps you author with Esri default basemaps.
Use vector basemaps by default
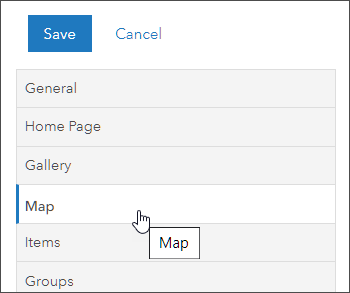
To use the Esri vector tile basemaps by default, go to your organization Settings, then the Map tab.
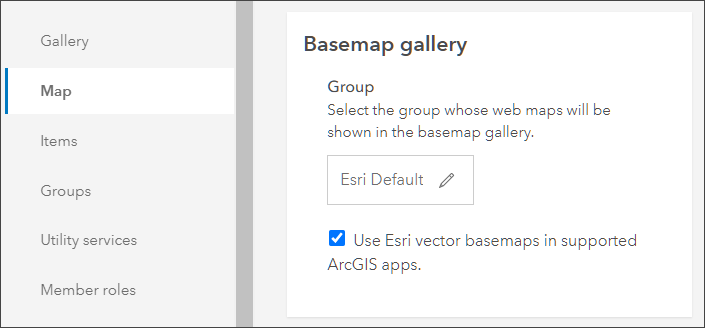
In the Basemap Gallery section, check the box to use Esri vector basemaps.
Use vector basemaps with custom basemaps
If you use a custom basemap gallery, you can add the Esri default vector tile basemaps into the gallery by checking the box to Share the Esri default basemaps to your custom basemap group, and also checking the radio dial for Vector Basemaps.
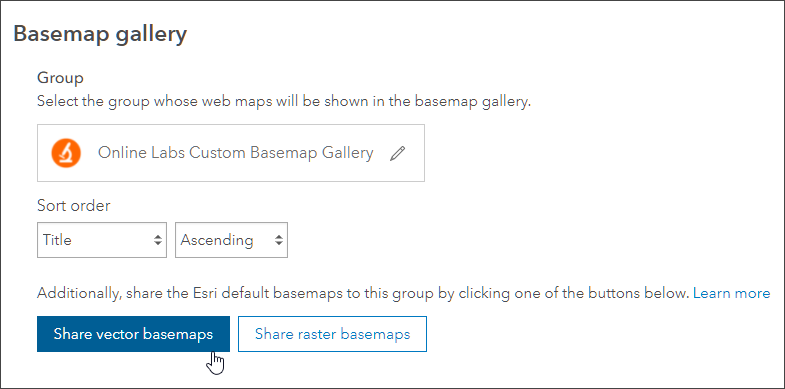
Select vector basemaps for a custom basemap gallery
Rather than use Esri’s predefined Living Atlas vector basemap collection, you can build your your own gallery by choosing from available Living Atlas vector basemaps. You can also combine these with your own custom basemaps.
As an administrator of your organization, you can change which basemaps your organization uses by creating a custom basemap gallery. The custom gallery can include a combination of your own basemaps, plus Living Atlas vector basemaps.
The steps to create a custom Basemap Gallery are:
- Create a group for your custom basemap gallery.
- Add maps you want to use as basemaps to the group.
- Set the group as your organization’s Basemap Gallery.
These steps are detailed in Create a custom basemap gallery for your organization and the Basemap gallery help topic.
Add vector basemaps to your custom basemap group
You can add Living Atlas vector basemaps to your custom gallery group from the Living Atlas website. Follow these steps.
Step 1 – Open the Living Atlas website. If you have not done so already, Sign In at the top right of the website.

Step 2 – Go to the Browse tab.

Step 3 – Select the Basemaps category.

Step 4 – Choose Vector Tiles.
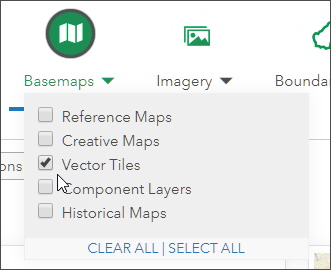
Step 5 – To ensure you get the Esri vector tile basemaps, set the filters for Maps
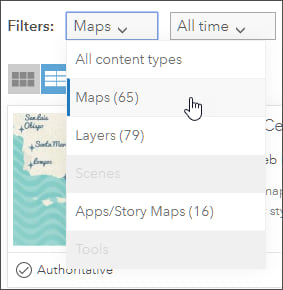
And set your region for All regions and check the box for Esri-only content. Your filter options should look like this:

Step 6 – To add a search result to your gallery, click the item title to open the item details.

Then click share:
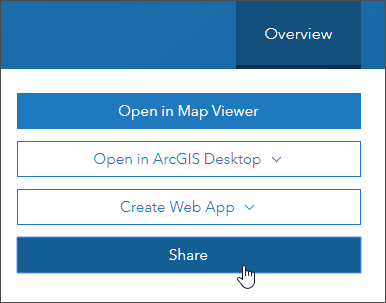
And share the item into your custom basemap group by clicking Edit group sharing:
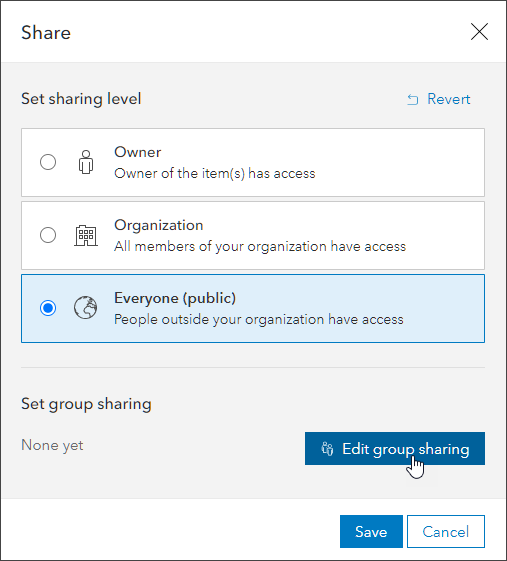
Then selecting the basemap gallery group.
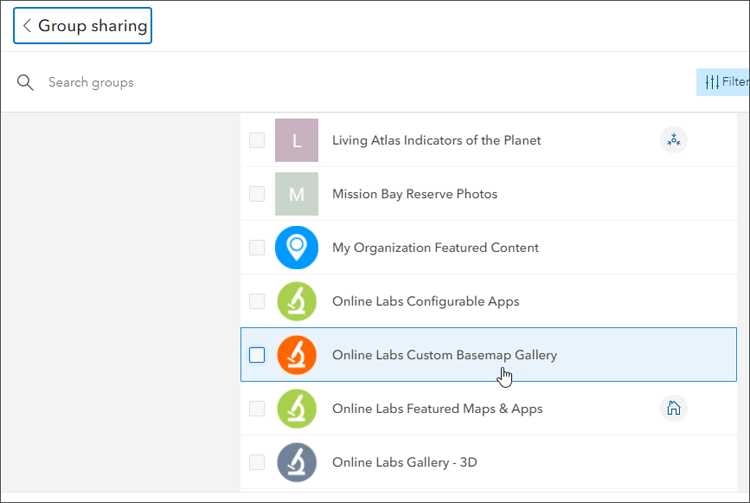
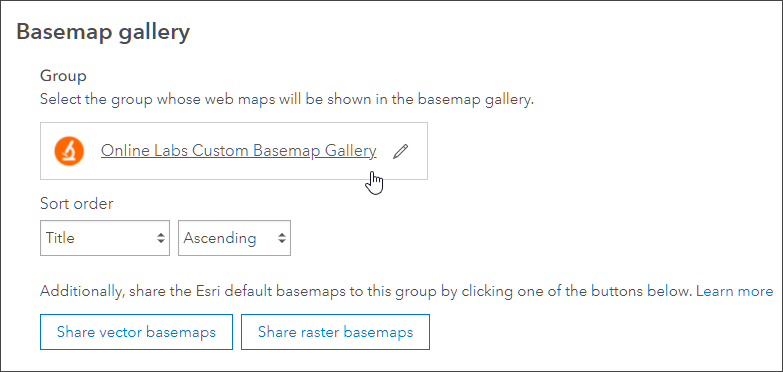
Step 9 – Set your basemap gallery to the custom basemap group. As Administrator, go to your organization Settings, then the Map tab. In the Basemap Gallery section choose your custom basemap group to use the basemaps you’ve selected.
More information
For more information, see the following blog articles and help topics:
- Create a custom basemap gallery for your organization
- Use Living Atlas to create a custom basemap gallery
- Configure map – basemap gallery
This blog article was originally published on October 7, 2019, and has been updated.

Commenting is not enabled for this article.