A basemap provides a background of geographical context for the content you want to display in a map. When you create a new map, you can choose which basemap you want from the basemap gallery. The basemap gallery is collection of maps, used across the organization, and set by the organization administrator. The administrator can choose to use the Esri default basemaps or can create a custom basemap gallery.
No matter what you see in your basemap gallery, you can choose your own from any of those available in the Living Atlas. Here’s the steps to make any Living Atlas basemap your own.
Step 1 – Go to the Living Atlas website and sign in at the top right.
Step 2 – Click the Browse tab.

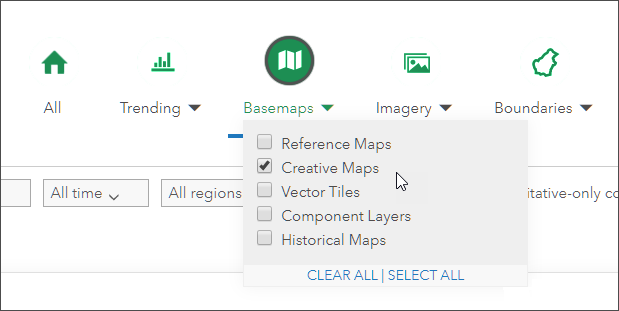
Step 3 – Click Basemaps, and choose one or more of the categories.

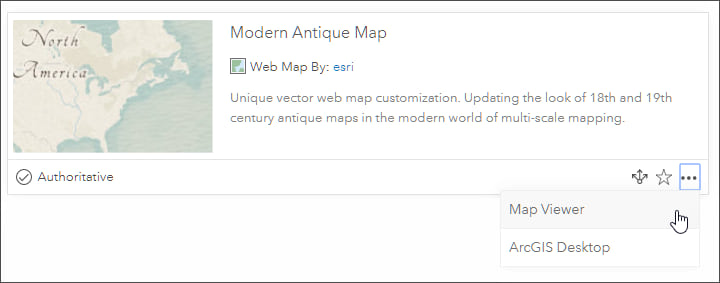
Step 5 – Browse to find one you like. Click the title or thumbnail to open the item page to learn more about it, then open the map.

Or click the options (…) and open the map directly in the Map Viewer.

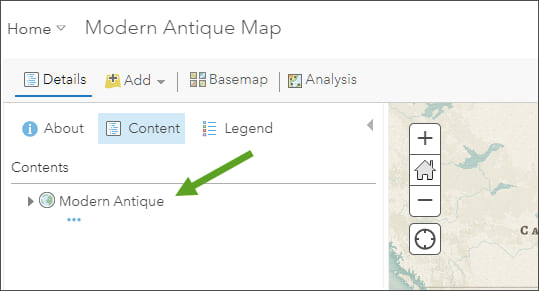
Step 6 – Once you’ve opened the map, click Content. You will see it is now your basemap.

Since you’ve already signed, in all you need to do is add your operational layers, then save as a new map.
More information
For more information see:
- Choose basemap
- Use Living Atlas to create a custom basemap gallery
- Create a custom basemap gallery for your organization
- Use vector basemaps for your organization

Commenting is not enabled for this article.