This blog article was originally published on October 1, 2015, and has been updated. The last previous update was March 24, 2024.
Email can be sent directly from web map pop-ups using pop-up configurations. Which configuration approach is best will be determined by how the email addresses are stored in the layer attributes. This post shows you how to send an email directly from a pop-up and covers two examples of how the email might be stored; as an email address (somebody@company.com) and as a mailto link (mailto:somebody@company.com?subject=Hello).
You can follow along using a sample web map. In the upper right, sign in to your account to save the map. You can also follow along without signing in.
Open the Layers pane from the Contents (dark) toolbar. The map contains a group layer with two layers; Office Location (unconfigured) and Office Location (configured). When viewing the pop-up configuration, make sure you’ve selected the layer you want.
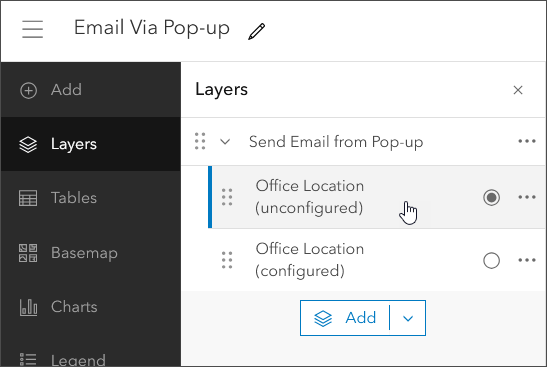
The unconfigured layer does not have a configured pop-up; it’s the default and unimproved display of attributes. Use this layer to follow along with the instructions below.
The configured layer uses a configured pop-up with all the email options described in this post.
The unconfigured pop-up
View the unconfigured pop-up layer. Ensure it is selected as indicated (the blue bar on the left indicates selection).
The email address is stored in two ways. The (a) Email field stores the address as a string in the format somebody@company.com. The (b) Mailto Link field stores the address as a clickable link in the format mailto:somebody@company.com?subject=Hello.
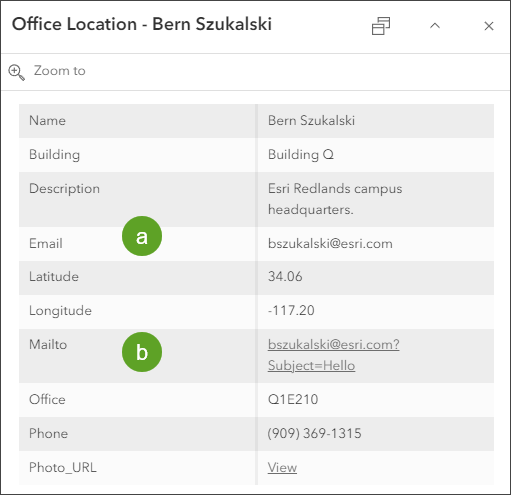
Using the techniques described below, the pop-up can be configured to use both attributes in different ways as clickable email links in the layer pop-up. The Photo_URL attribute is a link to a graphic that will be used for the mailto: link.
Configuring the pop-up
In the Layers pane, click the unconfigured layer to select it. A blue bar will highlight the selected layer.
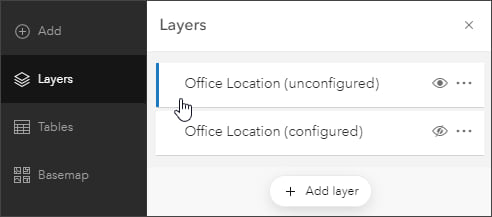
In the Settings (light) toolbar on the right, click Pop-ups to open the Pop-ups pane.
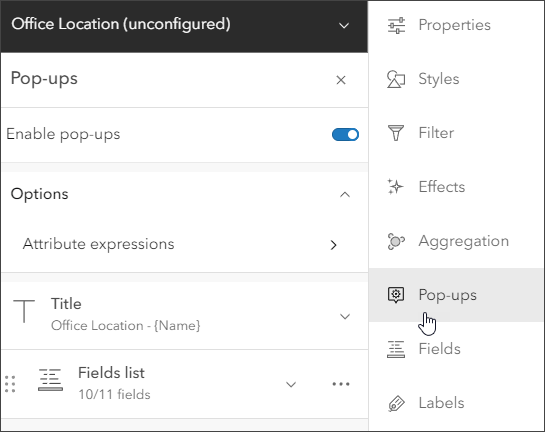
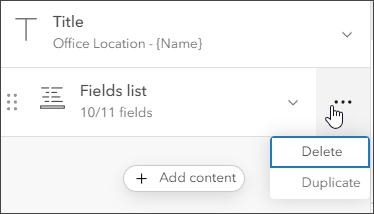
To set the stage for our configured pop-up, remove the Fields list by clicking options (…), then Delete.
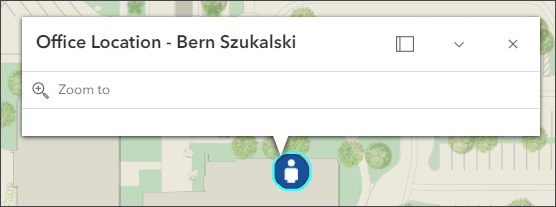
Now, only the title is displayed in the pop-up.
The pop-up can be configured in a variety of ways to enable an email link from the pop-up window using both the Mailto and Email attributes. Follow the steps below.
Email stored as mailto link
The Mailto string can be configured as a mailto link in the pop-up using two methods; the first is using a custom attribute display, the second uses a link from an image.
Method 1: Use a text link in a custom attribute display
Step 1 — In the Pop-up pane click Add content.
Step 2 — Choose Text.
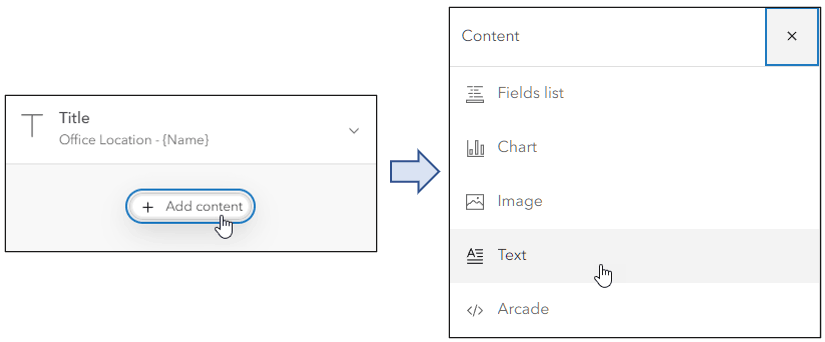
Step 3 — Add text and attributes to construct the text pop-up. To use an attribute, start by typing a curly bracket ( { ) to display a list of attribute fields.
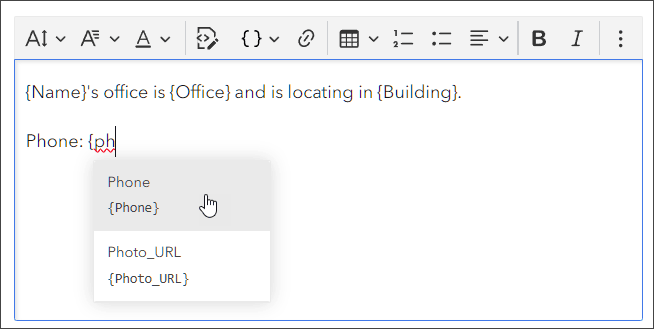
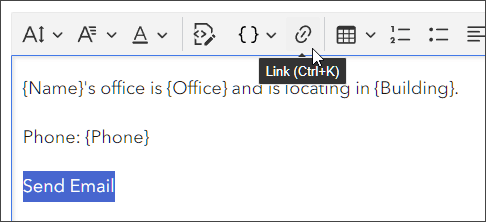
Step 4 — Next, enter the text string to use for the email link and select it. After selecting the text, click the Link button.
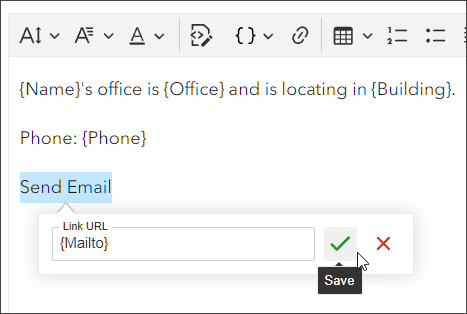
Step 5 — In the Link URL input, enter {Mailto}. This is the attribute that contains the mailto: link. Click the check mark to save it.
Tip: You can add the {Mailto} field to the text box, then cut and paste it into the Link input instead of typing it in.
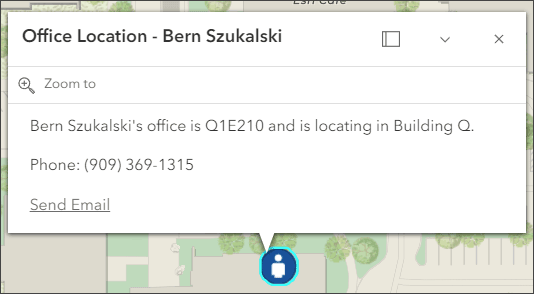
Click OK when finished. The pop-up now display a combination of text and fields along with an email link.
Method 2: Use an image link
Continuing from the steps above, follow these steps to add an image that opens the mailto link when clicked.
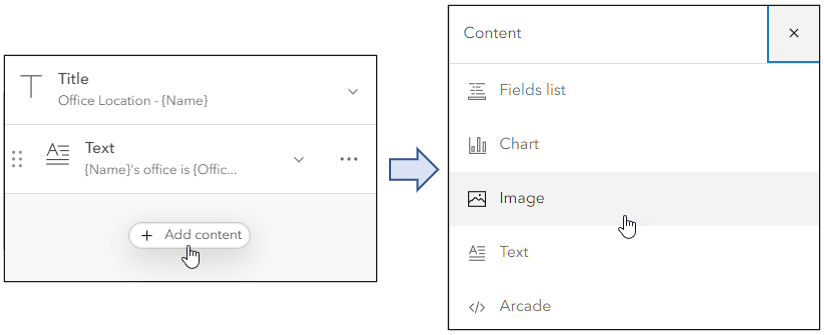
Step 1 — In the Pop-up pane click Add content.
Step 2 — Choose Image.
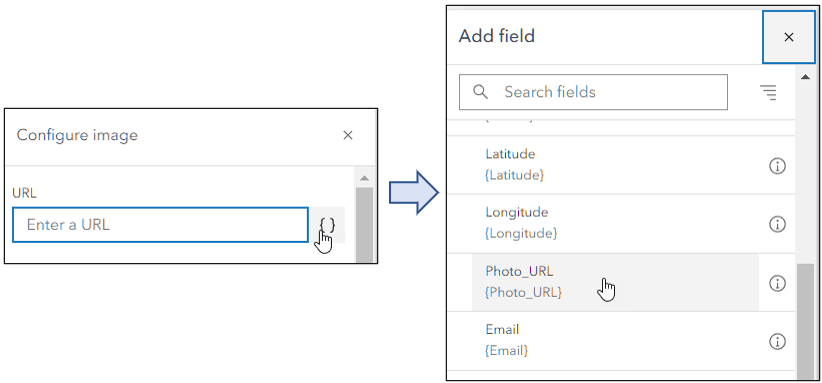
Step 3 — In the URL input, click the curly brackets ( { } ) to display a list of fields. Select Photo_URL from the list. The Photo_URL field contains the URL to the image to display in the pop-up.
Step 5 — The image will be configured so that when it is clicked, the email will be opened. In this step select the Mailto field as the Link field for the photo. Click the curly brackets as done in Step 3 above to display the field list to find the field.
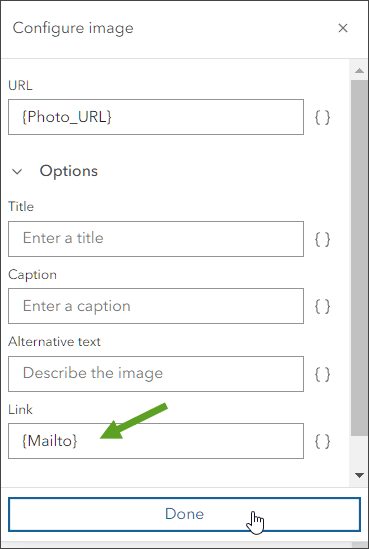
Optionally add a title, caption, and alternative text.
Step 6 — When finished, click Done at the bottom of the Configure image pane and save your map.
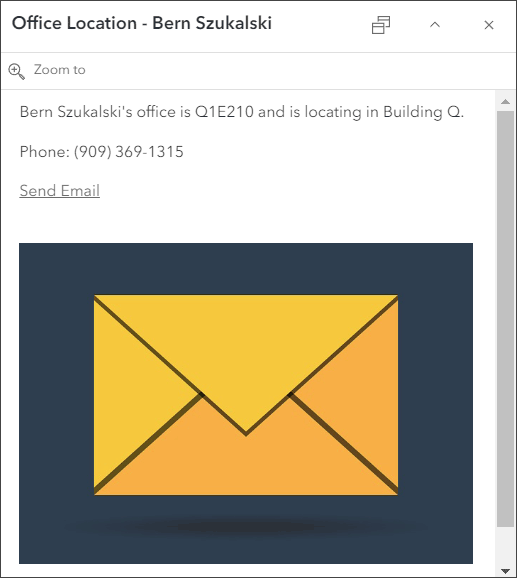
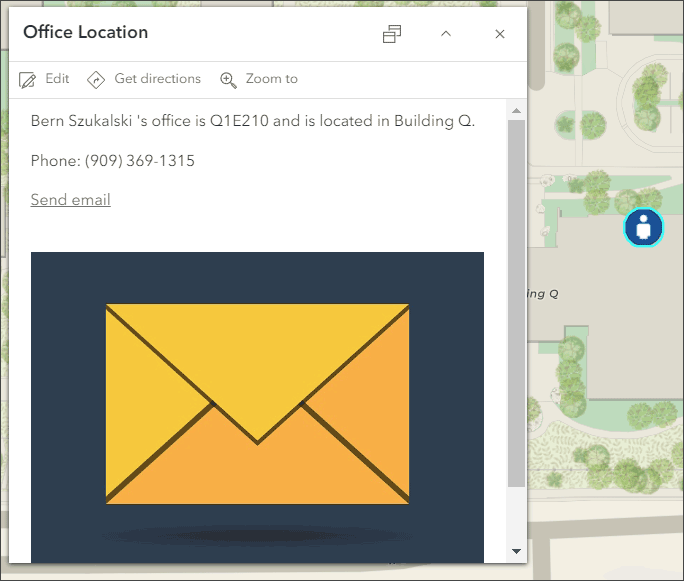
The pop-up now includes an image which, when clicked (or tapped if using a device) will send an email.
Email stored as address string
If the attribute field contains a standard email address string (somebody@company.com), a mailto link can be configured in the pop-up for both methods—text link and image link—discussed above.
Text link in a custom attribute display
Using a combination of text and the {Email} field, construct a a mailto link.
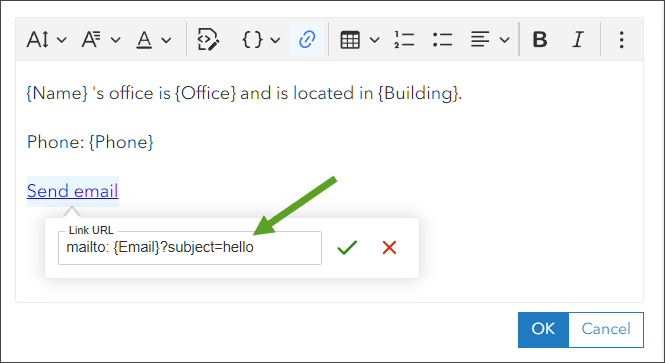
Image link
Construct the mailto: link the same way as shown above in the image Link URL property.

Summary
Using the sample map, hide the unconfigured layer and view the configured layer. Click the point location on the map to view a pop-up configured with all the options described above. Send me an email, and let me know what you think.
Use an app
You’ll likely not be sharing the web map using Map Viewer to enable your audience to send email via its pop-up. Rather, you’ll likely be configuring an app that will use the map with the configured pop-up. The email link will work in embedded maps and any app: ArcGIS Instant Apps, ArcGIS Experience Builder apps, ArcGIS Dashboards; and custom apps.
More information
Custom attribute displays and links from images in pop-ups provide opportunities to customize the capabilities presented in pop-ups, including the ability to create a link to send an email.
For more information, see the following:
- Configure pop-ups (Help)
- Pop-ups: the essentials (ArcGIS Blog)

Commenting is not enabled for this article.