An image hotspot is an area within an image that can be used as a clickable link to other information: a website, another graphic, a text document, a movie, or just about anything. In the world of GIS, we might even think of our polygons, lines, and points as truthfully located geographic hotspots on our map that can open pop-ups to reveal similar media.
In the world of GIS, we almost always insist that everything needs to be placed into real-world coordinate space and located somewhere on the planet. There are two ways that images, such has historical maps, can be placed into real-world coordinate space. One way is to use ArcGIS Pro to georeference the image and publish it as a tile or image service, the other way is using Map Viewer media layers.
What is a media layer?
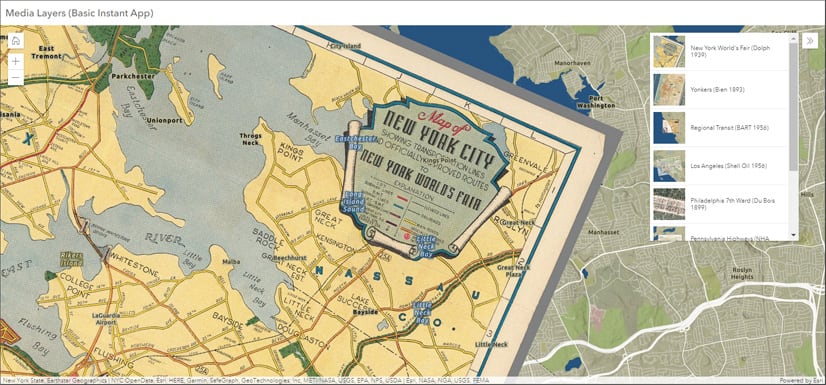
Media layers allow you to drag and drop images into your map, then resize, rotate, and skew them to get a good match to your basemap. The app below shows a few examples; use the bookmarks tool to navigate to different media layers. All examples are from the David Rumsey Historical Maps Collection.
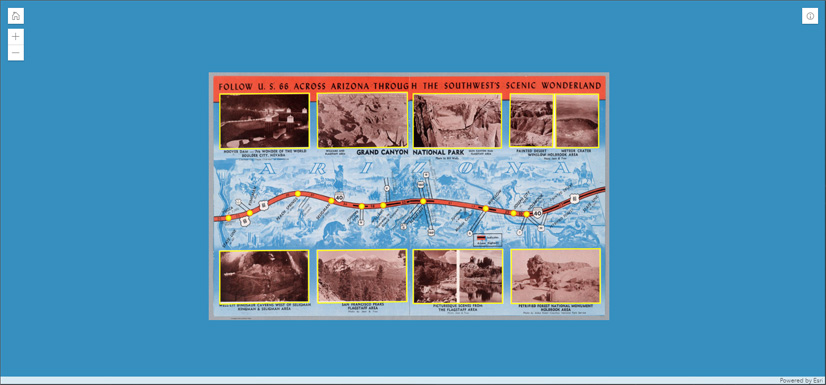
Media layers can also be used to include images that can’t be georeferenced properly, such as diagrams, cross-sections, schematics, and similar documents. These can be included as part of your overall ArcGIS Online content, and with a few simple techniques you can add hotspots to display pop-ups with text, images, links, and more.
View the example app below and continue reading to learn how it was created. You can also view the map that was used to create the app.
Make your own hotspot media layer map
To create something similar to the example above, the outline of the steps are as follows:
- Add the image you want to use as a media layer
- Remove/hide the basemap
- Add “hotspot” feature layers
- Create an app
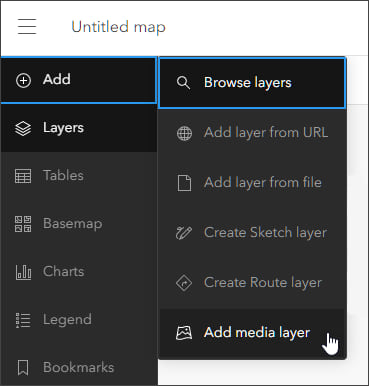
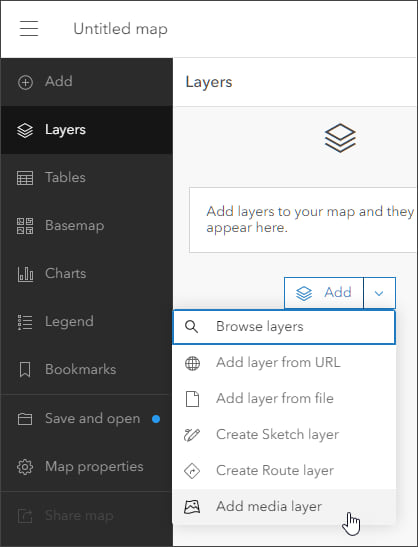
Step 1 — Sign in to your ArcGIS account and open Map Viewer. There are two ways to add media layers from the Content (dark) toolbar:
(1) Click Add, then Add media layer.
or (2) click Layers, then Add media layer from the Add drop-down.
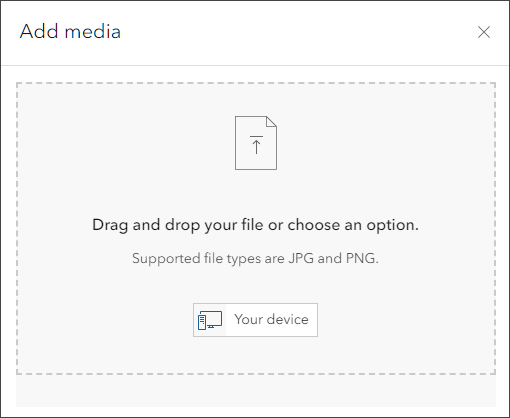
Step 2 — Drag and drop the image or browse to it by clicking Your device.
Step 4 — Since we’re not concerned about placing the image on our map, in the Add media layer pane click Update and close in the lower right.
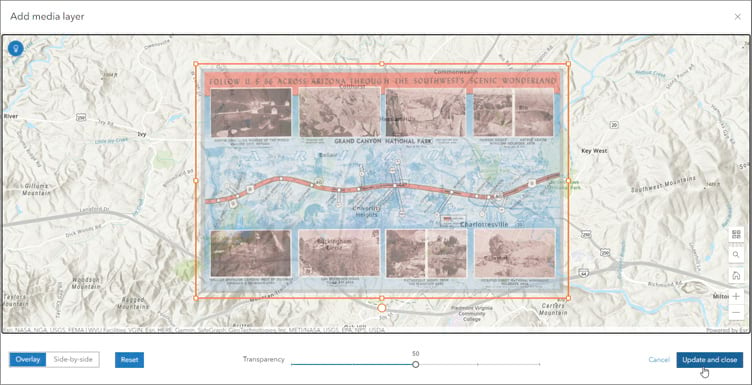
Tip: Depending on the resolution of your image and your current map extent, your results may vary. Experiment by dragging the image larger or smaller to see what provides the best results. Remember to hold the shift key down when dragging to preserve the image aspect ratio .
The image has been placed on the map as a new media layer. In the next steps, the basemap will be removed or otherwise hidden.
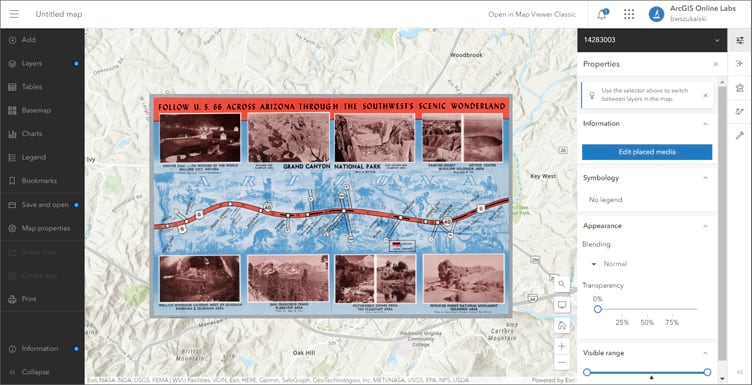
Step 5 — In the basemap pane, remove or hide all of the basemap layers. You can’t remove all basemap layers, so you will need to hide the remaining ones.
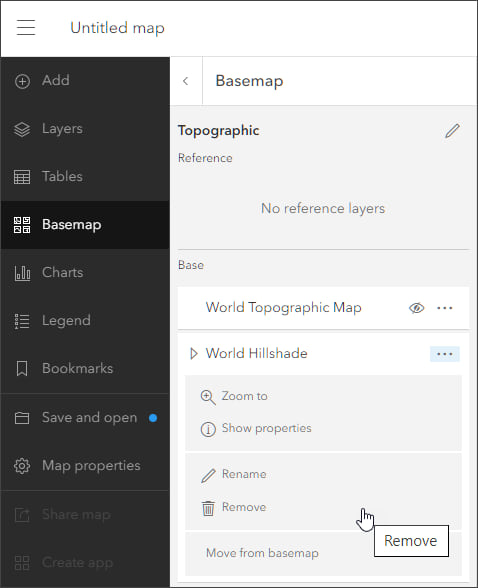
Tip: You can use a single layer basemap like World Imagery and just hide the imagery layer.
Step 6 — You can leave the map background white, but you can also change the background to a different color; one that might complement or highlight the image. Open the Map Properties pane from the Contents toolbar, then toggle Enable background color on and choose the desired color.
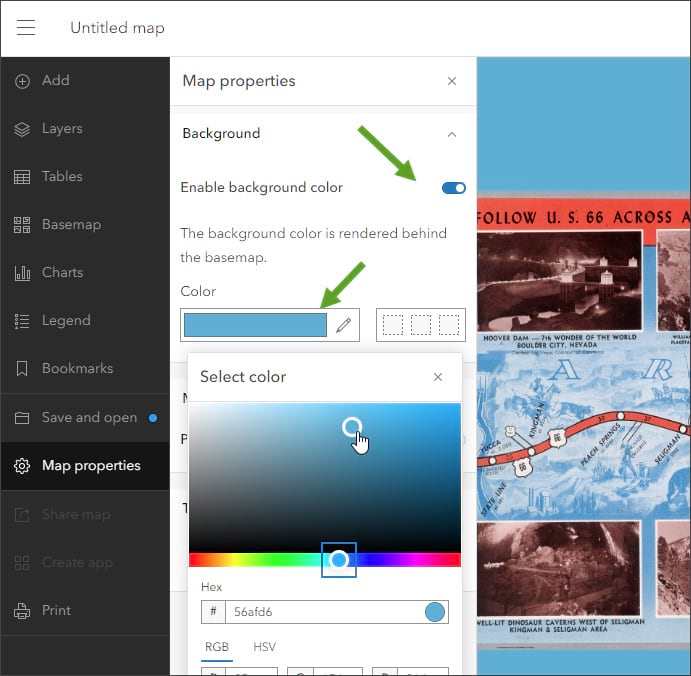
When finished, save the map.
Step 7 — Create the “hotspot” layers.
In the next steps, the “hotspot” layers will be created. These are point/stamp, line, or polygon feature or sketch layers that will be added on top of the image to configure the pop-ups that will contain the text, media, and other information that you want to display when a spot on the image is clicked.
In the sample, a point and a polygon hosted feature layer are used. However, stamp and polygon sketch features could also have been used. The results are the same in general, however there may be additional reasons (such as using existing feature layer templates, adding charts to pop-ups, or using related tables) that feature layers may be the best choice.
Whether you use feature or sketch layers, and how you create them, will depend on what you want to display in the hotspot pop-ups. For brevity, the steps for creating the hosted feature or sketch layers are not detailed here, instead they are outlined below:
Use hosted feature layers
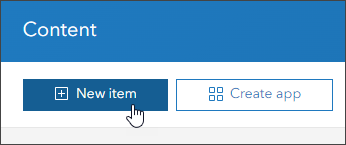
7a — In Content, click New item.
7b — When finished, configure the fields to hold the pop-up information by opening item Data tab, then selecting Fields, then clicking + Add.


7c — Add the layer(s) just created to your map. For each of them, select the layer and click Edit in the Settings (light) toolbar and add new features using the media layer as your guide to placing hotspots.
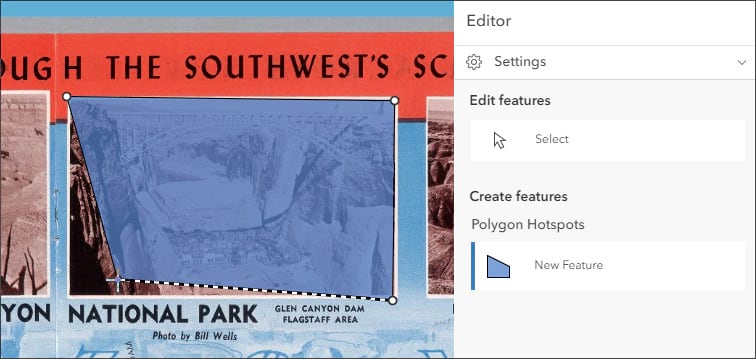
7d — Add attribute information for the fields added in (b) above, then click Create to add the feature.
7e — When finished, style the layers as desired, then enable and configure the pop-ups.
For more information, see:
Use sketch layers
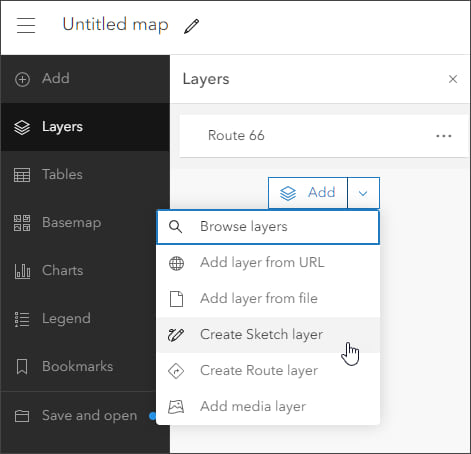
7a — In the Map Viewer Contents toolbar, or from the Add drop-down in the Layers pane, click Create Sketch layer.
7b — Choose the sketch feature type and add features to the map.
7c — Enable and configure the pop-up for each sketch feature.

For more information, see:
Save your map when finished.
Step 8 — Use ArcGIS Instant Apps to create an app for viewing and interacting with the media layer. Basic and Media Map are two good choices to consider for configuring minimalist, map-focused apps.
More information
For more information, see:
- Add media layers (Help)
- Announcing media layers for adding images to web maps (ArcGIS Blog)
- Apply cartographic effects to blend media layers into maps (ArcGIS Blog)
- Publish hosted feature layers (Help)
- Create sketch layers (Help)

Commenting is not enabled for this article.