The March ArcGIS Online update includes several enhancements to the edit experience in Map Viewer, including support for batch feature creation and an updated UI featuring snapping controls and a selection tool. This blog post will explore the new snapping controls and demonstrate how you can take advantage of similar snapping experience in both your editor and sketch workflows.
A snapping UI and the ability to snap to other features in your map was introduced in Sketch in the December release. With the March update, the editor widget has been updated with a similar UI and experience. This new UI for Snapping options allows you to control exactly what snapping options you want enabled.
Access snapping in the Editor
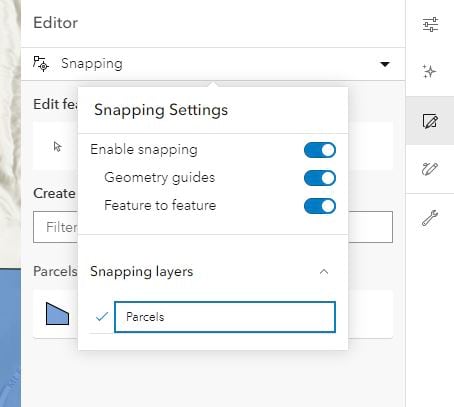
To access the snapping settings in the editor, ensure you have an editable layer in your map and then click Edit on the Settings (light) toolbar. As in Sketch, the snapping options are at the top of the pane when you open the Editor pane. It is here that you can enable snapping and toggle on or off Geometry guides (self-snapping) or Feature to feature snapping.
Self-snapping displays visual cues allowing you to easily draw perpendicular or parallel lines, while feature to feature snapping will display visual cues when the feature you are drawing can snap to the vertex, edge, or end point of an existing feature.
Expand the Snapping layers menu to select supported layers (feature layers, GeoJSON, WFS, or CSV layers) from your map that you want to snap to while editing.

A snapping use case
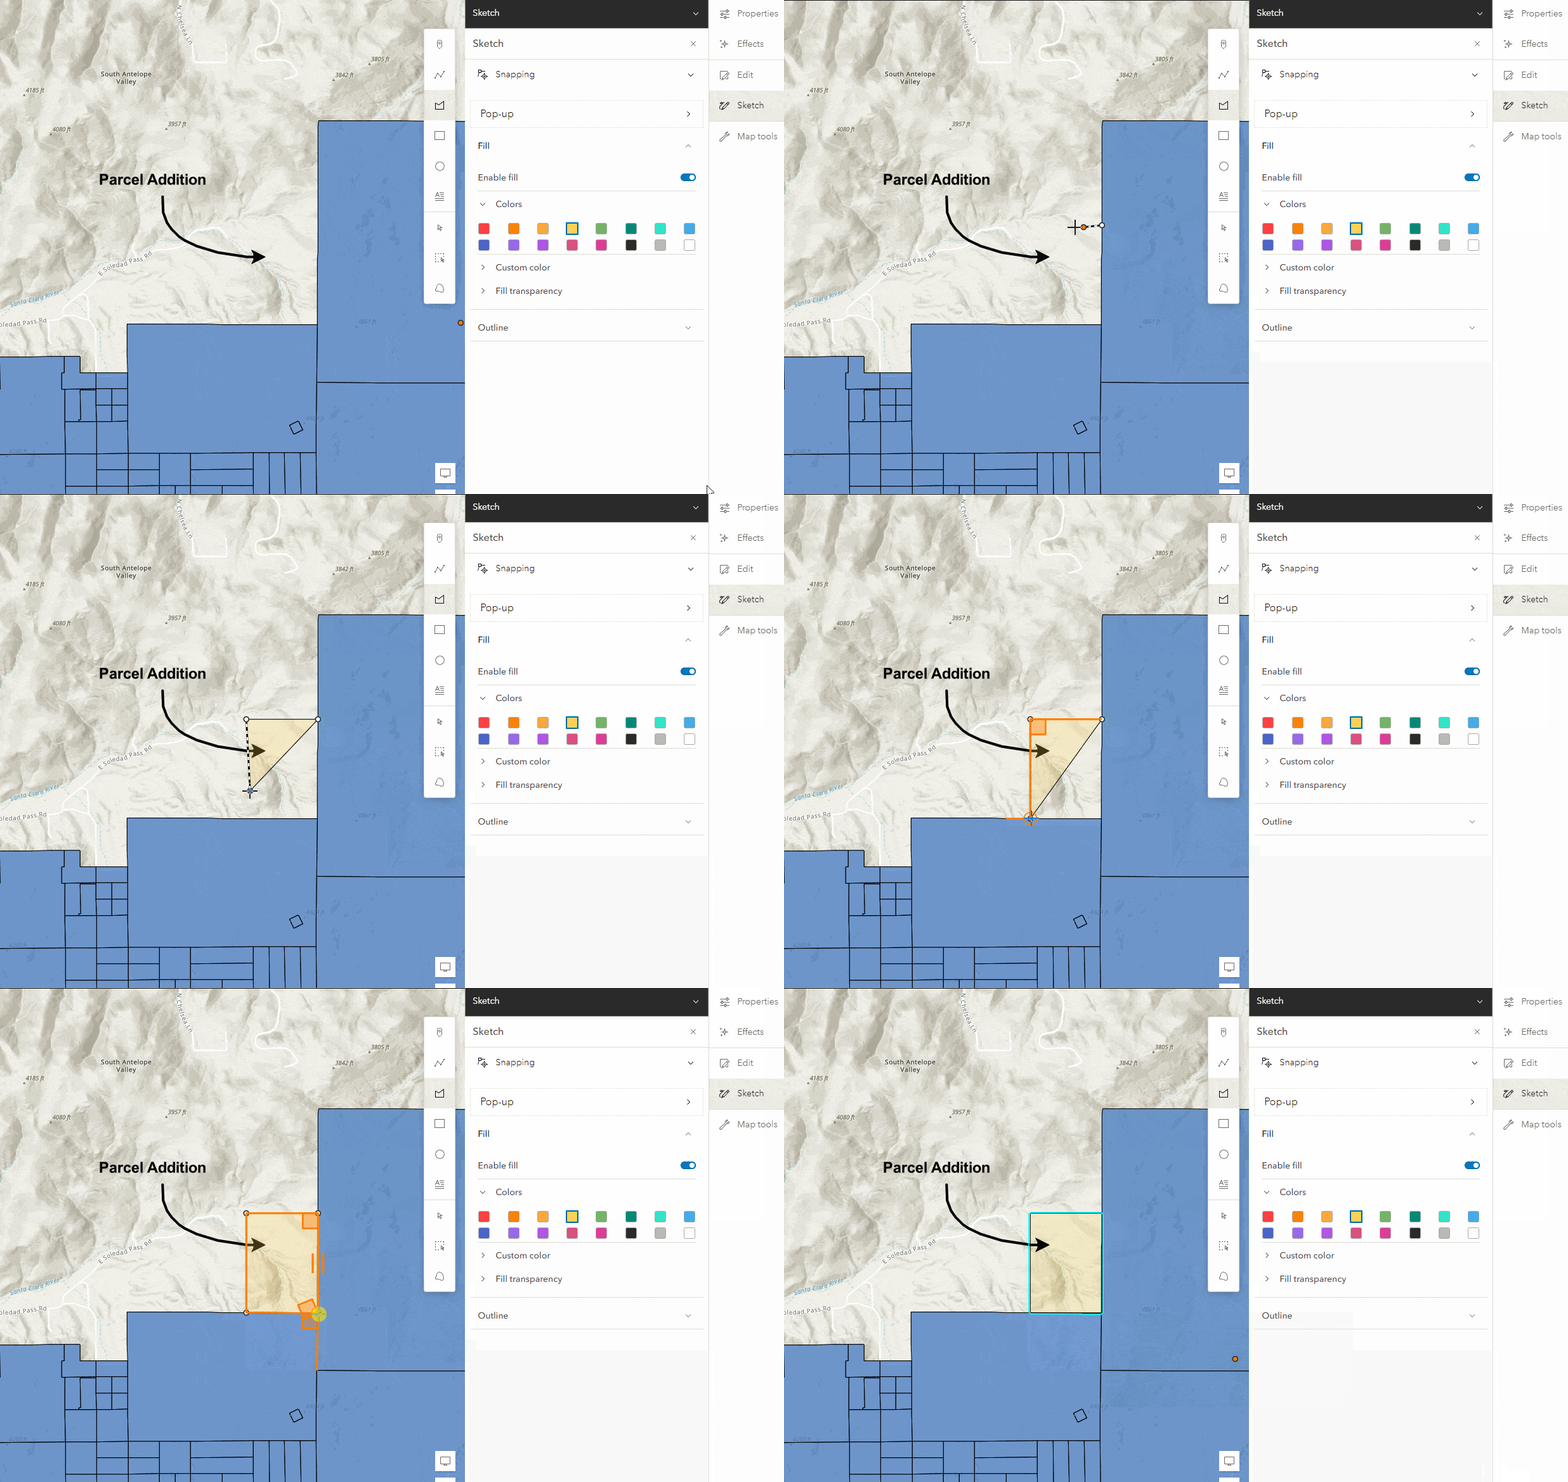
Both the Sketch and Editor panes provide different tools depending on the type of edits you might want to make, and snapping can be useful in both cases. For example, you might have a feature layer of parcels, but only want to demonstrate where a potential new parcel might go, before editing the actual feature layer.
Use Sketch to create a new sketch layer of this proposed parcel and use the other sketch tools like arrows or text to further mark up the map for review. In this case I have selected both the sketch and parcels layers as my snapping layers.

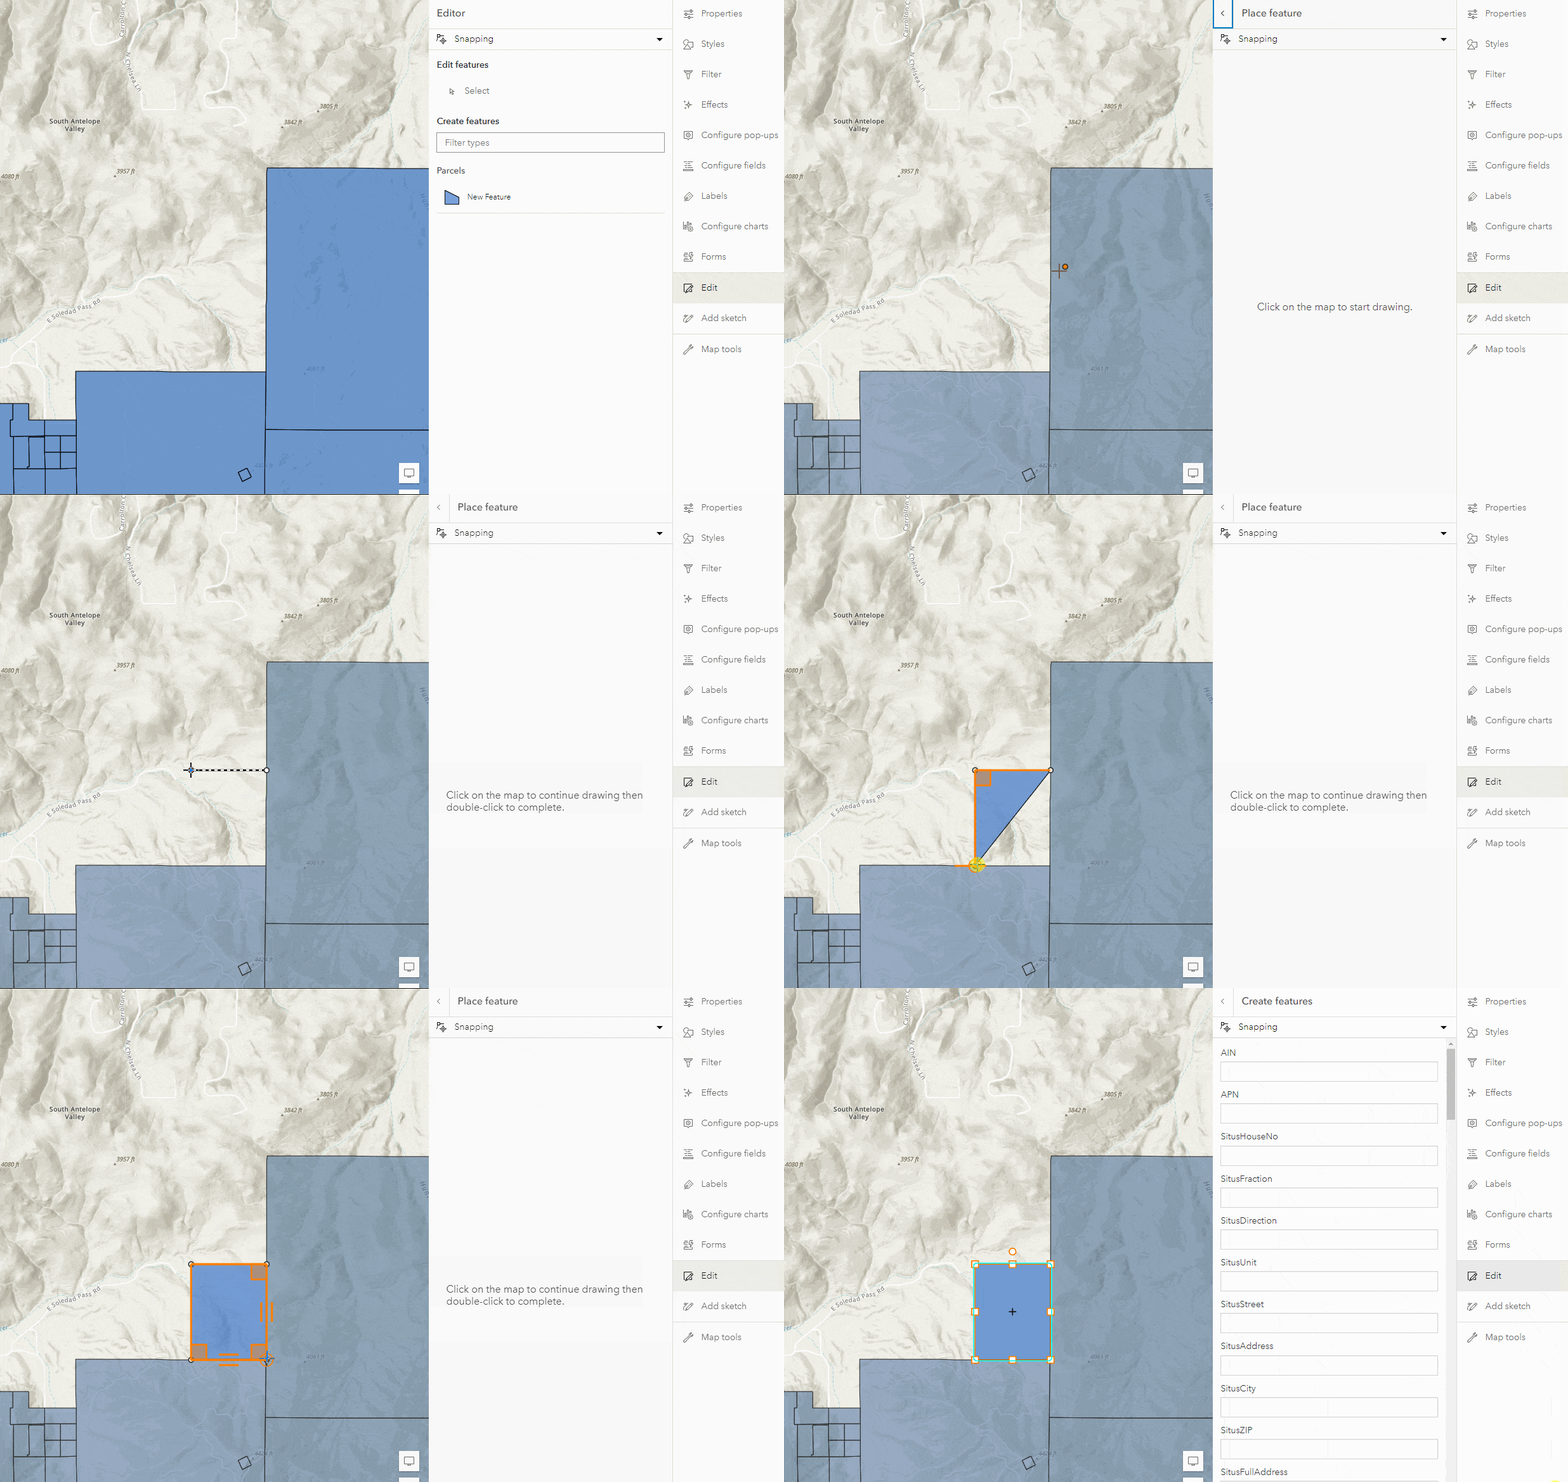
When you decide to permanently add the parcel, use the Editor tool to add that parcel in to your existing parcel layer permanently. Take advantage of self-snapping to ensure you have straight lines and select your existing parcel layer as the snapping layer to snap your new features to it.

This is just one example of how you can take advantage of the new snapping options available in Sketch and Editor. More information on working with Sketch can be found here, along with additional details about editing features in Map Viewer.

Article Discussion: