ArcGIS Living Atlas provides global, country-wide, and regional coverage for basemaps and many layers. But what if you’re interested in focusing on your state, county, city, or local project? Using blending and effects you can easily apply focus to Living Atlas basemaps and layers for your specific area of interest. Several approaches and examples are highlighted below. Follow the steps using the sample maps and layers to learn how.
Quick links
Use these links to view the sample maps:
- State & County Focus
Uses feature-specific effects on a single layer to apply focus to counties within a state using a filter expression. - Wilshire Boulevard Corridor Focus
Uses Destination In blending to apply focus to a one-mile buffer around a street. - Country Focus
Uses Destination In blending and filters to apply focus to a country. - Esri Campus Sketch
Uses Destination Atop blending and a sketch polygon to apply focus to the Esri campus. - Area (Camp Fire) Focus
Uses Destination In blending along with duplicate layers and effects, plus map background color, to apply focus to a fire perimeter.
Use these links to jump to a section of interest.
- Feature-specific effects
- Blending using one polygon
- Blending using filters
- Blending using sketch layers
- Blending, duplicate layers with effects, and background color

Use feature specific effects
An easy way to apply focus to specific geographic areas is to use feature specific effects. The key to making these work is having the appropriate attributes to apply filters to emphasize your area of interest.
The map shown below uses feature-specific effects to filter for a particular state (Missouri in this case) and highlight it apart from other states.
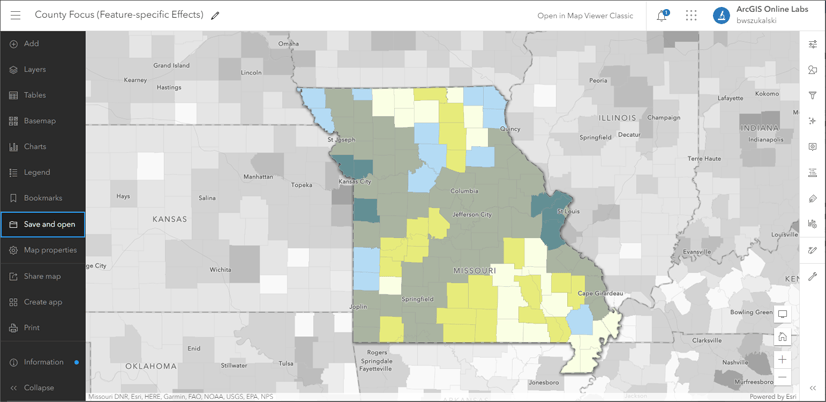
Make the map
To make the map shown above, follow these steps.
Step 1 – Open the starter map and Sign In using your ArcGIS account. You can also follow along without signing in, but you won’t be able to save your work.
To streamline the workflow, the county layer in the map has been extracted from the original Median Home Value and Income Living Atlas feature layer. You can use the original feature layer, but will need to select the County sublayer in the Median Home Value and Income group layer to follow along.
The sample map also uses the Human Geography Map basemap. Basemaps with reference layers work best with this technique since labels and other details will always draw atop the focus area.
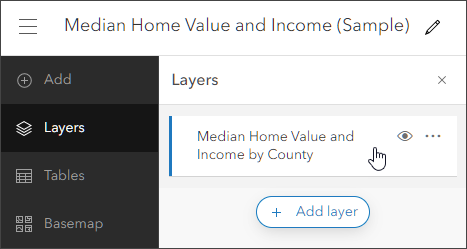
Step 2 — In the Contents (dark) toolbar, open the layers pane and ensure that Median Home Value and Income by County is selected.
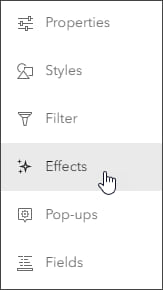
Step 3 — In the Settings (light) toolbar, click Effects.
Step 4 — In the Effects pane, click Feature-specific and choose Drop Shadow + Gray from the effects list.
This will apply a grayscale effect to all features that do not match the filter expression. Note that a default expression is generated.
Step 5 — Click Add expression.
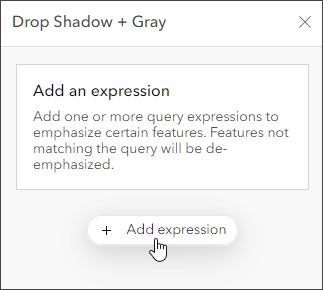
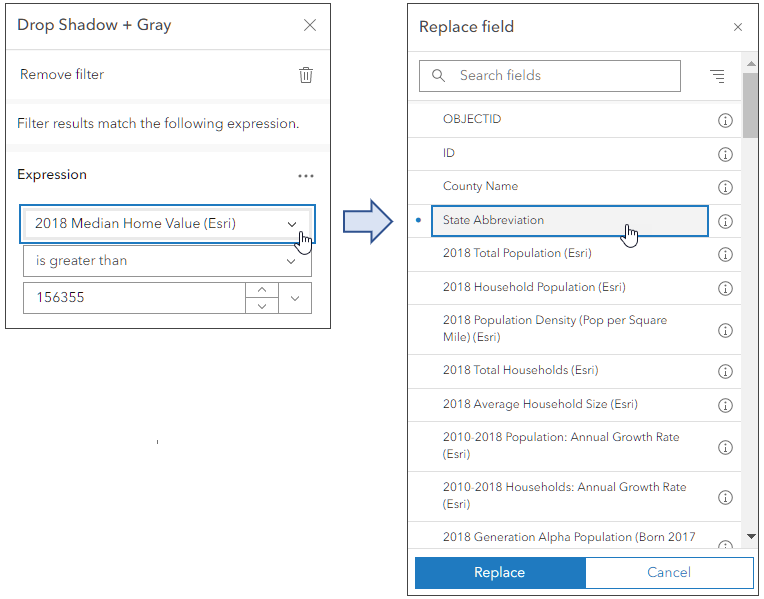
Step 6 — In the Expression pane, open the field list drop-down. Locate and select State Abbreviation, then click Replace. The state abbreviation will be used as the filter for the feature-specific effects.
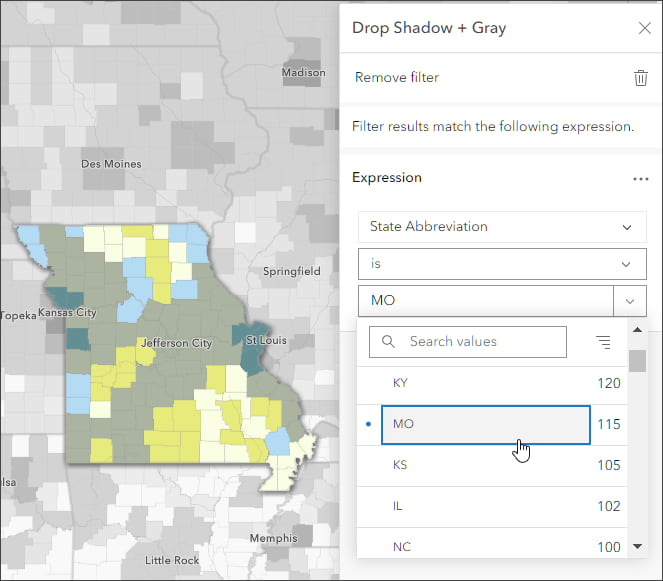
Step 7 — To apply focus on a state, select the state abbreviation from the drop-down.
Step 8 — Experiment with different effects and basemaps to achieve the desired results. Shown below, clockwise from upper left:
- Drop Shadow + Gray / Human Geography Map basemap
- Drop Shadow + Transparency / Human Geography Map basemap
- Drop Shadow + Transparency / Imagery Hybrid basemap
- Drop Shadow + Transparency / Dark Gray Canvas basemap
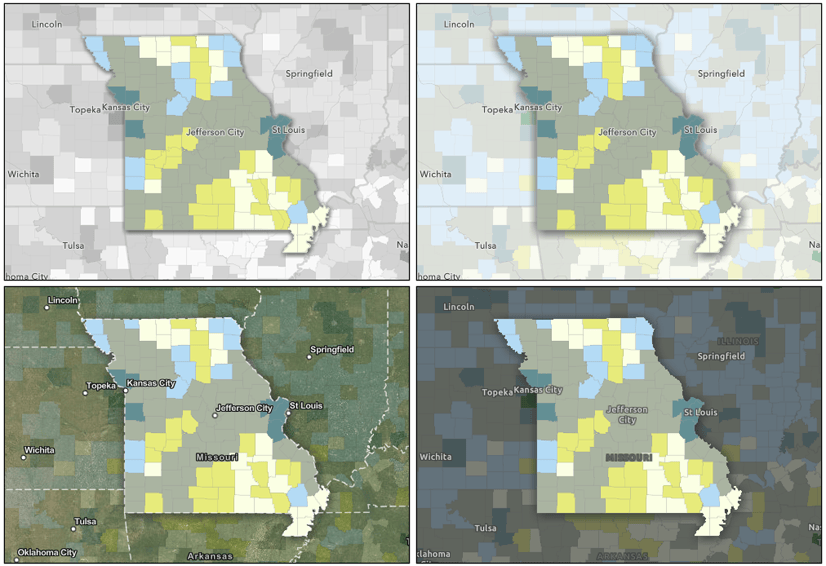
The same techniques can be used with any maps having layers that have filterable geographies.

Use blending
Another easy way to apply focus to specific geographic areas is to use blending. The key to making blending work as desired is having the appropriate areas (polygons) that you can use as geographic filters, and an understanding of how group layers can be used to apply blending to only layers within the group.
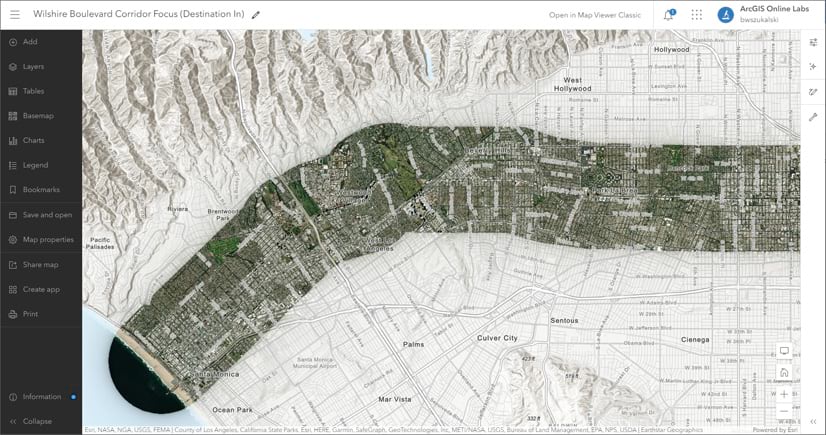
The map shown below uses blending to apply focus along a one-mile corridor of Wilshire Boulevard in Los Angeles, California. The map uses Destination In blending plus Bloom layer effects to achieve the final result.
Make the map
To make the map shown above, follow these steps.
Step 1 — Open the starter map and Sign In using your ArcGIS account. You can also follow along without signing in, but you won’t be able to save your work.
To streamline the workflow, the starter map already has the Wilshire Boulevard corridor layer (a one-mile buffer of the boulevard) and World Imagery layer from Living Atlas. It uses the Terrain with Labels basemap.
Step 2 — Add the two layers to a group layer. The blending will be confined to the layers within the group.
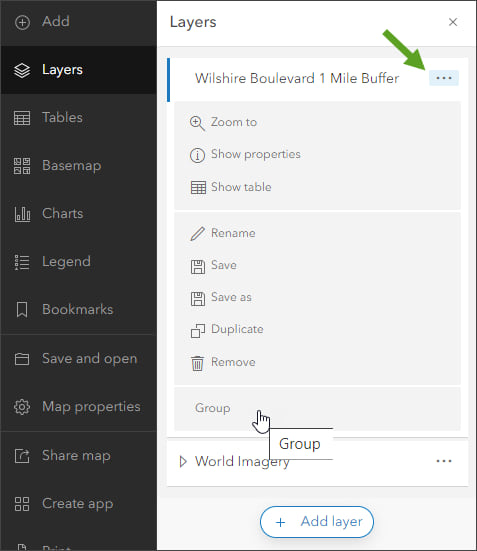
2a. In the Contents (dark) toolbar, open the Layers pane. Open the options menu for the buffer and click Group to create a new group layer.
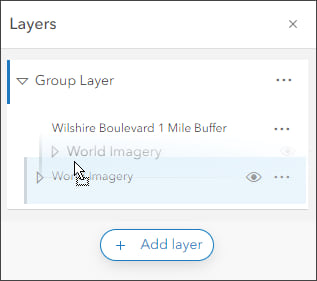
2b. Open the group layer and drag and drop World Imagery into the group. Ensure that World Imagery is positioned below the Wilshire Boulevard buffer.
Step 3 — In the Layers pane, select the Wilshire Boulevard layer.
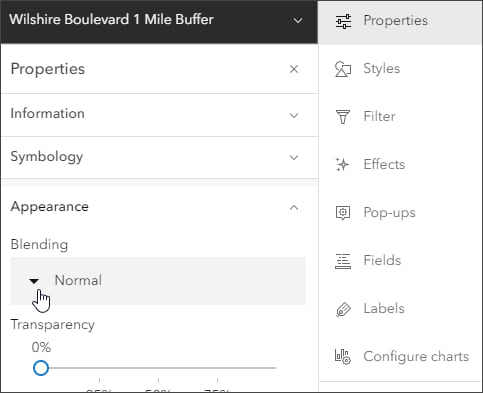
Step 4 — Open the Properties pane from the Settings (light) toolbar, then in the Appearance section open the Blending drop-down.
Step 5 — Choose Destination In.
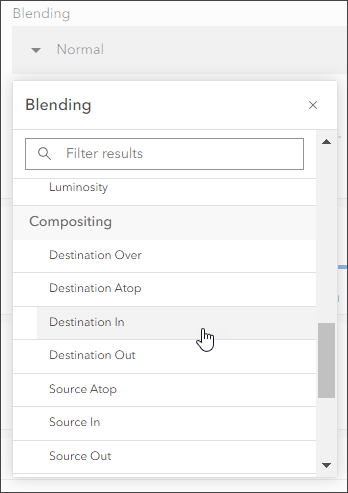
Destination In is a compositing blend mode that uses the top layer as a mask against others. Destination In is used when you want the destination, or background layer (in this case the imagery), to only draw where it overlaps the top layer. For more information, see Use blend modes.
Step 6 — You can soften the sharp edges of the blend using a Bloom effect on the Wilshire Boulevard buffer layer. In the Settings toolbar, click Effects, select Bloom, then adjust the strength, radius, and threshold of the bloom to achieve the desired results.
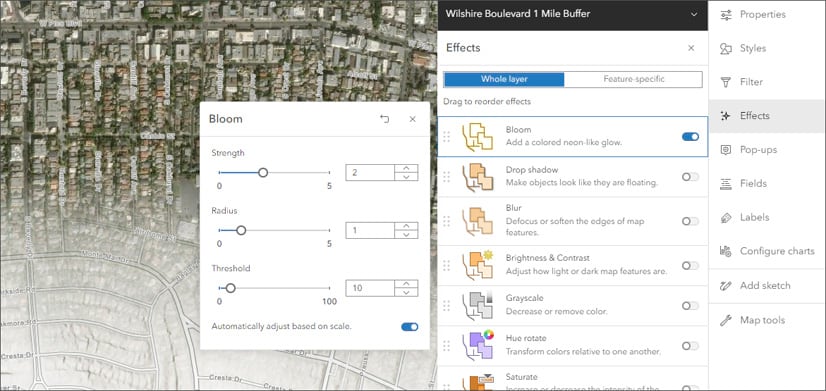
You can add other layers to the group layer and position them below the buffer layer to include them in the blend. Shown below, the Living Atlas World Traffic Service live feed has been added to the map, then to the group layer.


Use blending with layer filters
In the previous example, a single polygon layer (the Wilshire Boulevard buffer) is used for Destination In blending. However you can use any layer that has the desired geography, including layers that have filterable attributes to isolate the focus area.
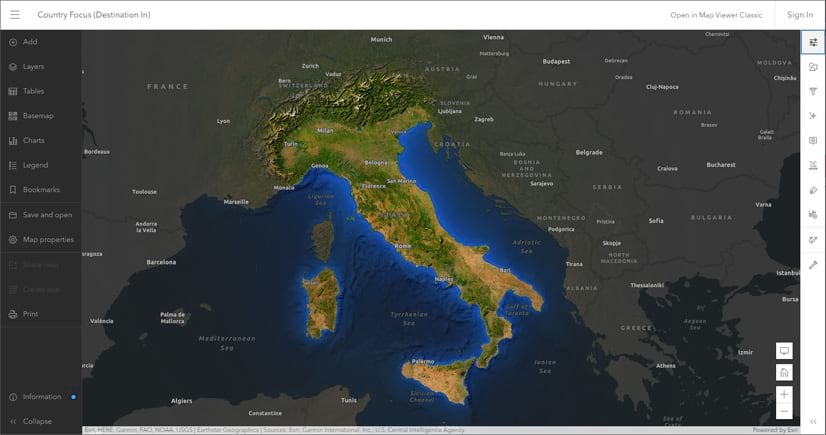
The map shown above uses Living Atlas World Imagery and World Countries layers atop the Dark Gray Canvas basemap. The World Countries layer is filtered by “COUNTRY is Italy.”
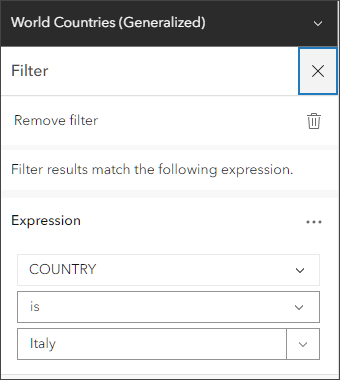
Adjust the filter to apply focus to a different country.

Use blending with sketch layers
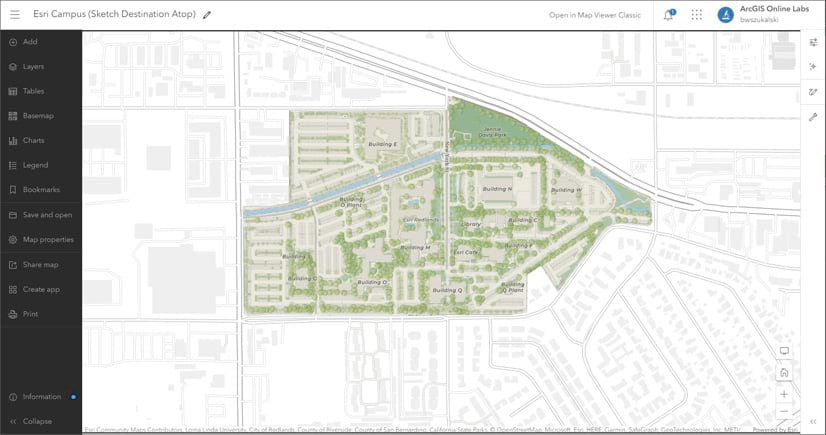
Sketch layers offer an easy way to create specific areas to apply focus. In the map shown below, a sketch layer was added to the map and a polygon was drawn around the Esri Redlands campus boundary.
The map uses Destination Atop blending on the sketch layer with the Living Atlas Charted Territory layer. The map uses the Terrain with Labels basemap with the World Terrain Reference and World Hillshade layers hidden.

Use blending with duplicate layers and effects
Duplicating layers provides opportunities to leverage multiple effects on the same layer. In the map shown below, the fire perimeter layer was duplicated so that different effects could be applied to the same layer. Open the map to examine how it was created.
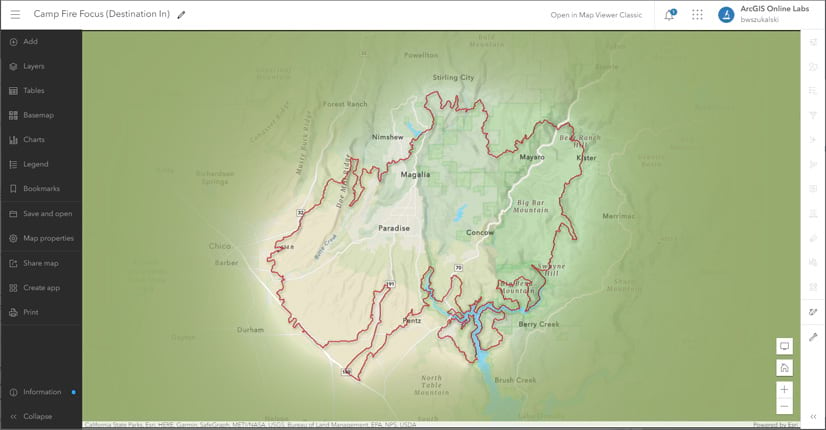
The top layer is styled using a red outline with transparent fill. It uses a Drop shadow effect ( shadow #000000, width 3, X-offset 2 / Y-offset 3, and Opacity of 50) to make it “pop.”
The second, duplicate layer is styled with a white background and no outline. Destination In blending is used, along with a Bloom effect (Strength 2.2, Radius 0.6, Threshold 10).
The Outdoor Map basemap is used with a green map background to harmonize with the predominant colors in the basemap.
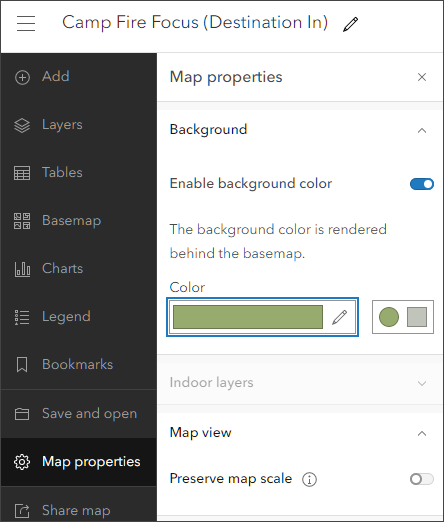
Change the background color to explore different effects.

More information
For more information, see:
- Use blend modes (Help)
- Use effects (Help)
- Highlighting areas using effects and blending (ArcGIS Blog)
- Effects in Map Viewer (ArcGIS Blog)

Commenting is not enabled for this article.